Single Sign On (SSO) Configuration with Azure AD
Single Sign On (SSO) streamlines user authentication by enabling access to multiple applications with a single set of credentials. This guide explains how to configure SSO with Azure Active Directory (AD), enhancing security and improving user access across your organization’s applications.
Configuring SSO with Azure AD
Setting up Single Sign-On (SSO) with Azure AD integrates your server with Azure's authentication services. By configuring system settings, activating SSO, and choosing a login user, you prepare your server for seamless integration. This guide covers setting up a new enterprise application in Azure, configuring SAML settings, and syncing data between your server and Azure AD. Follow the steps below to activate Single Sign-On with Azure AD.
Step 1 – Navigate to System Configuration > System Settings > Single Sign On.
Step 2 – Upon the activation, select a Failover Login User from the drop-down; root user will be selected by default.
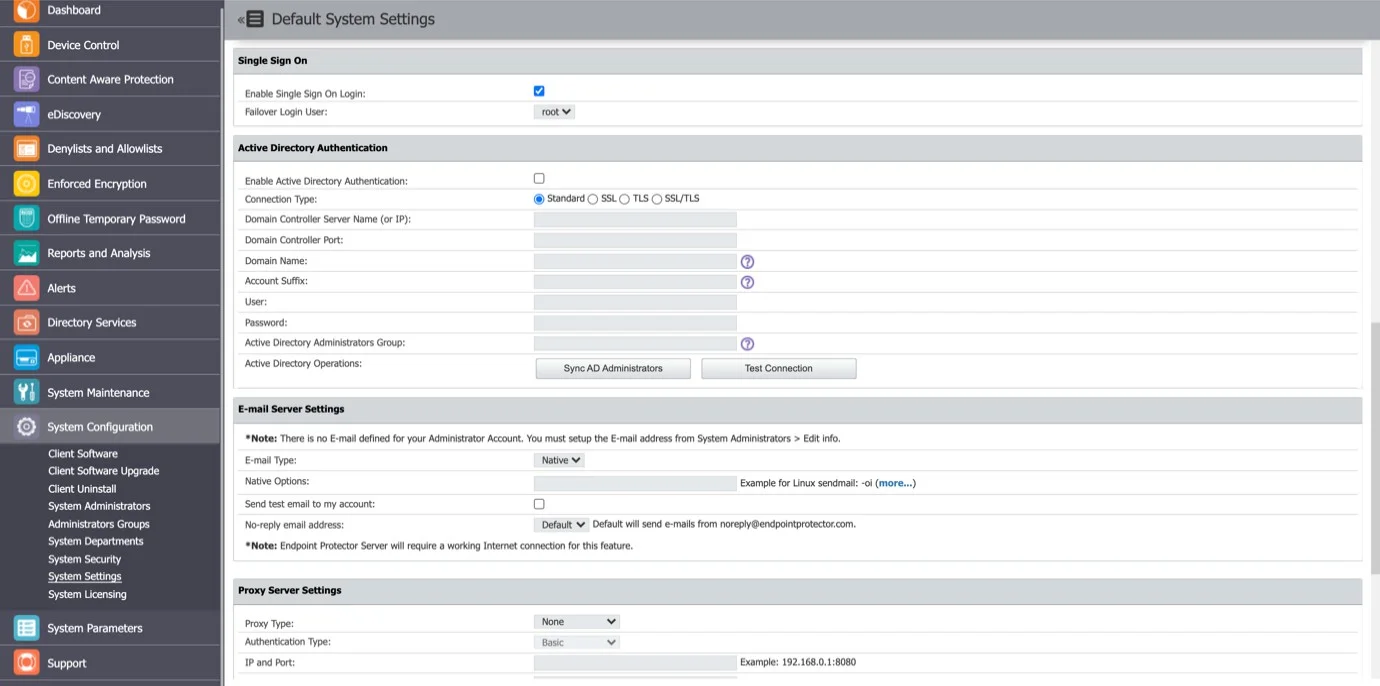
After the above steps have been completed, a Single Sign On subsection is displayed in the System Configuration section.
NOTE: The Failover Login User you selected cannot be deleted from Endpoint Protector Server while it is selected. Single Sign On cannot be activated without a Failover Login User.
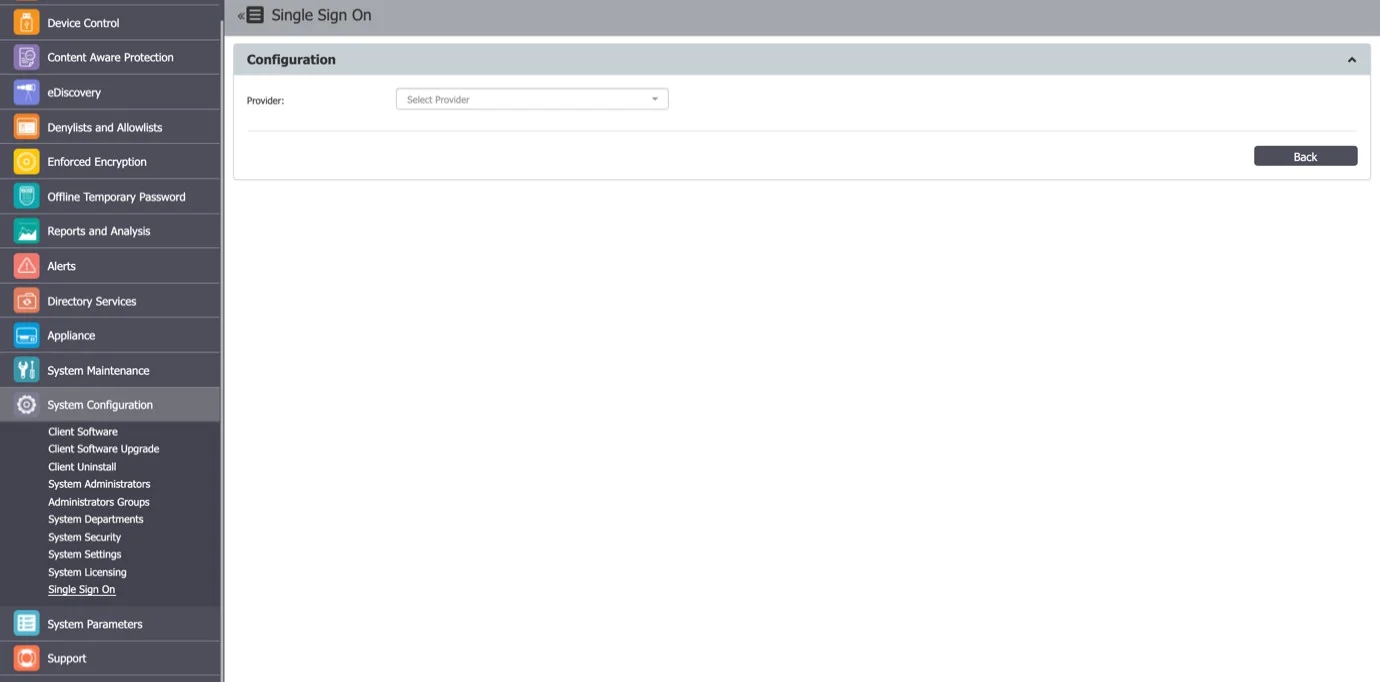
Step 3 – Select the Provider to view Single Sign On subsections.
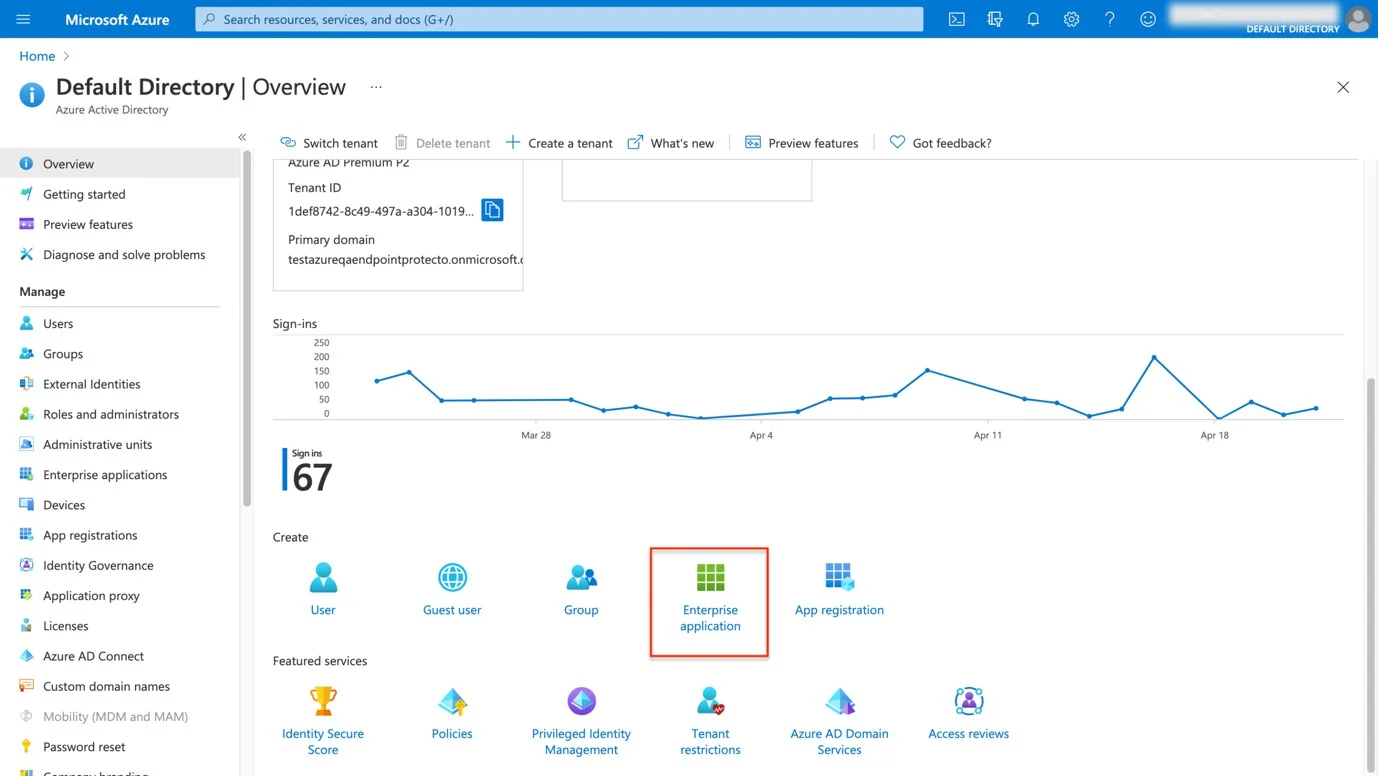
Step 4 – Navigate to portal.azure.com and login.
Step 5 – Navigate to Azure Active Directory.
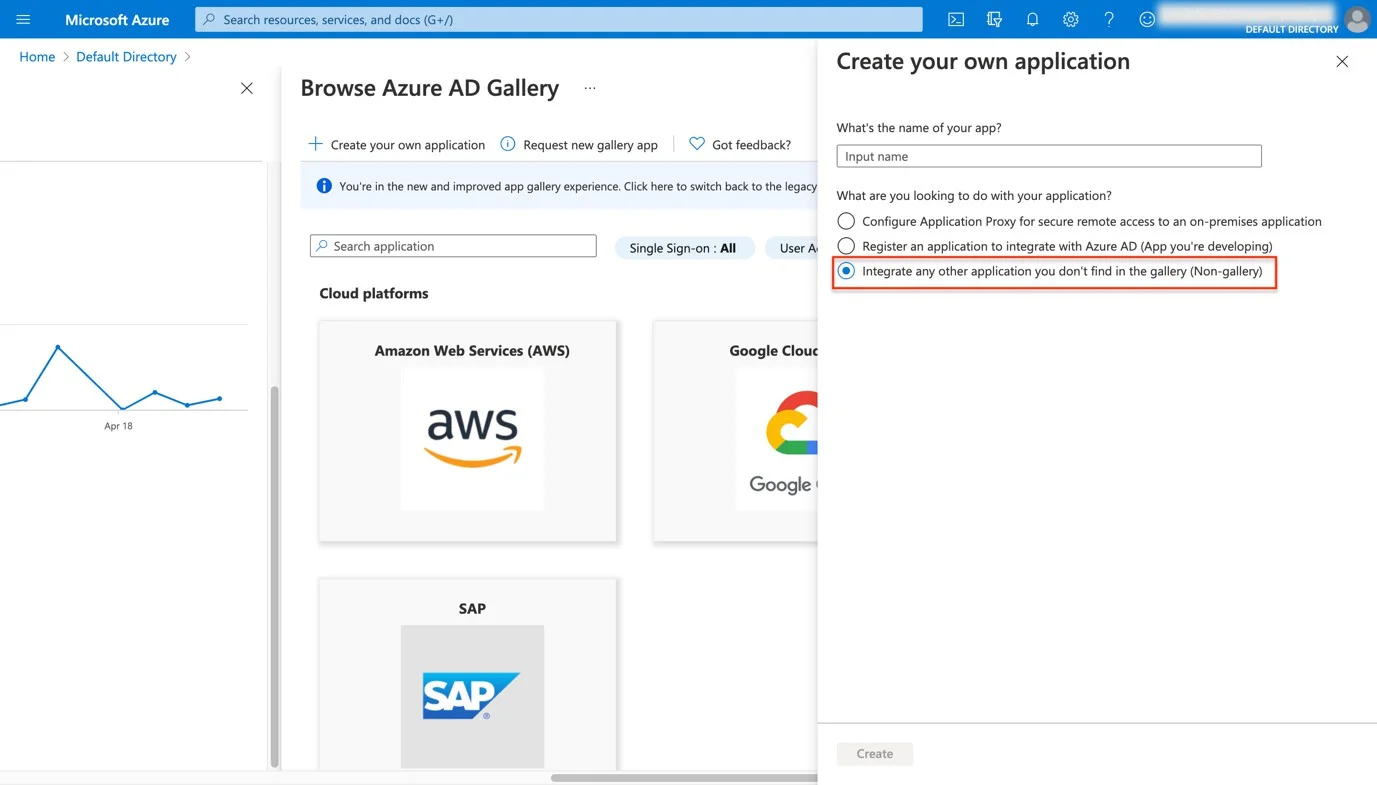
Step 6 – Create a New Enterprise Application:
- Click Create your own application to add an new application.
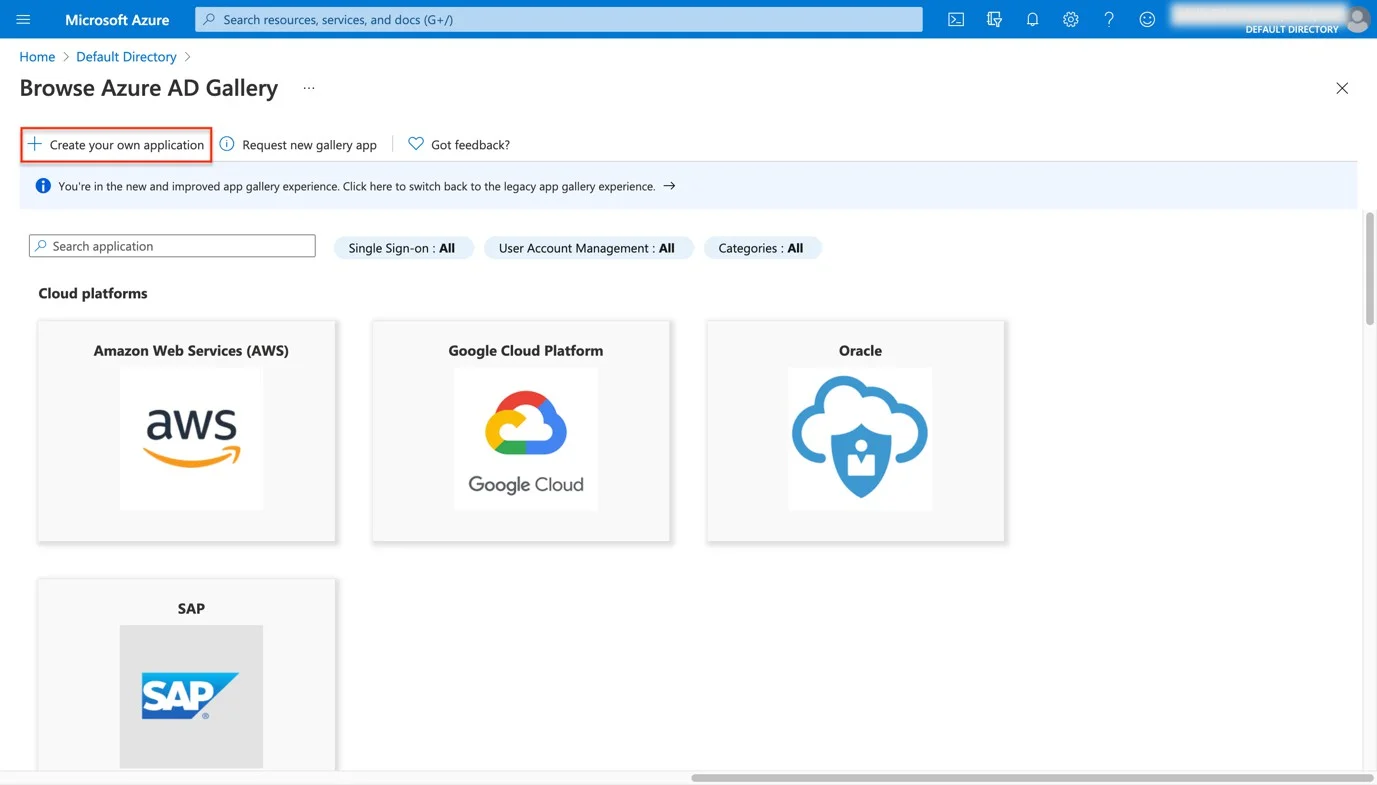
- Give the application a name.
- Select Integrate any other application you don’t find in the gallery.
- Click Create.
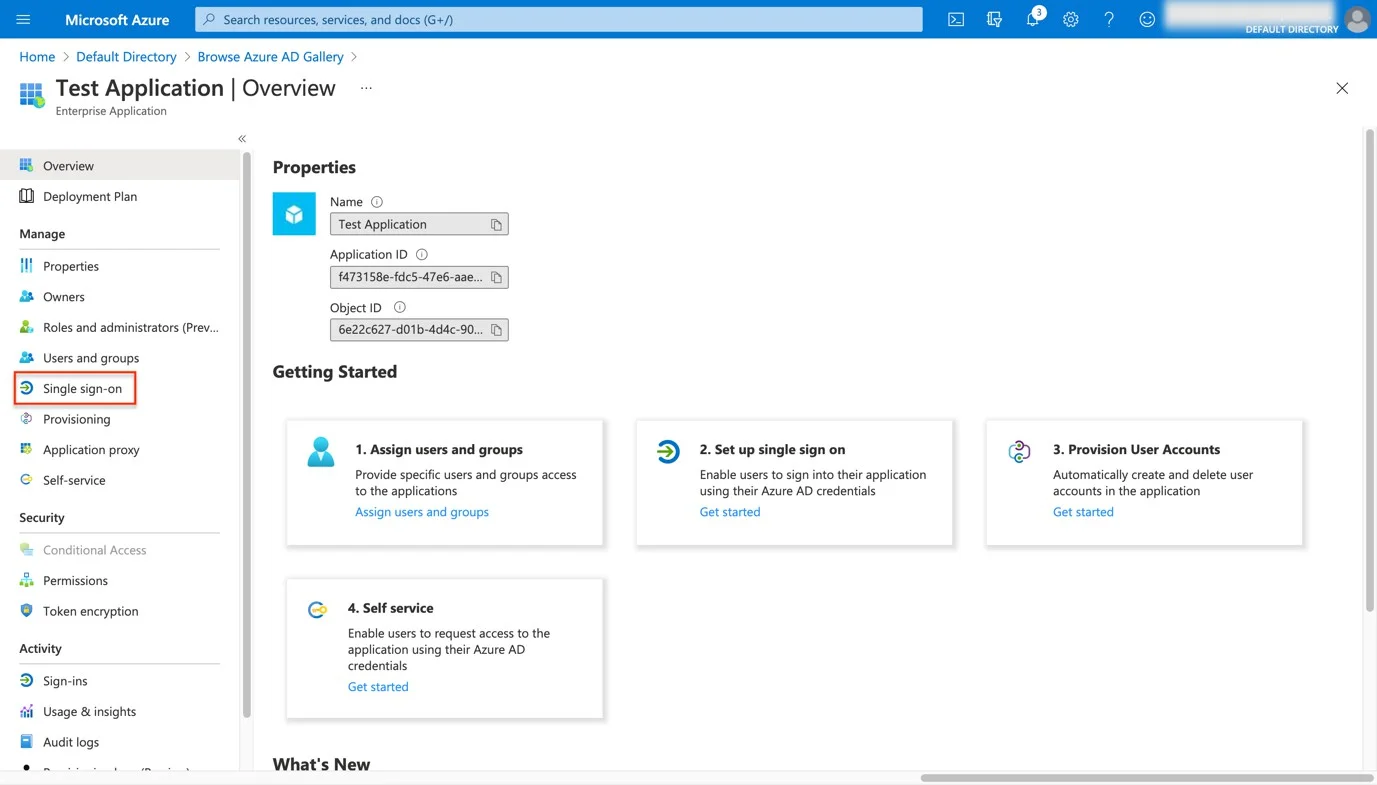
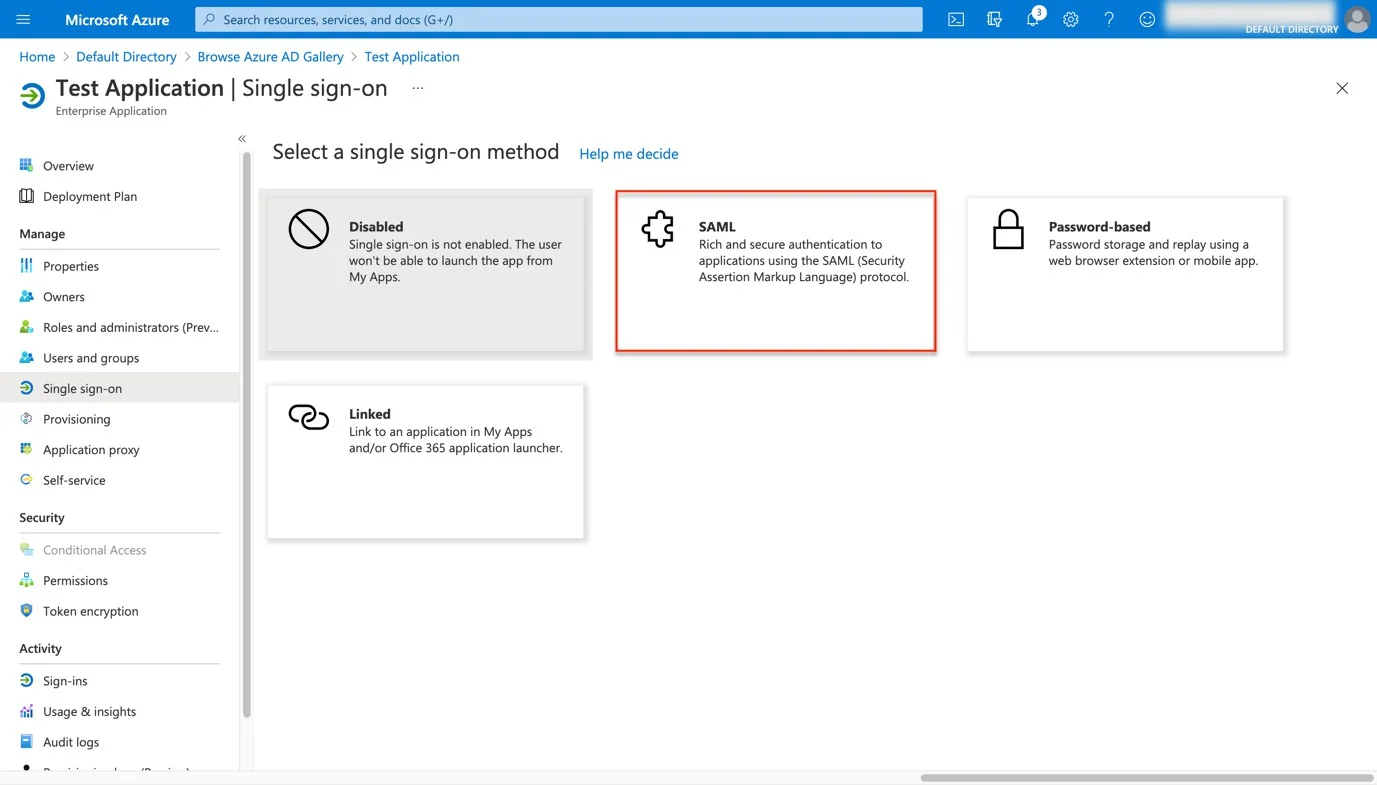
Step 7 – From the left-hand menu Navigate to Single sign-on and then select the SAML method.
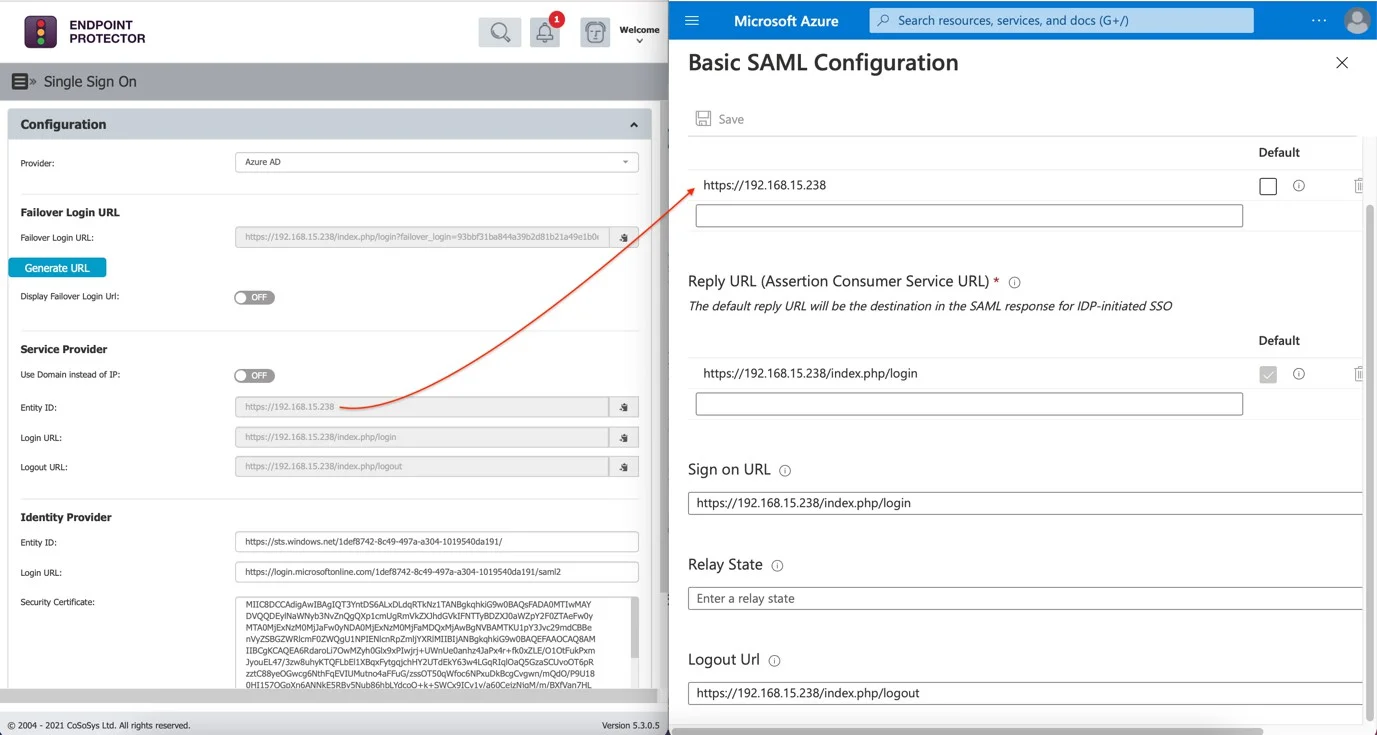
Step 8 – To edit Basic SAML Configuration, open the Single Sign On page from the Endpoint Protector Server and copy/paste the data from the Single Sign On page on the Basic SAML Configuration page.
Step 9 – On the Basic SAML Configuration page, delete the data that is by default completed for Identifier (Entity Edit).
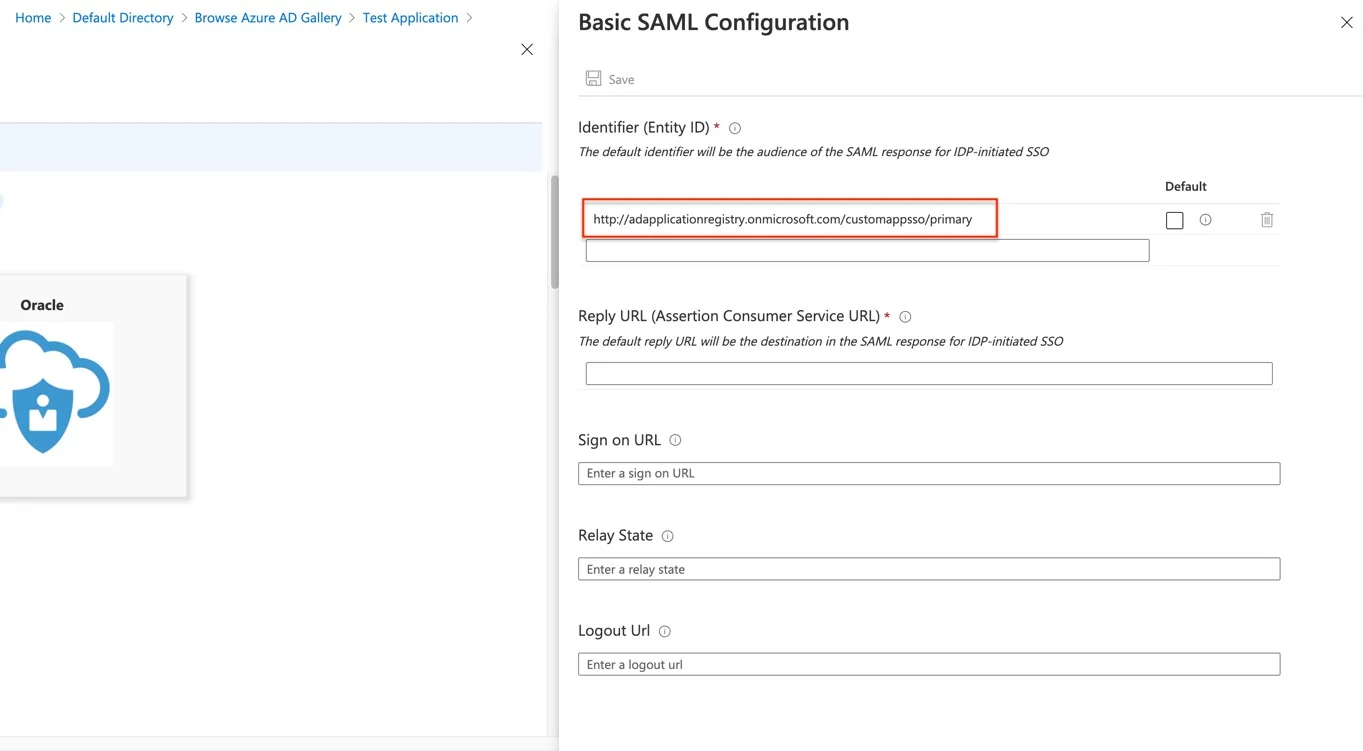
Step 10 – From the Single Sign On page on the Endpoint Protector Server:
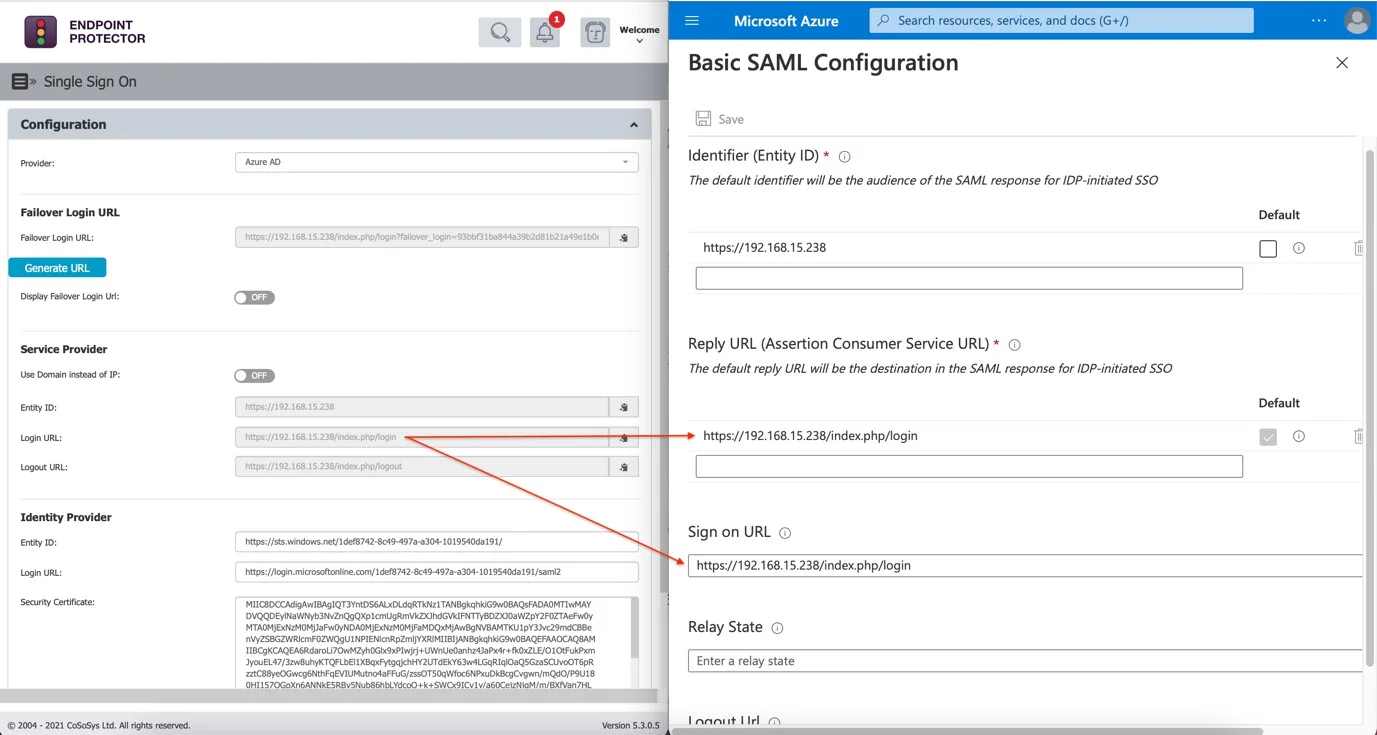
- Copy the data from the Service Provider's Entity ID field and paste it into both the Identifier (Entity ID) and Reply URL (Assertion Consumer Service URL) fields on the Basic SAML Configuration page in Microsoft Azure. Finally, set it as Default.
- Copy the Login URL from the Single Sign-On and paste it into the Sign-On URL field on the Basic SAML Configuration page in Microsoft Azure.
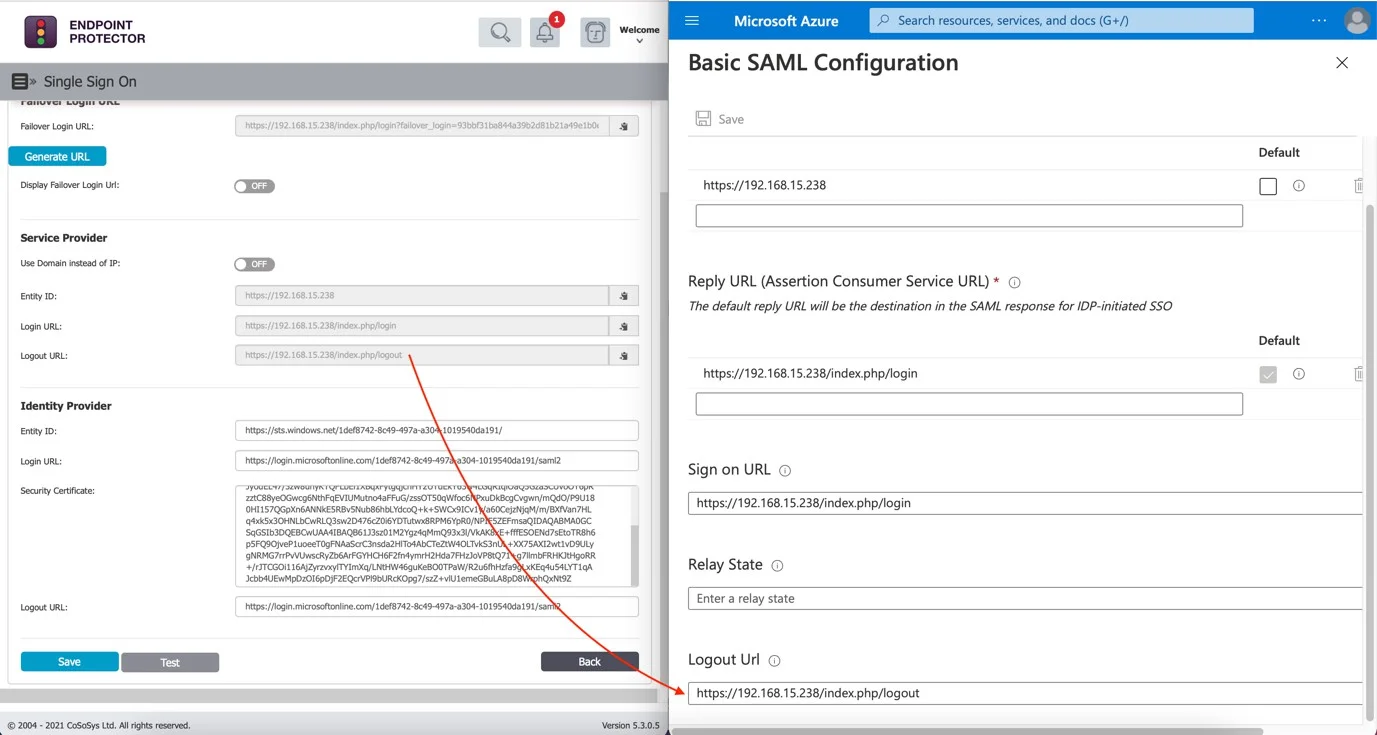
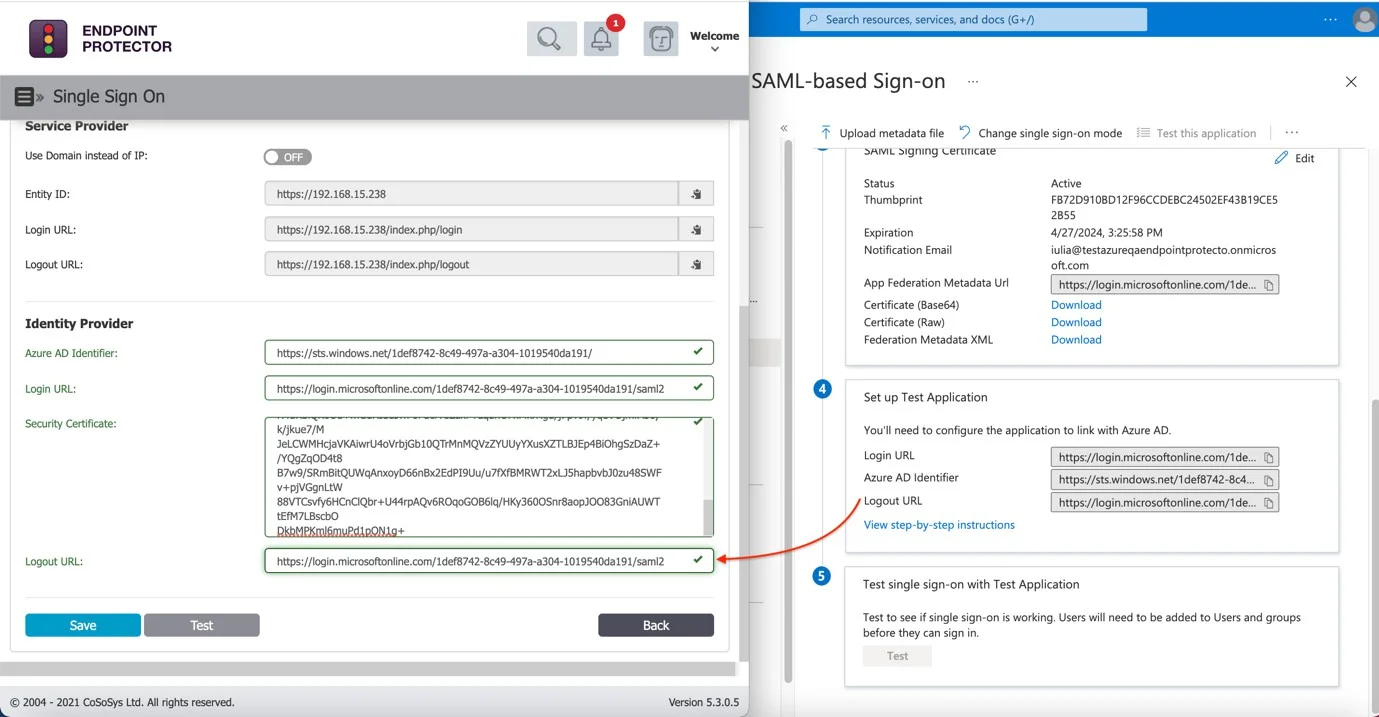
- Copy the Logout URL from the Single Sign-On and paste it into the Logout URL field on the Basic SAML Configuration page in Microsoft Azure.
Step 11 – Click Save to save the settings without testing Single Sign On yet.
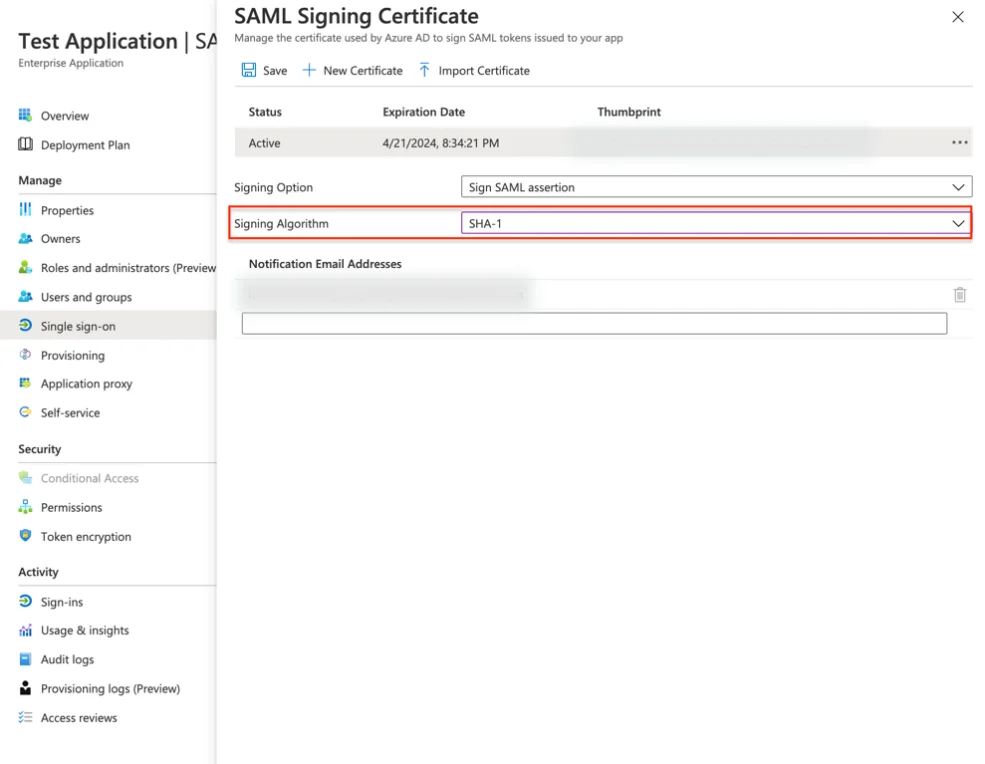
Step 12 – Navigate to Step 3 on the SAML Signing Certificate page and click Edit.
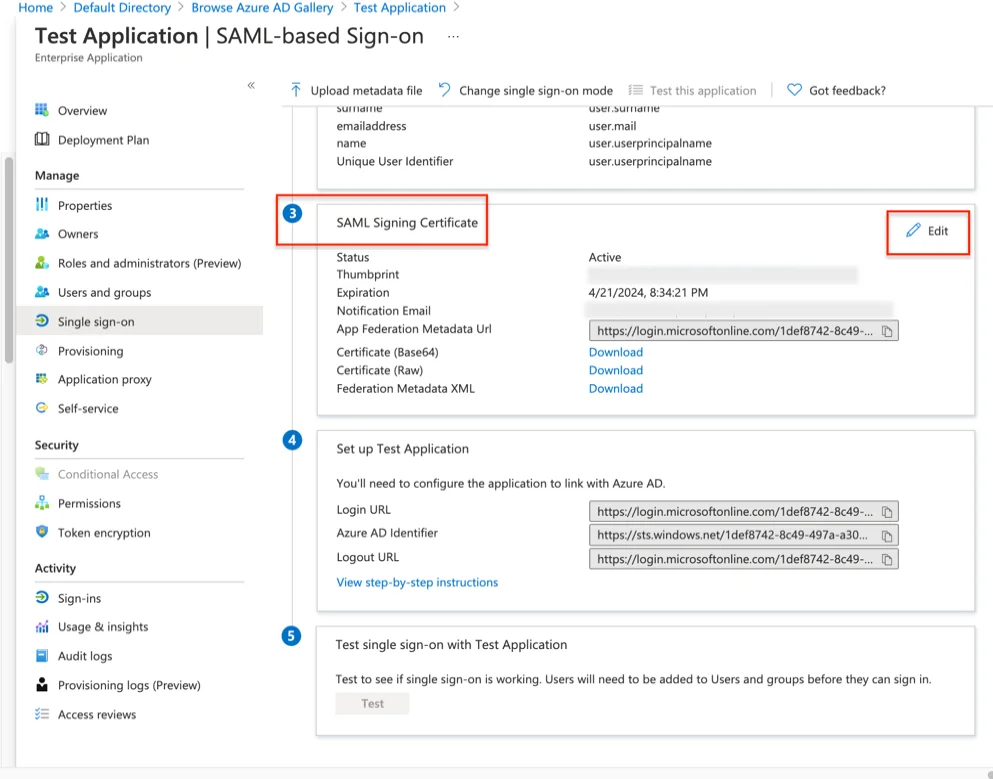
Step 13 – Change the Signing Algorithm to SHA-1 and click Save.
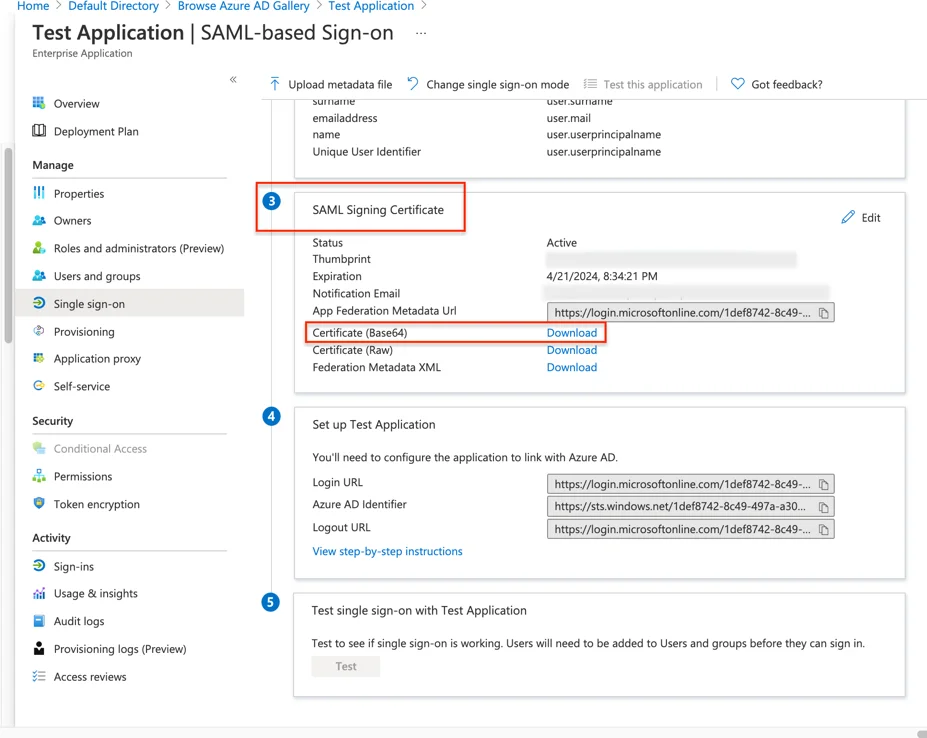
Step 14 – In Step 3 of the SAML Signing Certificate, download the Certificate (Base64).
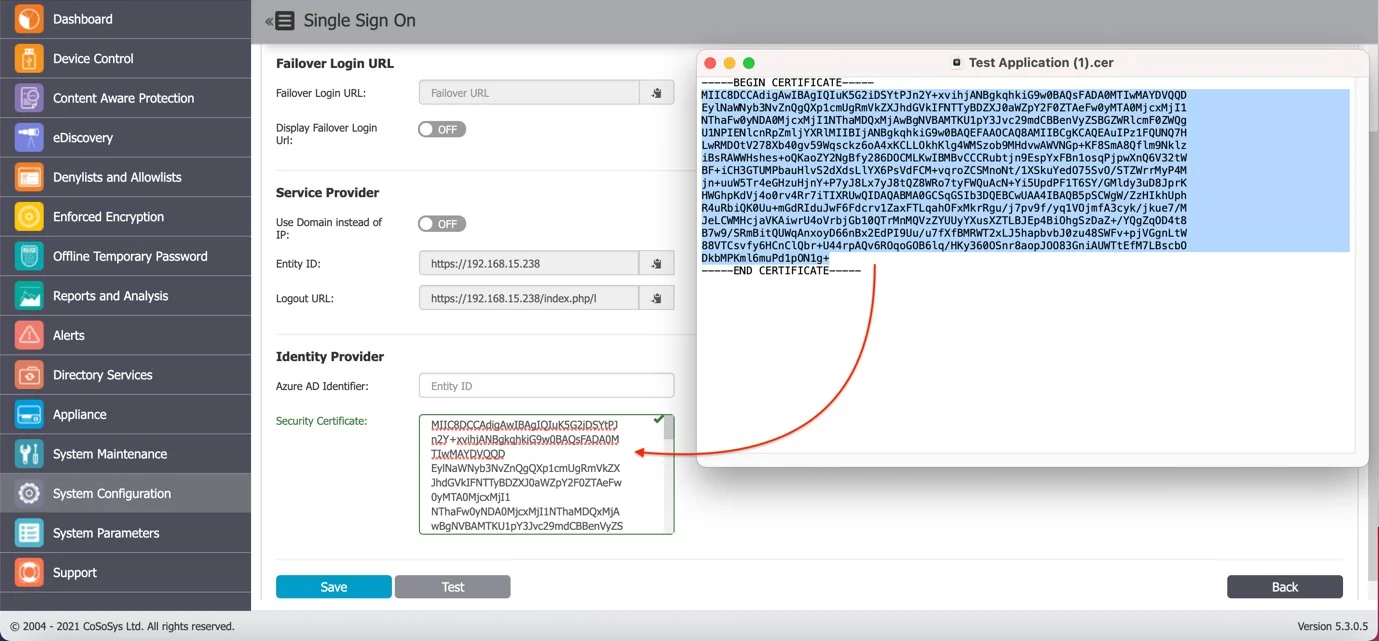
Step 15 – Open the downloaded certificate with a text editor and copy the content inside it.
Step 16 – Paste the content into the Security Certificate field under the Single Sign-On section in the System Configuration of the Endpoint Protector Server.
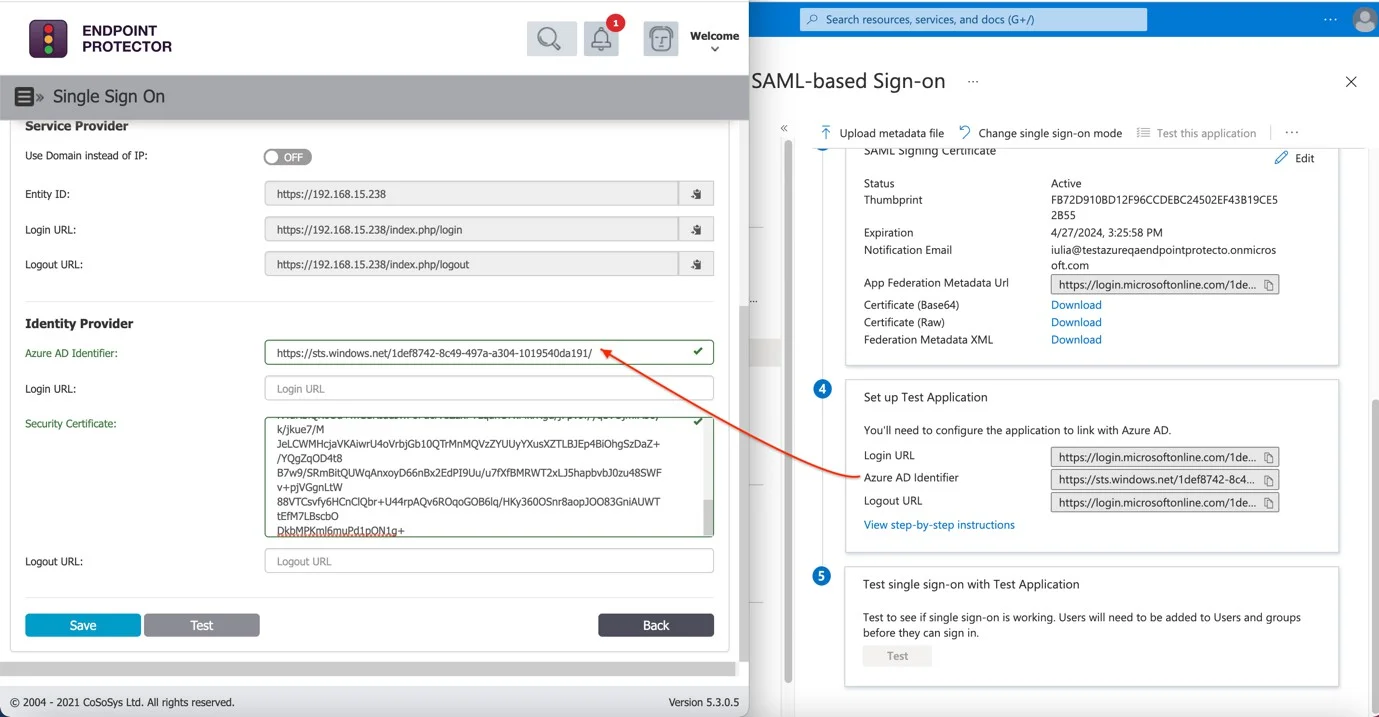
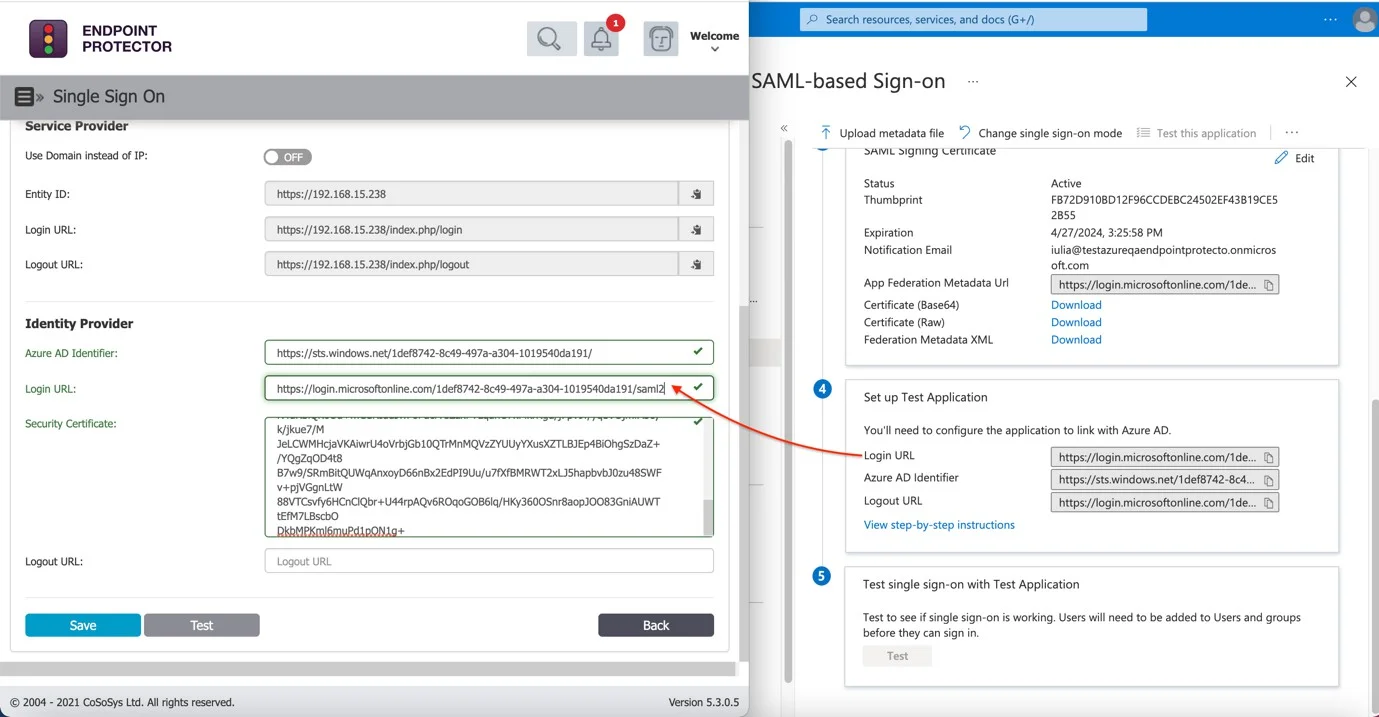
Step 17 – Return to the Azure SAML-based Sign-On page, proceed to Step 4 ("Set up your application"), and copy the Azure AD Identifier.
Step 18 – Navigate to the Endpoint Protector Server System Configuration > Single Sign On > Identity Provider, Azure AD Identifier and paste the data from the previous step.
Step 19 – Return to Azure SAML-based Sign On page and reach Step 4, Set up “your application” and copy Login URL.
Step 20 – Switch to the Endpoint Protector Server, System Configuration > Single Sign On > Identity Provider > Login URL and paste the data from the previous step.
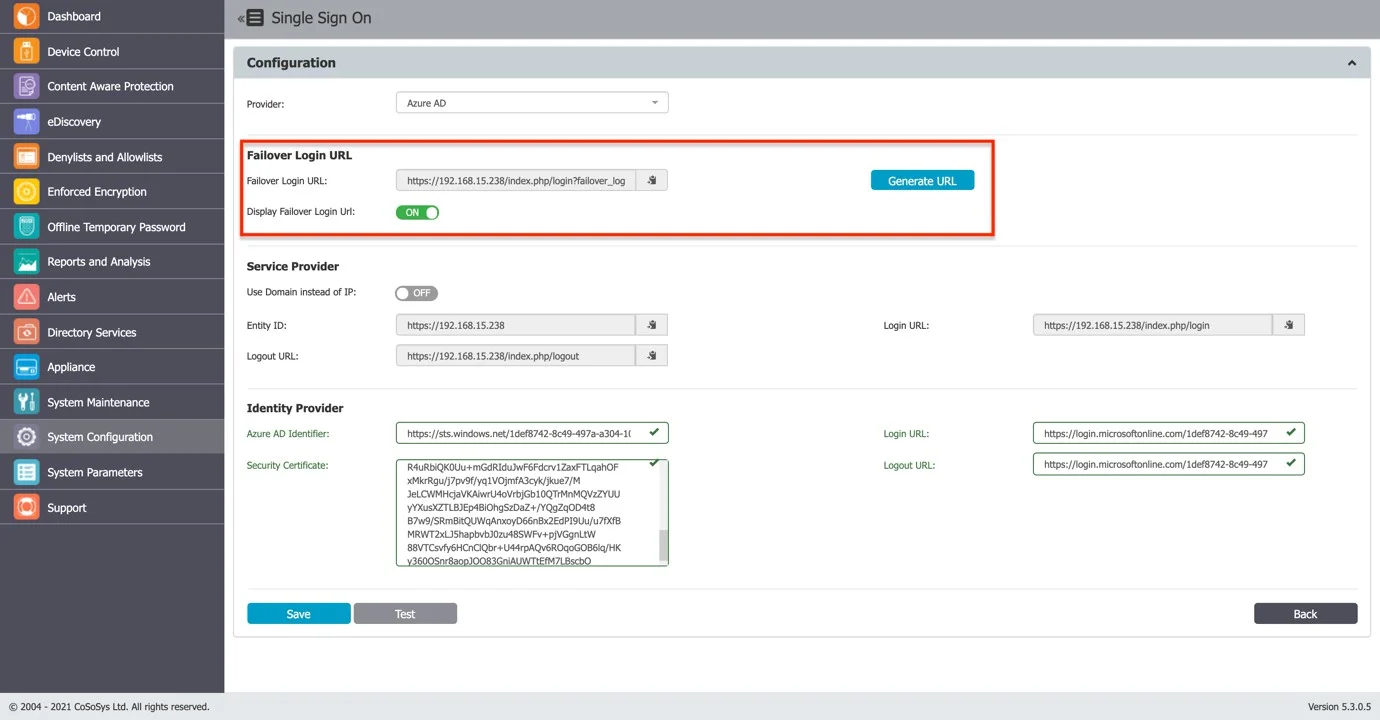
Step 21 – Generate the Failover Login URL from Endpoint Protector Server System Configuration > Single Sign-On > Failover Login URL and Save it.
Step 22 – Save the settings on the Single Sign On page from the Endpoint Protector Server.
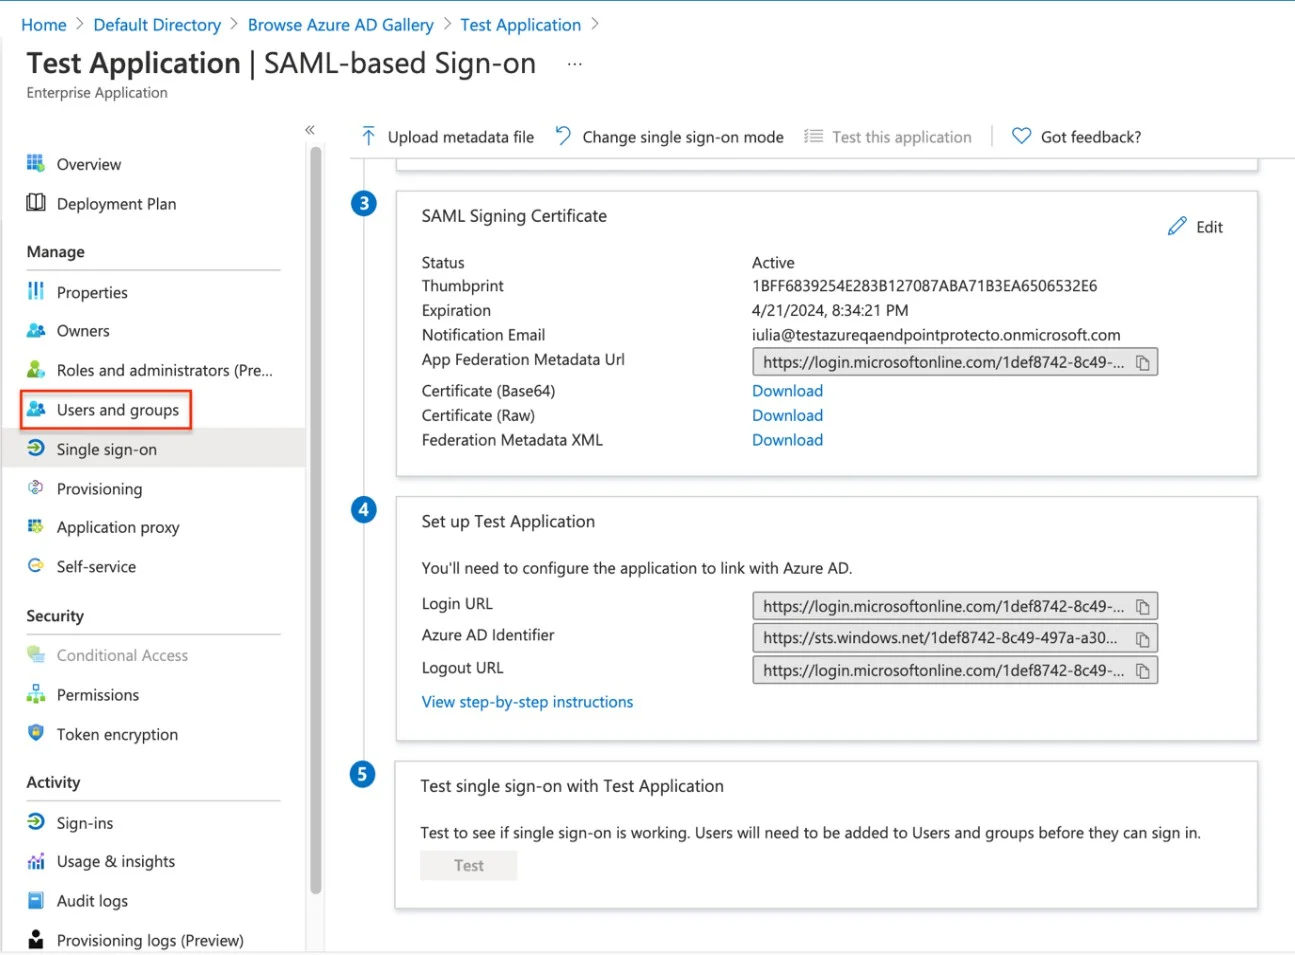
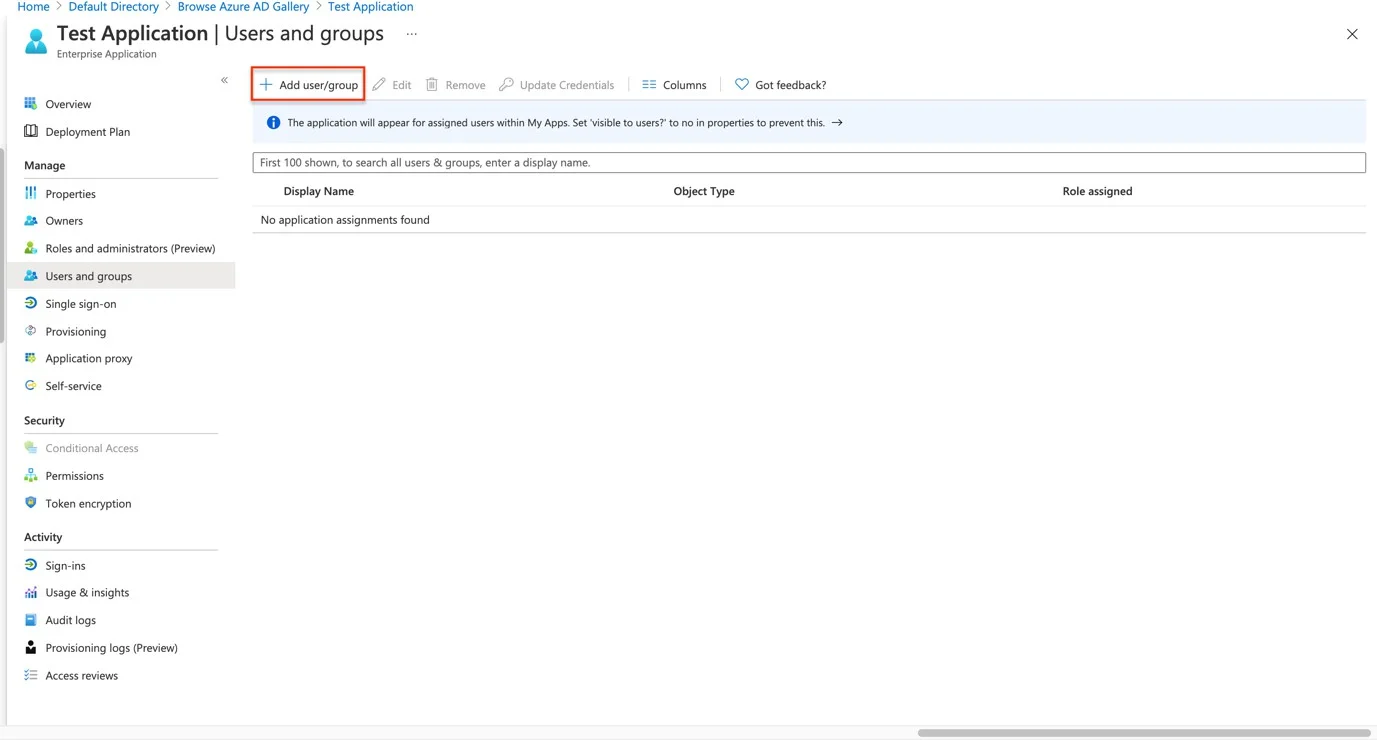
Step 23 – Switch to Azure, Select Users and groups from the left menu.
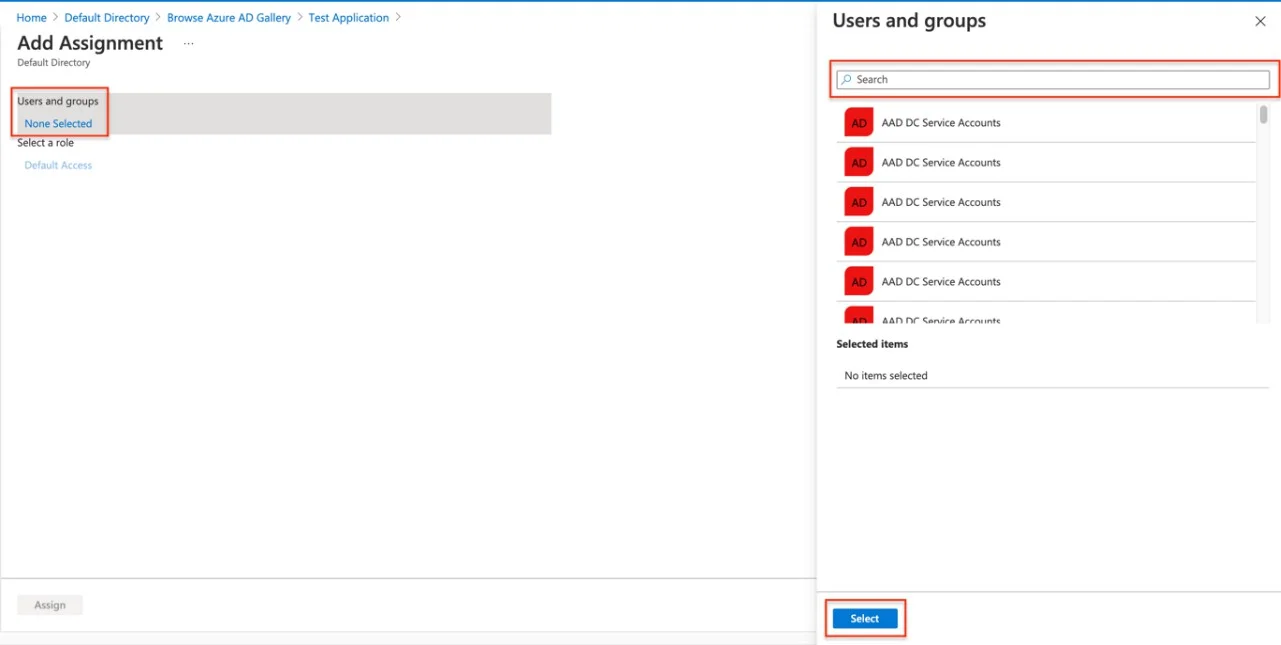
Step 24 – Go to Add user/group > none Selected, search for the Azure User, then Select, and Assign.


Step 25 – The user is assigned to the application, and logging into Endpoint Protector with Azure is now possible.
Step 26 – Log out of the Endpoint Protector Server and log back in. The administrator should be redirected to http://login.microsoftonline.com/ for the Azure login process.