Single Sign On (SSO) Configuration with Okta
Single Sign On (SSO) is a powerful authentication process that enhances security and improves user experience by allowing users to access multiple applications with a single set of login credentials. In this guide, we focus on configuring SSO using Okta, a leading identity management service, to streamline user access and secure your system effectively.
Configuring SSO with Okta
Configuring Single Sign-On with Okta involves several key steps that integrate your server with Okta’s authentication framework. Begin by activating SSO within your system’s configuration settings, selecting a failover user, and preparing for provider selection. This section will guide you through the precise steps required to establish a secure and efficient SSO connection, including application integration in Okta, SAML settings configuration, and the necessary data synchronization between your server and Okta. Follow the steps below to ensure a successful setup.
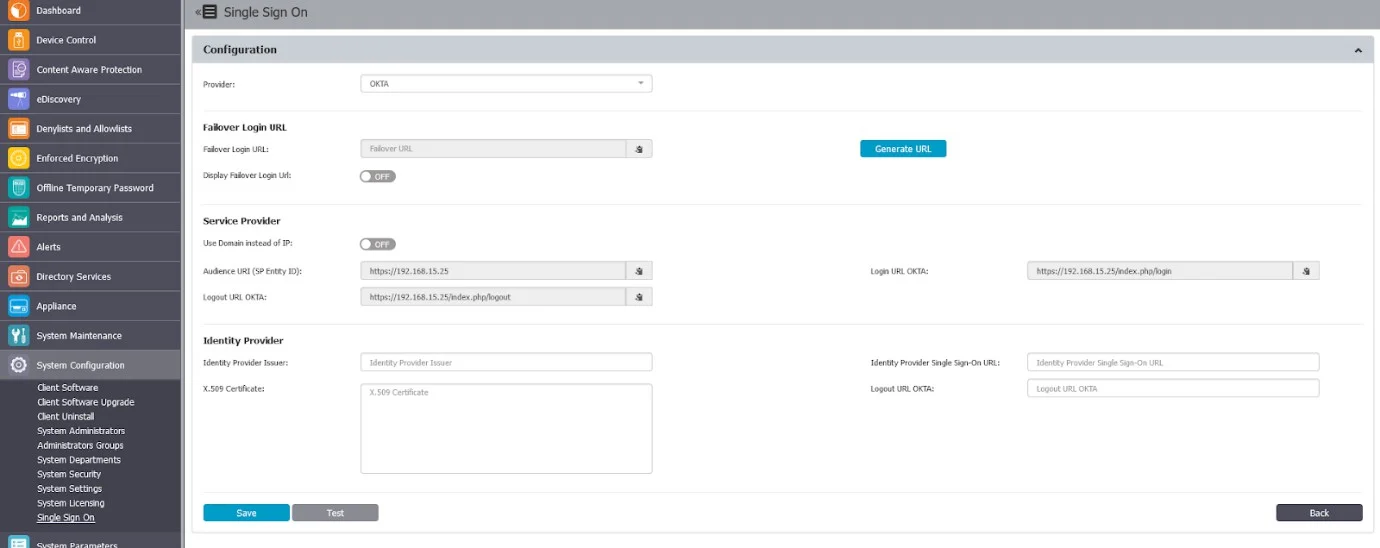
Step 1 – To activate Single Sign-On, navigate to System Configuration > System Settings > Single Sign-On. Once activated, select a Failover Login User from the drop-down menu. The Root user is selected by default.
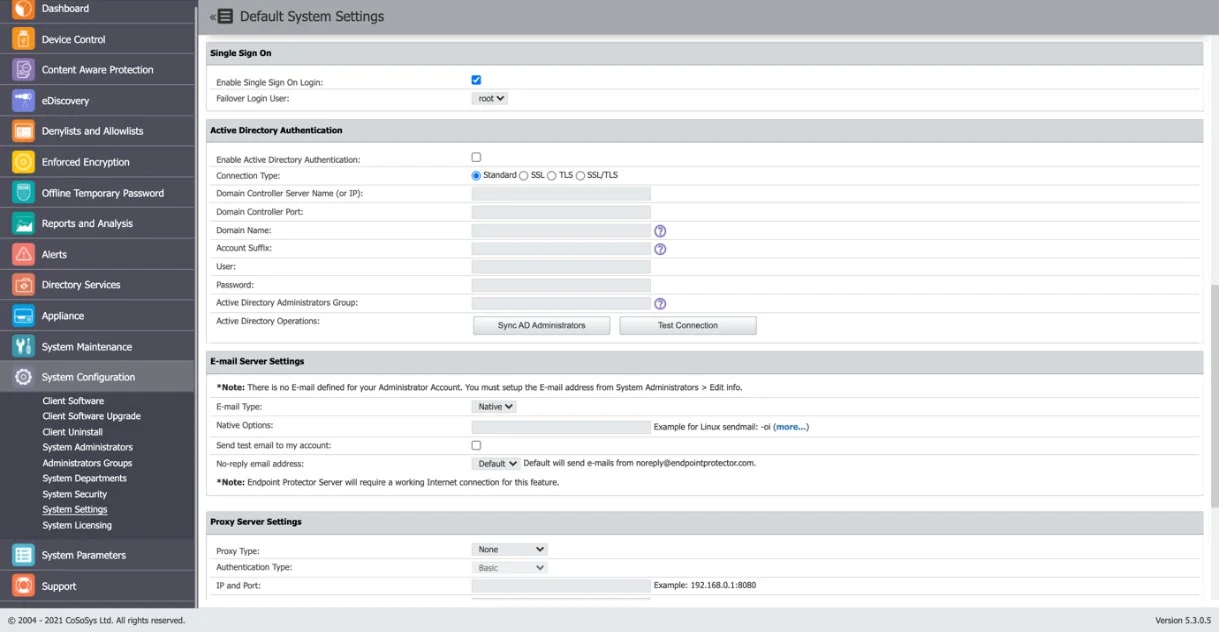
After completing the above steps, a Single Sign-On subsection will appear in the System Configuration section.
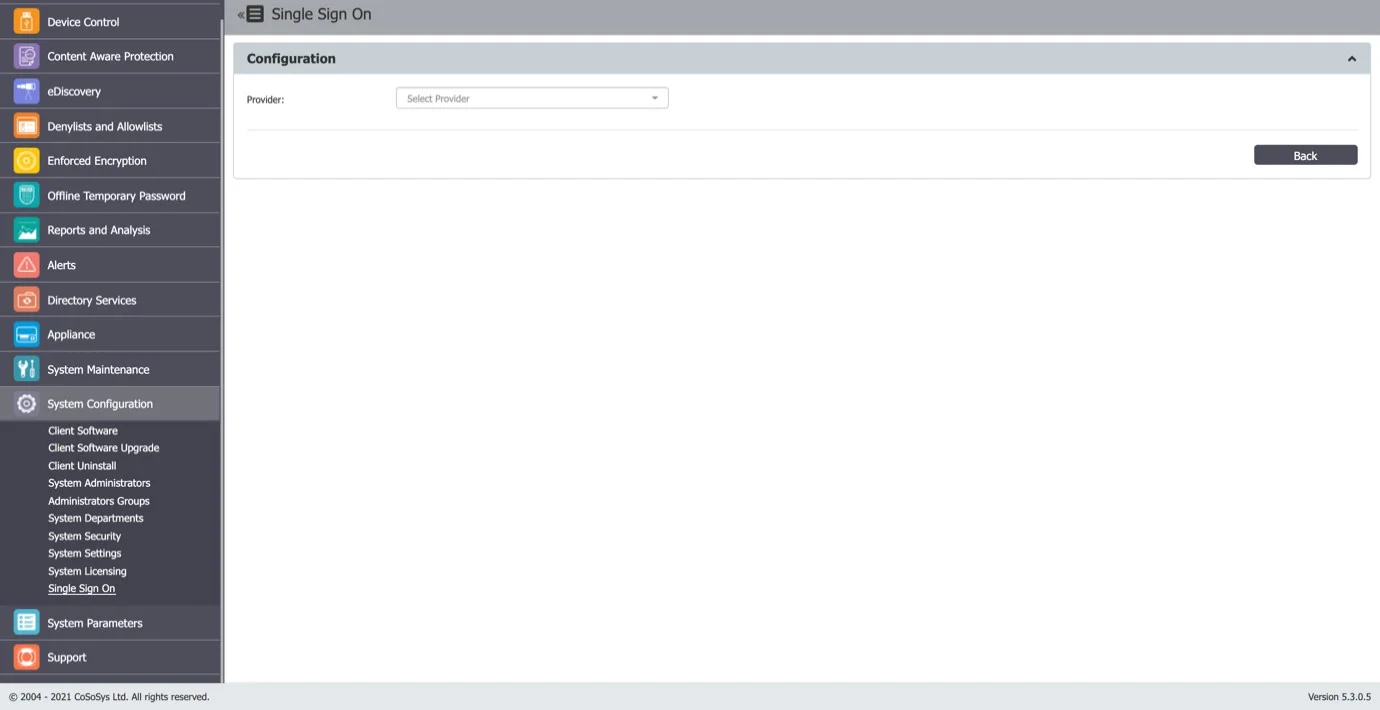
Step 2 – Select the Provider in order for Single Sign On subsection to be displayed.
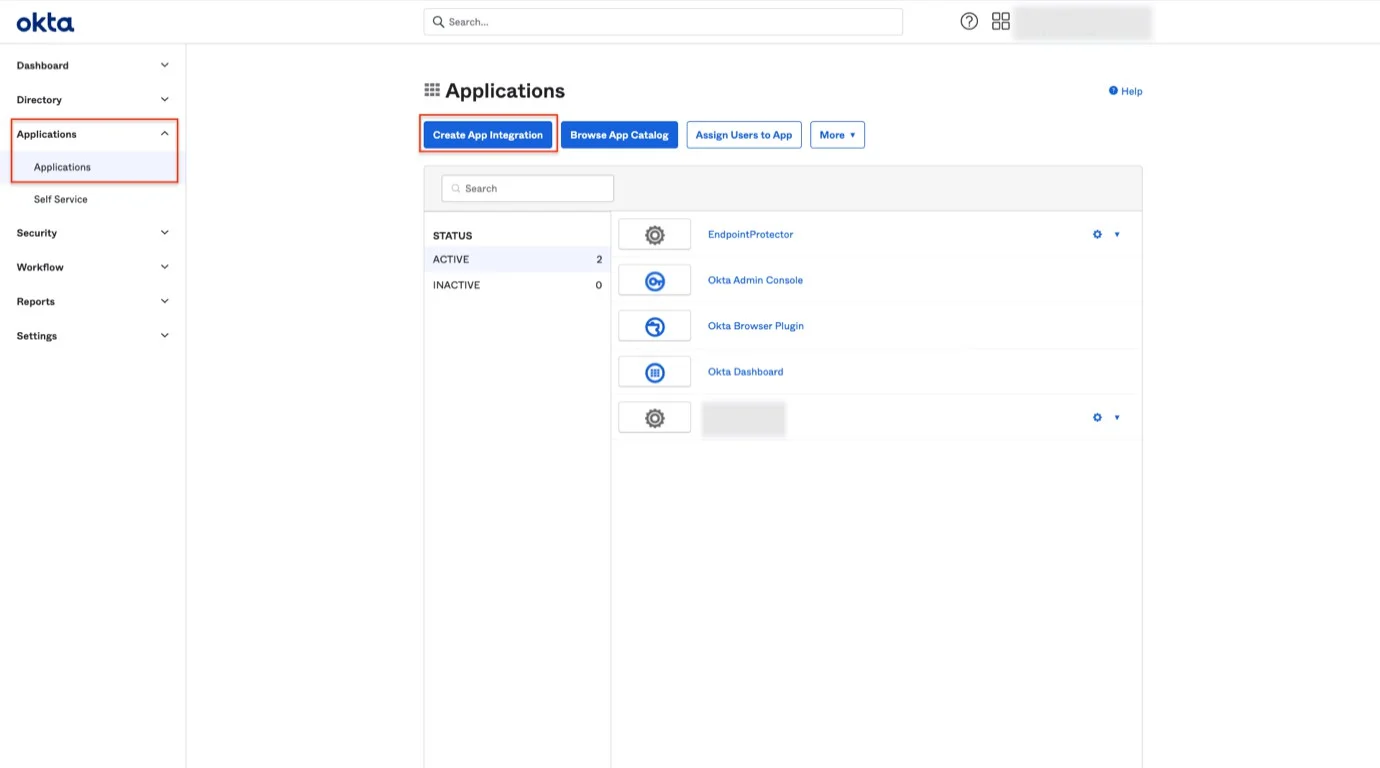
Step 3 – Go to yourcompany.okta.com, select Applications, and then click Create App Integration.
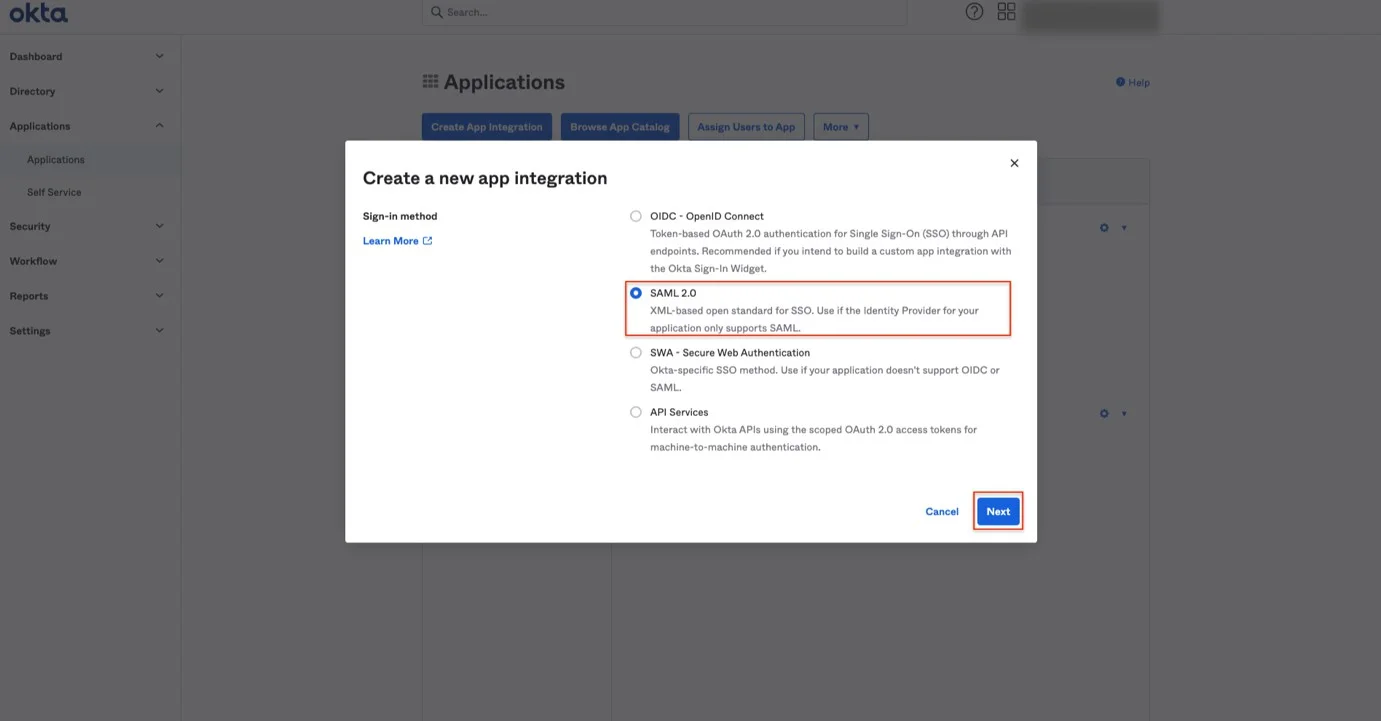
Step 4 – On the next screen, select SAML 2.0 and click Next.
Step 5 – Set a Name for the Application and click Next.

Step 6 – Open the Configure SAML tab.
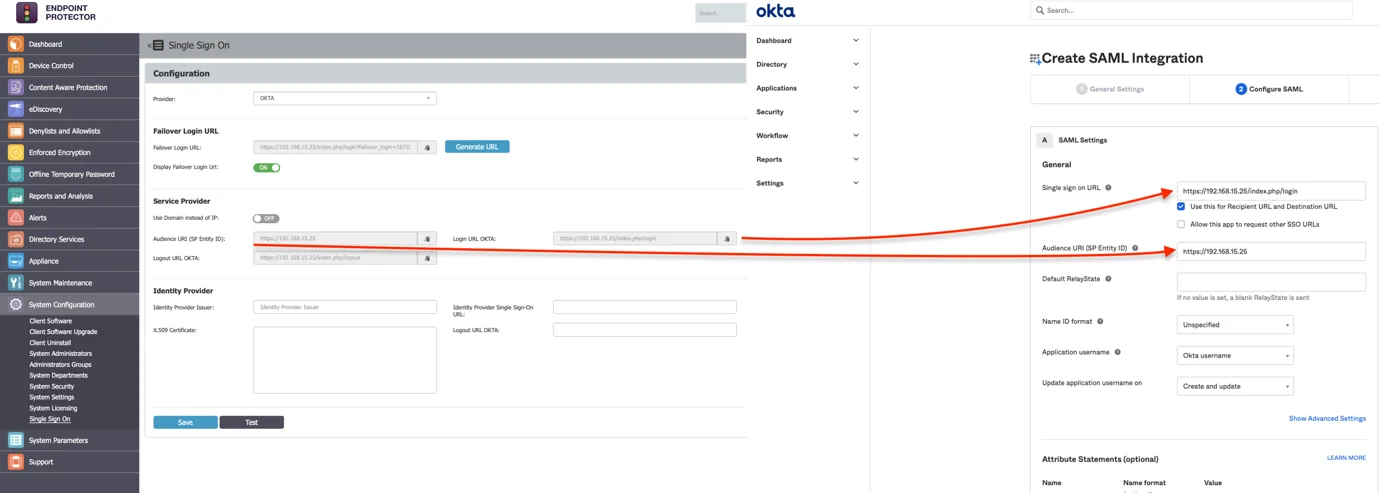
Step 7 – Go to your Endpoint Protector Server, System Configuration, Single Sign On.
Step 8 – Copy the information from:
- Audience URI (SP Entity ID) and paste it on the field with the same name from OKTA, Configure SAML.
- Login URL OKTA and paste it on the field Single sign on URL from OKTA page, Configure SAML.
Step 9 – On the OKTA page, click Show Advanced Settings.
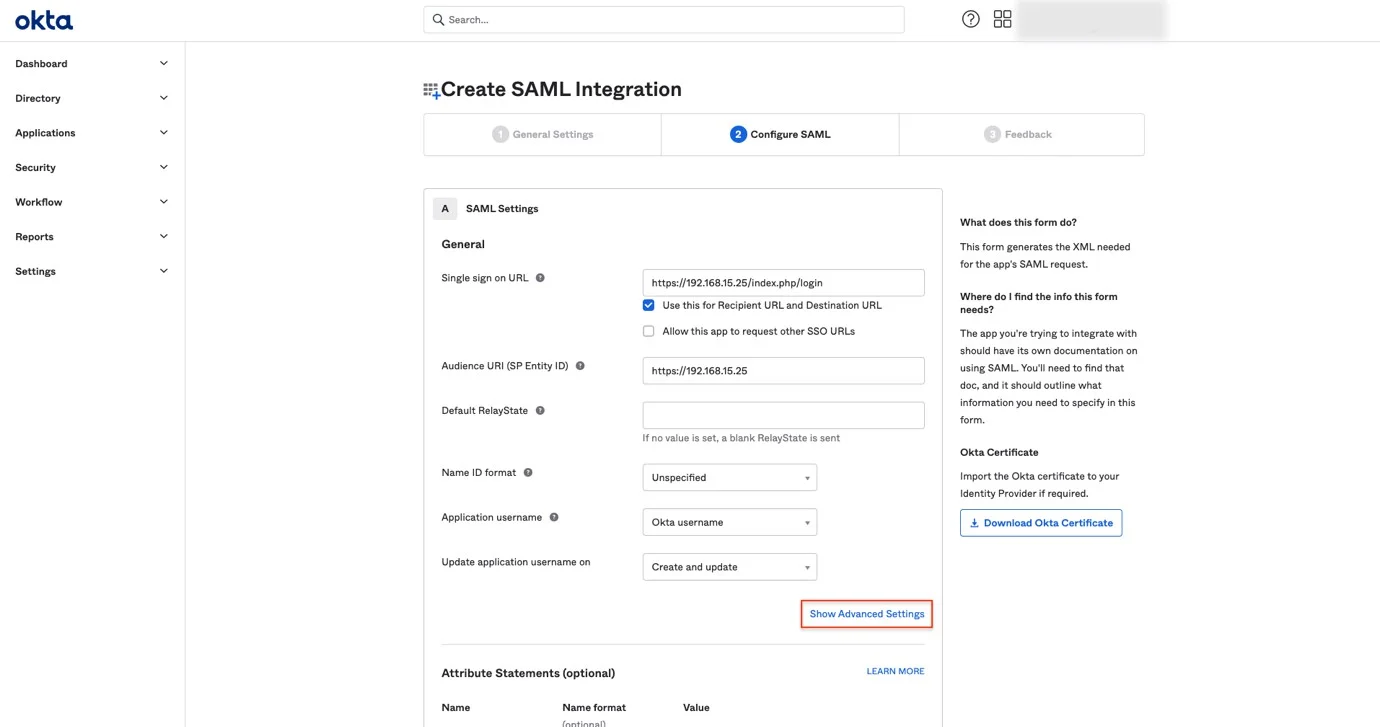
Step 10 – Edit the following fields:
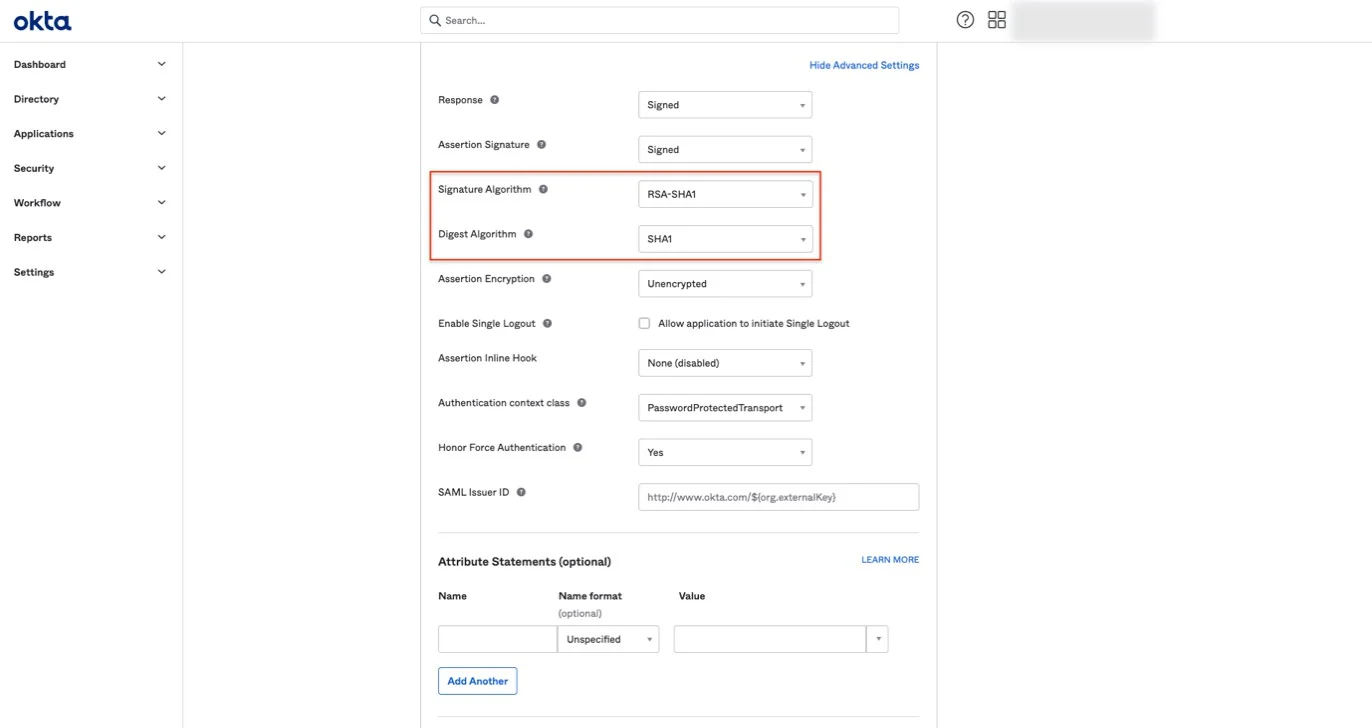
- Signature Algorithm, select RSA-SHA1
- Digest Algorithm, select SHA1
Step 11 – Hide Advanced Settings and click Next.
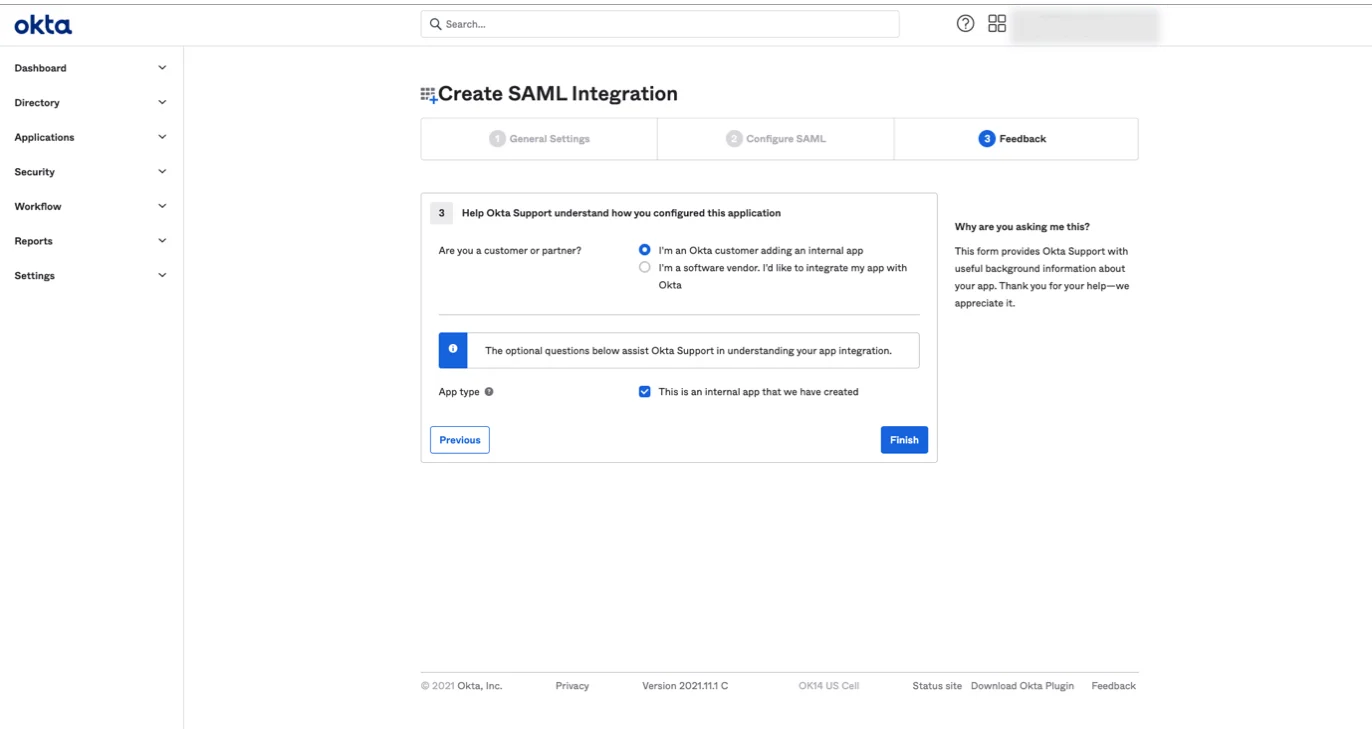
Step 12 – At step 3, select an answer for each question and click Finish.
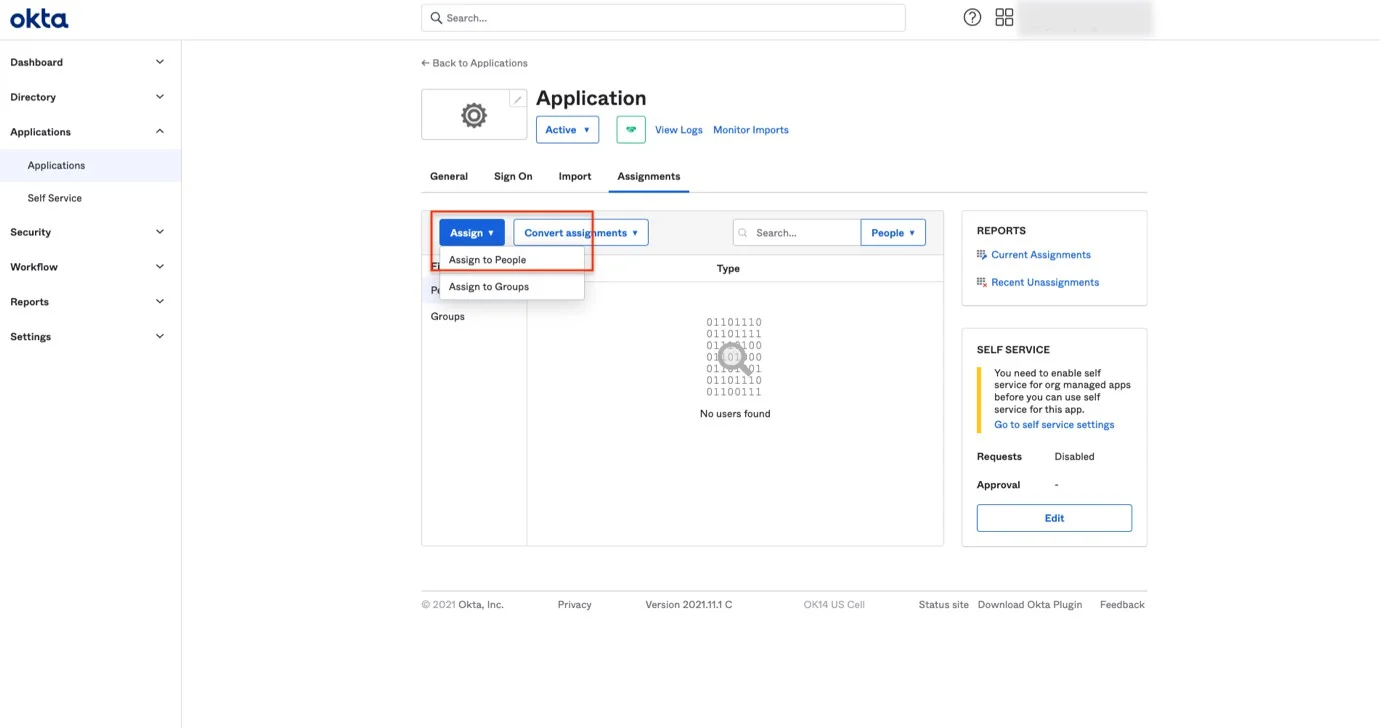
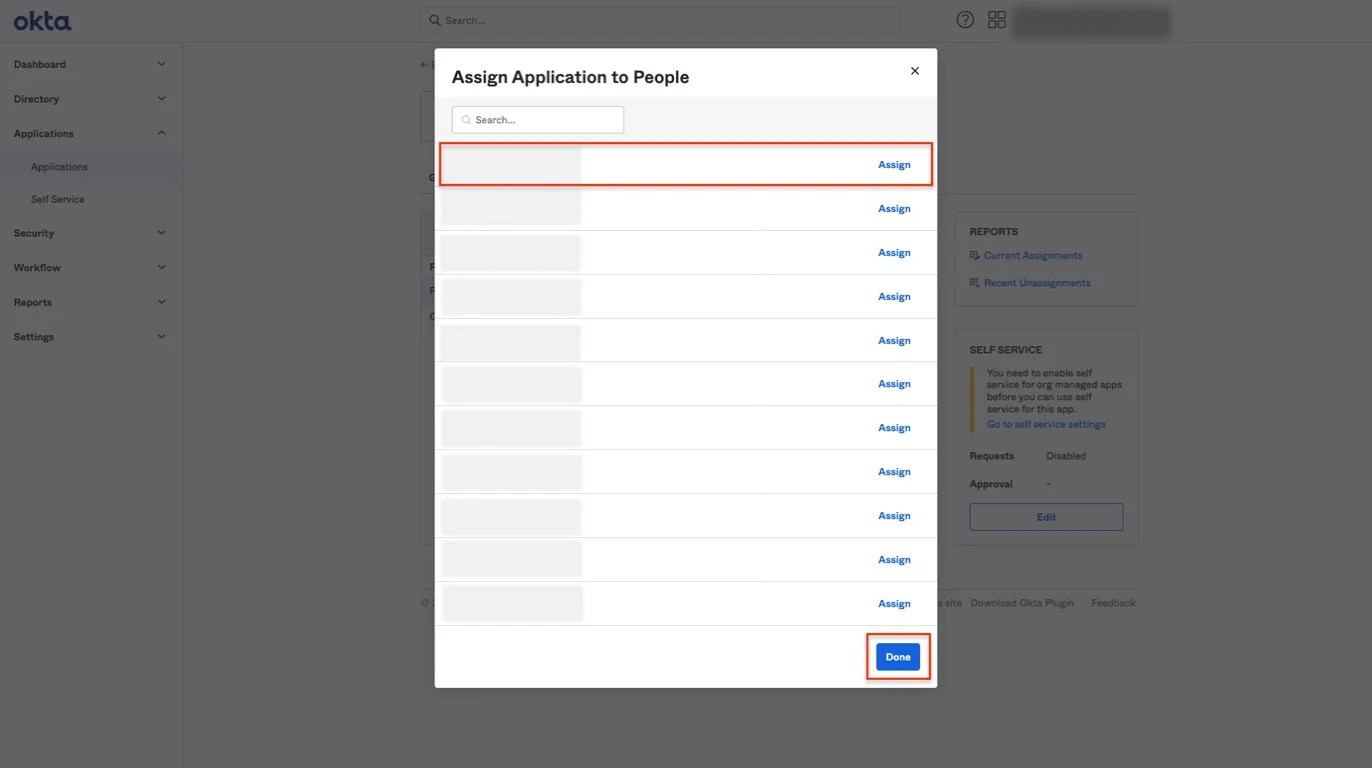
Step 13 – Navigate to Applications, select the Endpoint Protector application, go to Assignments, and assign people to the application.
Step 14 – After assigning the accounts, click Done.
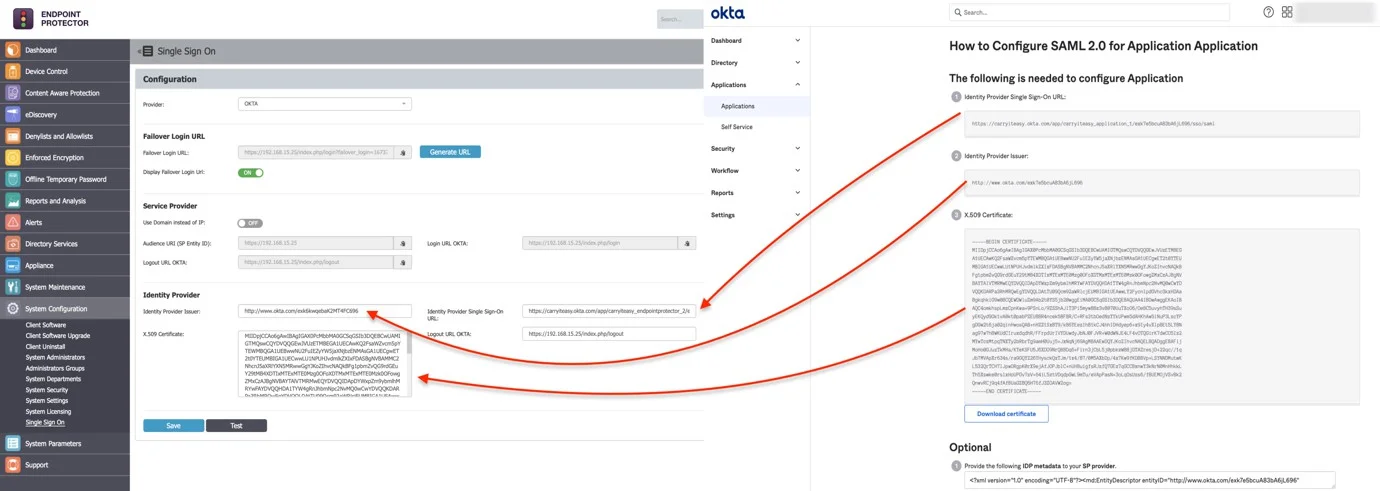
Step 15 – Navigate to Applications, open the created app and click Sign On, View Setup Instructions.

Step 16 – From the new opened section, copy the needed information and paste it on your Endpoint Protector Server:
- Identity Provider Single Sign-On URL to Endpoint Protector Server, System configuration, Single Sign On, Identity Provider Single Sign-on URL
- Identity Provider Issuer to Endpoint Protector Server, System configuration, Single Sign On, Identity Provider Issuer
- X.509 Certificate to Endpoint Protector Server, System configuration, Single Sign On, X.509 Certificate
Step 17 – Save the settings on your Endpoint Protector Server and click Test to confirm configuration settings are correct.