Single Sign On (SSO) Configuration with Okta
Single Sign On (SSO) is a powerful authentication process that enhances security and improves user experience by allowing users to access multiple applications with a single set of login credentials. This guide focuses on configuring SSO using Okta, a leading identity management service, to streamline user access and secure your system effectively.
Configuring SSO with Okta
Configuring Single Sign-On with Okta involves several key steps that integrate your server with Okta’s authentication framework. Begin by activating SSO within your system’s configuration settings, selecting a failover user, and preparing for provider selection. This section guides you through the precise steps required to establish a secure and efficient SSO connection, including application integration in Okta, SAML settings configuration, and the necessary data synchronization between your server and Okta.
Step 1 – To activate Single Sign-On, navigate to System Configuration > System Settings > Single Sign-On. After you activate it, select a Failover Login User from the dropdown menu. The Root user is the default selection.
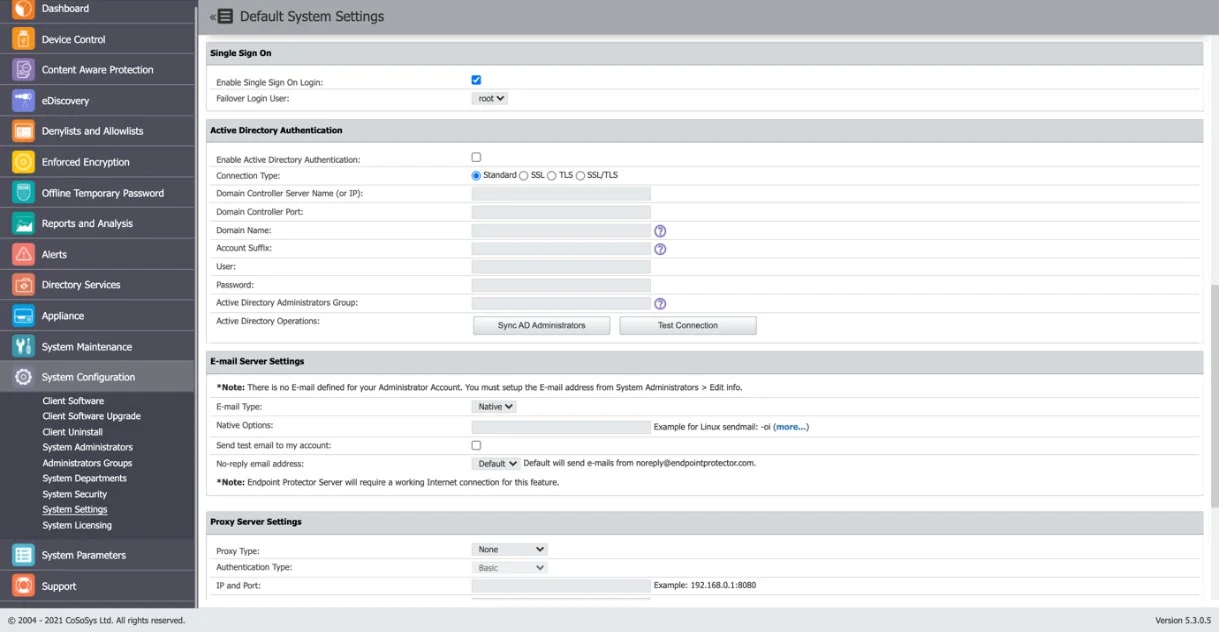
After you complete these steps, a Single Sign-On subsection appears in the System Configuration section.
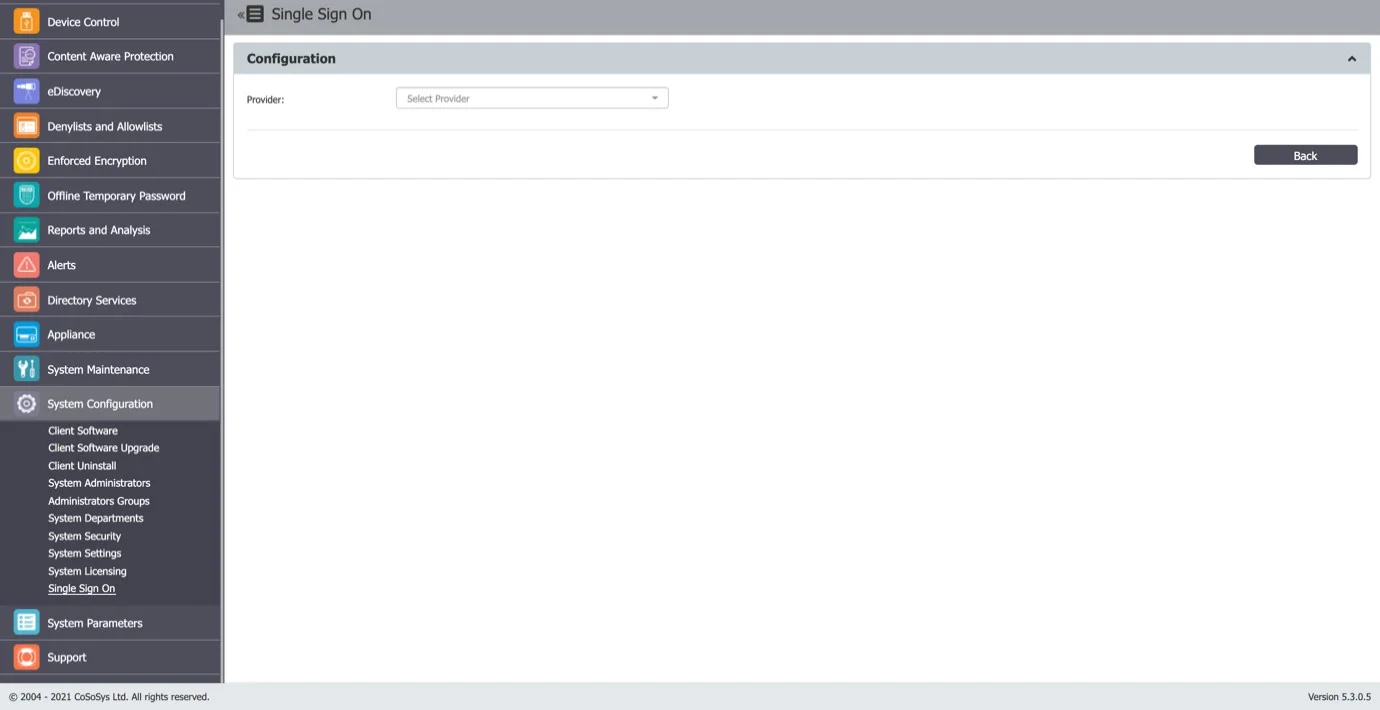
Step 2 – Select the Provider to display the Single Sign On subsection.
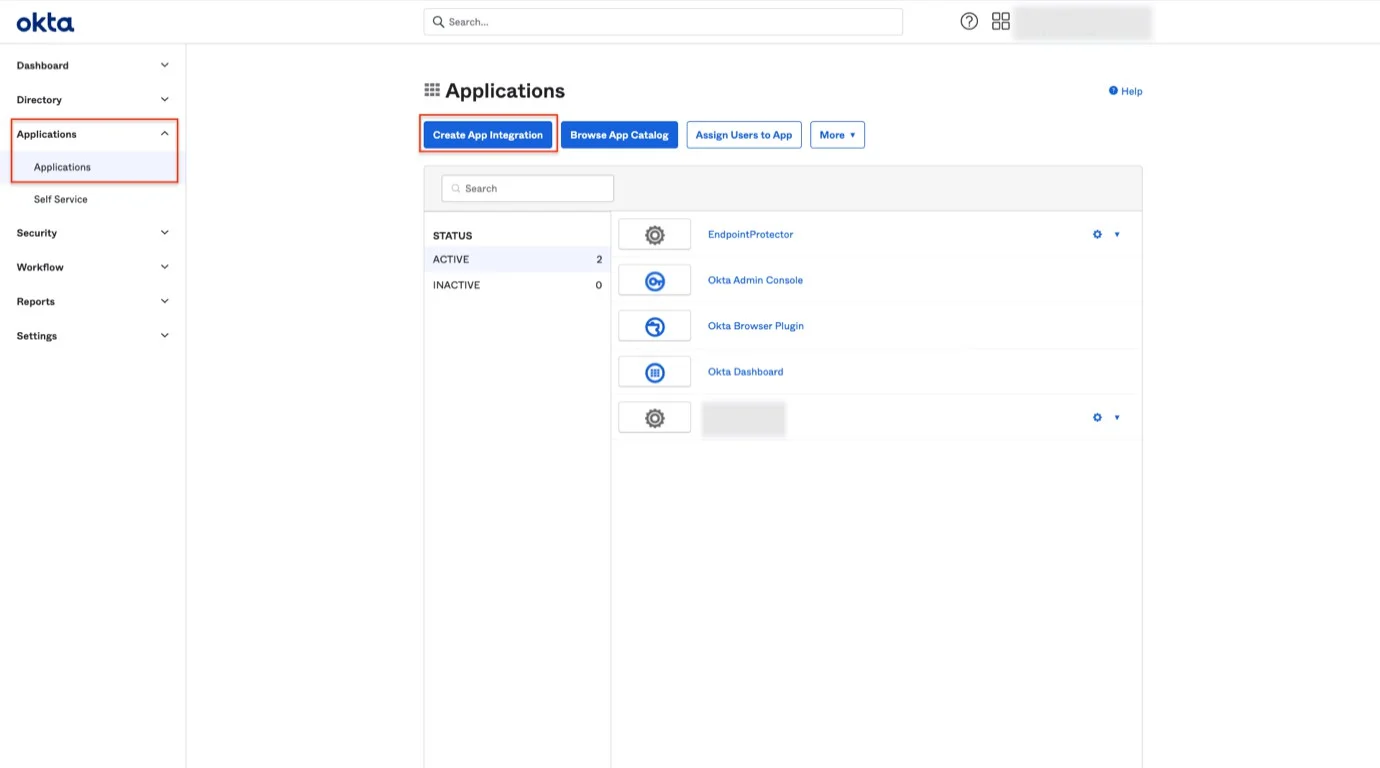
Step 3 – Go to yourcompany.okta.com, select Applications, and then click Create App Integration.
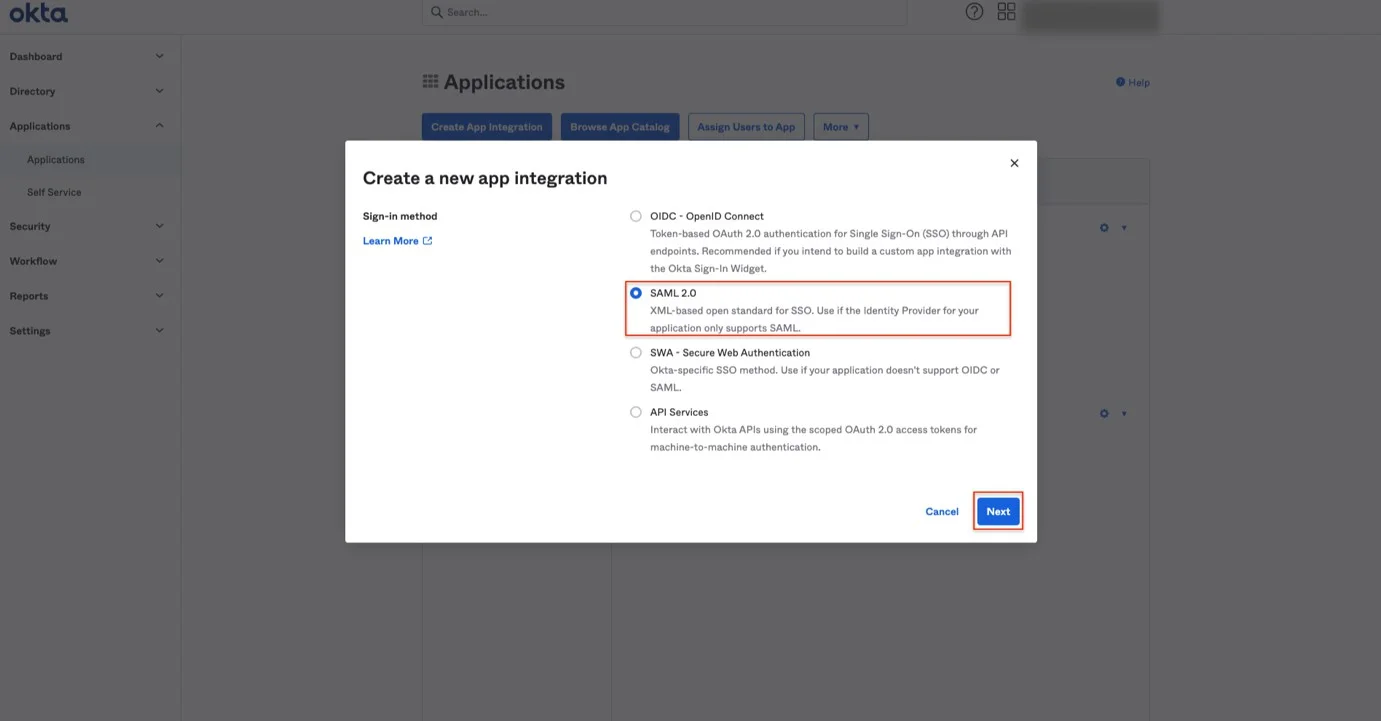
Step 4 – On the next screen, select SAML 2.0 and click Next.
Step 5 – Set a Name for the Application and click Next.
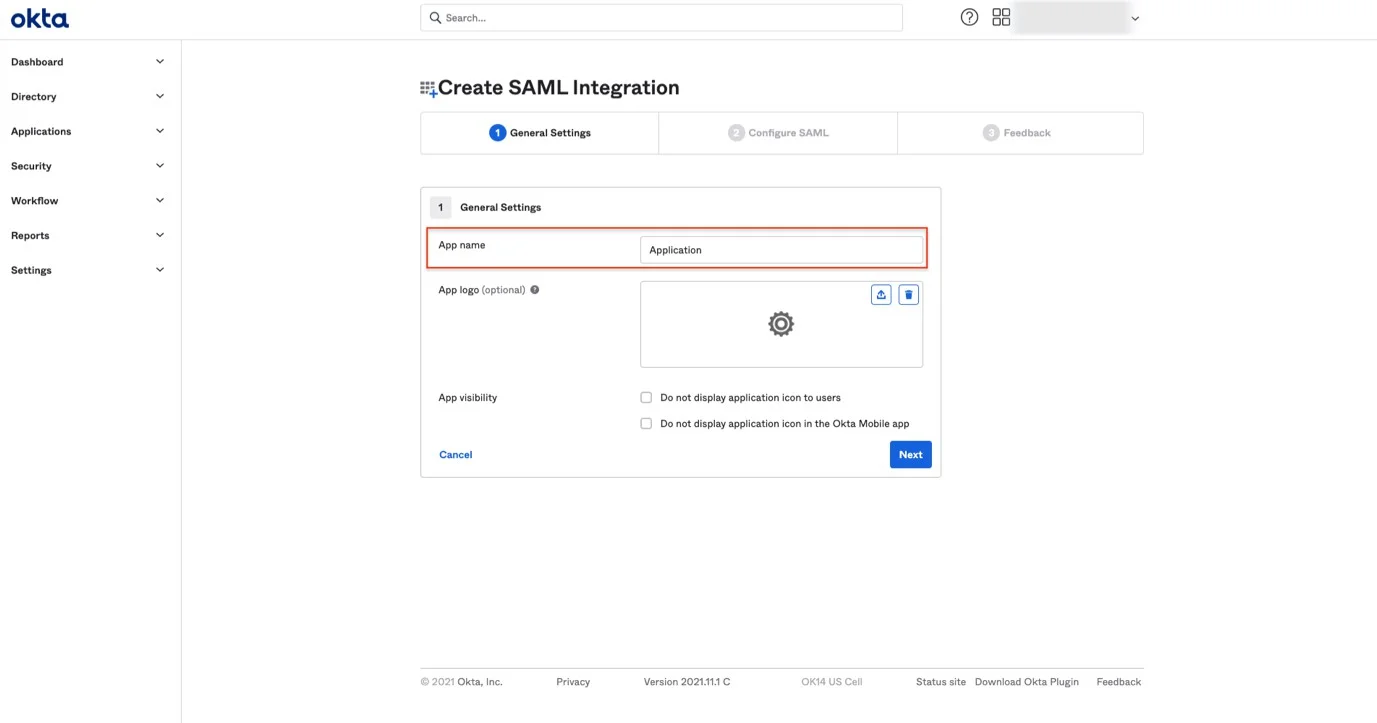
Step 6 – Open the Configure SAML tab.
Step 7 – Go to your Endpoint Protector Server, System Configuration, Single Sign On.
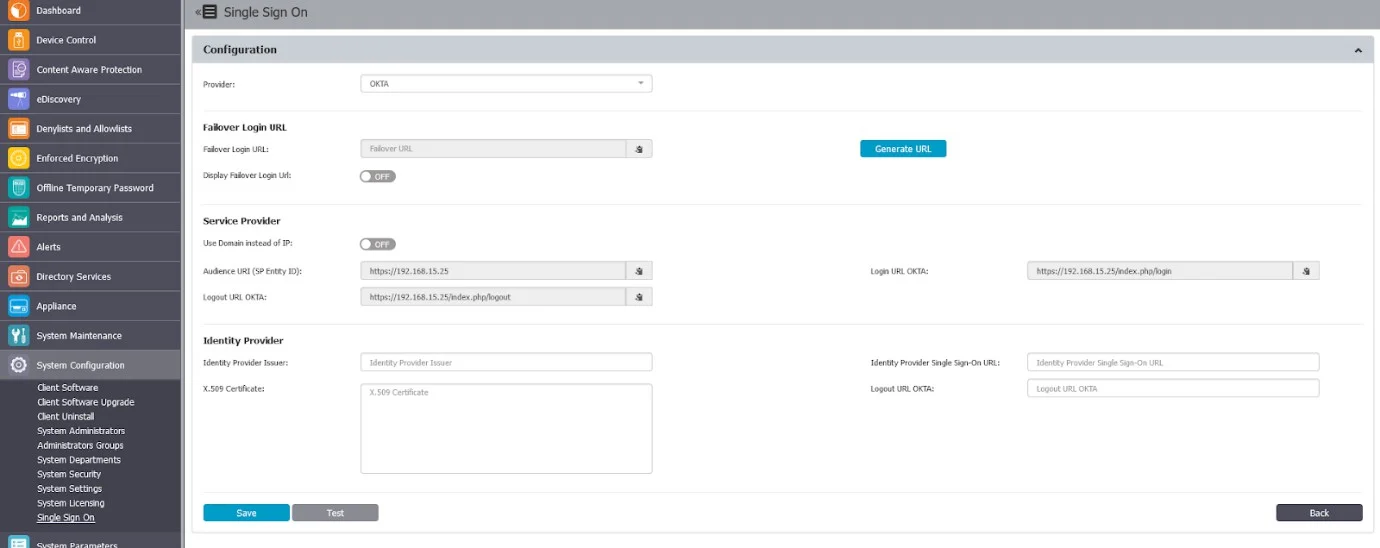
Before you copy the values in the next step, ensure you set the Service Provider to Domain (see Single Sign On). Values based on an IP address stop working when the server address changes.
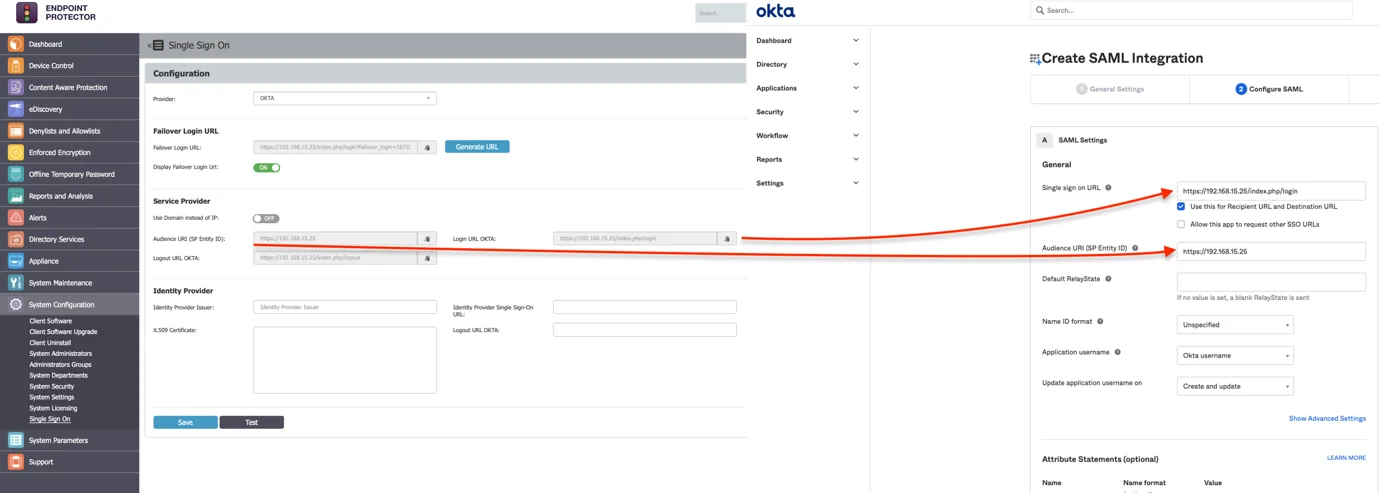
Step 8 – Copy the information from:
- Audience URI (SP Entity ID) and paste it on the field with the same name from OKTA, Configure SAML.
- Login URL OKTA and paste it on the field Single sign on URL from OKTA page, Configure SAML.
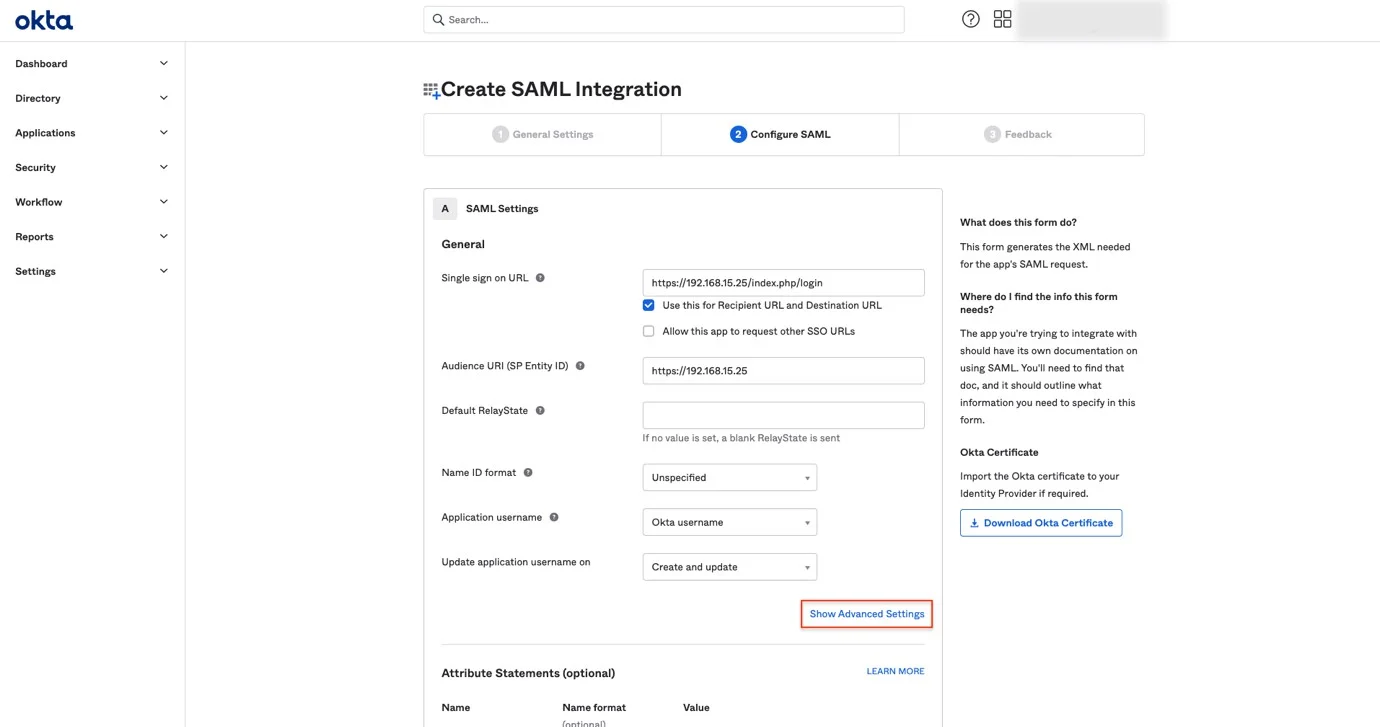
Step 9 – On the OKTA page, click Show Advanced Settings.
Step 10 – Edit the following fields:
- Signature Algorithm, select RSA-SHA256
- Digest Algorithm, select SHA256
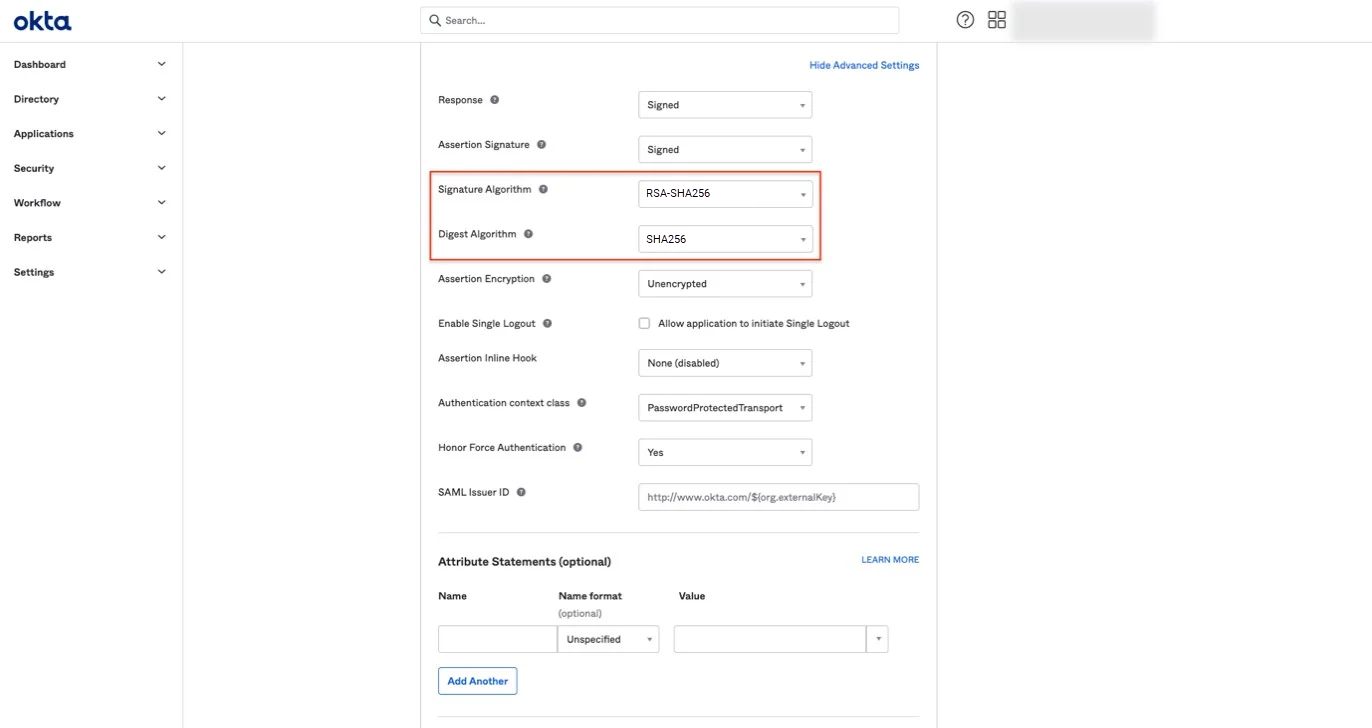
Step 11 – Hide Advanced Settings and click Next.
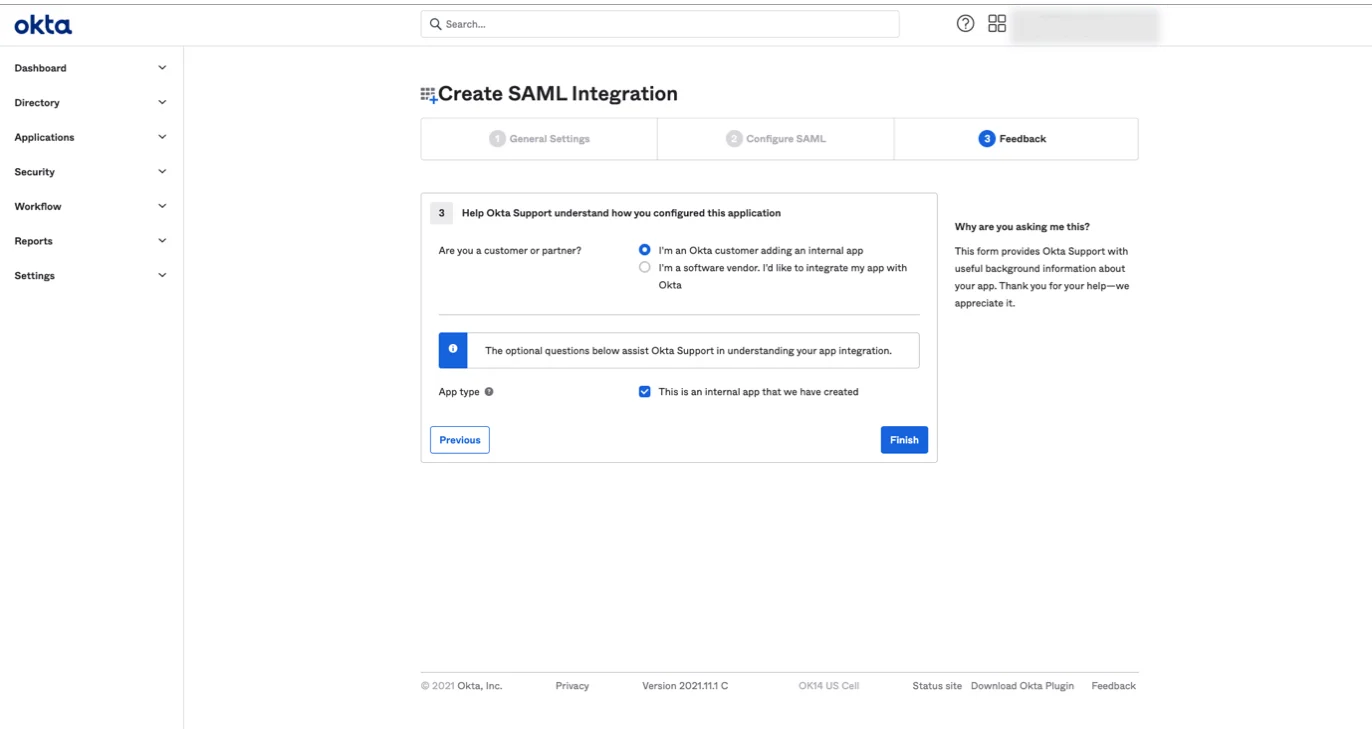
Step 12 – At step 3, select an answer for each question and click Finish.
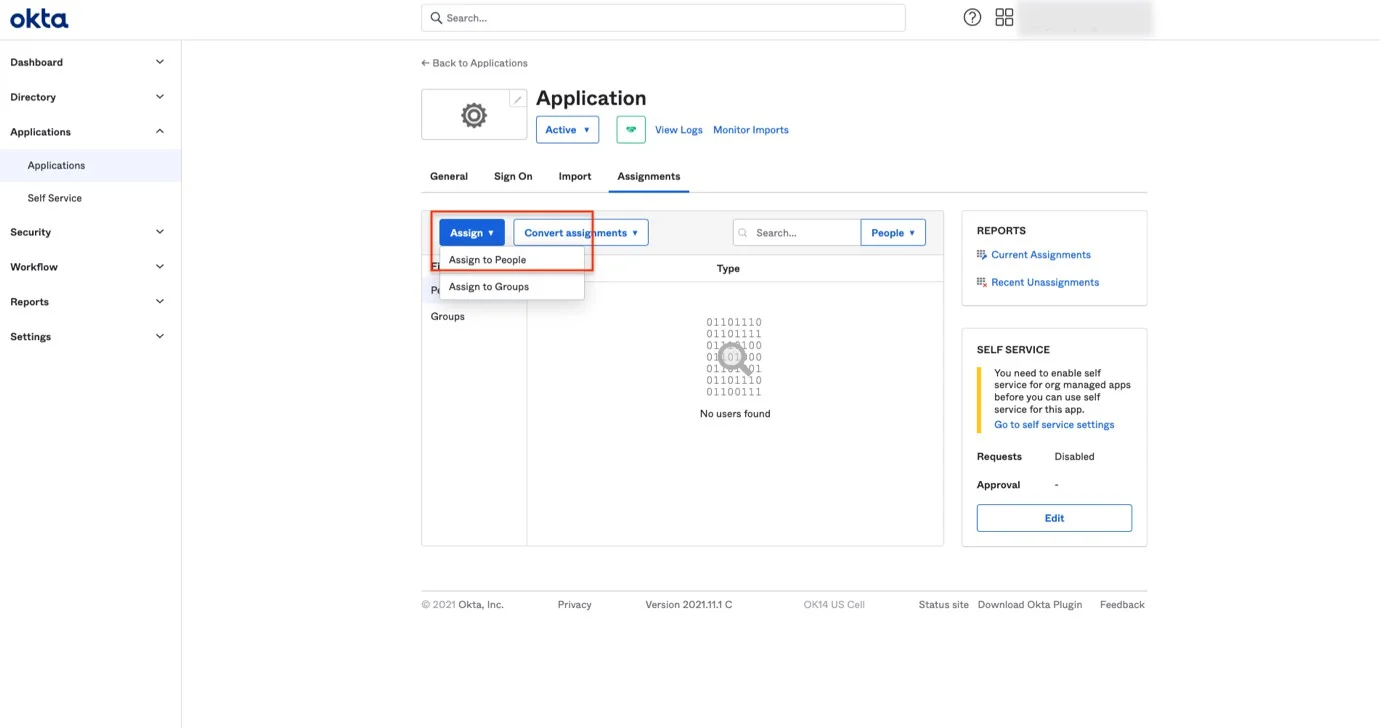
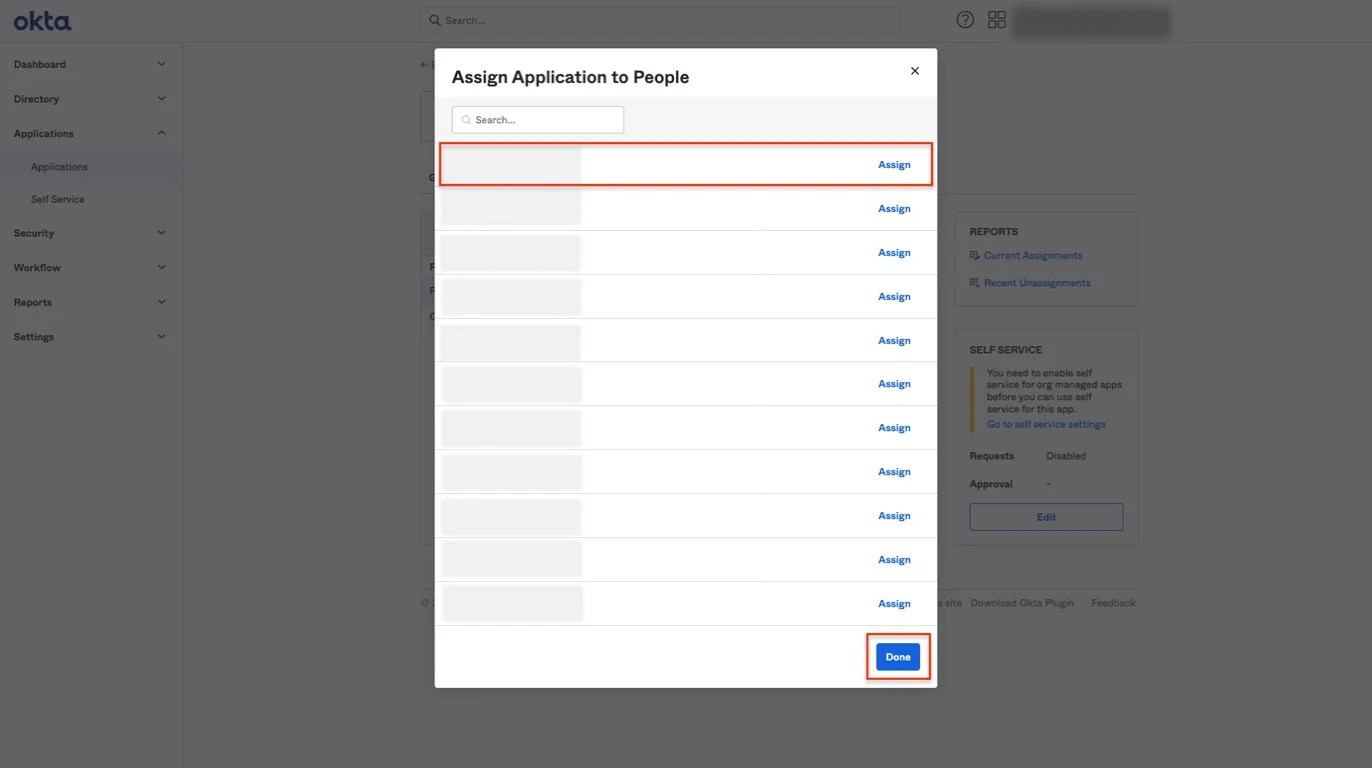
Step 13 – Navigate to Applications, select the Endpoint Protector application, go to Assignments, and assign people to the application.
Step 14 – After assigning the accounts, click Done.
Step 15 – Navigate to Applications, open the created app and click Sign On, View Setup Instructions.
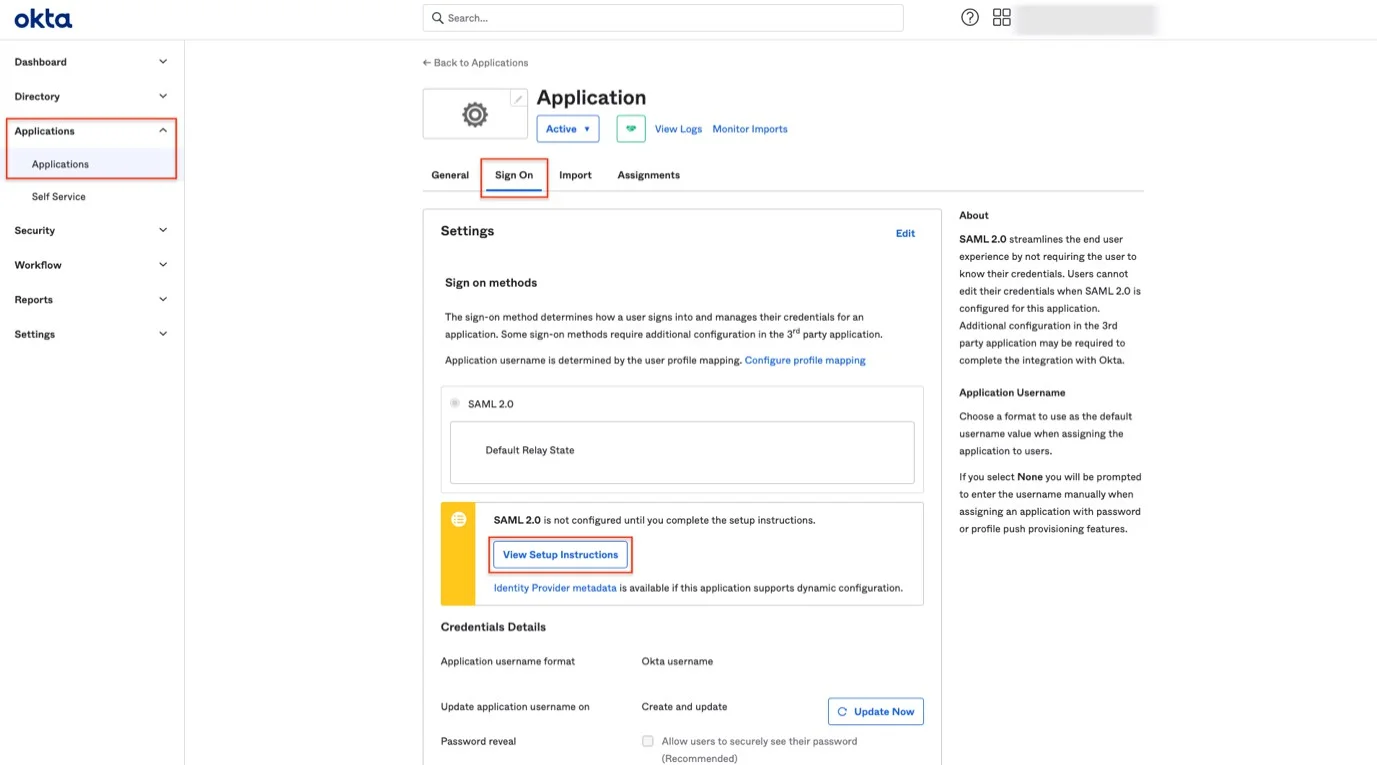
Step 16 – From the new opened section, copy the needed information and paste it on your Endpoint Protector Server:
- Identity Provider Single Sign-On URL to Endpoint Protector Server, System configuration, Single Sign On, Identity Provider Single Sign-on URL
- Identity Provider Issuer to Endpoint Protector Server, System configuration, Single Sign On, Identity Provider Issuer
- X.509 Certificate to Endpoint Protector Server, System configuration, Single Sign On, X.509 Certificate
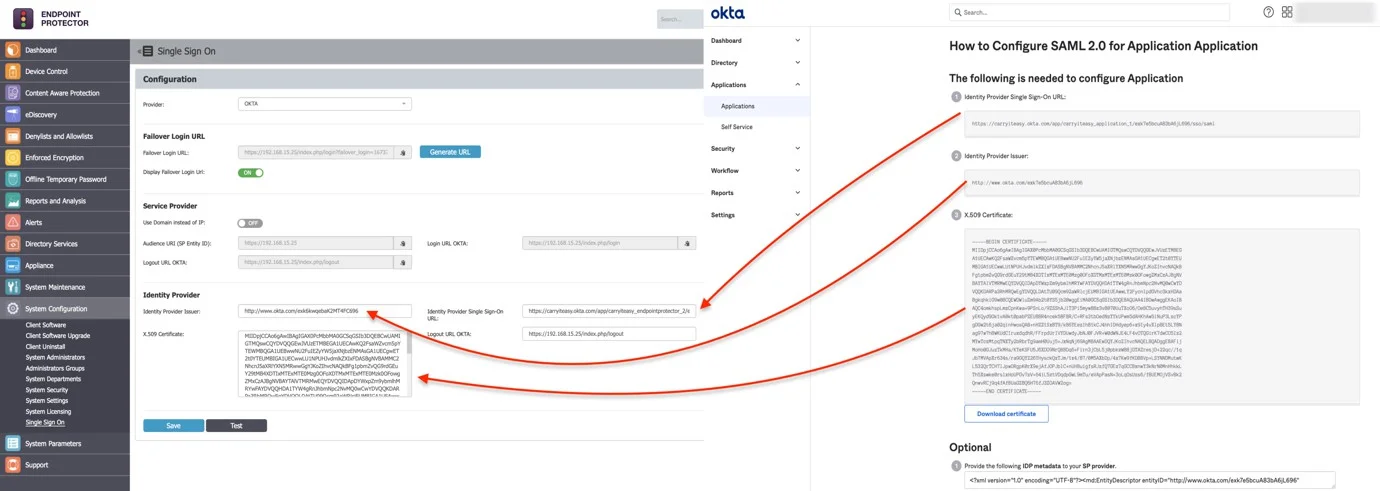
Step 17 – Save the settings on your Endpoint Protector Server and click Test to confirm configuration settings are correct.