Windows Deployment
To deploy the Endpoint Protector MSI package for Windows using Intune, follow these steps:
Step 1 – Open and log in to Endpoint Protector;
Step 2 – Go to the System Configuration, Client Software and download the Windows Endpoint Protector MSI package;
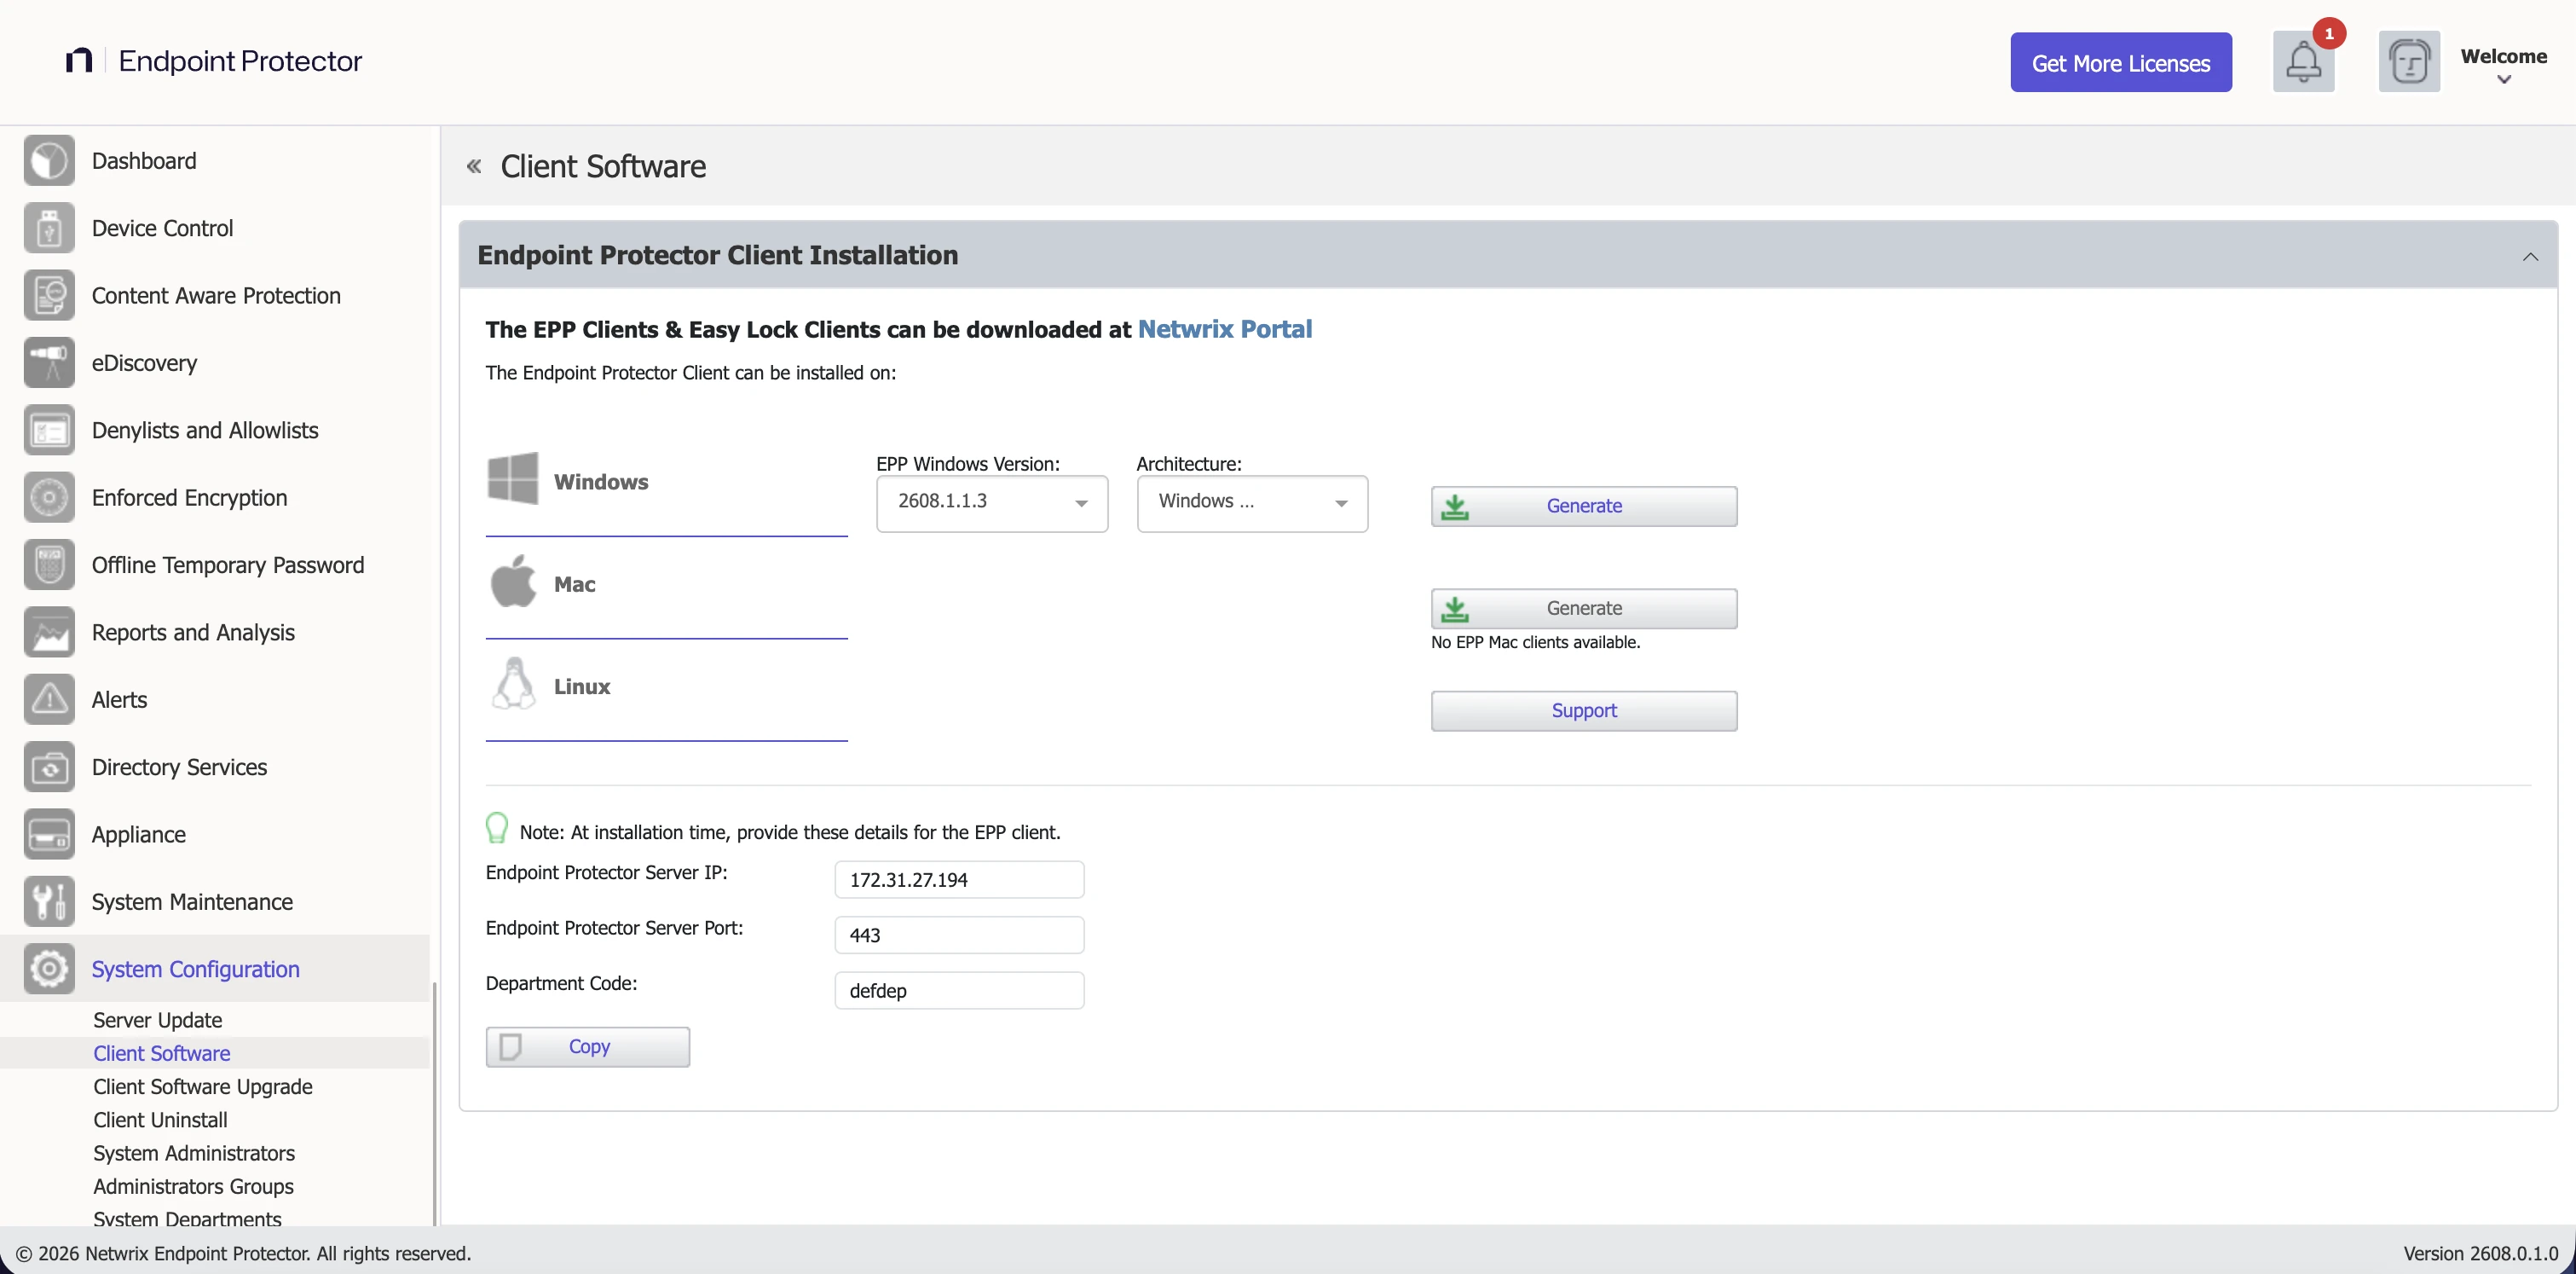
EPPClientSetup.2608.1.1.3_x86_64.msi is an example filename. Always download and deploy the
latest available EPP Client version.
When deploying the .msi package, delete the information in the brackets as well as the underscore that precedes it - EPPClientSetup.2608.1.1.3_x86_64.msi
Step 3 – Go to the Microsoft Intune admin center (also known as Microsoft Endpoint Manager) and sign in;
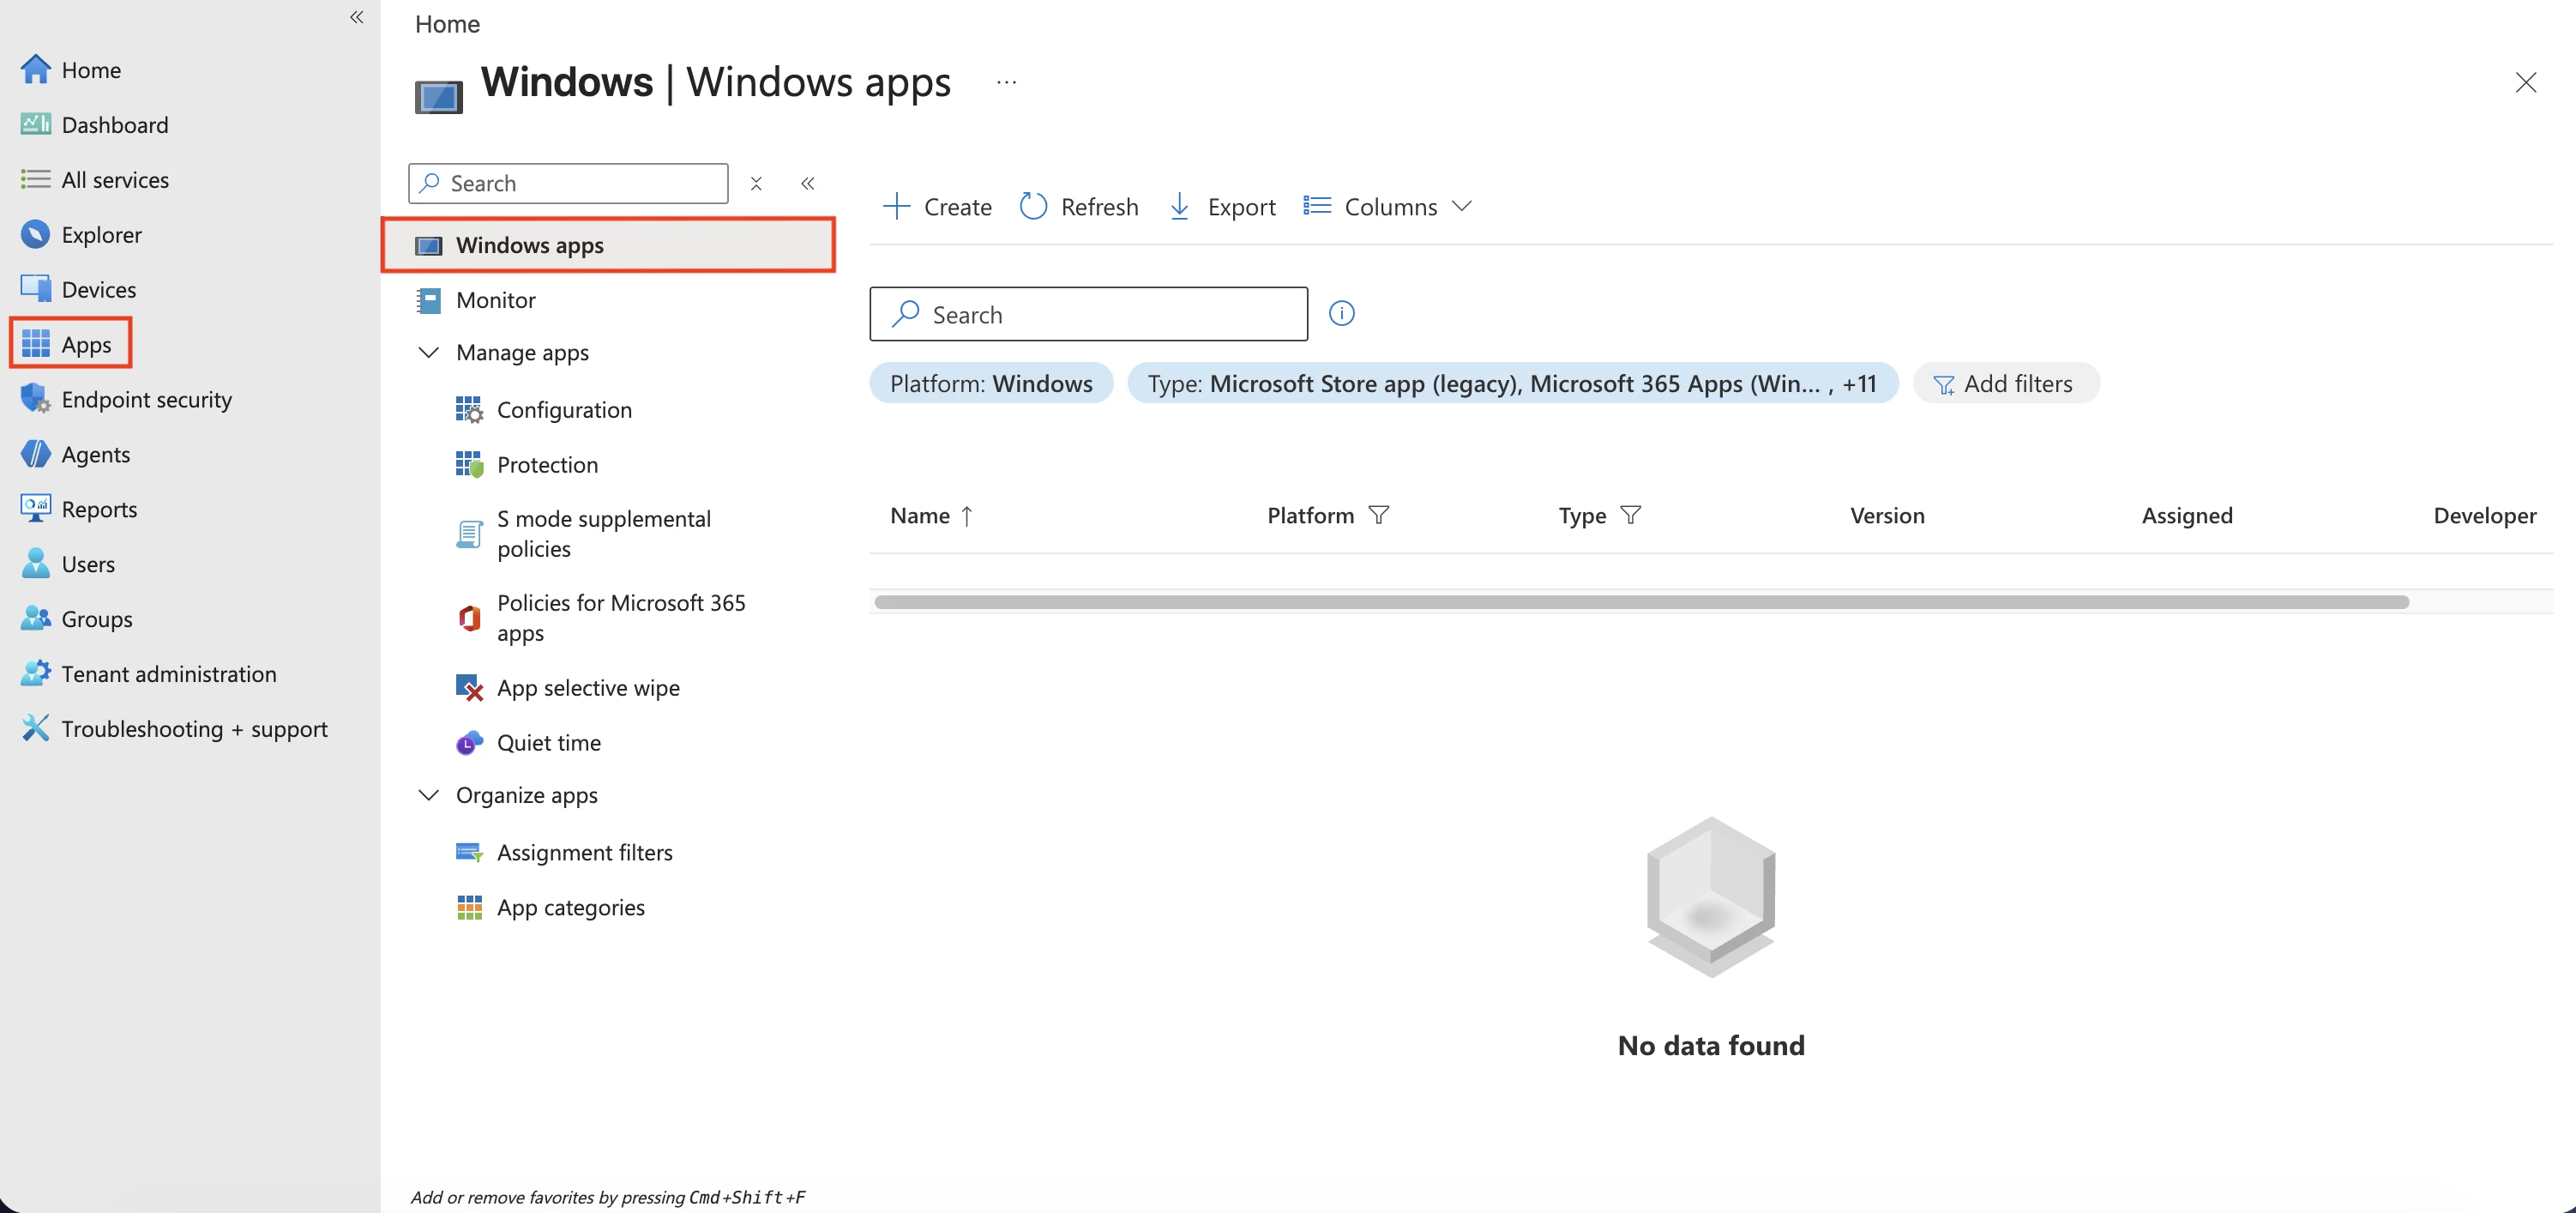
Step 4 – Go to Apps from the left-hand side menu, and on the Apps Overview page, select the Windows platform;
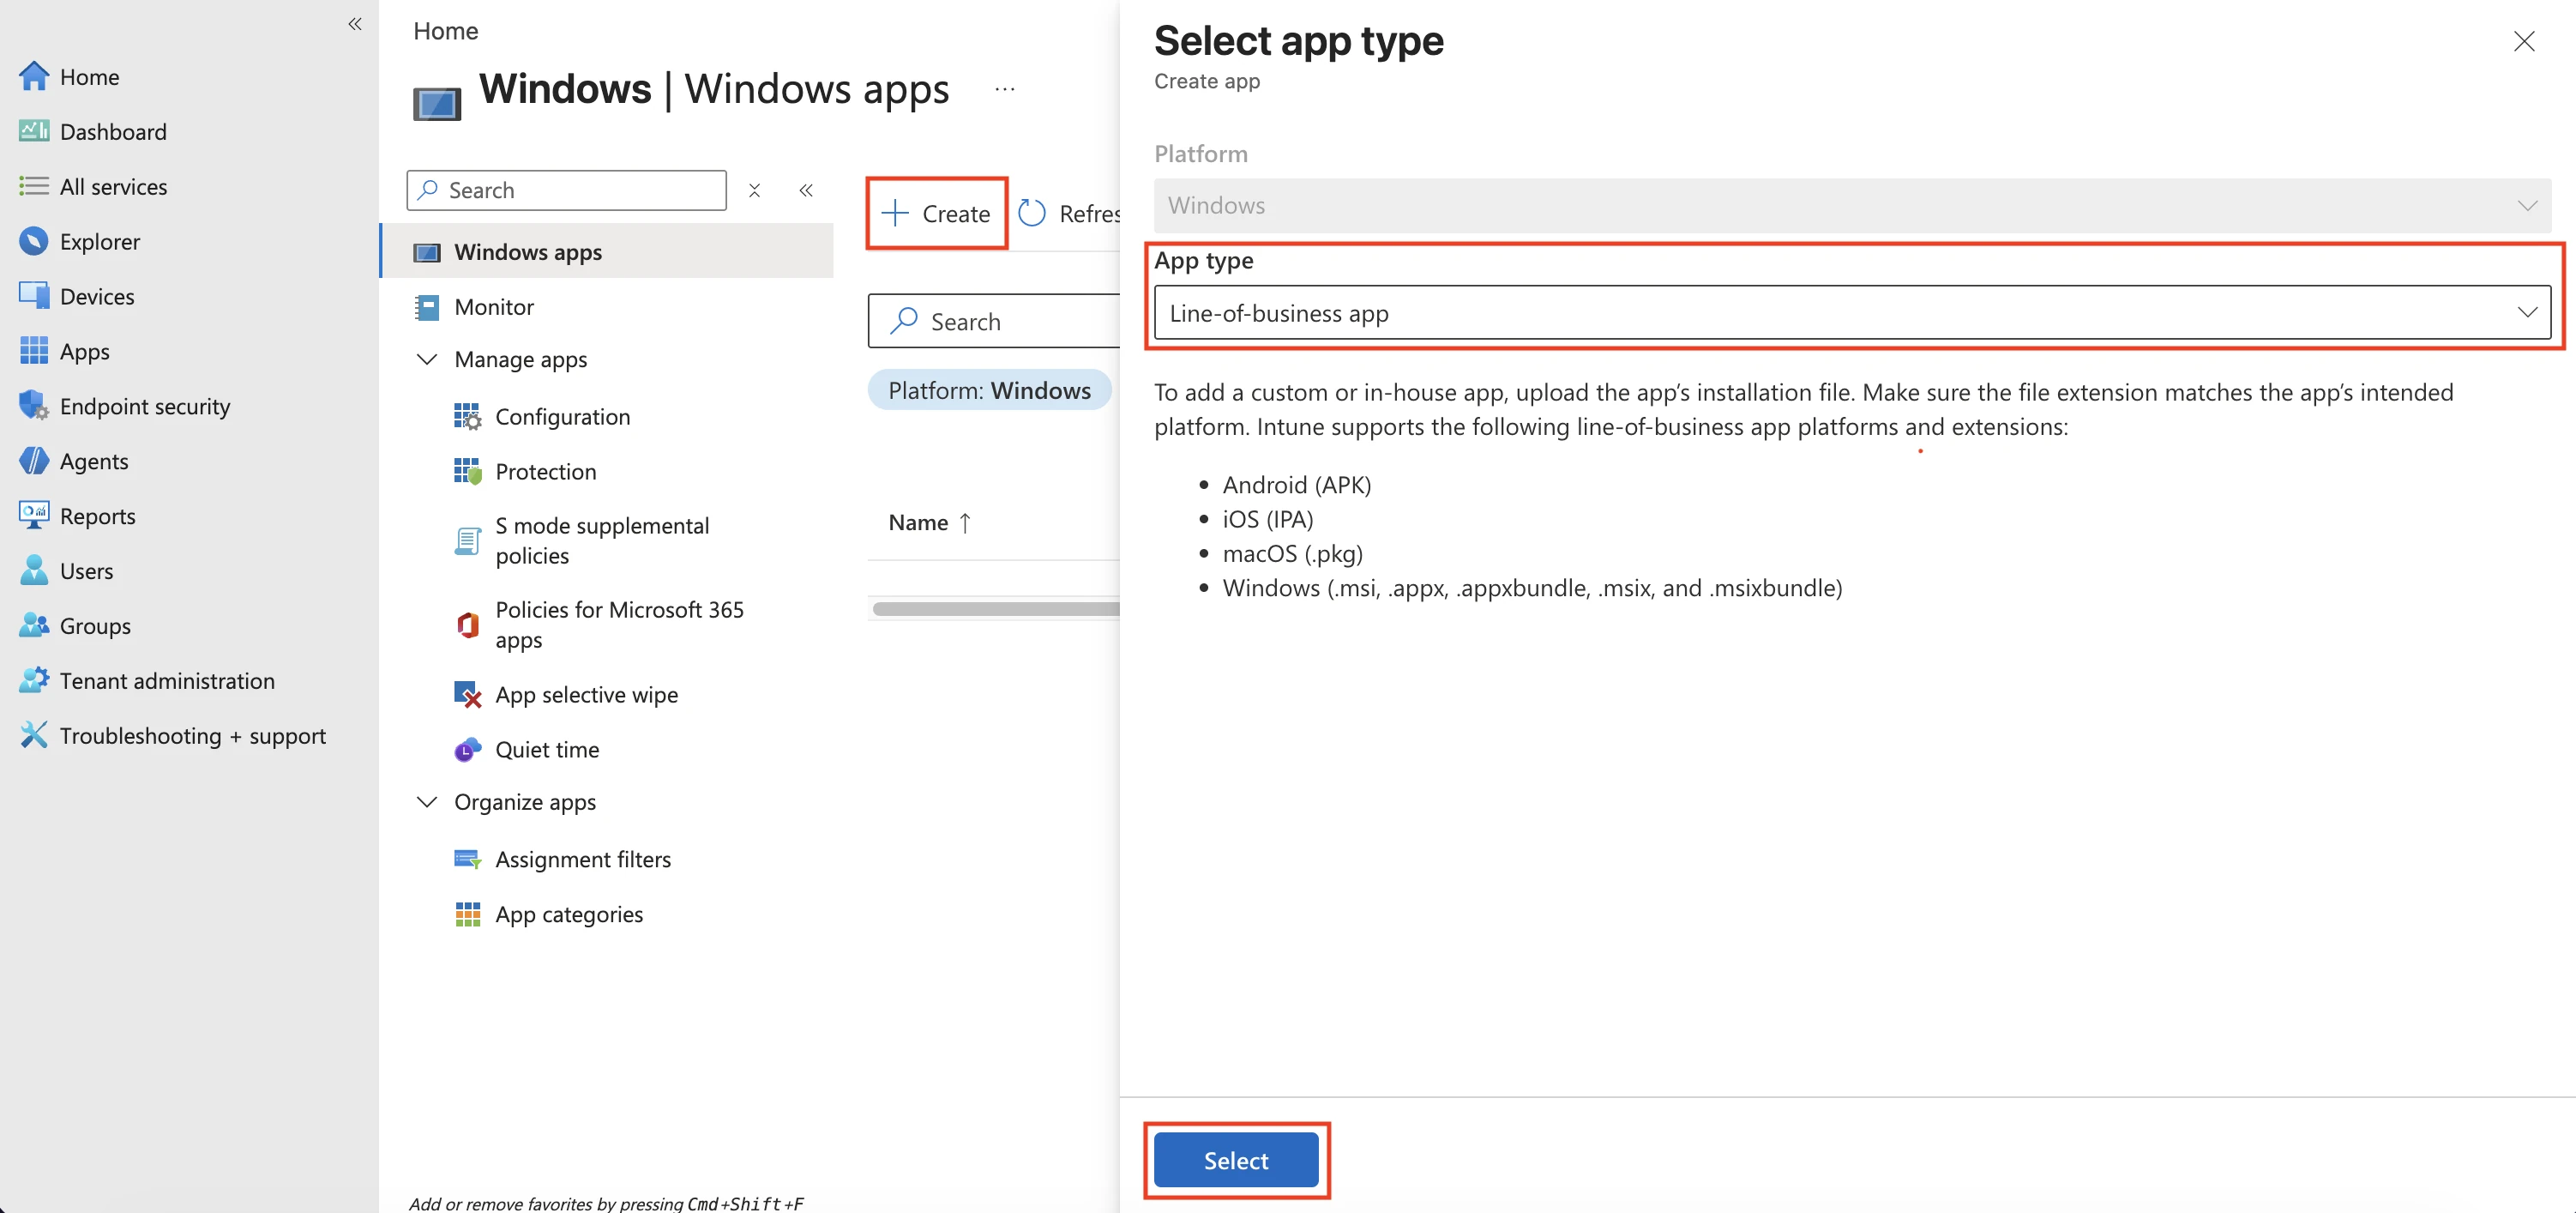
Step 5 – On the Windows App page, click Create, select the Line of business app type, and then click Select;
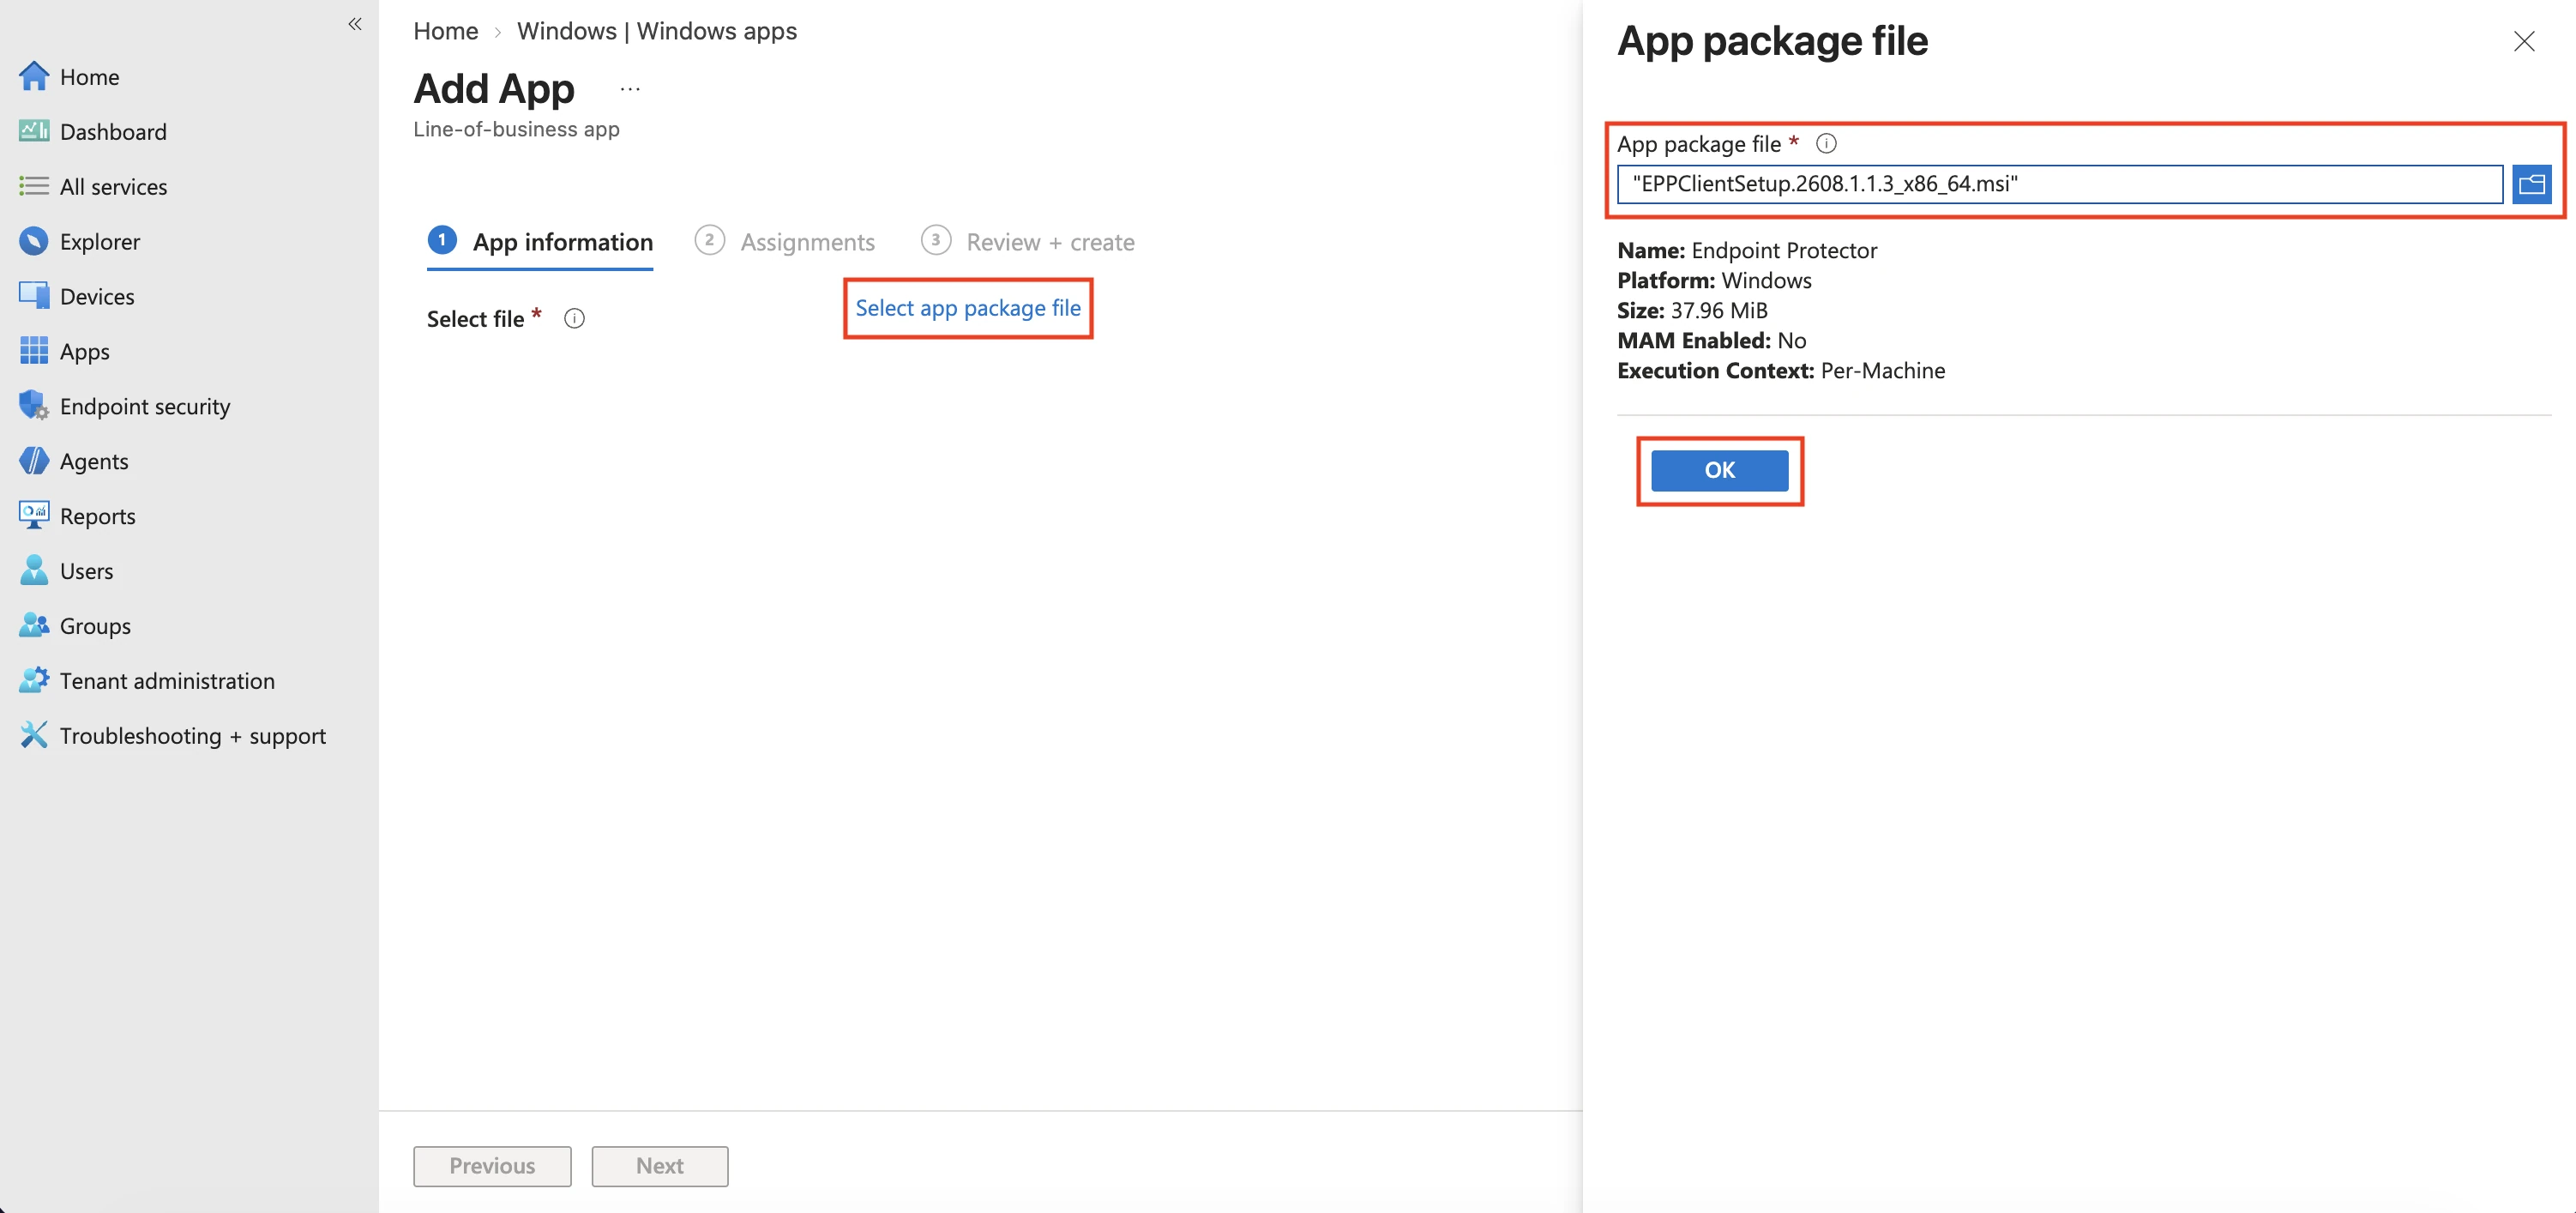
Step 6 – Click Select app package file and from the right-hand side, select the Endpoint Protector MSI file and click OK;
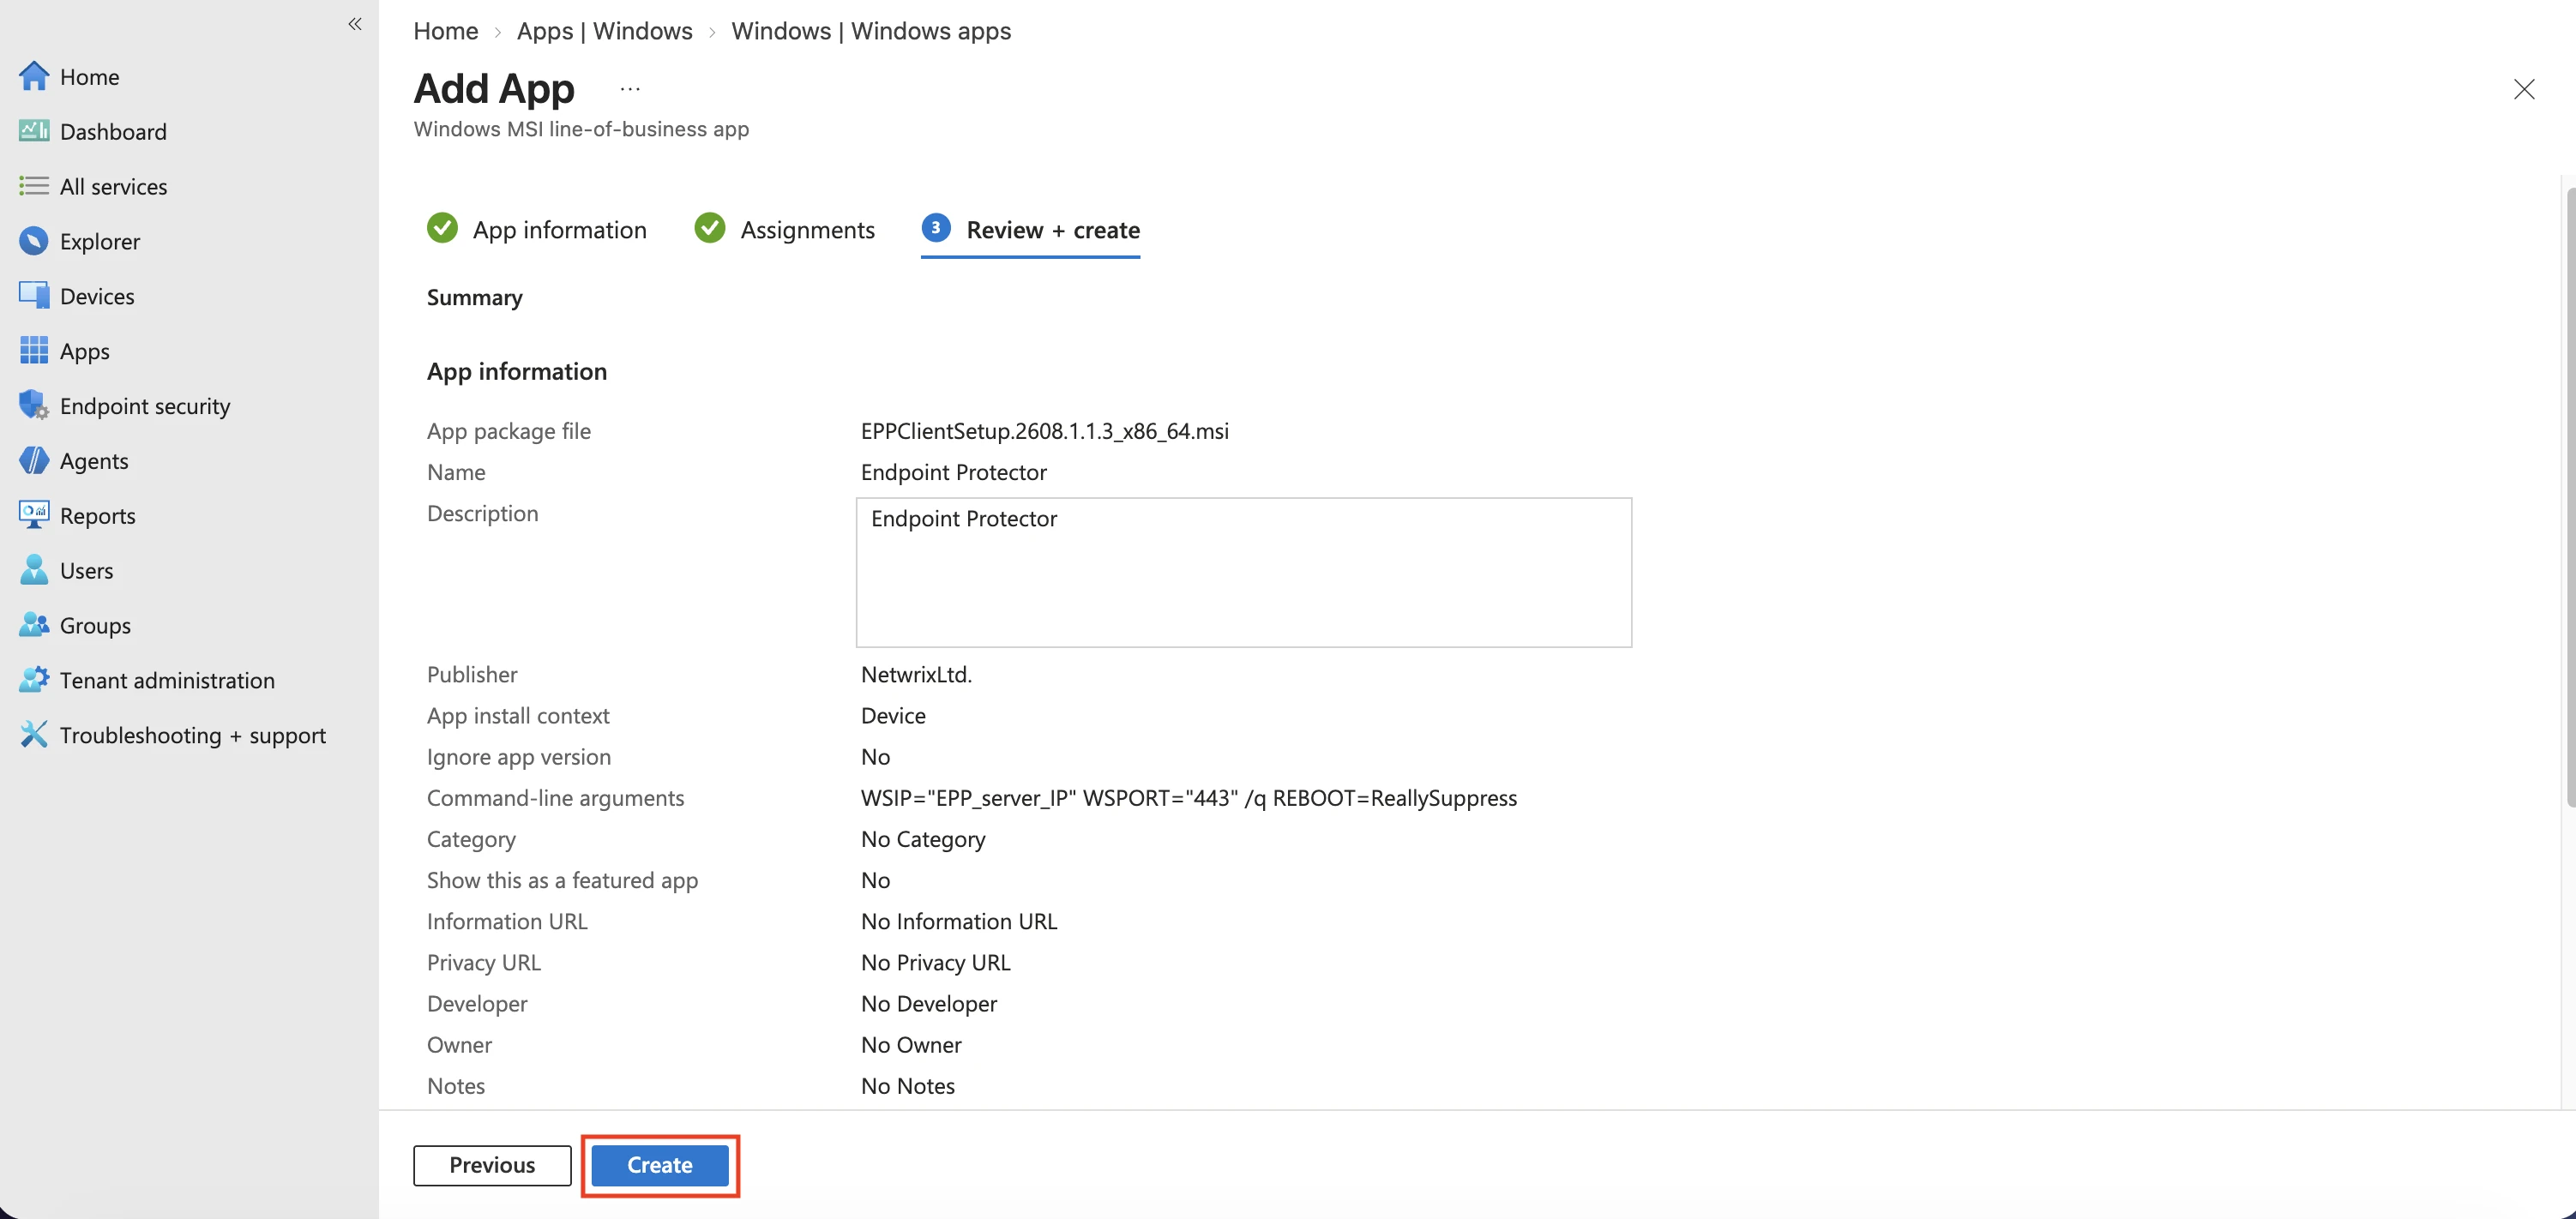
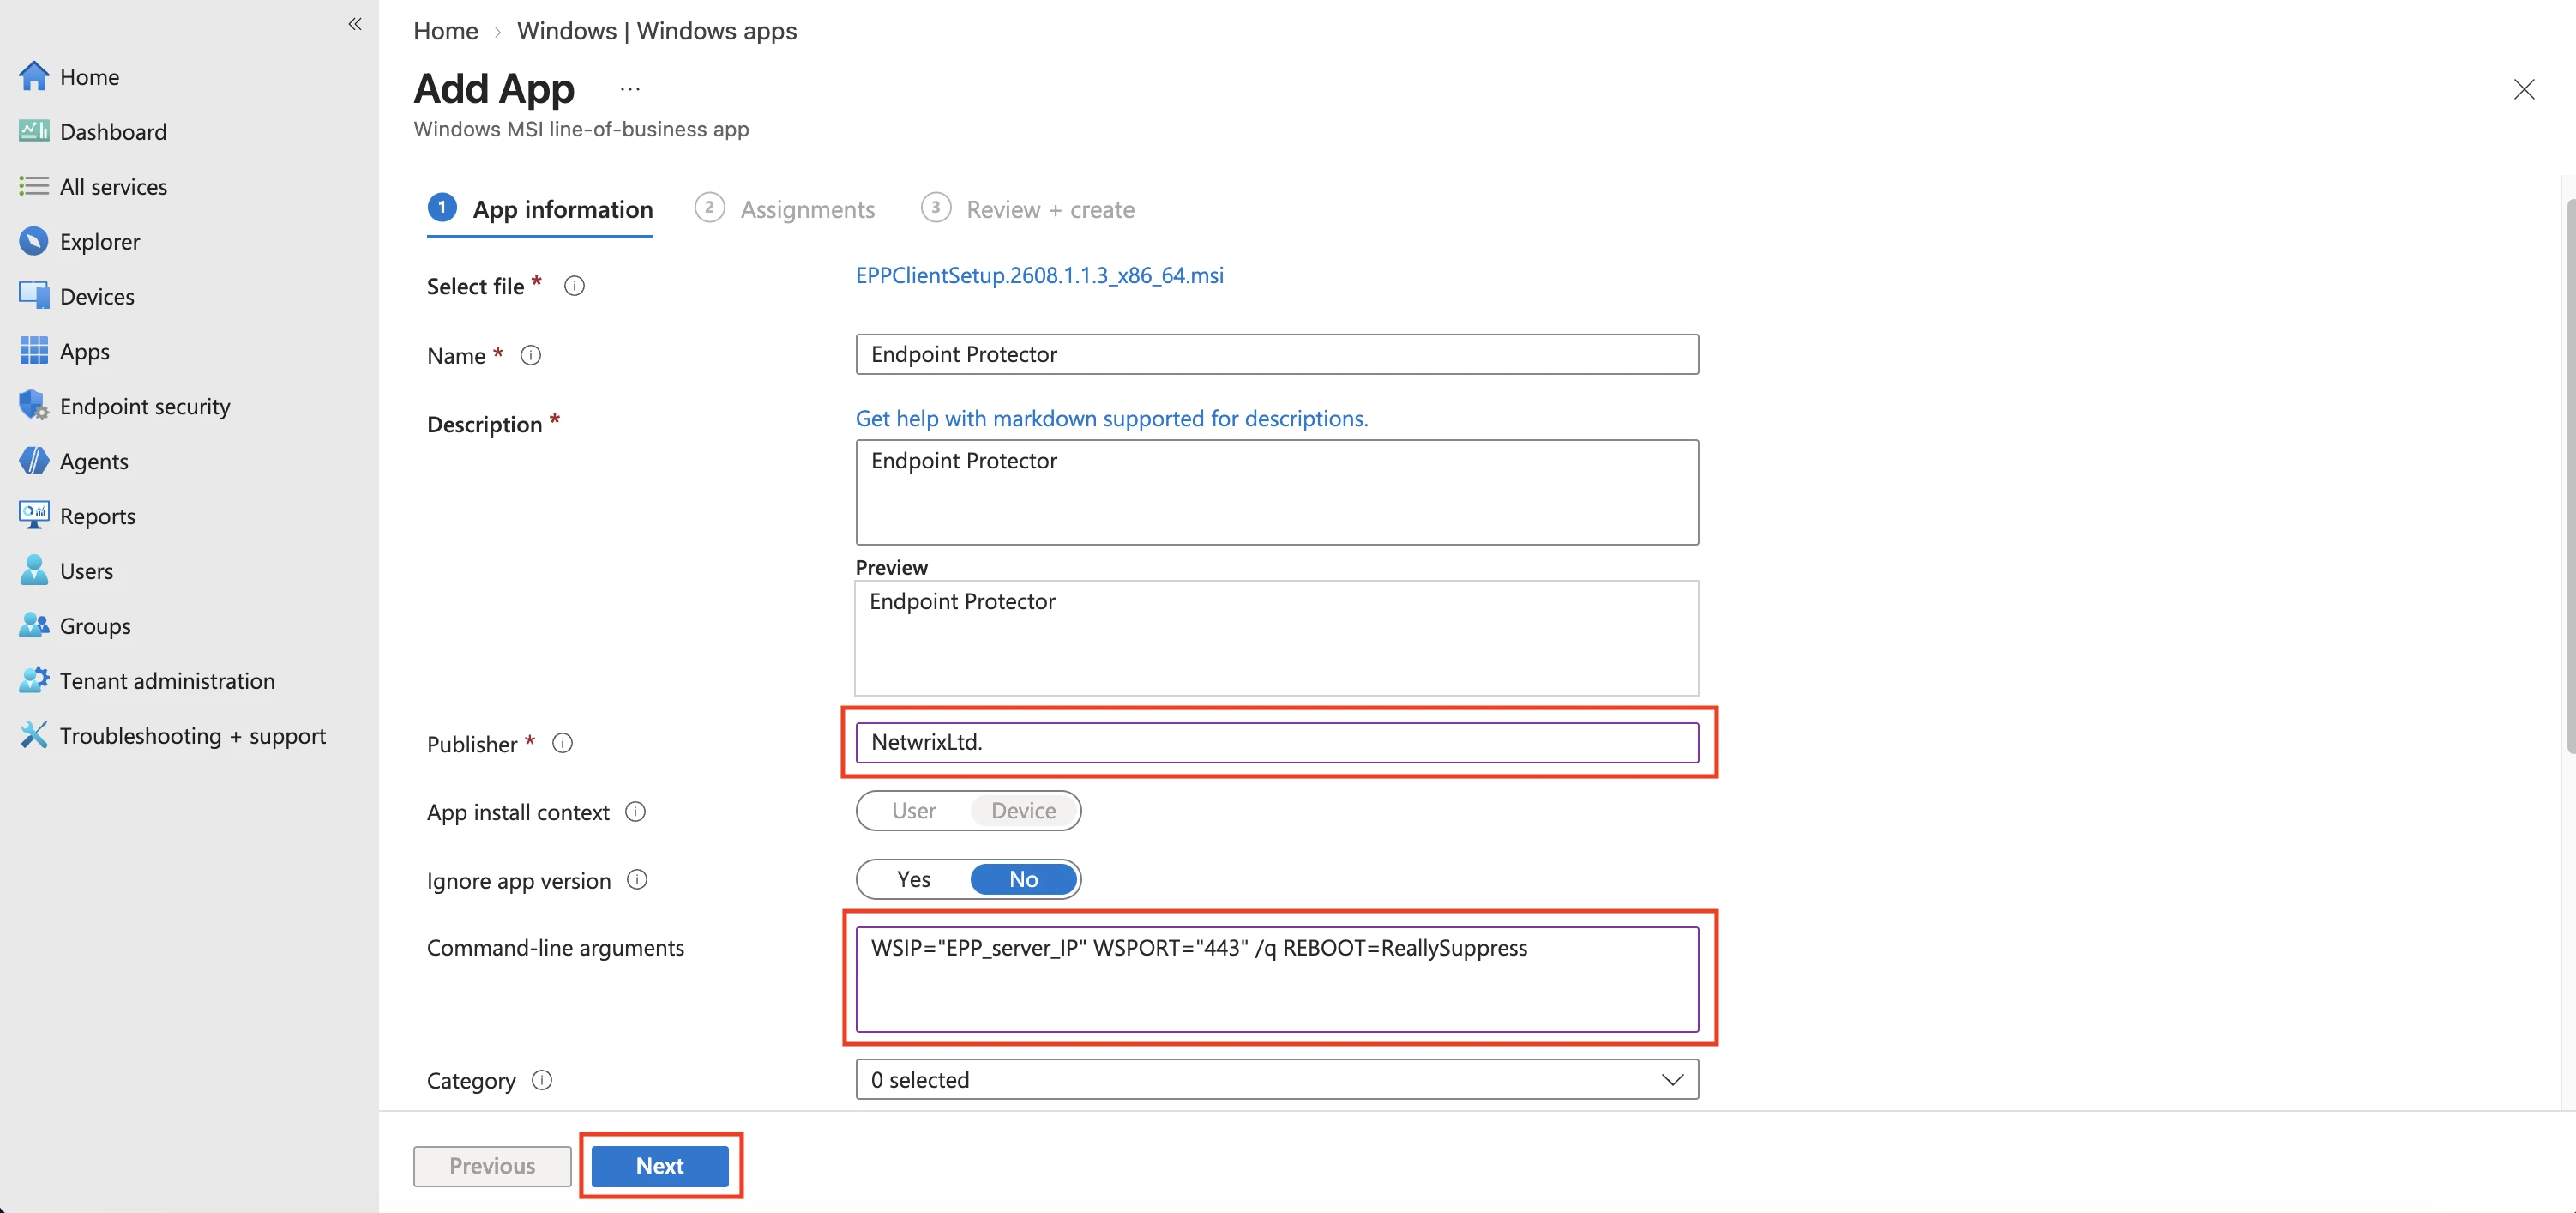
Step 7 – On the App information page, fill in the mandatory fields and then click Next:
-
Name – add Endpoint Protector and optional, the package version (Endpoint Protector 5.7.3.6)
-
Description – click Edit Description and add installation details
-
Publisher – add NetwrixLtd.
-
Command-line argument – add the following command line in the text box and complete it with the required information (server IP, port):
- WSIP="EPP_server_IP" WSPORT="443" /q REBOOT=ReallySuppress
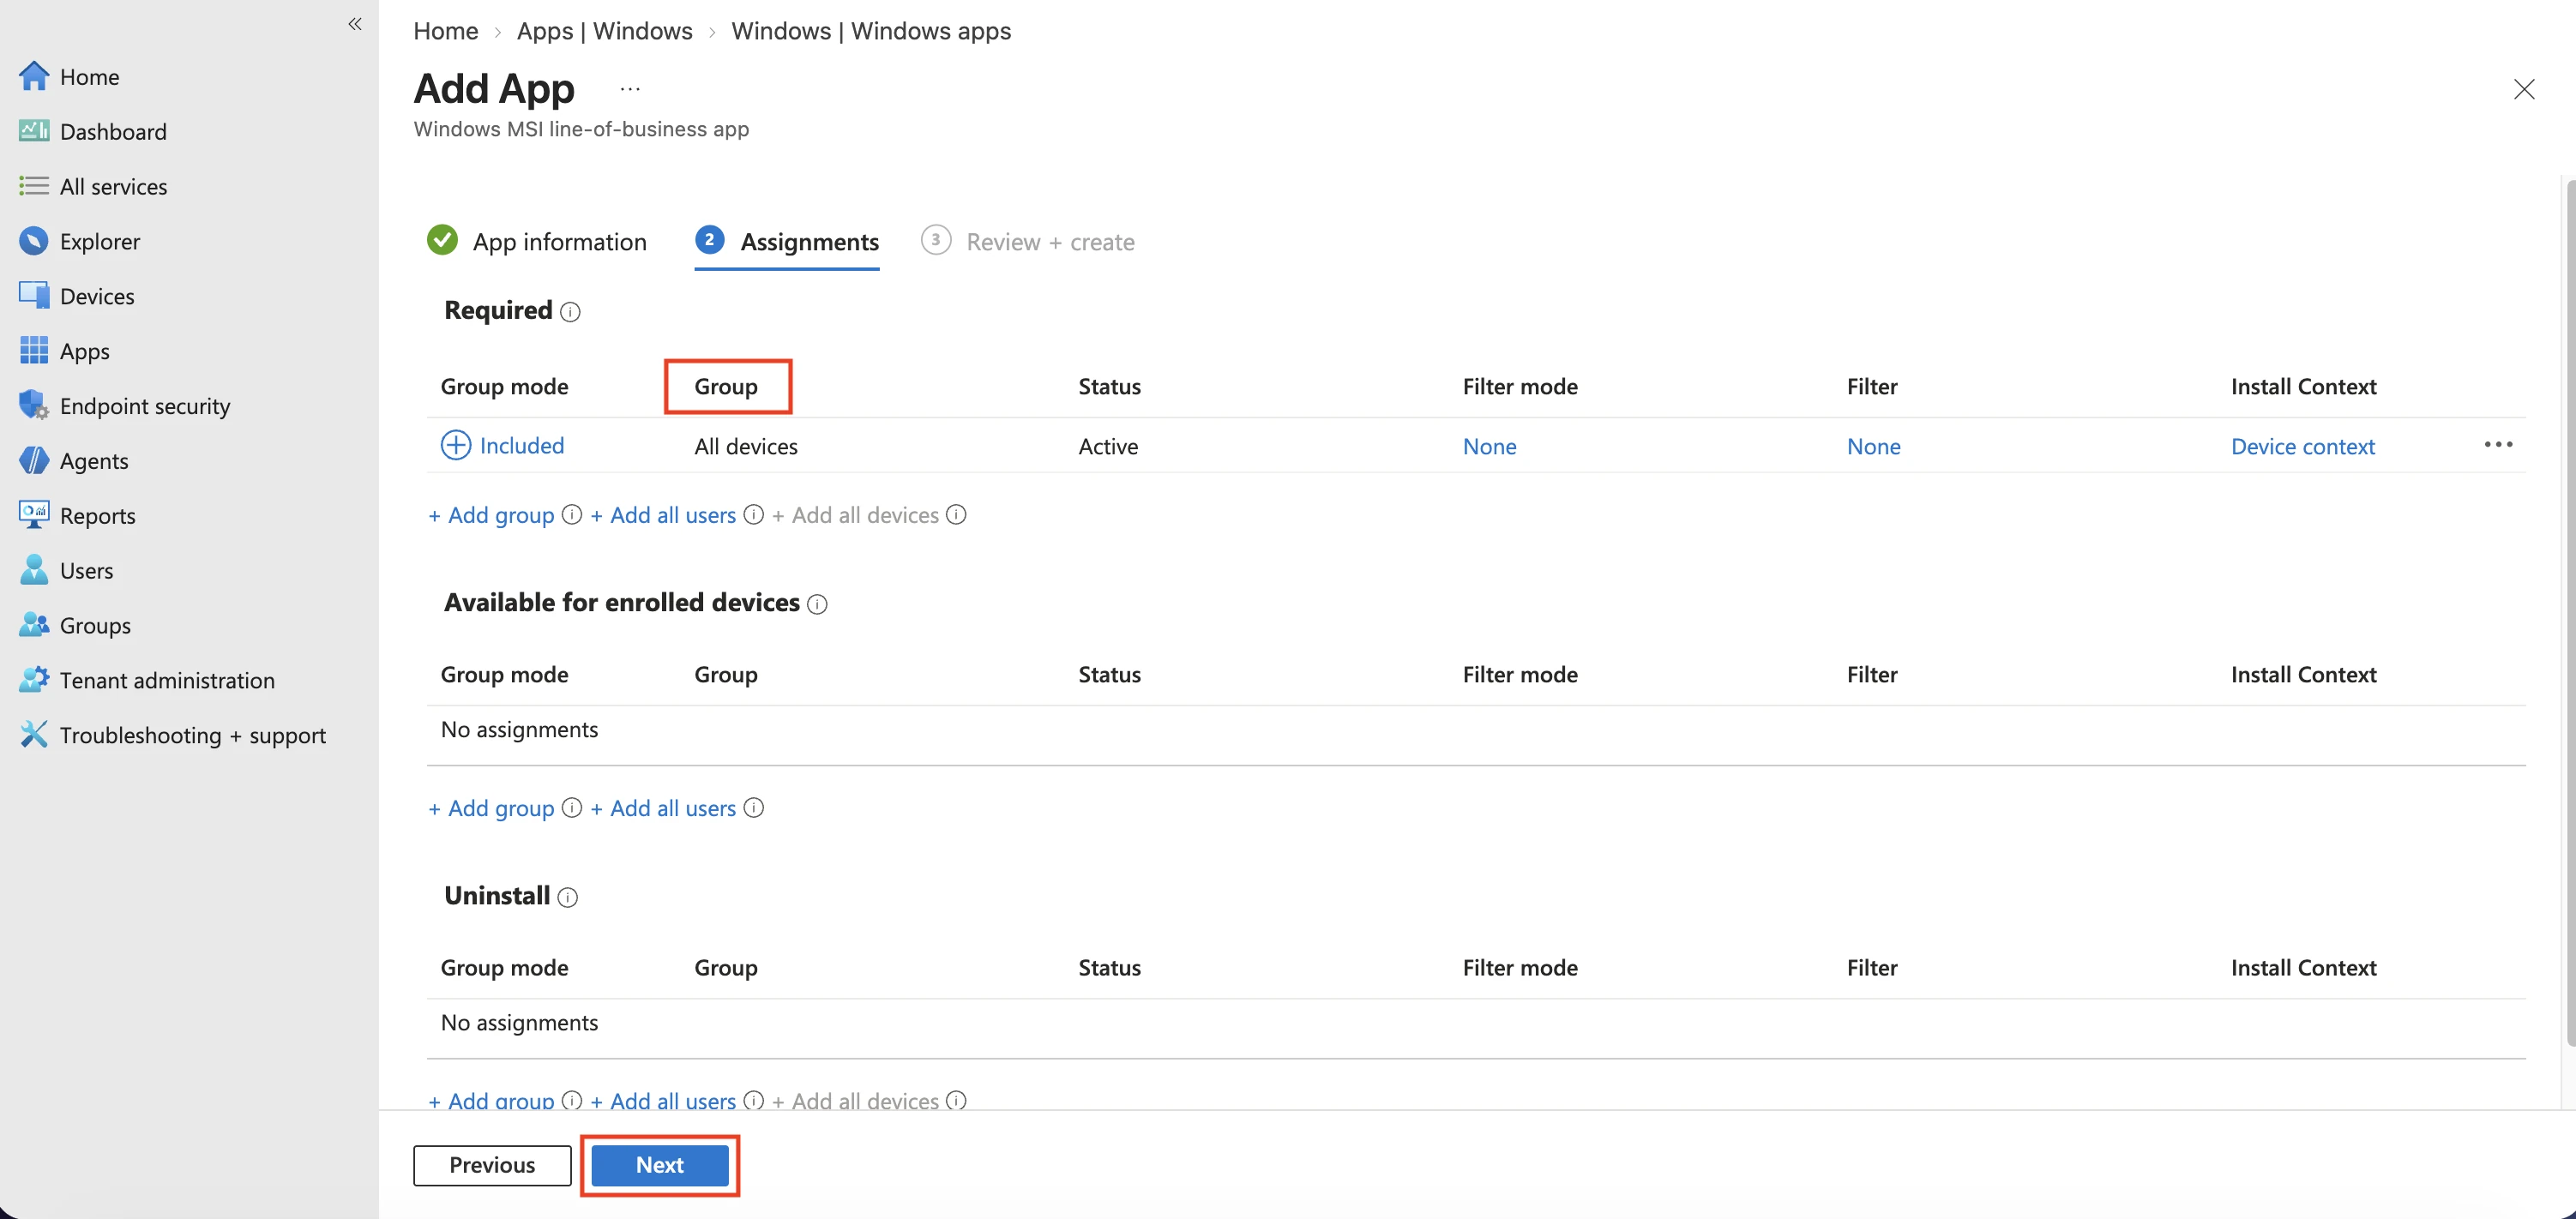
Step 8 – On the Assignments page, in the Requirement section, select the group for which you want to deploy the Endpoint Protector client and then click Next;
Step 9 – On the Review + create page, click Create - this will start the Endpoint Protector MSI package upload.