Review and Modify Assigned Roles
How to review and modify user permissions grouped by categories.
Overview
The Assigned Roles page displays all user permissions organized by category. Users with appropriate permissions can view, assign, edit, and remove role assignments from this page.
Access Control: All role assignments displayed and operations available are governed by Access Control Rules (ACR). Users can only view and manage roles and identities within their configured area of responsibility. Proper ACR configuration is required for delegated administration scenarios.
Participants and Artifacts
This operation should be performed by a user with the appropriate permissions. See the Configure a User Profile topic for additional information.
Users require the /Custom/ProvisioningPolicy/AssignedRoles/{EntityType} permission to access the Assigned Roles page.
The following example provides the rights for the Administrator profile to access the Assigned Roles page on the Entity Type Directory_User. See the Create a Provisioning Rule and Create Roles in the Role Catalog topics for additional information.
Code attributes enclosed with <> need to be replaced with a custom value before entering the script in the command line.
<AssignedRolesAccessControlRules EntityType="Directory_User" Profile="Administrator" />
Default Filters
When you open the Assigned Roles page, several filters are available, based on your configuration, to help you narrow down and focus on specific role assignments.
For information about configuring custom search bars, see Custom Search Bar.
The default filters include:
- Policy — Filter by the governing policy associated with a role
- Role — Filter by a specific role to see all users who hold that assignment
- Assignments ending before — Filter by end date using a date picker to find expiring assignments
- Workflow State — Filter by the current state within a workflow (e.g., Approved, Calculated, Pre-existing)
- Category Filtering: Use the category selector in the left sidebar to view assignments organized by role category (e.g., Career Management, Payroll).
Multiple filters can be combined simultaneously. Use filters to isolate specific assignments before multi-select operations.
Review Assigned Roles
Review the Assigned Roles by proceeding as follows:

Step 1 – On the home page, in the Administration section of the UI click on Assigned Roles.
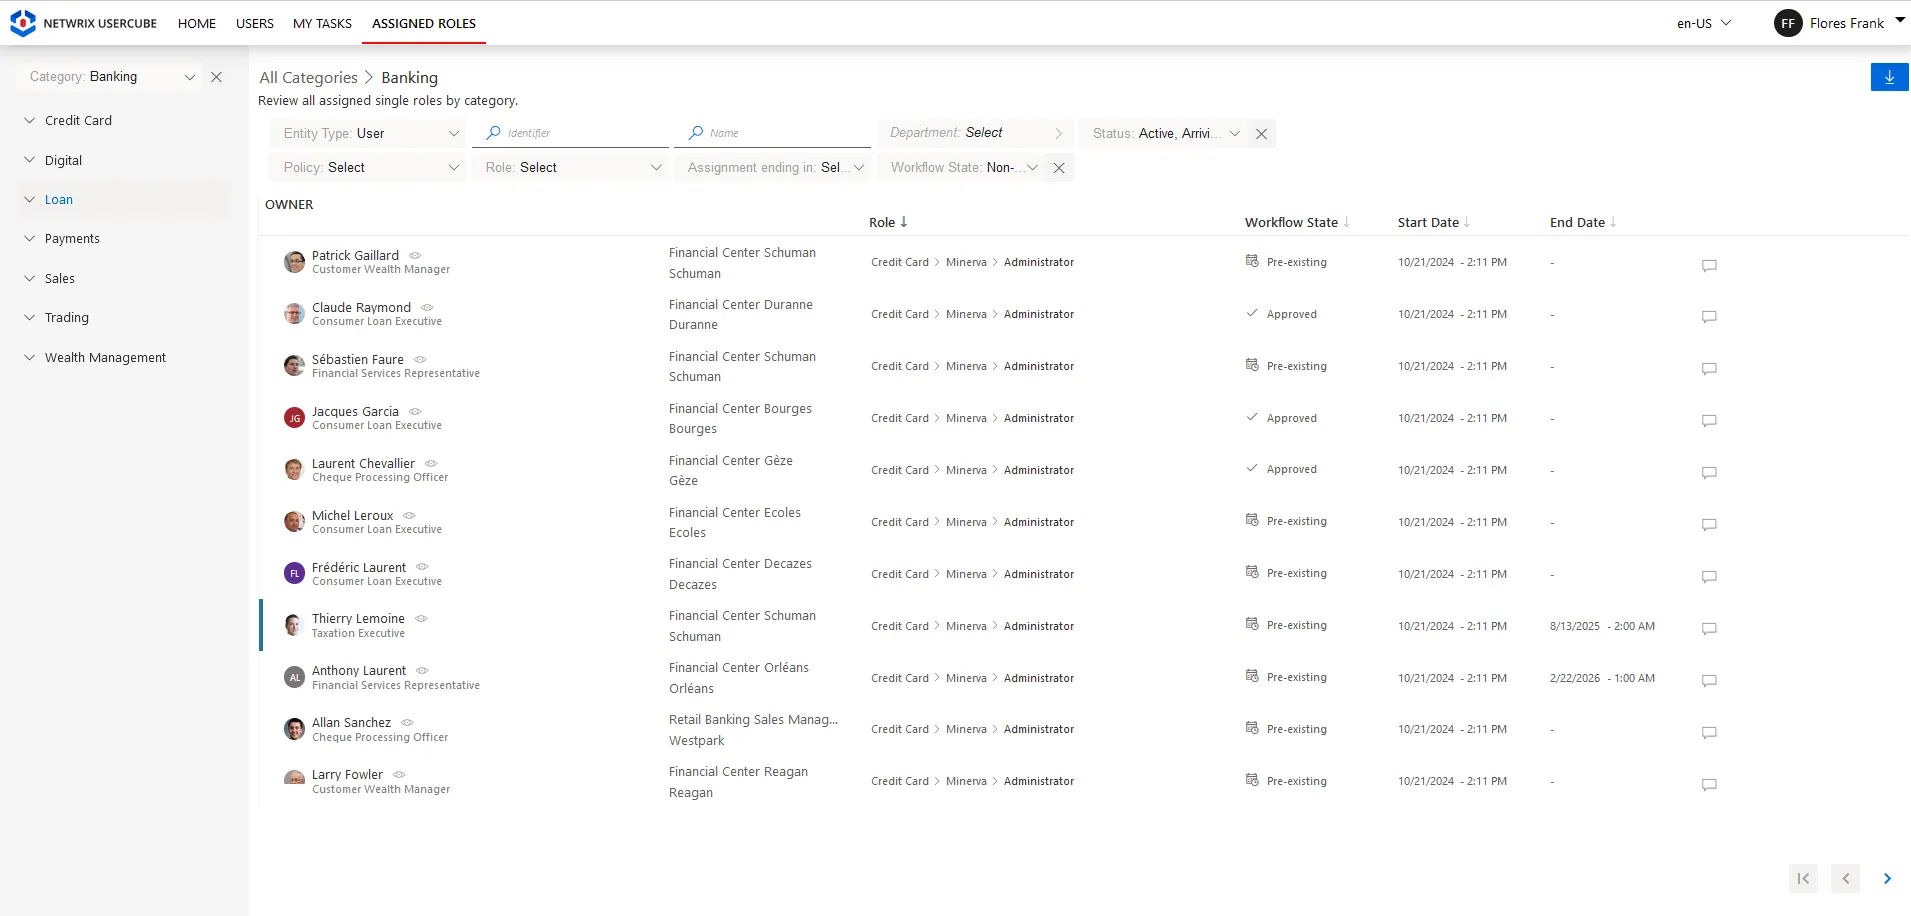
Step 2 – View the list of users with different assigned roles and filter them by Entity Type, Workflow State, Policy, Role or by using a custom filter.
Roles display their category hierarchy based on the selected category (e.g., Haunes > Administrator). The page shows both manual and automatic role assignments, including parameterized roles, with assignment metadata (workflow state, dates).
Edit Assignments
To edit dates and comments for multiple assignments simultaneously:
- Use filters to display the assignments you want to modify.
- Click the Edit button in the action bar.
- Select the assignments by clicking their checkboxes.
- In the "Update assigned roles" panel:
- Review the selected owners and roles
- Edit start/end dates
- Add comments if needed
- Update parameters if the selected roles are parameterized
- Review and confirm your changes.
Changes take effect immediately and apply to all selected assignments.
When editing multiple assignments, ensure they share compatible characteristics (same role, similar dates) to avoid conflicts.
Use multi-select editing when you need to extend expiration dates for a group of temporary assignments, or to add comments to multiple related permissions at once.
Note: Some assignments may display a lock icon instead of a checkbox, indicating they cannot be selected due to permissions or workflow constraints.
Remove Assignments
To remove multiple role assignments at once:
- Apply filters to display the assignments you want to remove (e.g., filter by a specific role or department).
- Click the Remove button in the bottom action bar.
- Select the assignments using checkboxes. The selection count updates as you select more rows.
- A success notification will confirm the removal, and the assignment list will refresh automatically. If any removals fail, an error notification will provide details.
- Cannot be undone: Removal operations cannot be reversed from this screen. If you remove assignments in error, they must be re-requested through the assignment workflow.
- Permission impact: Ensure that removing a role does not unintentionally revoke permissions users require for their day-to-day responsibilities.
- Locked assignments: Assignments with lock icons cannot be selected or removed due to workflow constraints.
Before removing multiple assignments, use specific filters to narrow the list to only the assignments you intend to remove. Double-check the selection count and review the confirmation message carefully before proceeding.
Assign Roles
Use the Assign Roles workflow to assign one or more roles to one or more users simultaneously.
Starting the Assignment Workflow
- Click the + Assign roles button at the top left of the page.
- The "Assign roles" panel opens on the right side, showing Step 1: Select owner and role.
Step 1: Select Owners and Roles
Selecting Users (Owners):
- In the Owner search field, begin typing a user's information.
- Click a user to select them. The selected user appears as a chip (removable tag) above the search field.
- To select multiple users: Continue typing and selecting additional users. Each selected user is added as a chip.
When selecting users, the AutocompleteBinding of the DisplayEntityType is taken into consideration. The configuration should be modified to correspond to the correct binding.
One should note that an evolution will be made in a future release to add several autocomplete bindings.
Owner Filtering: The list of available owners is filtered by the criteria applied on the main Assigned Roles page. Click Remove filters if you need to access users outside the current filter scope.
Selecting Roles:
- Below the owner section, browse the Roles list organized by category hierarchy.
- Use the Role search field to filter roles by name if needed.
- Click the radio button circle next to a role to select it.
- To select multiple roles: Click additional role radio buttons. Selected roles are indicated with blue filled circles.
- The selection counter at the bottom shows how many roles are selected (e.g., "2 rows selected").
Roles are displayed with their hierarchy path (e.g., "Career Management > Larissa > Administrator") and are filtered based on the category of the main Assigned Roles page.
Step 2: Configure Assignment Details
- Click Next to proceed to the next step of the workflow.
- Specify assignment dates:
- Start Date: Adjust when the role assignment becomes effective
- End Date: Optionally set an expiration date for the assignment
- Add any comments to document the business justification for the assignment.
- Specify role parameters, if at least one of the roles is parameterized.
Step 3: Confirm and Complete
- Review all assignment details carefully.
- Click Confirm to create the role assignments.
- The system creates the assignments and displays a success notification.
- The newly assigned roles appear in the Assigned Roles list once the operation completes.
If assigning a role would introduce a blocking risk violation (e.g., segregation of duties conflict), that specific role assignment will not be created. No notification is provided for blocked assignments.
Similarly, if assigning a role would introduce a warning, it will be added without a warning being raised.
A future release will include a summary indicating which role assignments were blocked due to risk violations and which assignments present a warning.
Download Report
The Assigned Roles page includes a download button in the upper-right corner. Click this button to export the current view as an Excel (.xlsx) file.
To download the report:
- Apply filters to narrow the list of assigned roles.
- Click the download button in the upper-right corner.
- The file downloads automatically as an .xlsx file containing all role assignments visible in the current filtered view.