Protect Agent/Server Communication
This guide shows how to set up a secured authentication system between Identity Manager's agent and server.
Overview
Identity Manager provides a simple way to protect the communication between agent and server, using OpenID Connect.
First, make sure to understand the OpenID protocol. For example, see Microsoft's documentation on the matter.
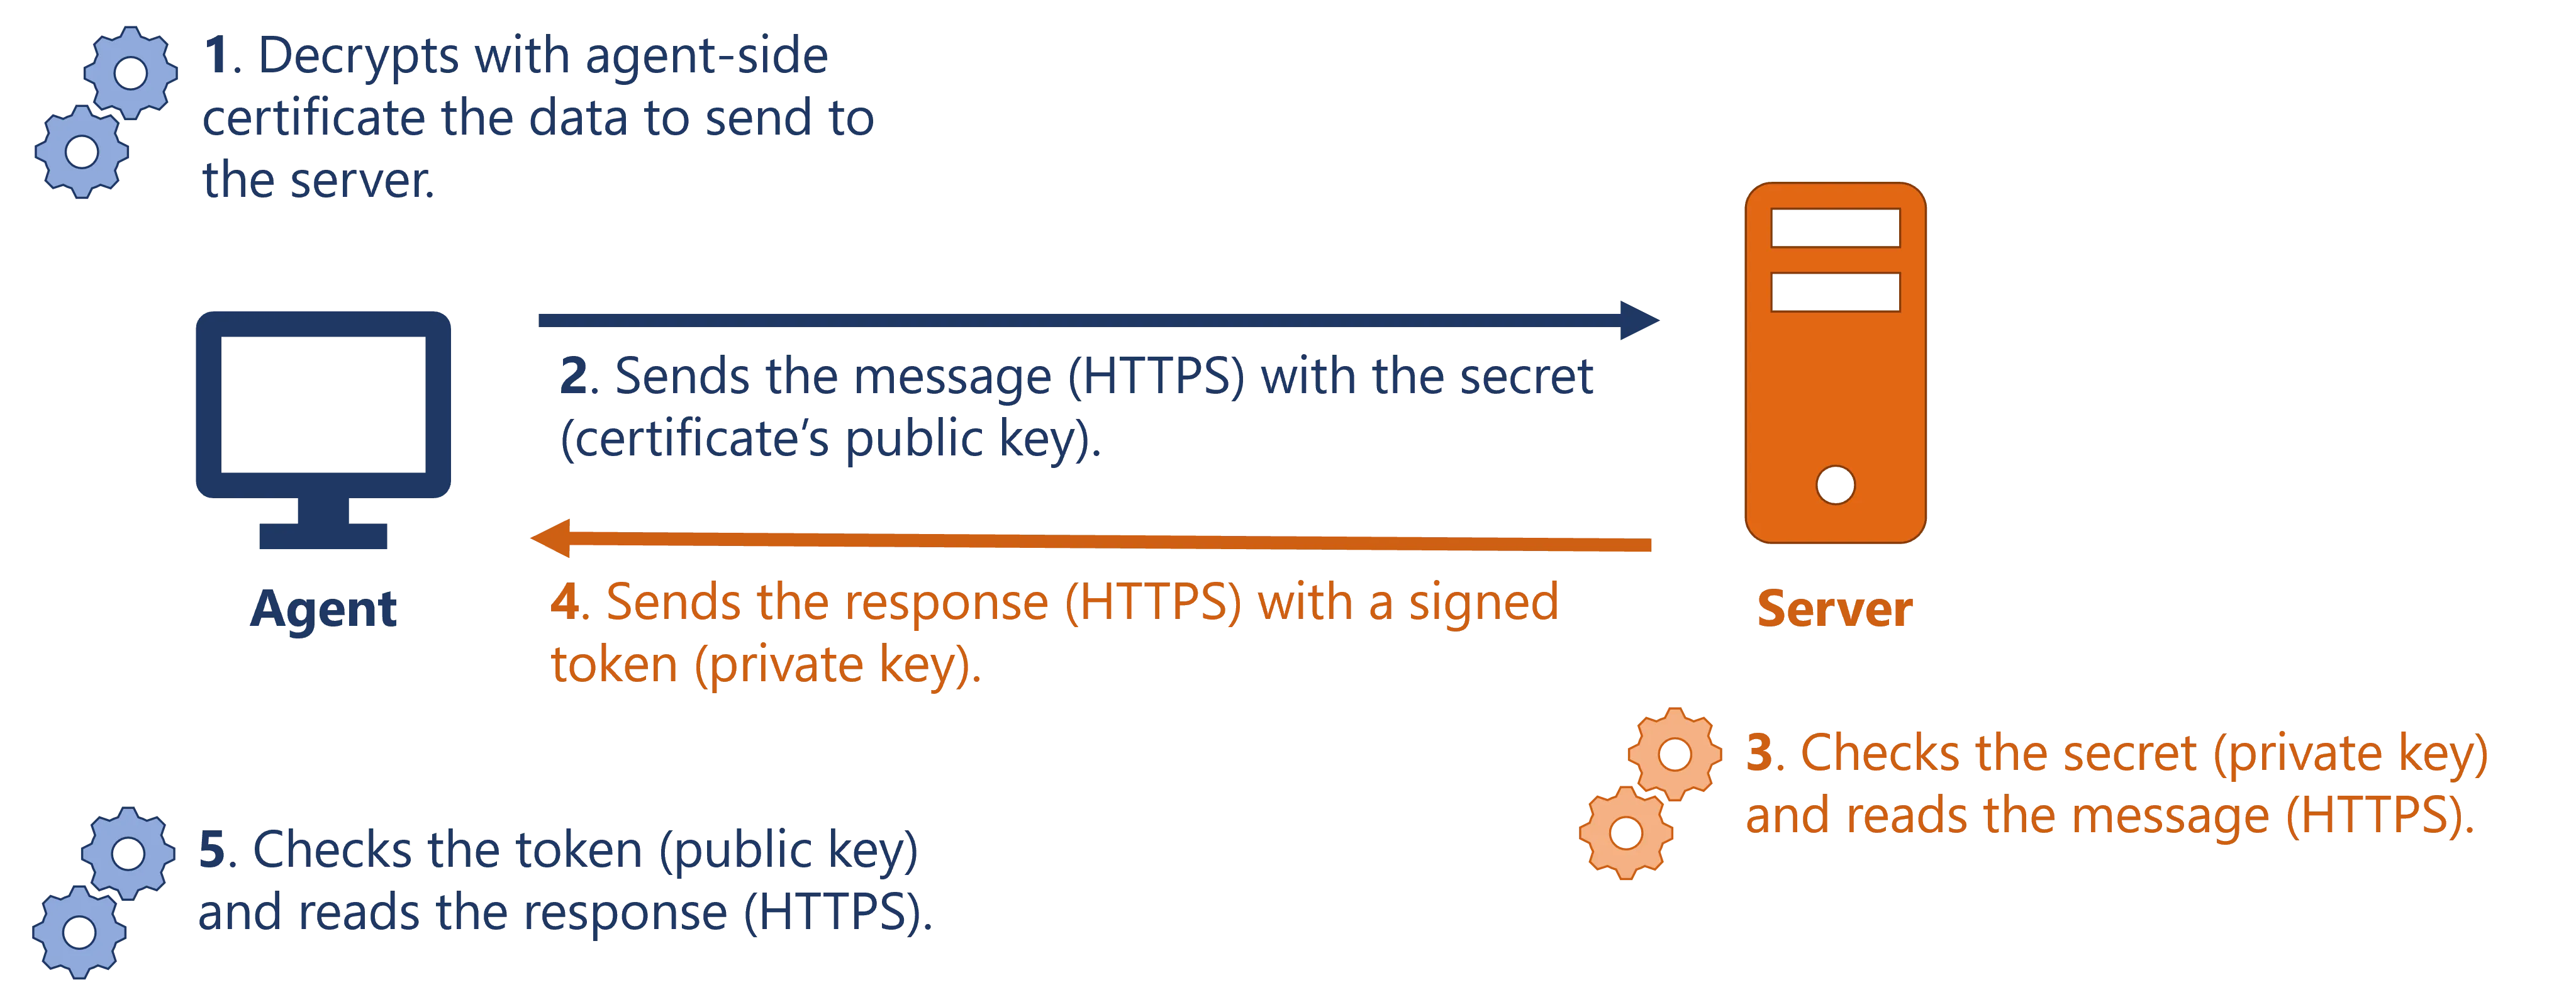
The idea, when sending data from the agent to the server, is the following:
- the agent decrypts its own data which was encrypted with the agent-side certificate;
- the agent calls the server, and sends its HTTPS-encrypted message;
- the server receives and decrypts the message, before encrypting it again with its own encryption certificate configured by Identity Manager.
Configuration details
The server must be configured, in its appsettings.json, with:
- an encryption certificate with the private and public keys, in order to be able to send signed tokens.
The agent must be configured, in its appsettings.json, with:
-
an encryption certificate with at least the server's public key, in order to be able to verify the tokens sent by the server;
-
another encryption certificate meant to encrypt specific files such as logs or temporary files;
-
an SSL encryption certificate for the HTTPS connection.
The SSL certificate is required when working in an on-premises environment. In a SaaS environment, Identity Manager provides it.
In order to give to the agent the right permissions, the XML configuration must specify an OpenIdClient linked to its hashed secret, and to a Identity Manager profile.
Protect Agent/Server Communication
Protect agent/server communication by proceeding as follows:
-
Make sure that both the agent and server configurations specify an encryption certificate. See the Application Settings for additional information.
For example:
appsettings.json

{
  "IdentityServer": {
      "X509KeyFilePath": "./identitymanager.pfx",
      "X509KeyFilePassword": "secret"
  },
  ...
} -
Make sure that the agent is also configured with its own encryption certificate. See the Application Settings for additional information.
For example:
appsettings.json

{
  "EncryptionCertificate": {
      "File": "./identitymanager-Files.pfx",
      "Password": "secret",
      "EncryptFile": true
  },
  ...
} -
Configure an OpenIdClient, both on agent side in
appsettings.agent.jsonwith the non-hashed secret and on server side in the XML configuration with the secret hashed by the Usercube-New-OpenIDSecret executable. See the OpenIdClient for additional information.For example on agent side:
appsettings.agent.json

{
  "OpenId": {
      "OpenIdClients": {
          "Job": "newSecret"
      },
      ...
  }
  ...
}
And on server side:
./identitymanager-New-OpenIDSecret.exe --client-secret secret<OpenIdClient Identifier="Job" HashedSecret="K7gNU3sdo+OL0wNhqoVWhr3g6s1xYv72ol/pe/Unols=" DisplayName_L1="Permissions for jobs" Profile="Administrator" />