Create a Connector
How to implement a Connector via XML to connect Identity Manager to an external system.
See an example on how to register For Microsoft Entra ID.
Netwrix Identity Manager (formerly Usercube) strongly recommends configuring as much as possible via the UI instead of XML files. See the Connect to a Managed System topic to learn how to create a connector via the UI.
Prerequisites
Configure the external system
Some systems need additional configuration for Identity Manager to connect.
Configure Identity Manager
Identity Manager's agent must be set up to access the system's data via the related connector.
Netwrix Identity Manager (formerly Usercube) recommends performing the configuration via Identity
Manager's configuration files like appsettings.json and appsettings.agent.json. However, these
settings can also be input through environment variables. See the
Network Configuration topic for additional information.
This process is configured through a
Connection in the UI and/or
the XML configuration, and in the appsettings.agent.json > Connections section:
    appsettings.agent.json

{ ... "Connections": { ... "<ConnectionIdentifier>": { ... } } }
The identifier of the connection and thus the name of the subsection must:
-
Be unique.
-
Not begin with a digit.
-
Not contain
<,>,:,",/,\,|,?,*and_.
Netwrix Identity Manager (formerly Usercube) recommends completing this guide without credential protection, and once the configuration works switch to a more secure way of storing credentials.
See the Microsoft Entra ID topic to learn how to protect Microsoft Entra ID's credentials.
Build the Connector
See the Connect to a Managed System topic to learn how to build a connector via the UI, with its connections, entity types and mappings.
When exporting the configuration, a <connectorName> connector should be found in the Conf/<connectorName>/<connectorName> Connector.xml file.
All XML files must start with the <?xml> and <ConfigurationFile> elements.
Entity model
The Entity Model of the connector defines how the exported data will be written to Identity Manager's repository. It should match as closely as possible the structure of the relevant data from the external system, and be aligned with Identity Manager's repository.
The entity model is configured by entity type and entity association containing scalar and navigation properties. See the Entity Model Entity Association , and Entity Type topics for additional information.
The entity model can be refined later in the project.
Entity mapping
Each property of the entity type must be mapped to an attribute from among those exported from the system.
Entity mapping is configured through Entity Type Mapping and Entity Association Mapping .
So each element of an entity type mapping is meant to link a property from the result of the CSV export file containing the exported attributes to a property from the entity type.
In the mapping, the CSV file is identified by the ConnectionTable and the entity type by the Identifier.
An association mapping is the equivalent of an entity type mapping, but for the properties of an entity association instead of an entity type.
Display the Connector in the UI
Menu items
Identity Manager provides a menu item to list all connectors in the dashboard's left menu.

It is usually written like this:
Runtime/Bootstrap/Nav.xml

<MenuItem Identifier="Nav_Connectors" DisplayName_L1="Connectors" ParentMenuItem="Nav" />
Then each connector should be configured with a menu item, which is created automatically when working via the UI.
Displayed resources
See the Organize Resources' Datasheets to learn more on how to set the display properties via the UI.
In the XML configuration, scalar properties are automatically displayed in the datasheets of the connector's resources. But navigation properties must be declared explicitly.
The properties to be displayed are configured through Display Entity Type.
Microsoft Entra ID's resources are listed in a table.
The resources are displayed in a table configurable through a Display Table.
Resources' display names
See the Set Resources' Display Names to learn how to set resources' display names via the UI.
Each resource is displayed in the UI with a display name.
Resources' display names are customizable through Entity Type property expression.
Permissions
In order to access the connector, a user must have the right permissions.
Permissions within Identity Manager are configured through Access Control Rule.
# Create the Connector
How to declare the technical container of a
[ Connector ](/docs/identitymanager/saas/configuration/xml-configuration/scaffoldings.md).
## Overview
Here, you will learn how to create a connector: the shell that harbors entity types and connections
related to a single managed system.
Keep in mind that a Identity Manager installation can have more than one agent. Connectors should be
created with a specific agent in mind since the agent needs to physically connect to the managed
system's data. Fortunately, you don't need to worry about that right now, since you are starting
with the agent provided with Identity Manager's SaaS environment. See the
[ Architecture ](/docs/identitymanager/saas/identitymanager/introduction-guide/architecture/index.md) topic for additional
information.
## Participants and Artifacts
For a given managed system, integrators may need the help of the application owner who knows the
purpose of the application.
| Input | Output |
| ----- | --------------- |
| - | Empty connector |
## Create a Connector Container
Create a connector container by proceeding as follows:
1. On the home page in the **Configuration** section, click on the **Connectors** button.
You will see all existing connectors.
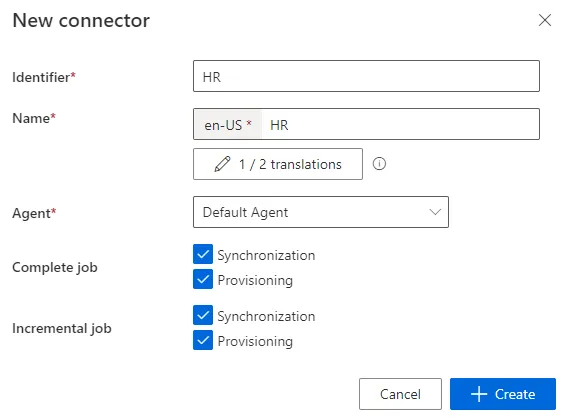
2. Click on the addition icon and fill in the information fields.

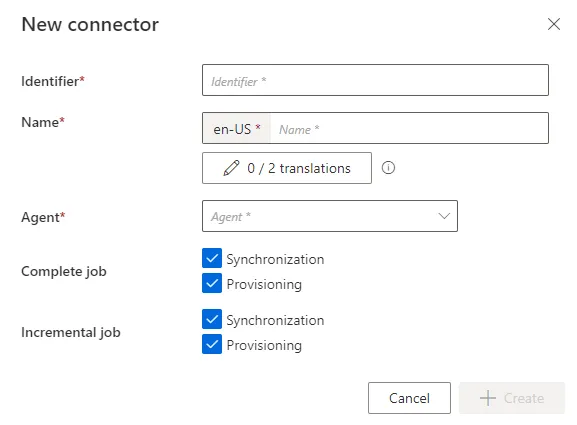
- `Identifier`: must be unique among connectors, without any whitespace, start with a letter,
and contain only letters, numbers, `.` and/or `-`.
- `Name`: will be displayed in the UI to identify the connector.
- `Agent`: agent that the connector is supposed to use.
Netwrix Identity Manager (formerly Usercube)recommends choosing the provided SaaS agent.
- `Complete Job`: [ Jobs ](/docs/identitymanager/saas/automation/tasks-and-jobs/jobs.md) scheduled to
perform a set of tasks, including completesynchronization and/or provisioning for all the
connectors, for which you selected the corresponding checkbox.
- `Incremental Job`: [ Jobs ](/docs/identitymanager/saas/automation/tasks-and-jobs/jobs.md) scheduled
to perform frequently a set of tasks, including incrementalsynchronization and/or provisioning
for all the connectors, for which you selected the corresponding checkbox.
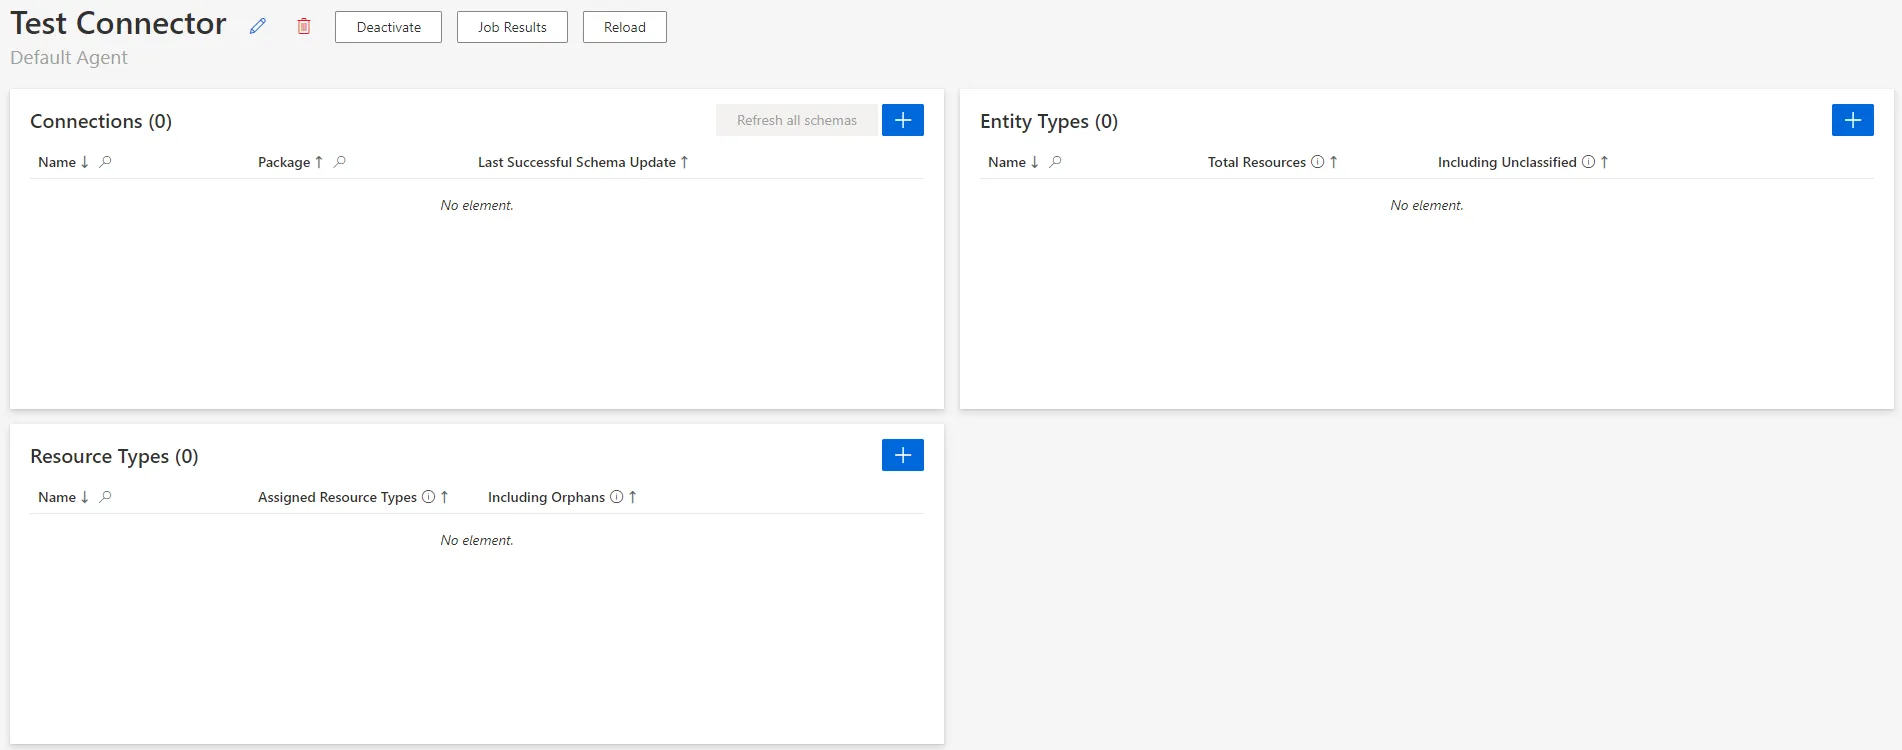
3. Click on **+ Create** to get on the connector's overview page:
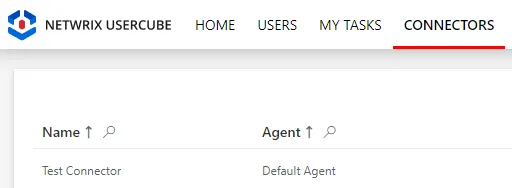
## Verify the Connector Declaration
In order to verify the process, check that the connector has been added to the connectors list with
the right name and identifier.
# Create an HR Connector
How to create a connector dedicated to the automation of identity management (creation, update,
deletion), via the synchronization of HR data into Identity Manager and internal provisioning. See
the[ Connect to a Managed System ](/docs/identitymanager/saas/connectors/how-to/index.md)provisioning.
## Overview
### HR connector in the global process
The HR connector is no priority but rather an optimization, handled at the end of the configuration
cycle.
The HR connector is sometimes the first created connector, used to develop the identity repository.
However, the HR connector requires a specific IT infrastructure (agent, proxy, Virtual Machine,
etc.) which can take time to implement, and delay the project's progress.
Moreover, in the long run it poses a few problems as HR data usually misses crucial information such
as contractor data, or the projects employees are working on. This can mean that:
- the identity repository is filled using several sources. And when creating identities
automatically from HR data and other sources, you need to specify which properties of each
identity can be overwritten by a change in HR and which cannot. This is to avoid manually changed
attributes being overwritten by the HR data by mistake. This is very tedious.
- the HR data is rarely up to date early enough to be really useful as a trigger for identity
creation and deletion. As a result, identities end up being created manually through workflows
most of the time.
Hence we choose to build the first iteration of the project upon a manual data upload to
[ Create the Workforce Repository ](/docs/identitymanager/saas/identity-management/index.md).
This way, we do not have to wait for the agent's implementation to create the first profiles and
start connecting systems (AD, SAB, SAP, etc.). Thus value is created faster and we can focus on IGA
activities such as the review of orphaned and unused accounts, eliminating risk earlier in the
process.
We can still connect HR data, later on, to check consistency between our identity repository and HR
data, through a certification-like process.
### Technical details
An HR connector is considered an inbound connector, as it writes to the central identity repository
inside Identity Manager.
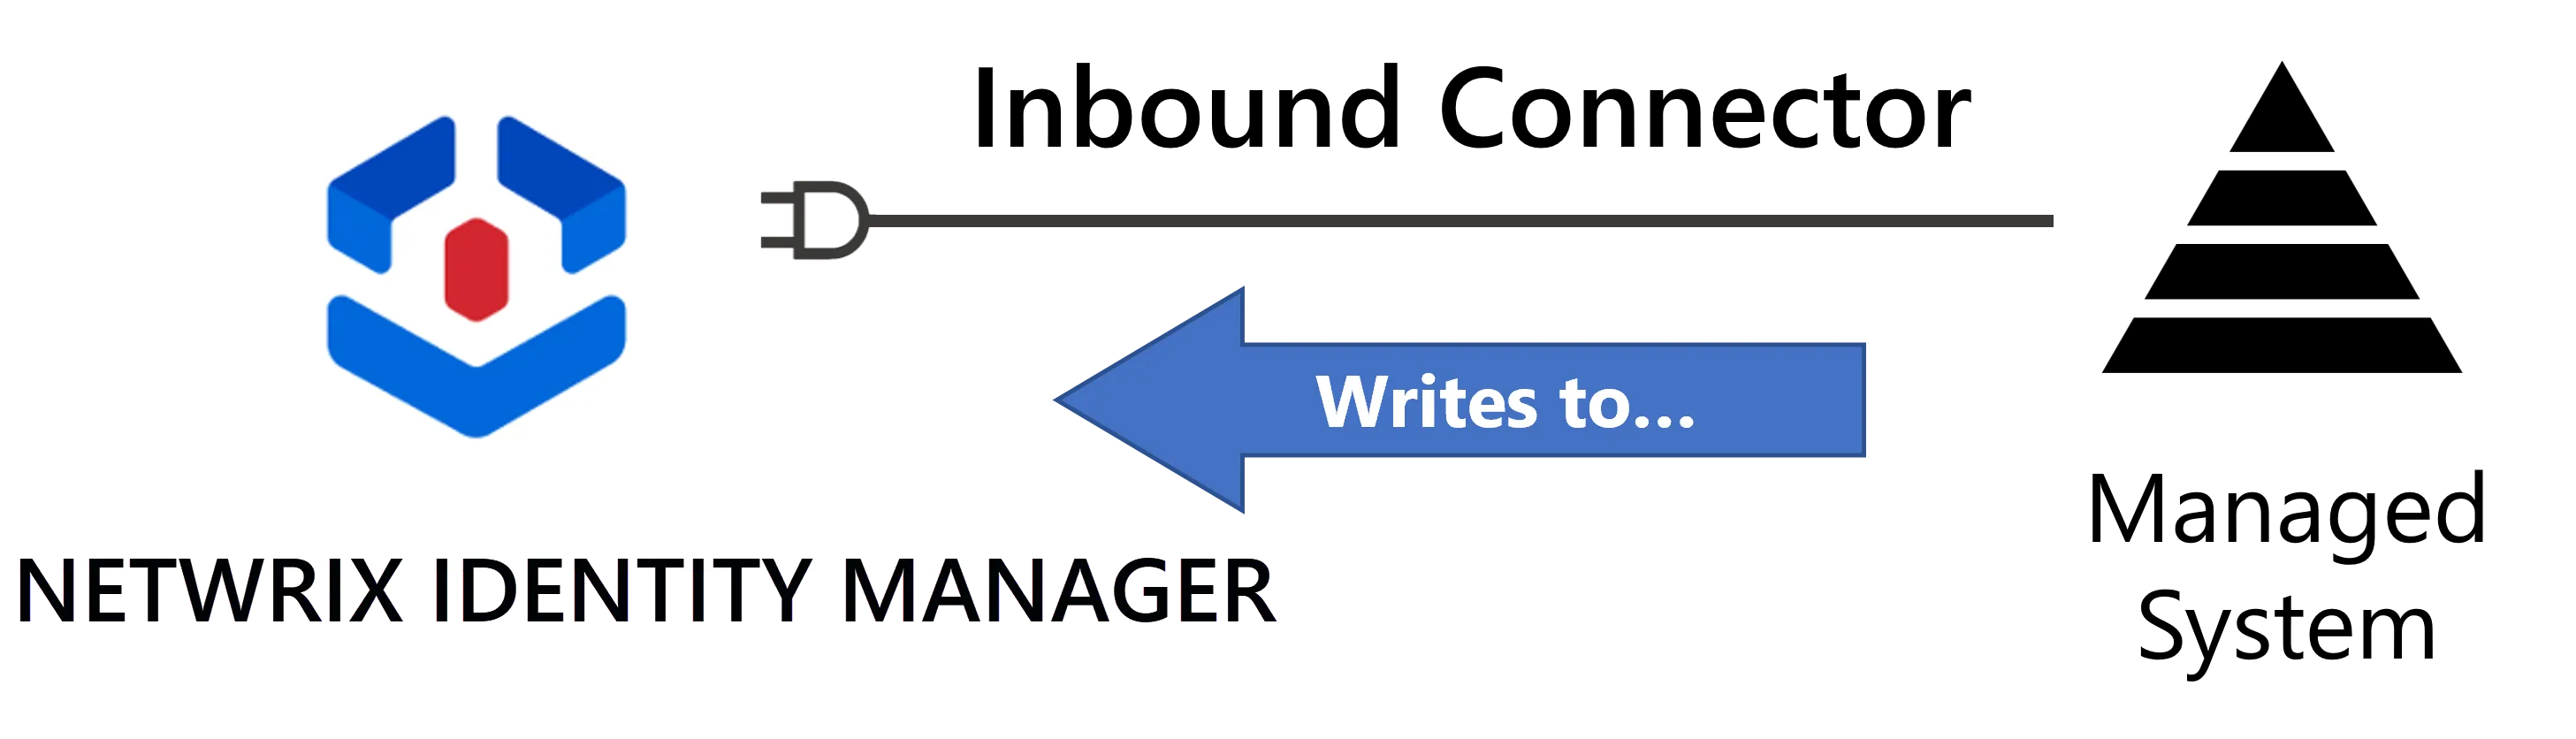
As Identity Manager is able to feed all managed systems, it can also feed itself thanks to specific
connections such as the
[InternalWorkflow](/docs/identitymanager/saas/connectors/connector-reference/internal-workflow.md)
connection. It means that the corresponding connector is able to launch workflows within Identity
Manager and keep track.
Typically, an HR connector with such a connection would be able to launch workflows inside Identity
Manager for identity creation, update and deletion, based on HR files.
## Participants and Artifacts
This operation should be performed in cooperation with HR staff who can access HR data.
| Input | Output |
| ------------------------------- | ------------ |
| Identity Repository. (required) | HR connector |
See the [ Create the Workforce Repository ](/docs/identitymanager/saas/identity-management/index.md)topic
for additional information.
## Create an HR Connector
Create an HR connector by proceeding as follows:
1. Outside Identity Manager,
[ Model the Data ](/docs/identitymanager/saas/connectors/configuration/index.md)of your connector.
2. Declare an HR connector using your local agent. See the
[ Create the Connector ](/docs/identitymanager/saas/connectors/how-to/create-connectors/index.md) topic for
additional information.
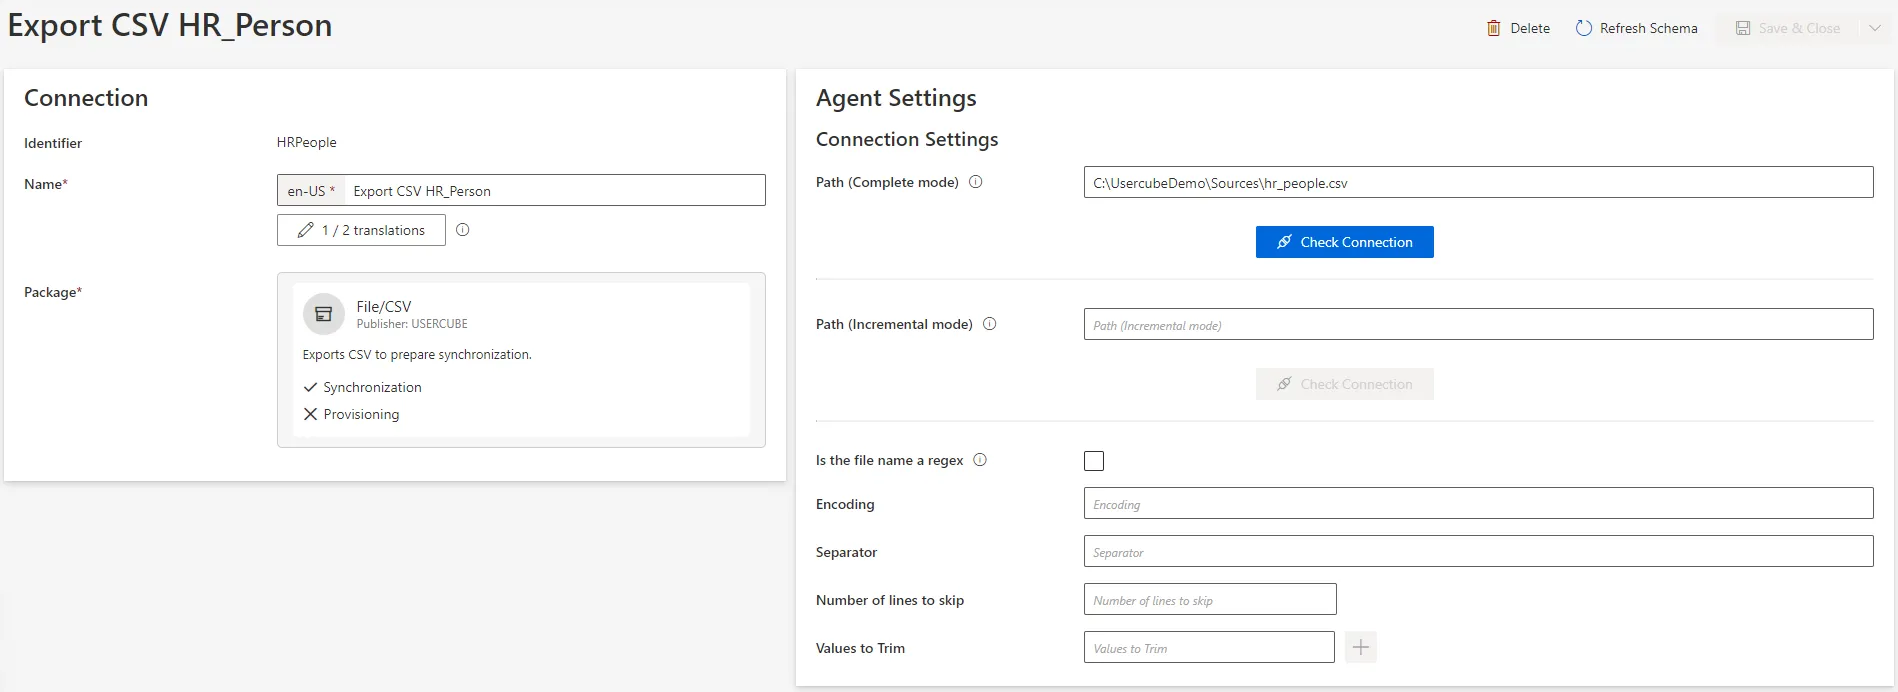
3. Create an Export CSV connection for each HR file to connect. See the
[Create a Connection](/docs/identitymanager/saas/connectors/configuration/connections.md) topic for
additional information.
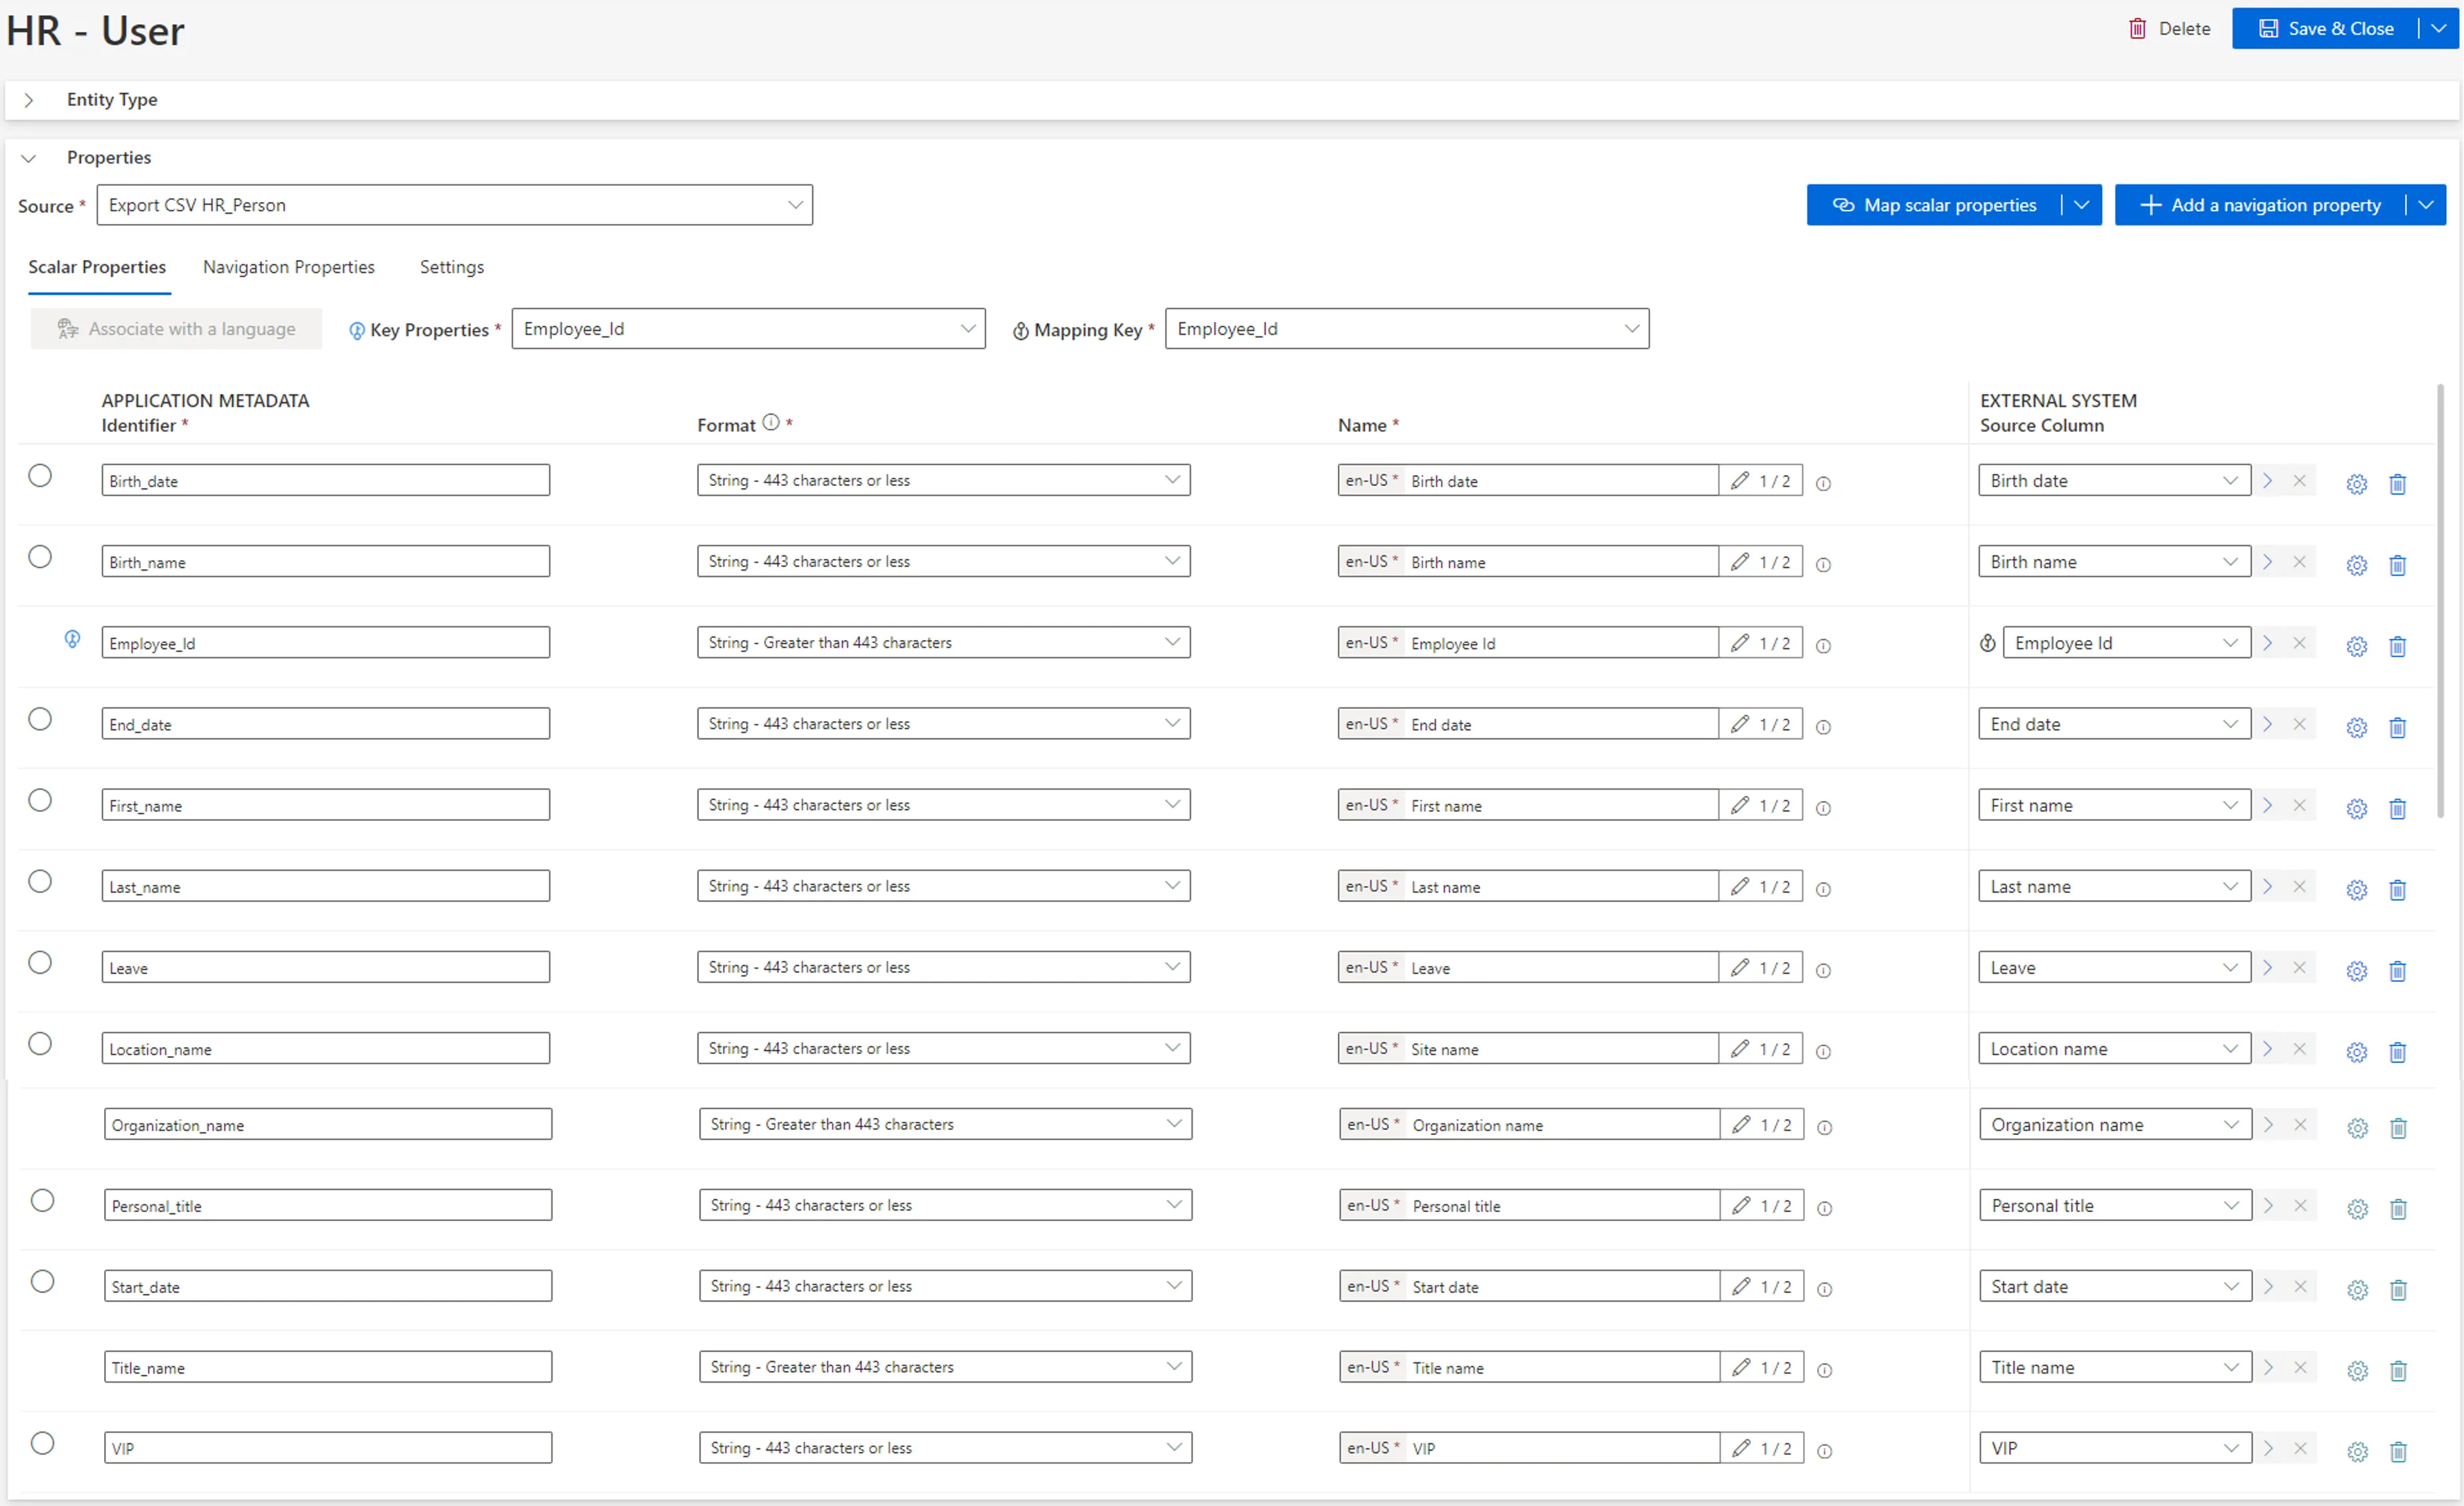
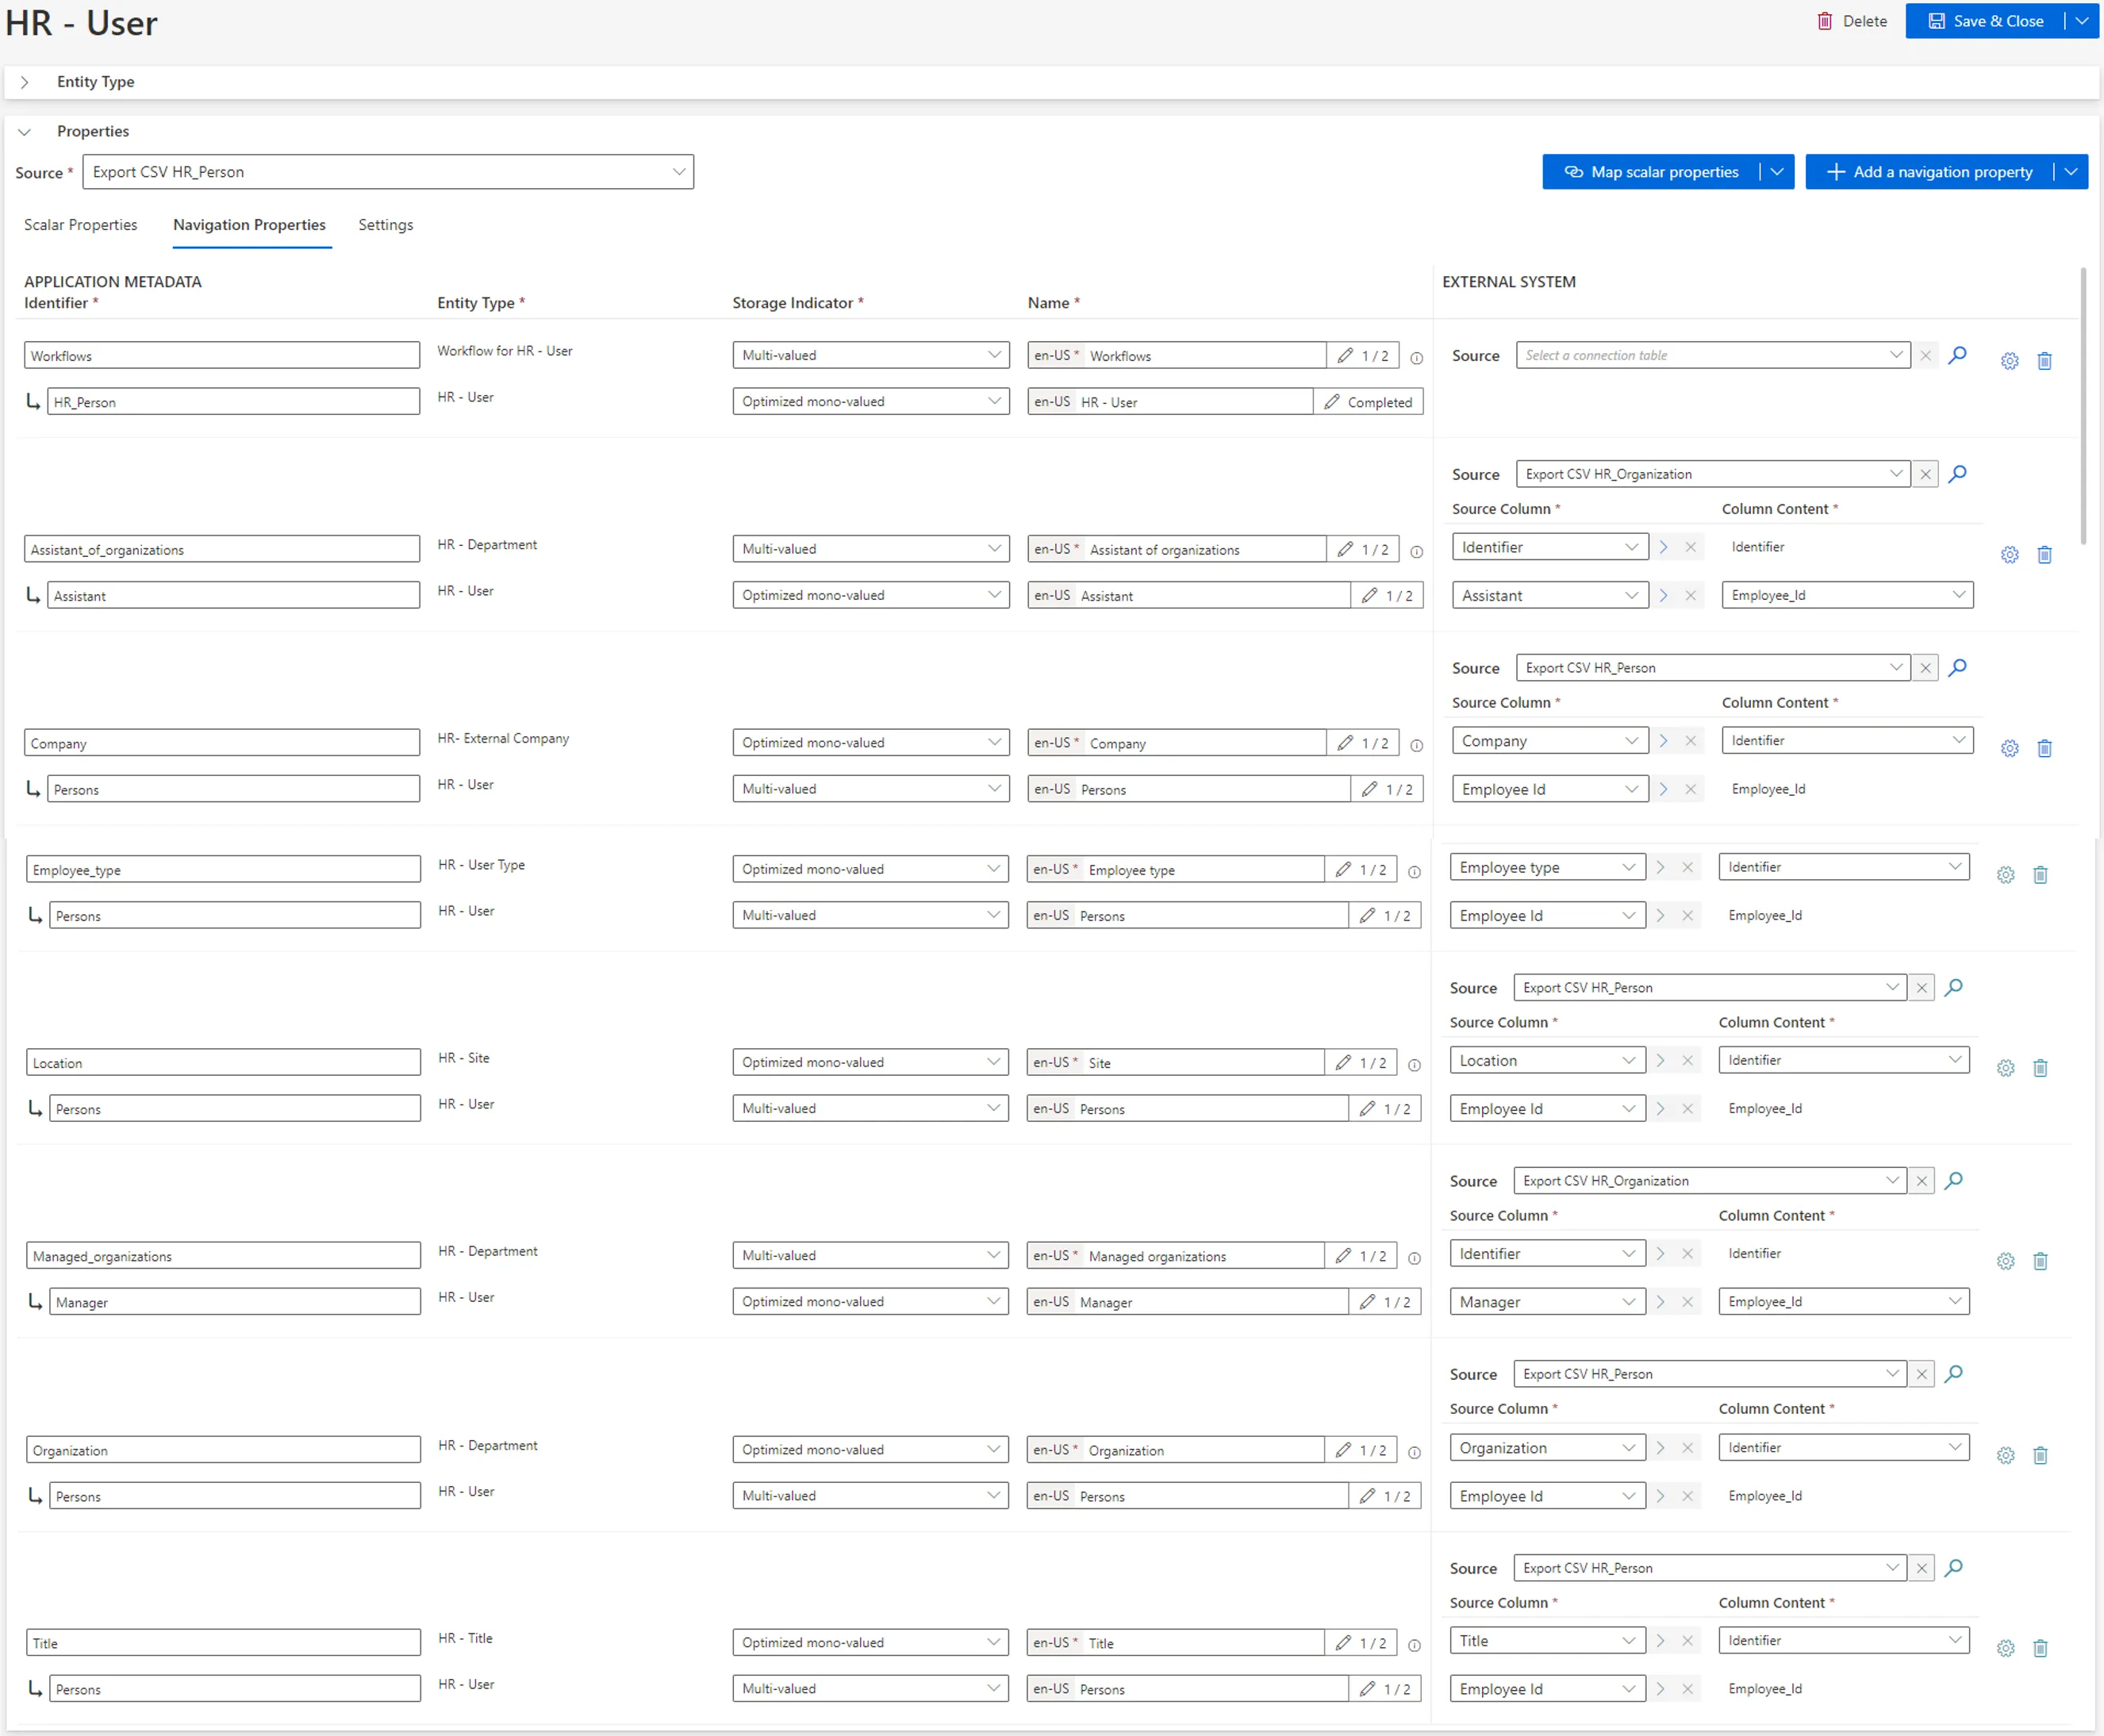
4. [Create an Entity Type](/docs/identitymanager/saas/identity-management/entity-model.md) corresponding
to your model. For example:
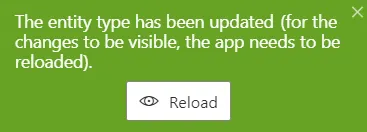
5. Don't forget to reload and [ Synchronize Data ](/docs/identitymanager/saas/synchronization/index.md) to access
HR data within Identity Manager.
## Verify HR Connector Creation
In order to verify the process:
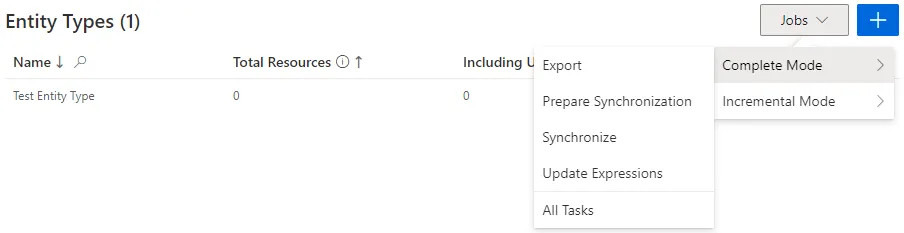
1. Launch synchronization.
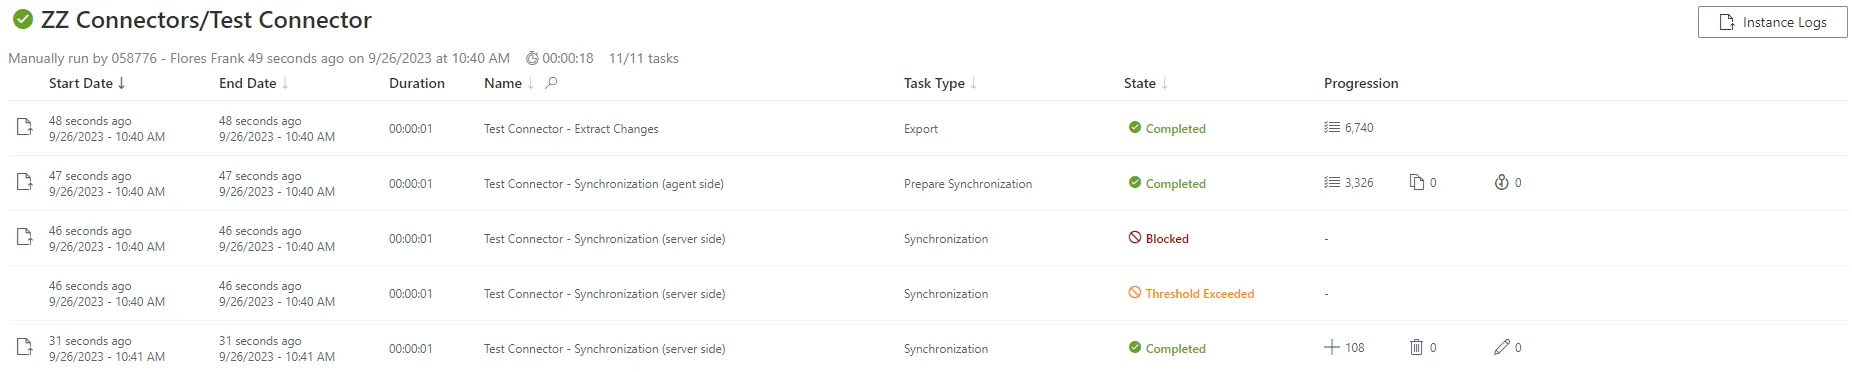
2. Access the connector's logs (from **Job Results** on the connector's dashboard) to ensure that
synchronization completed successfully.
3. Check that the entity types have been added to the left menu of the home page.
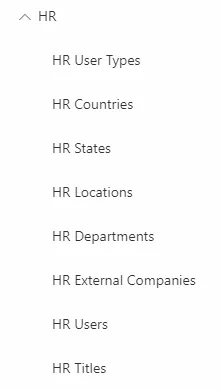
4. Access the relevant entity types (from the menu items on the left of the home page) to check
synchronized resources, by navigating in the UI from the accounts through a sample of
associations, via the Eye icon:

You should seek configuration validation, not validation of the actual data being synchronized.
# How to Implement a New System
How to add a new system to the solution.
## Overview
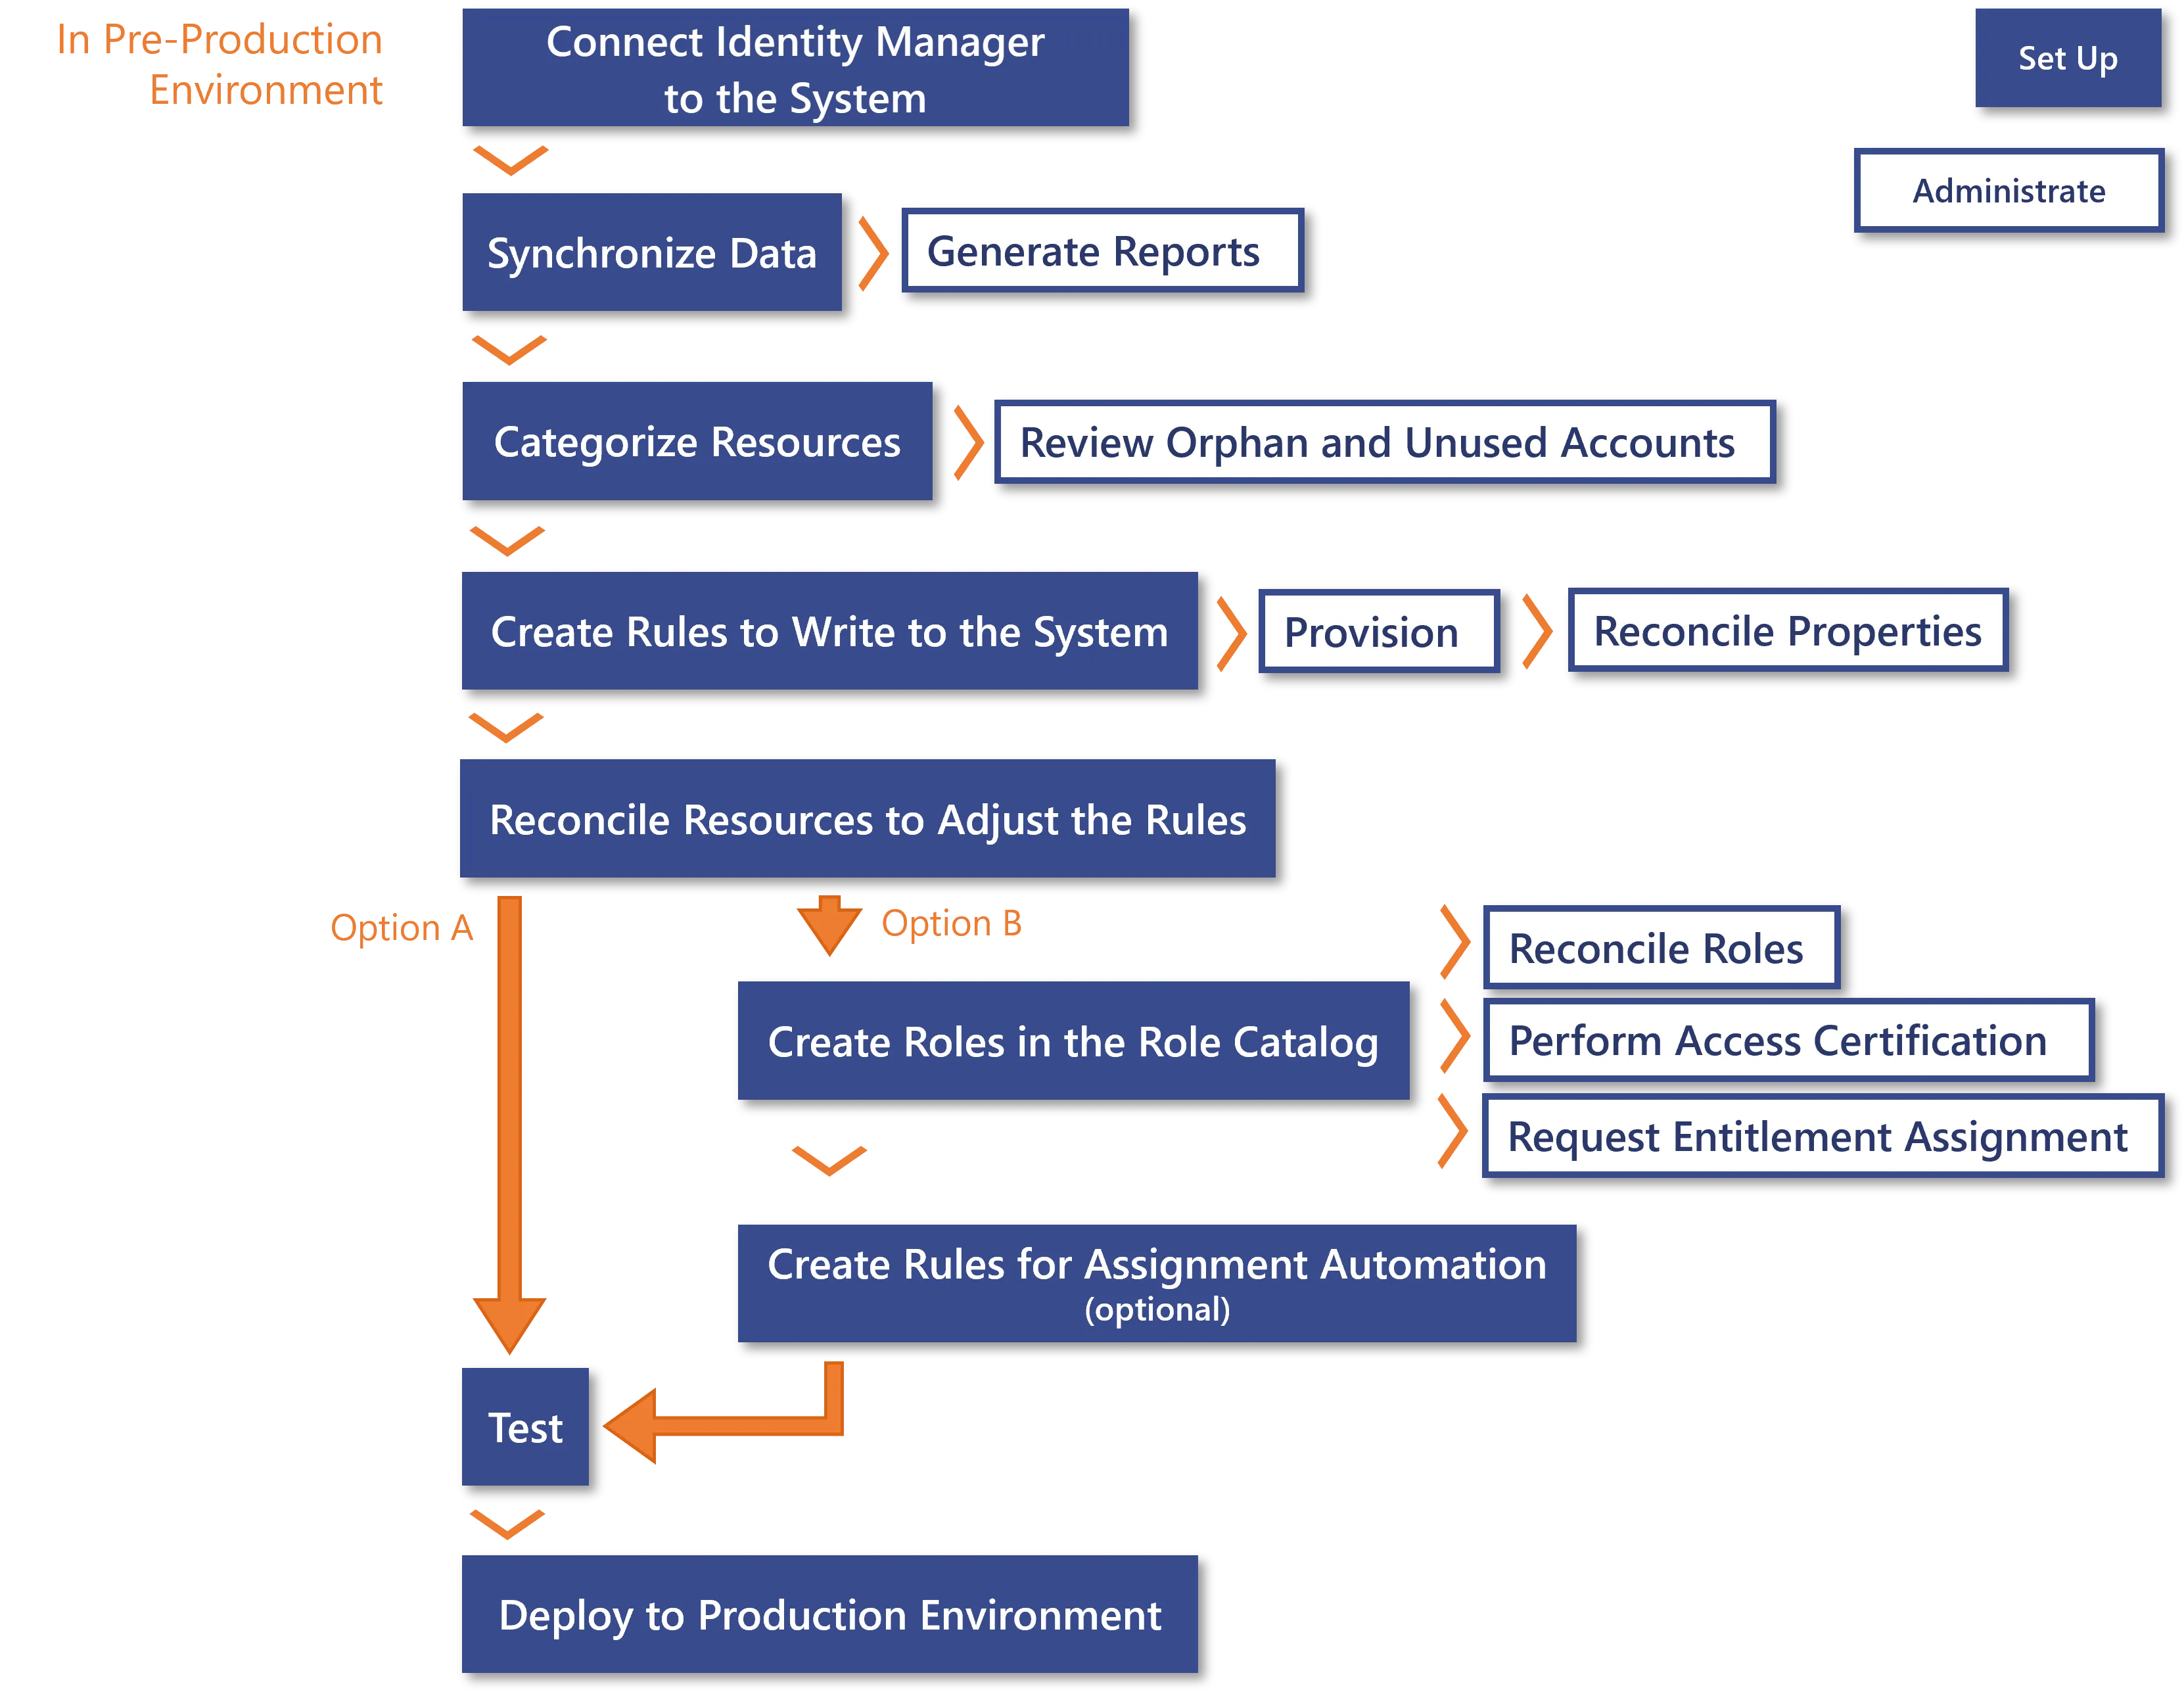
When connecting Identity Manager to a new system, several process paths can be taken according to
your strategy. There is no option fundamentally better than the others, your decision must depend on
your needs.
The **option A** leads quickly to the implementation in production environment, i.e. a new
application in Identity Manager's scope. With this, you can
[Review Orphaned and Unused Accounts](/docs/identitymanager/saas/governance/access-certification.md),
[Provision](/docs/identitymanager/saas/provisioning/index.md) the AD,
[ Reconcile a Property ](/docs/identitymanager/saas/role-management/role-assignment/nonconforming-detection.md),
and [ Generate Reports ](/docs/identitymanager/saas/governance/reporting/index.md), for example the list of profiles
assigned to users.
The **option B** takes more time as it goes through the creation of the role model based on the
system's entitlements, but it leads to even more gain as you can also
[ Reconcile a Role ](/docs/identitymanager/saas/role-management/role-assignment/nonconforming-detection.md),
[ Perform Access Certification ](/docs/identitymanager/saas/governance/access-certification.md)access
certification and
[ Request Entitlement Assignment ](/docs/identitymanager/saas/role-management/role-assignment/index.md), and also
[ Generate Reports ](/docs/identitymanager/saas/governance/reporting/index.md), for example the list of assigned single
roles.
The option B is more complicated and time-consuming than the option A, but leads to more gain. Be
aware that you can go through the process options simultaneously.
## Process Details
### Common starting steps
1. [ Connect to a Managed System ](/docs/identitymanager/saas/connectors/how-to/index.md): create the appropriate
connector with its connections and entity types.
2. [ Synchronize Data ](/docs/identitymanager/saas/synchronization/index.md) into Identity Manager.
Based on this, you can [ Generate Reports ](/docs/identitymanager/saas/governance/reporting/index.md), for example
the list of resources in the system. A few predefined reports are available from the start, you
can generate any report from this list as soon as it makes sense according to the integration
progress.
3. [ Categorize Resources ](/docs/identitymanager/saas/connectors/configuration/index.md) in order to classify them
according to their intent, and correlate these resources with their owners.
4. [ Create a Provisioning Rule ](/docs/identitymanager/saas/provisioning/index.md) to write to the
system in order to update the resources' properties directly in the system.
5. Adjust the rules by
[ Reconcile a Property ](/docs/identitymanager/saas/role-management/role-assignment/nonconforming-detection.md)
resources, i.e. analyze the differences spotted between the reality of resources' properties and
those computed by the previously established rules. Especially, verify that accounts are
correlated to the right owners and that their properties have the right values.
Either the integrator handles the customization of the rules and the review of non-conforming
resources, or they can assign an application administrator profile to a given user to perform
it. Assigning this profile requires profile configuration, see steps 11 and 12.
After connecting Identity Manager to an external system, two process options are available according
to your needs: either aim directly to the implementation in production environment, or first build
the role model in order to enable more administration activities. Both options can be started
simultaneously.
### Option A: Straight to production implementation
Go directly to the common final steps (step 8).
### Option B: First build the role model
6. [ Create Roles in the Role Catalog ](/docs/identitymanager/saas/role-management/index.md) for
applications managed by the system.
7. [ Automate Assignments ](/docs/identitymanager/saas/role-management/role-assignment/index.md) if needed: use Role
Mining to create single role rules in bulk; adjust the generated rules individually and manually.
### Common final steps
8. Perform tests.
9. Deploy the pre-production configuration to the production environment.