Connect Power BI to Identity Manager
This guide shows how to connect Power BI to Identity Manager.
Overview
When facing a periodic need for producing specific reports, especially when a visual presentation is required, Identity Manager offers the possibility to connect to the Power BI application. This application will allow you to create customized reports with a vast range of display options (such as graphs, charts, matrixes, etc.) using Identity Manager's universes.
Prerequisites
- Power BI Desktop must be installed on your device.
- Identity Manager's server must be running.
Connect Power BI to Identity Manager
Connect Power BI to Identity Manager by proceeding as follows:
-
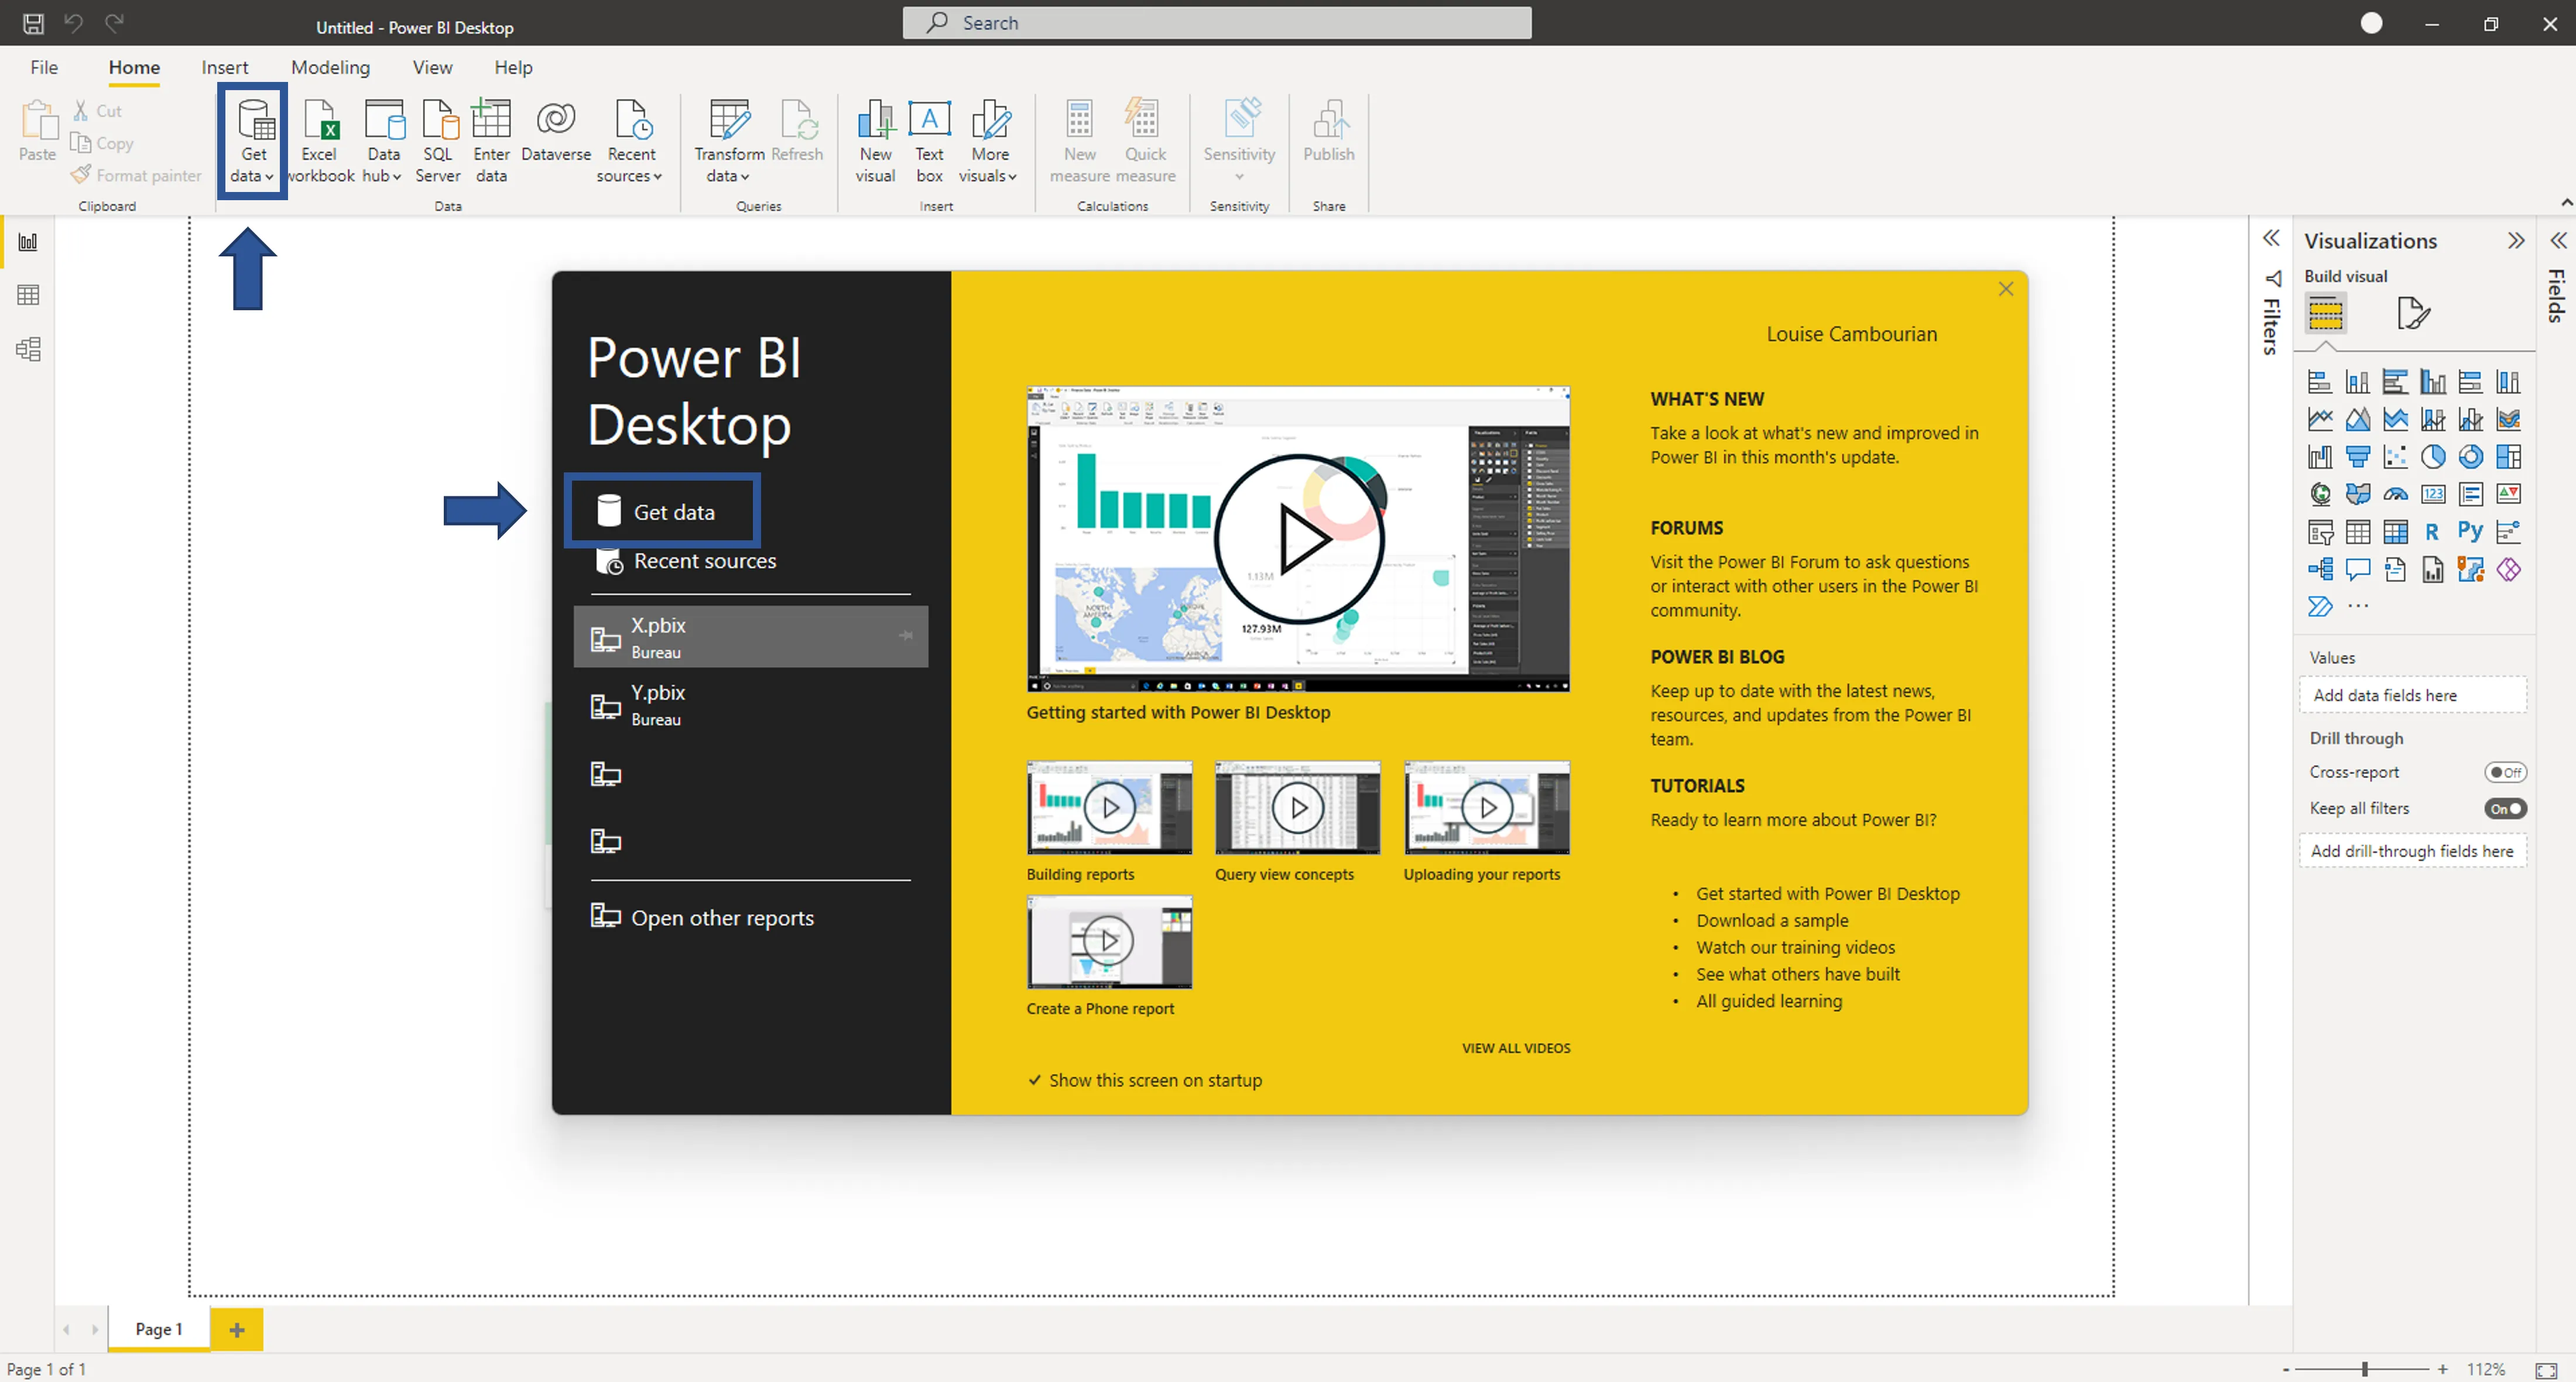
Open Power BI Desktop.
-
Click on Get data either in the welcome window or in the home menu.
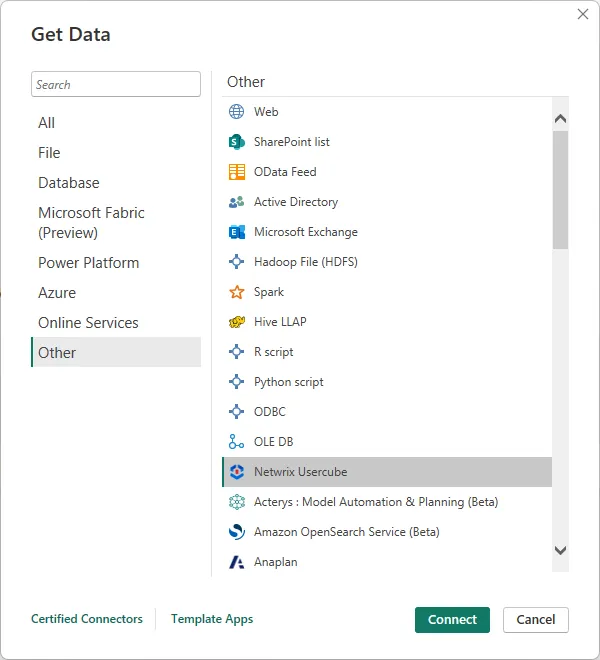
-
In the opening window, search for Identity Manager, click on its plugin in the right menu, and click on Connect.
-
Enter Identity Manager's server URL in the opening window.

-
In the opening window, enter the OpenIdClient of the
Administratorprofile. TheClient Idexpects the concatenation of the identifier ofOpenIdClientwith@and Identity Manager's domain name. See the following example.
-
You can now access in the left panel the Universe from Identity Manager configuration. You can click on the desired universe to expand it, and view and pick the desired tables.

Power BI tip: to view a table, click on its name. To select a table, check the box next to the table's name.
-
Once you've selected all the tables you need, click on Load to import data to the Power BI report. You can also click on Transform data to open the query editor and make other changes in your tables, rows and columns.
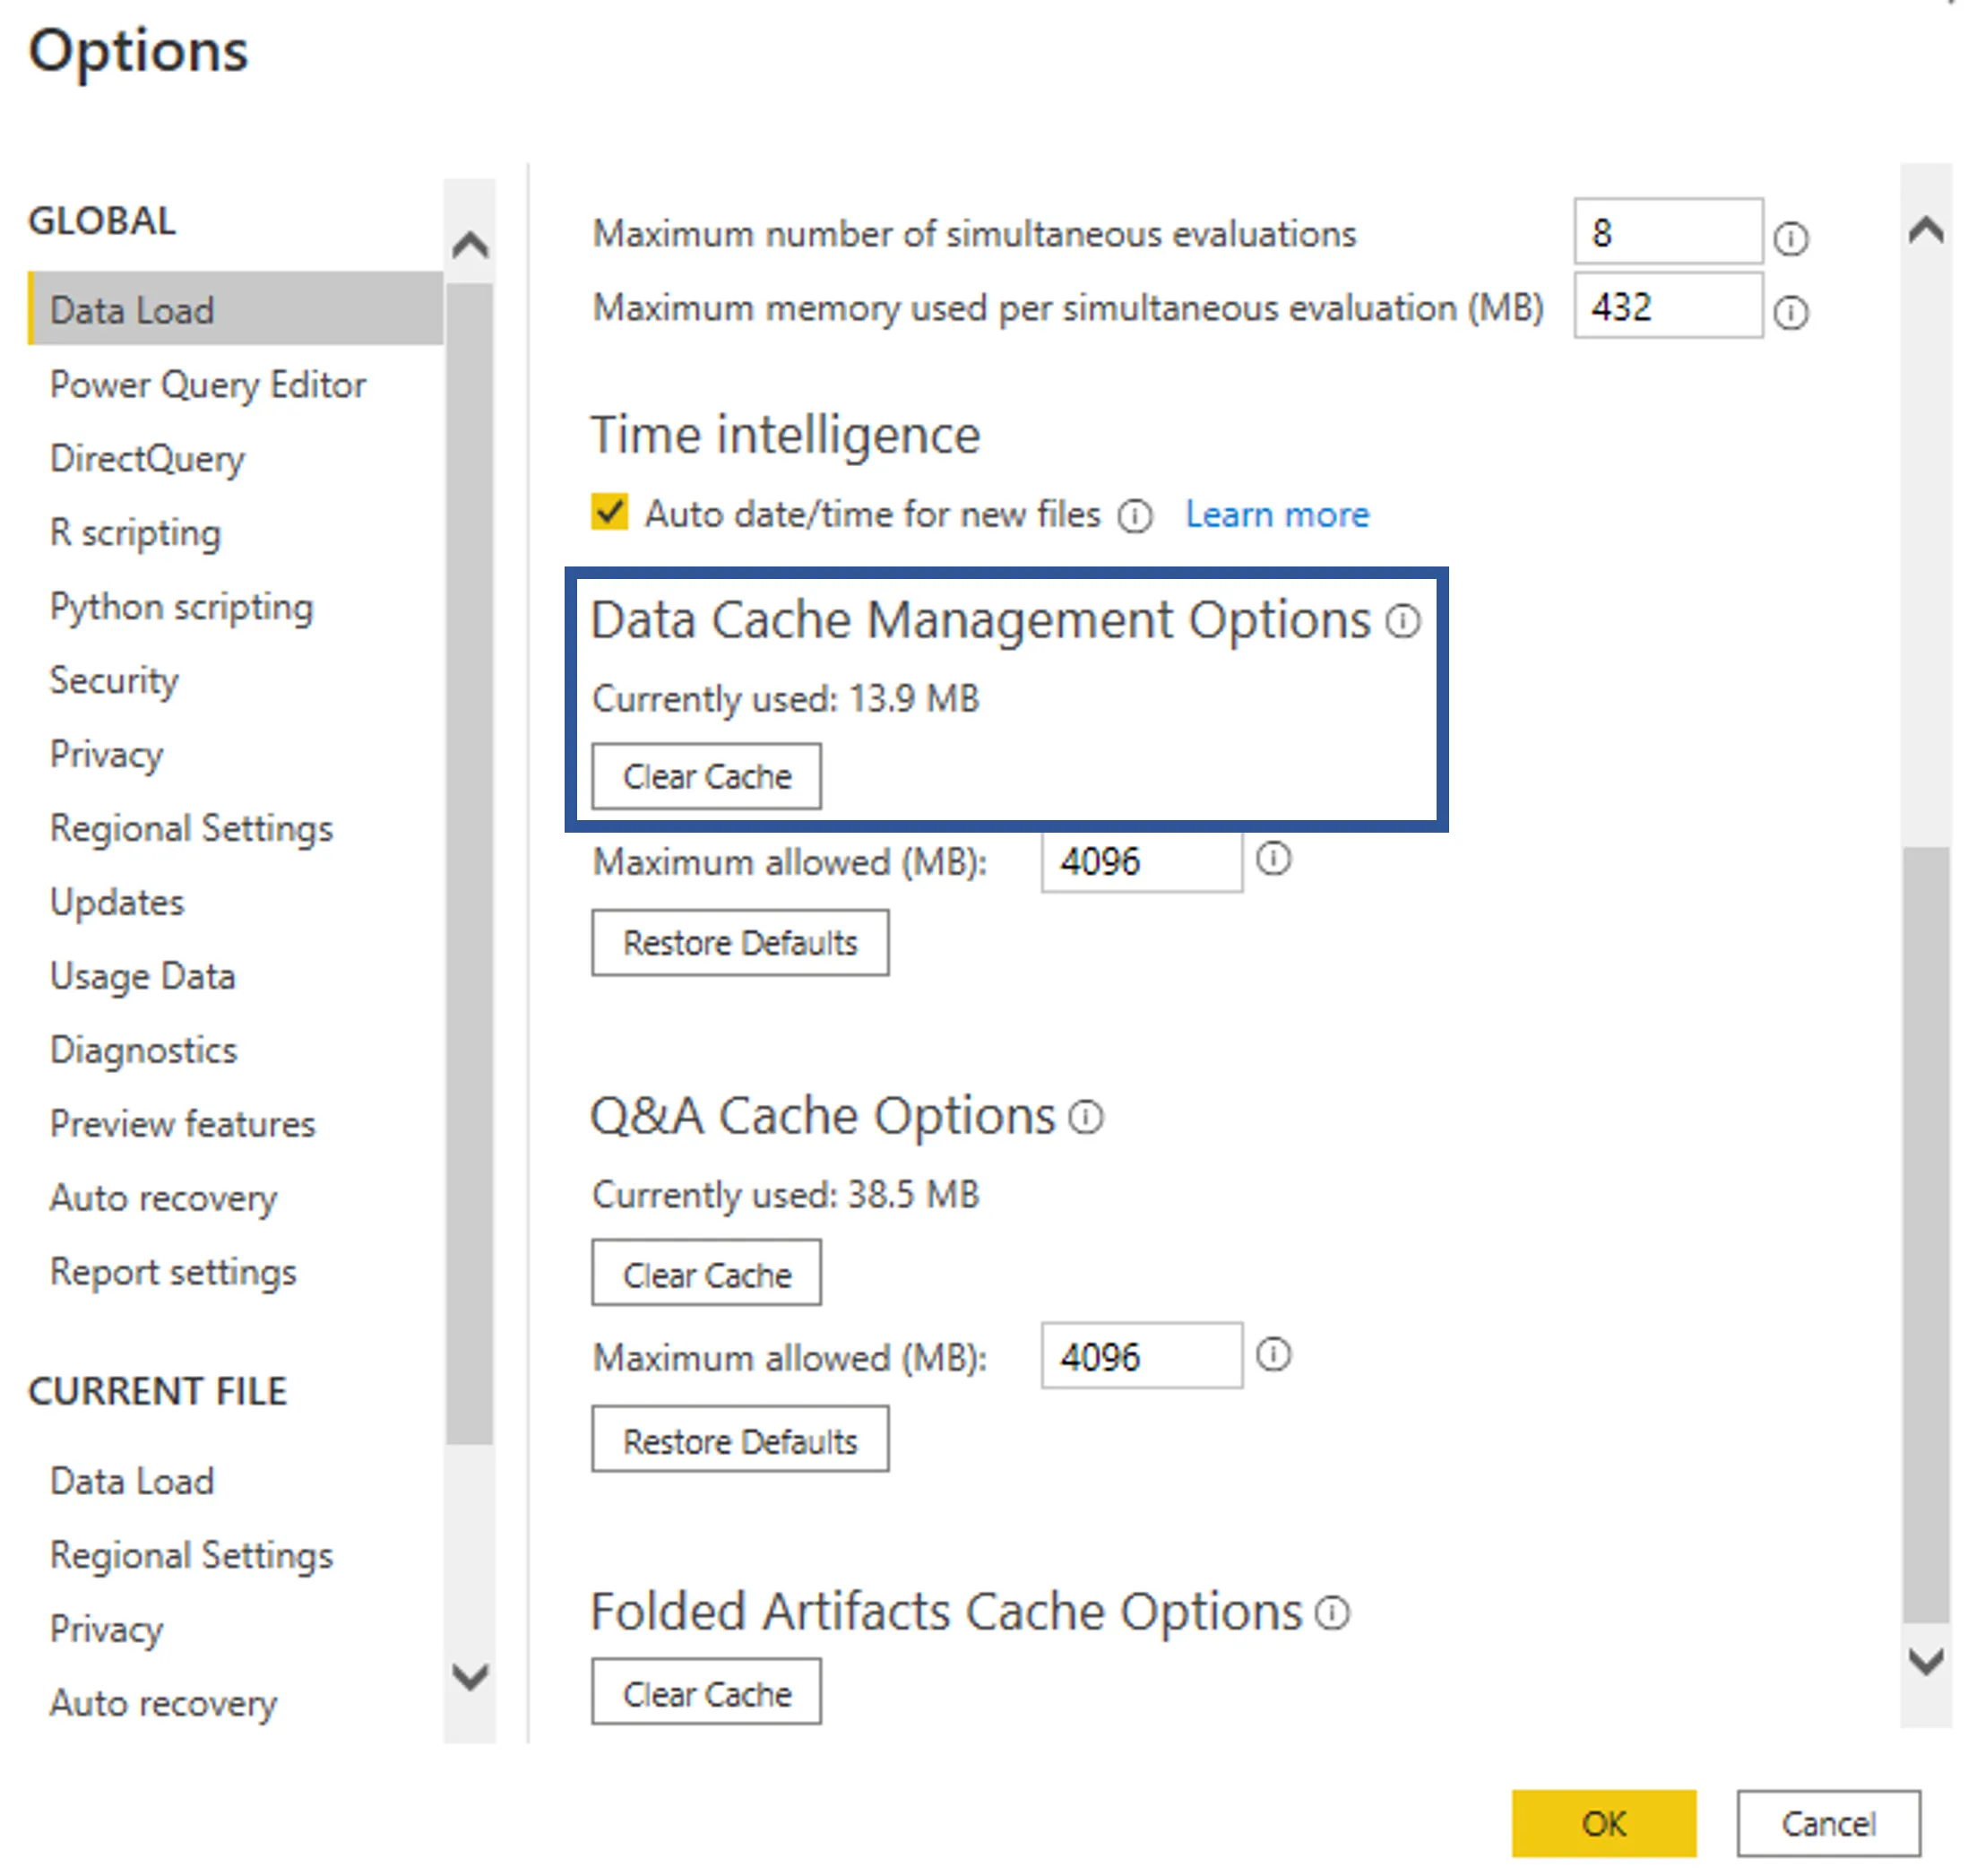
Clear the Cache
Remember to clear the cache in Power BI to ensure that all changes are considered.
Clear the cache by proceeding as follows:
-
In Power BI, click on File > Options and settings > Options.
-
In the Data Load tab, click on Clear Cache.