Azure Storage Page
The Azure Storage page displays the Azure storage containers configured for domain controller backup usage with Identity Recovery.
Click Configuration in the left pane. Then click the Azure Storage tab on the Configuration page to open the Azure Storage page.
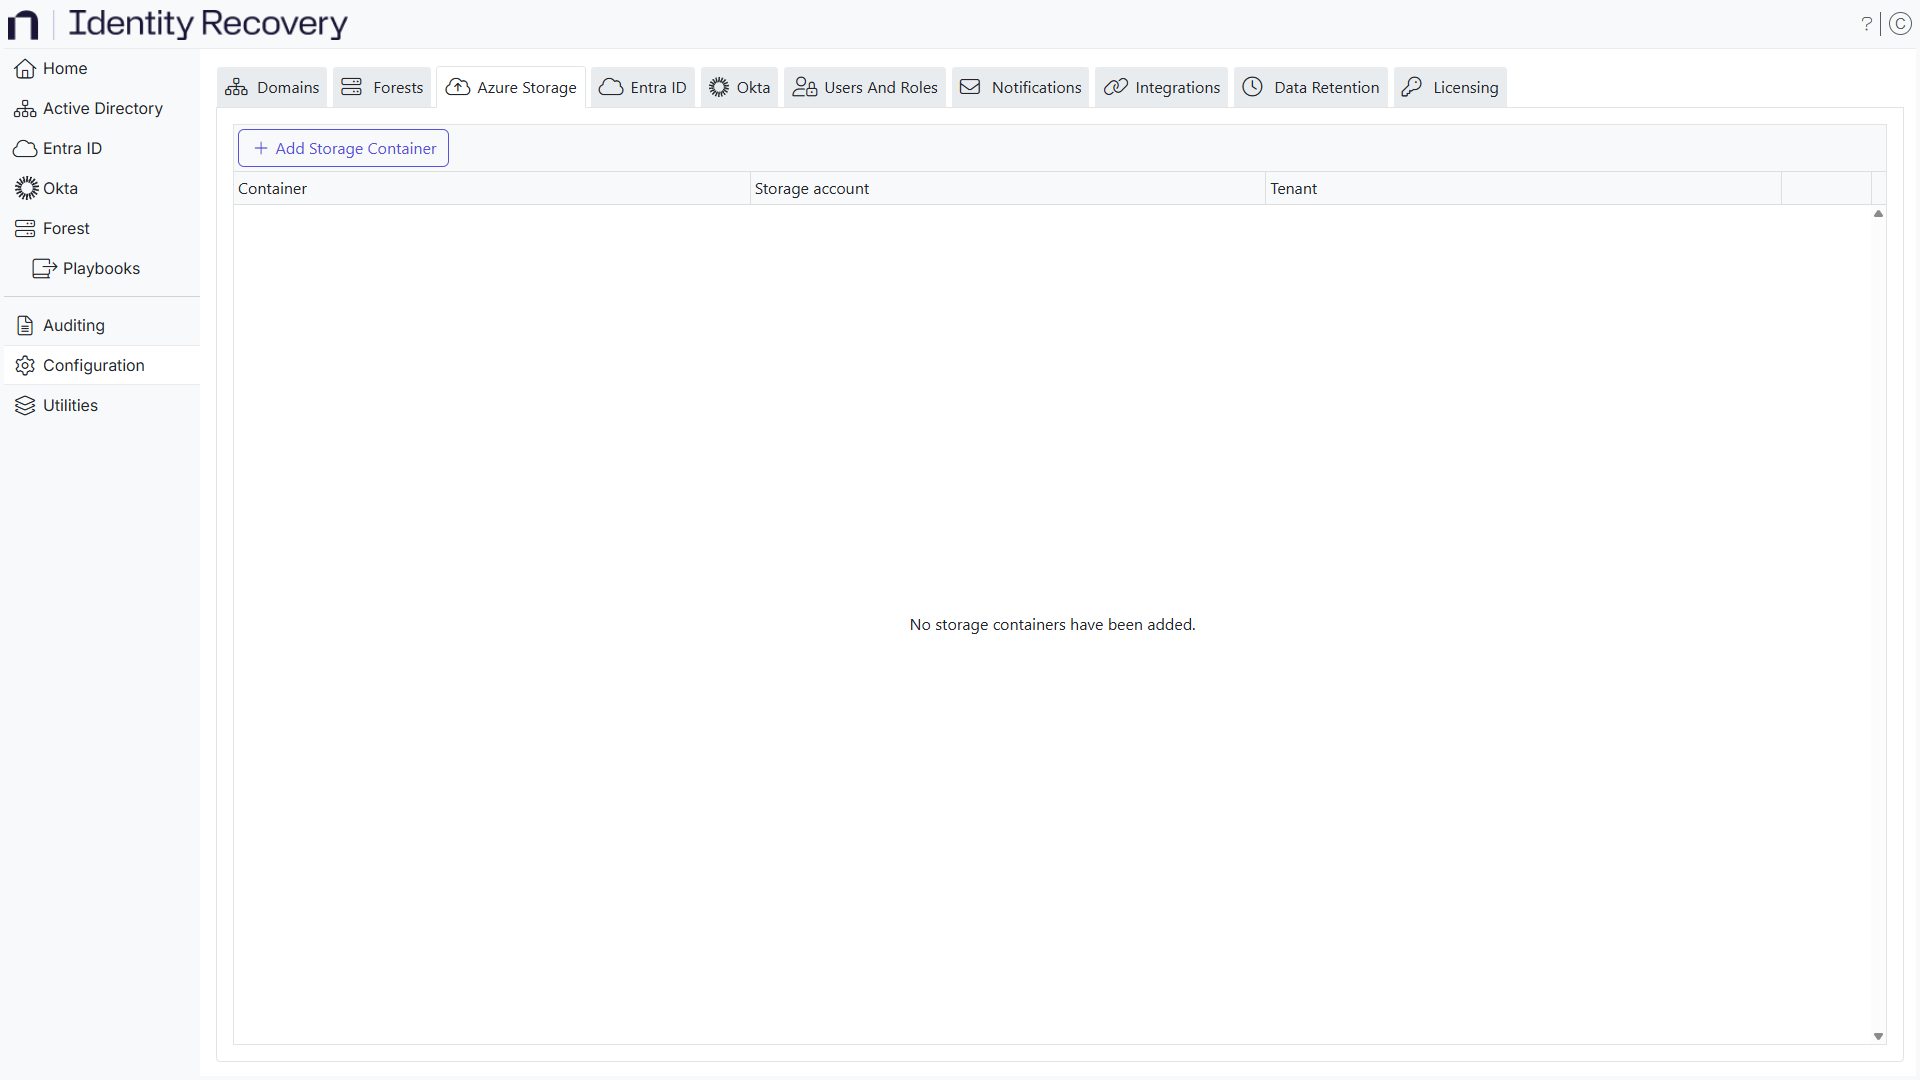
The table displays the following information:
-
Container – The container in Azure storage
-
Storage account – The storage account for this container
-
Tenant – The tenant the storage container exists in
-
Action – Actions you can perform on storage containers
- Remove – Click Remove to remove the storage container
- Edit - Click Edit to edit the storage container configuration
Add a Storage Container
Step 1 – Click the Add Storage Container button on the Azure Storage page. The Add Storage Container wizard opens.
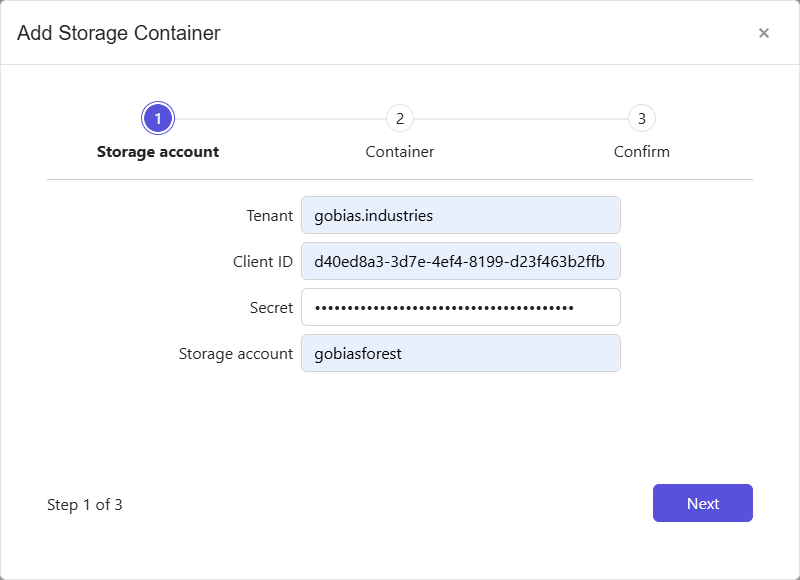
Step 2 – Enter the tenant name, client ID, secret, and storage account from the application registration in Entra and click Next.
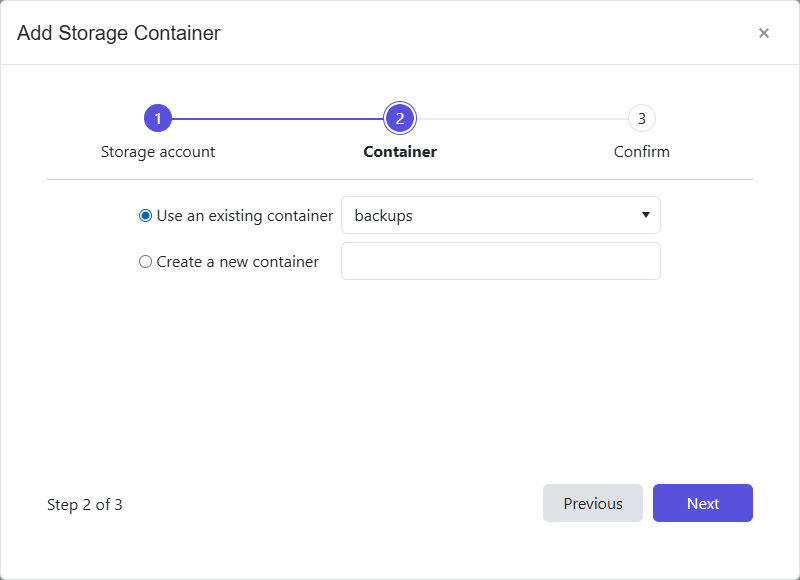
Step 3 – Select an existing container using the dropdown list or specify a new container name. Click Next to continue.
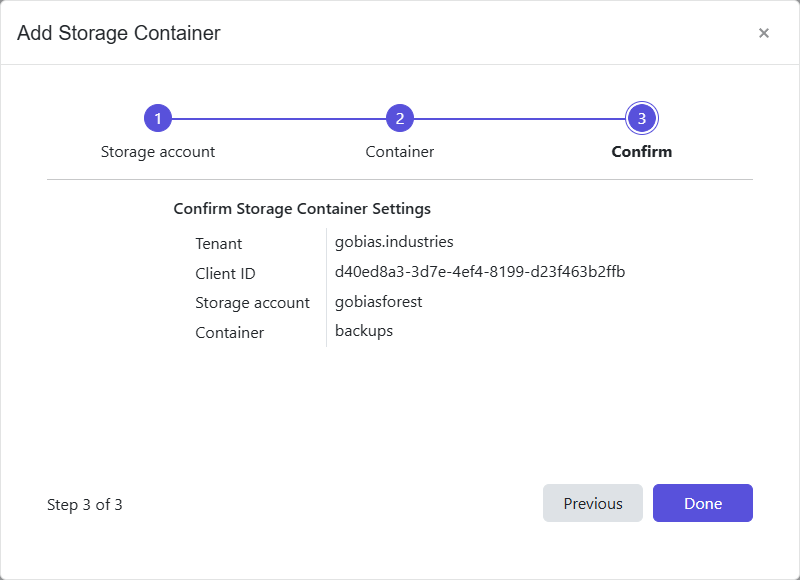
Step 4 – The Confirm page displays a summary of the settings you provided on the pages of the wizard. Use the Back button to return to a previous page and change any setting. Click Done to finish the wizard.
The storage container is now added to the system.
Edit a Storage Container Configuration
Editing a storage container follows the same steps as adding one.
Step 1 – On the Storage Container page, click the Edit configuration icon for a storage container. The Edit Storage Container wizard opens.
Step 2 – Modify the settings you want for the storage container configuration
Step 3 – The Confirm page displays a summary of the settings you provided on the pages of the wizard. Use the Back button to return to a previous page and change any setting. Click Done to finish the wizard.
The storage container configuration is updated.