Domains Page
The Domains page provides a list of the domains backed up by Identity Recovery. It displays the backup schedule settings for each added domain. You can also add and configure new domains.
Click Configuration in the left pane. Then click the Domains tab on the Configuration page to open the Domains page.
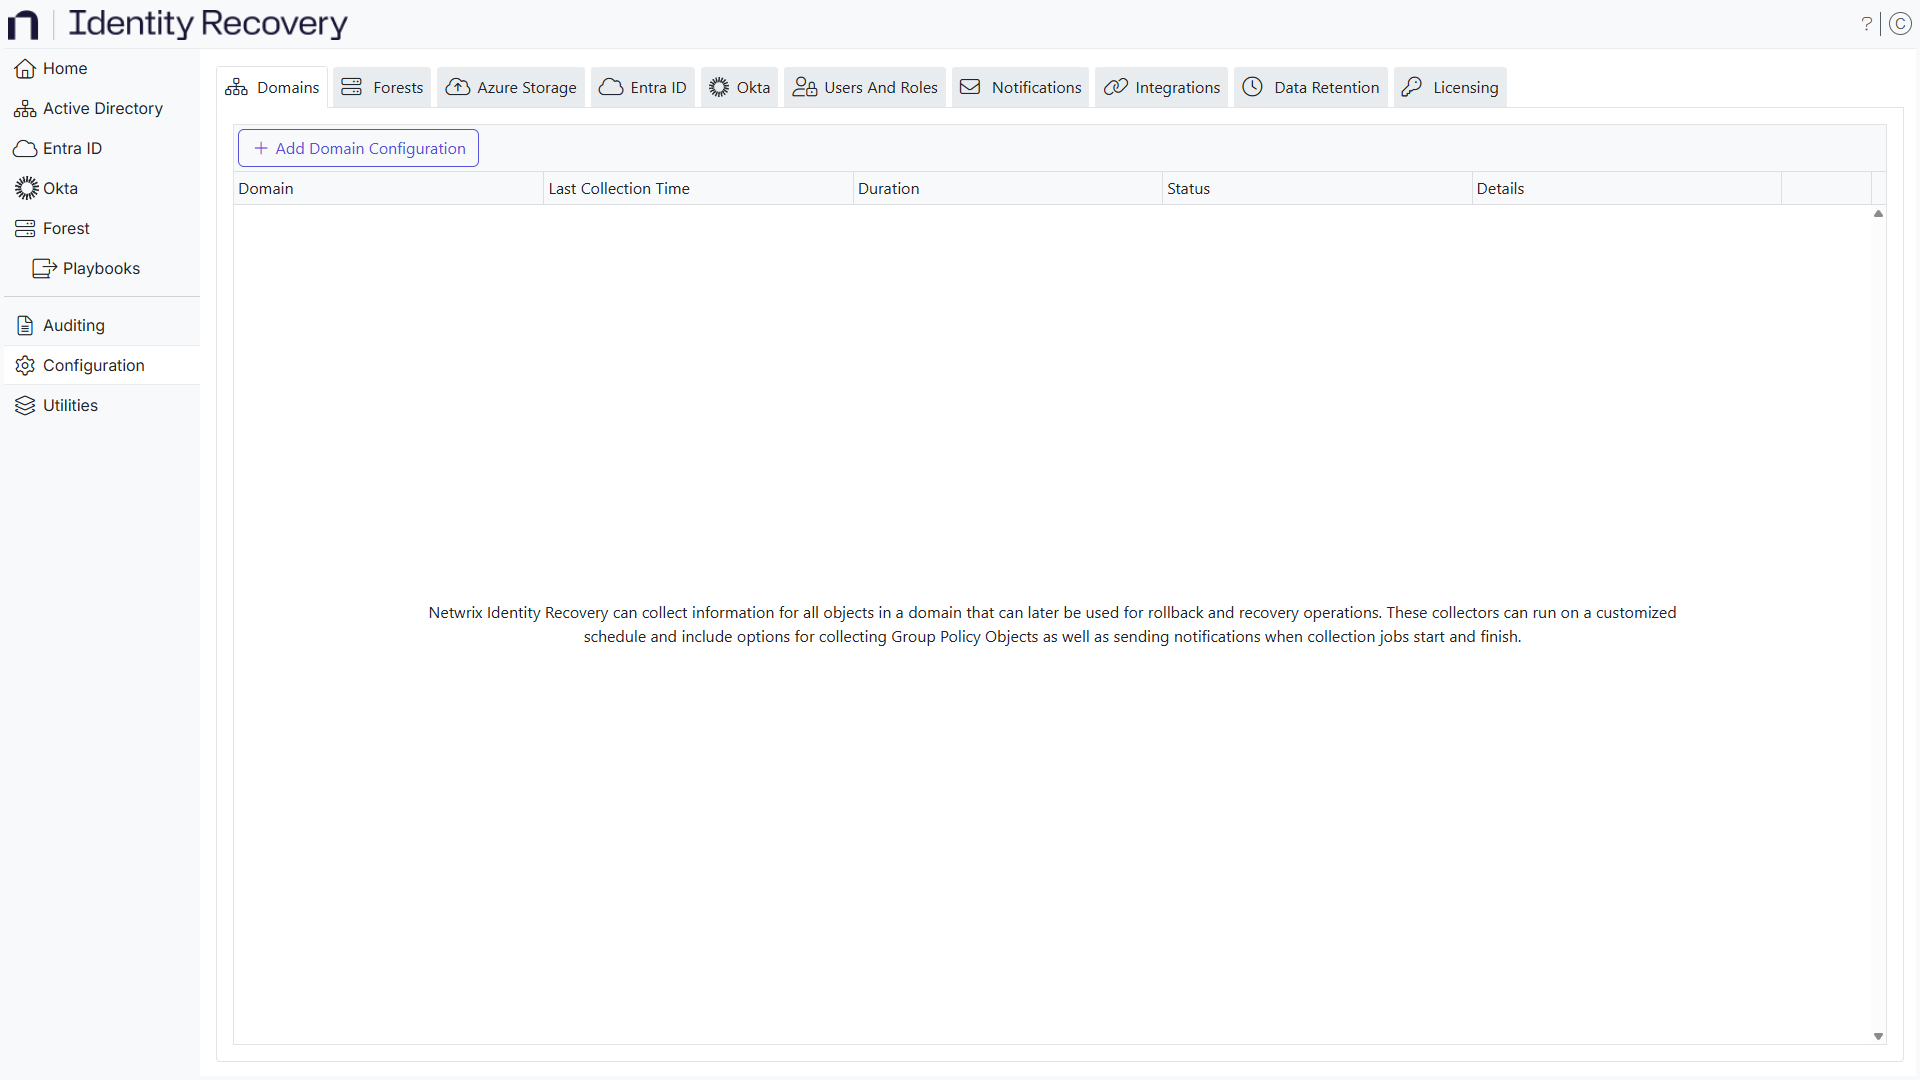
The table displays the following information:
-
Domain – Fully-qualified name of the domain
-
Last Collection Time – The most recent time the collection (backup) occurred
-
Duration – The time the collection took to complete
-
Status – Collection state as idle, waiting, error, or success
-
Details – Information about any errors that occurred during the last backup
-
Actions – Displays the icons used to collect, edit, and delete the respective domain
- Run backup – Click the Play icon to start a new collection (backup) on the respective domain if you need a collection outside of the configured schedule
- Edit configuration – Edit the settings of the domain. Click the Edit icon for a domain to open the Edit Domain Configuration wizard and edit the domain's settings. See the Edit Domain Configuration topic for additional information.
- Delete configuration – Click the Delete icon for a domain to delete it
To add a domain, click the Add domain configuration button. See the Add a Domain topic for additional information.
Add a Domain
To add a domain, provide domain details and configure the backup schedule. For a list of the supported Windows Servers, see the Target Domains topic.
Step 1 – Click the Add domain configuration button on the Domains page to launch the Add Domain Configuration wizard.
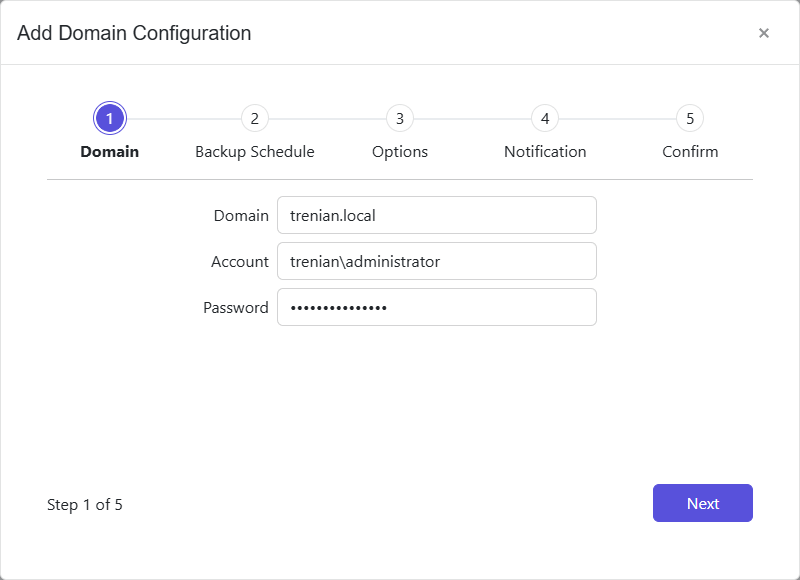
Step 2 – Enter a domain [example.domain.com] in the Domain field.
Step 3 – Enter the account username [DOMAIN\USERNAME] you'll use for backups, rollbacks, and recoveries in the Account field.
Step 4 – Enter the password for the account in the Password field.
The account must have Domain Admin privileged access to read and write object data in order to back up, rollback, and restore objects in Active Directory. If the account has read-only rights, it can back up the domain but can't rollback or restore objects. In this case, you must provide alternate credentials with read and write access to objects on the Credentials page of the Object Rollback and Object Restore wizards. See the Rollback Objects and Recover an Object topics for information on the wizards.
For a Least Privilege Access Model to provision an Active Directory security group with the permissions that are necessary to perform backups, rollbacks, and recovery, see the Least Privilege Access Model topic.
Step 5 – Click Next.
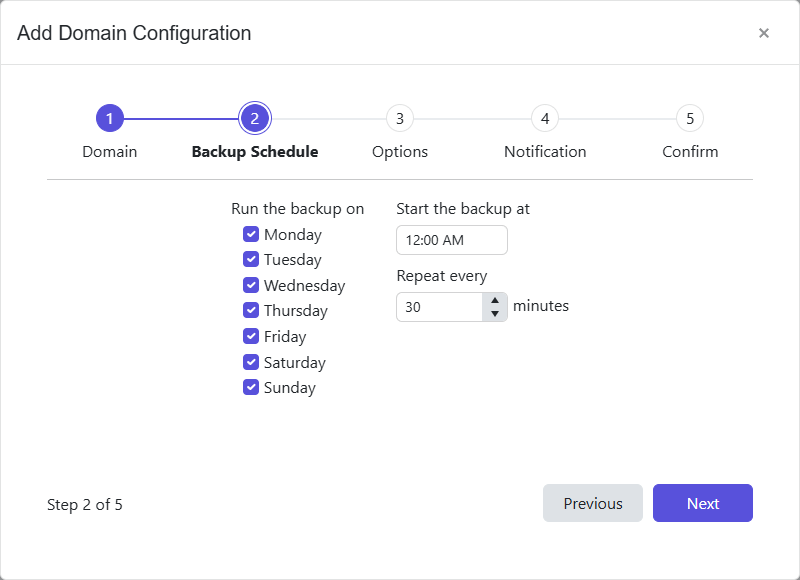
Step 6 – In the Run the backup on section, select the days of the week when you want backups to run.
Step 7 – Select a start time (UTC) in the Start the backup at field to begin the backup. The default time is 12:00 AM.
Step 8 – In the Repeat every field, enter a frequency, in minutes, to set the time between the start of each domain backup. Consider the size of the environment when configuring this option. Click Next.
If you change the start time from the default and select a frequency (in minutes), the backups will run at your desired frequency but skip from midnight until the selected start time.
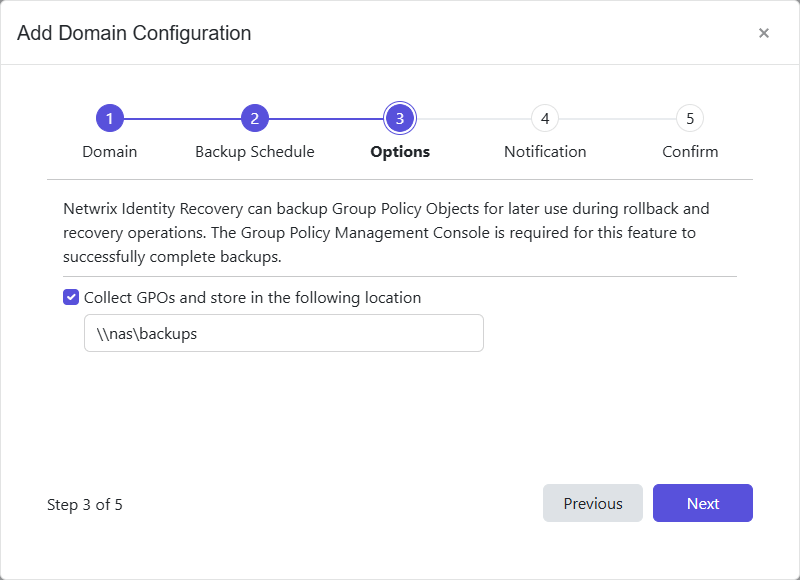
Step 9 – (Optional) Select the Collect GPOs checkbox to enable GPO rollback and recovery. This setting requires Group Policy Management Console (GPMC). If GPO collection isn't desired, skip to Step 10.
Step 10 – If you select the Collect GPOs checkbox, you can now specify the save location for the GPO backup in the Store the Group Policy Object backups in the following location field.
The path must be a network share. Don't provide the path to a local drive for storing the backup.
Step 11 – Click Next.
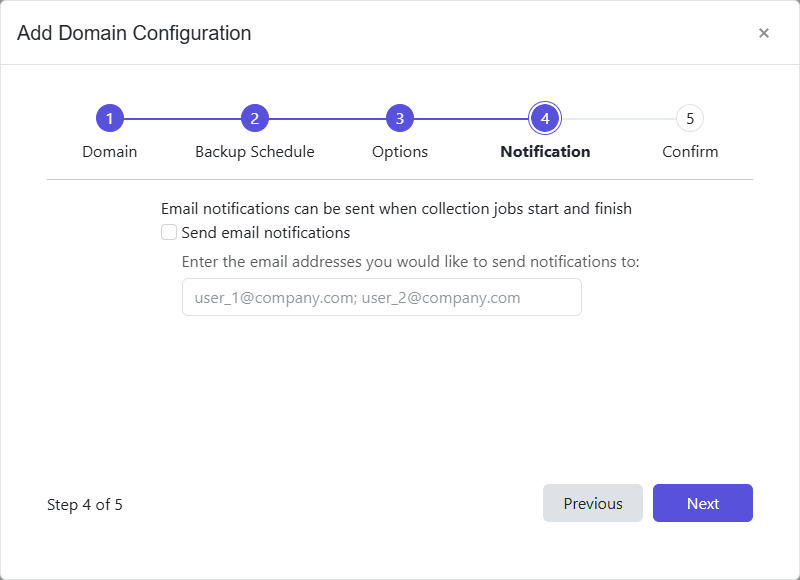
Step 12 – To set notifications, select the Send email notifications checkbox and enter the email address of one or more users and/or groups to receive the job start and end notifications. Use a semicolon (;) to separate multiple recipients. See the Notifications Page topic for additional information.
If notifications aren't desired, skip this step.
Step 13 – Click Next.
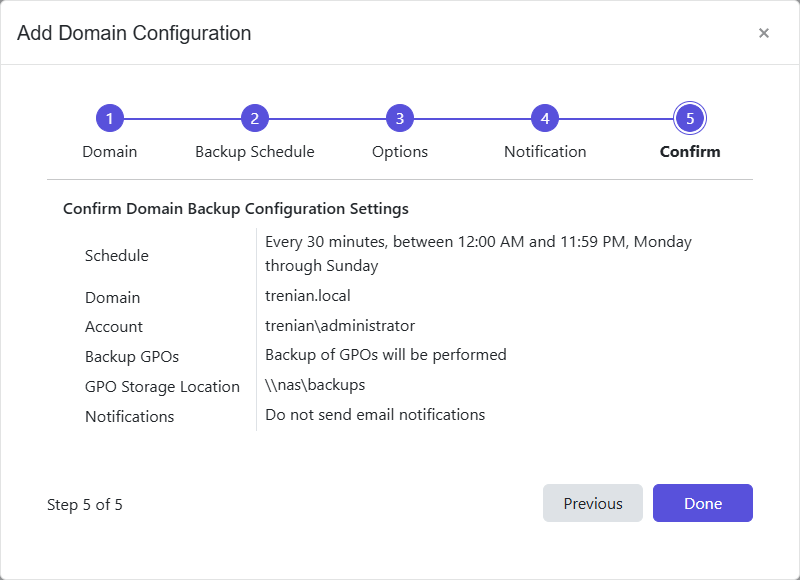
Step 14 – The Confirm page displays a summary of the settings you provided on the pages of the wizard. Use the Back button to return to a previous page and change any setting. Click Done to finish the wizard.
Identity Recovery adds the new domain backup configuration to the Domains page.
Backups will begin as scheduled. On the first scheduled instance, Identity Recovery performs a complete backup of the domain. Then, subsequent backups only include the incremental changes that occurred since the previous backup.
Edit Domain Configuration
Editing a domain follows the same steps as adding one.
Step 1 – On the Domains page, click the Edit configuration icon for a domain. The Edit Domain Configuration wizard opens.
Step 2 – Modify the settings you want for the domain backup configuration
Step 3 – The Confirm page displays a summary of the settings you provided on the pages of the wizard. Use the Back button to return to a previous page and change any setting. Click Done to finish the wizard.
The domain configuration is updated and backups will resume as scheduled.