Netwrix Integrations Page
The Netwrix Integrations page lets you configure access to the data in other Netwrix products. At present, only Netwrix Threat Prevention is supported. This enables Identity Recovery to pull object data from the integrated product and tie it with that same object's data in Identity Recovery. Users can then view the audit history and activity data coming from Threat Prevention for objects on the Active Directory Page.
Click Configuration in the left pane. Then click the Netwrix Integrations tab on the Configuration page to open the Netwrix Integrations page.
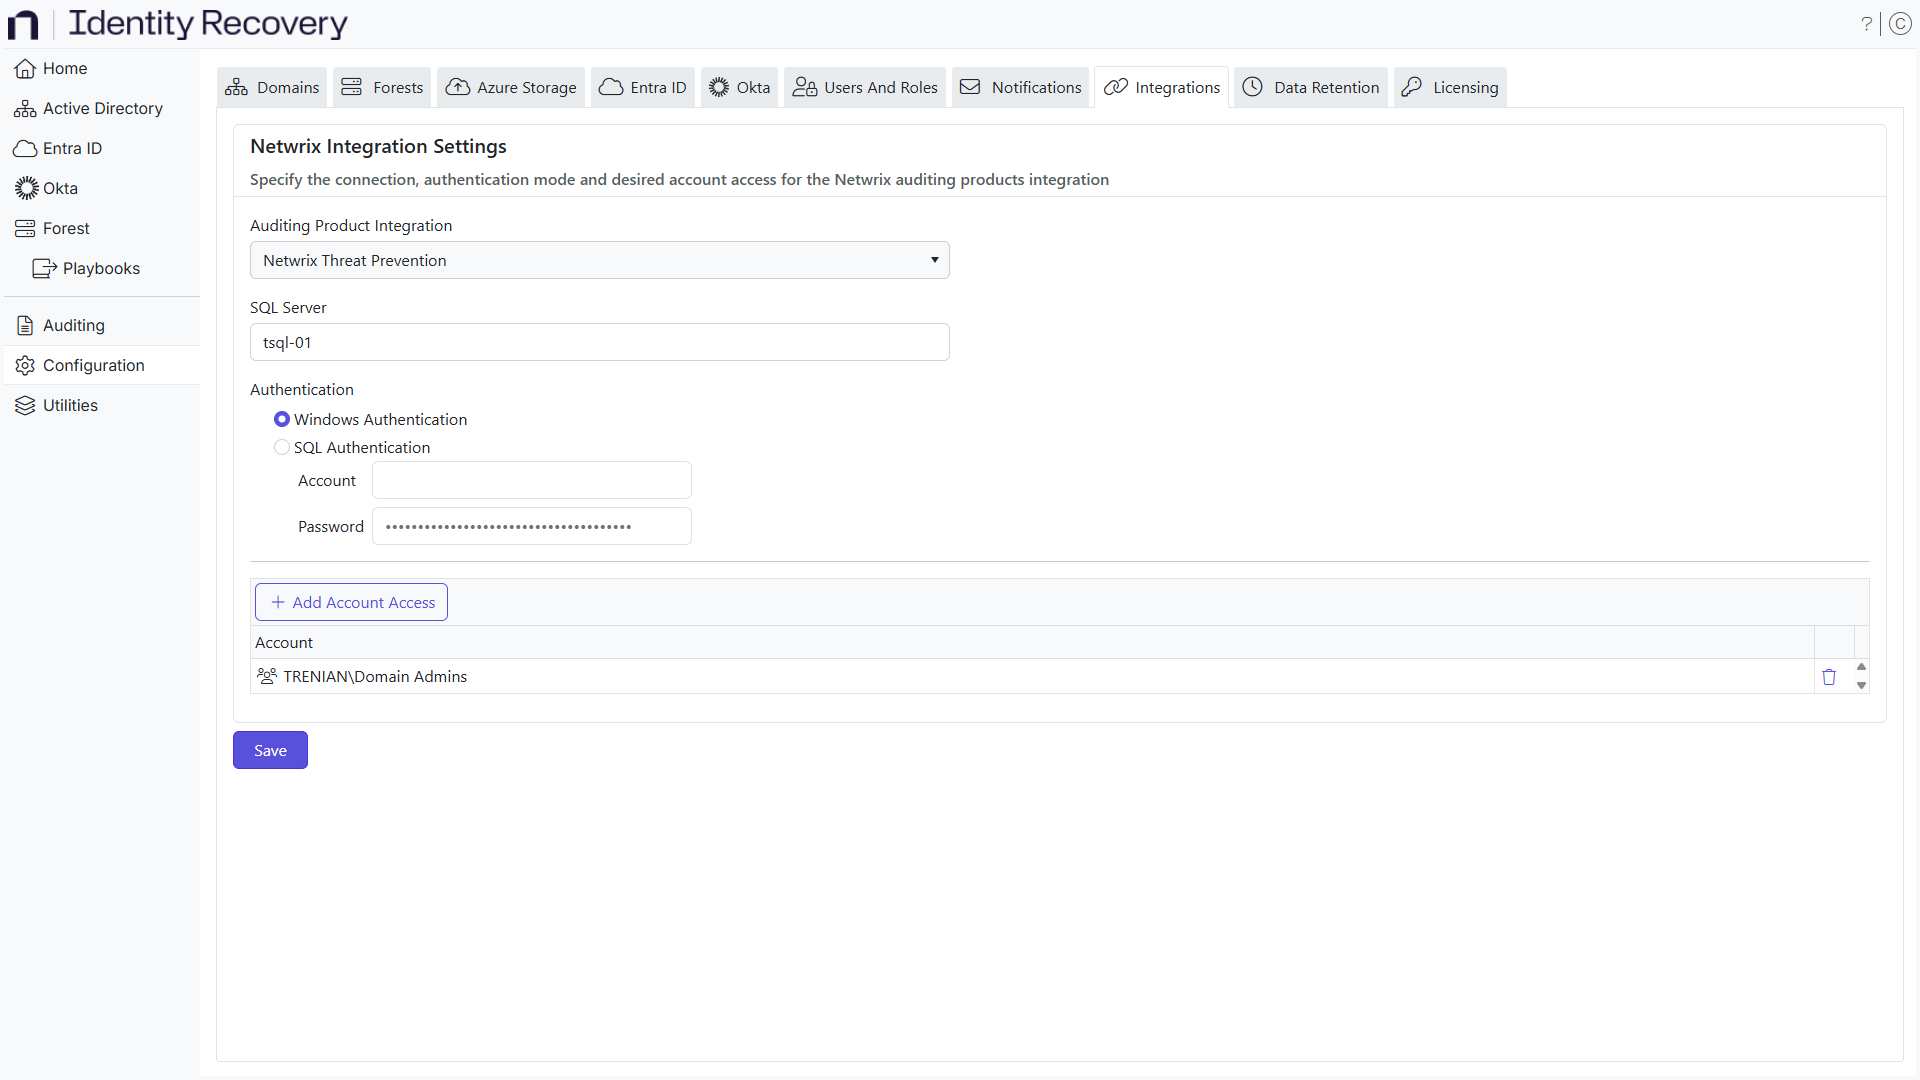
Step 1 – On the Netwrix Integrations page, use the Auditing Product Integration dropdown menu to select a product for integration. The menu displays the supported Netwrix products, namely Netwrix Threat Prevention.
Step 2 – In the SQL Server field, enter the IP address or the server name of the SQL server where the Threat Prevention database resides.
Step 3 – Select the option button for Windows authentication or SQL authentication to set the authentication mode.
- Windows authentication uses the credentials provided on the Netwrix Recovery Server Configuration page of the Identity Recovery Setup wizard. See the Install the Application topic for additional information.
- For SQL Server authentication, provide SQL credentials in the Account and Password fields. The account requires Read permissions on the Threat Prevention database.
Step 4 – Click Test to test the connection. A message appears to indicate if the test succeeded or failed.
Step 5 – To view audit data from Threat Prevention in Identity Recovery, you must specify which user accounts have Threat Prevention access. Only users who log into Identity Recovery with one of these specified accounts can fetch and view audit and activity data from Threat Prevention for domain objects.
-
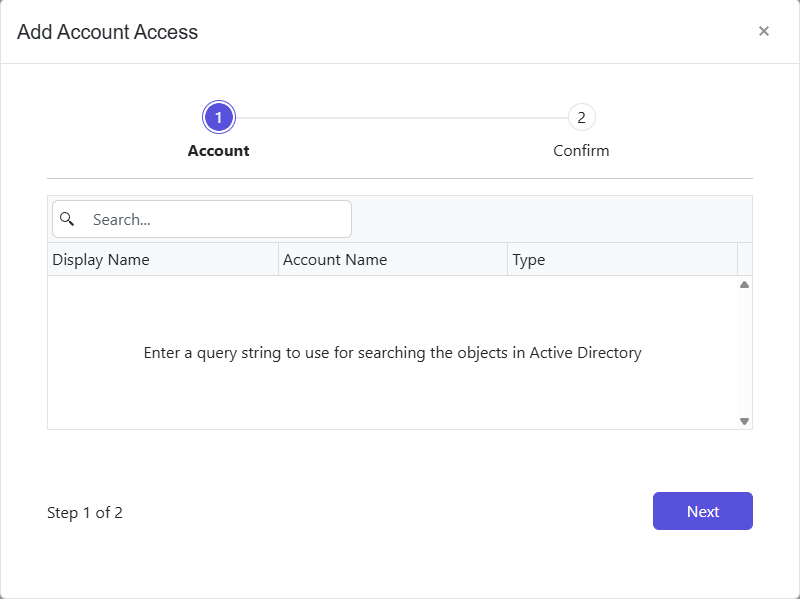
Click the Add account access button to add an account. The Add Account Access wizard opens.
-
Enter a user's first or last name, display name, sAMAccountName, or group name in the Search field. As you type, the system will find matches in Active Directory and display the results. Select the user you want and click Next.
-
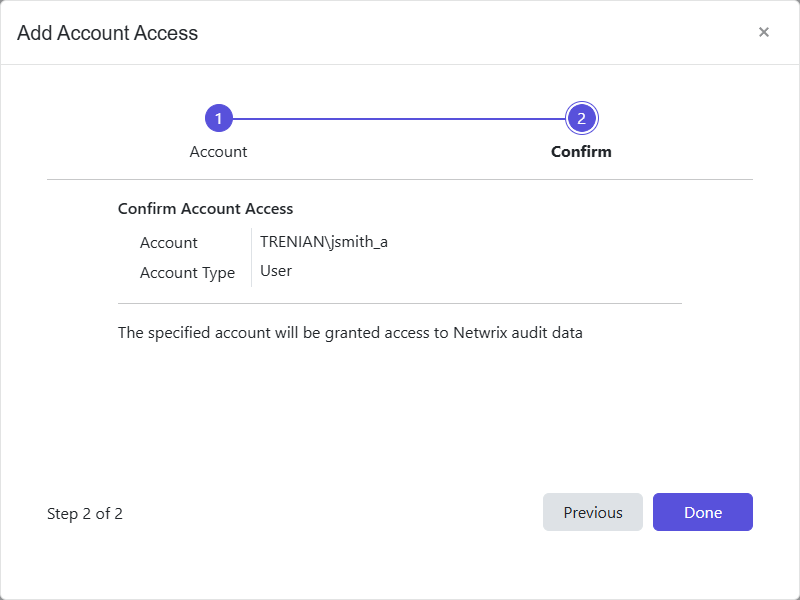
The Confirm page displays a summary of the settings you provided on the pages of the wizard. Use the Back button to return to a previous page and change any setting. Click Done to finish the wizard.
The account appears under Account on the Netwrix Integrations page. See the Integration with Threat Prevention topic for additional information.
Step 6 – Click Save.
Identity Recovery now applies your integration settings.