Users and Roles Page
The Users and Roles page displays the accounts with access to Identity Recovery.
Click Configuration in the left pane. Then click the Users and Roles tab on the Configuration page to open the Users and Roles page.
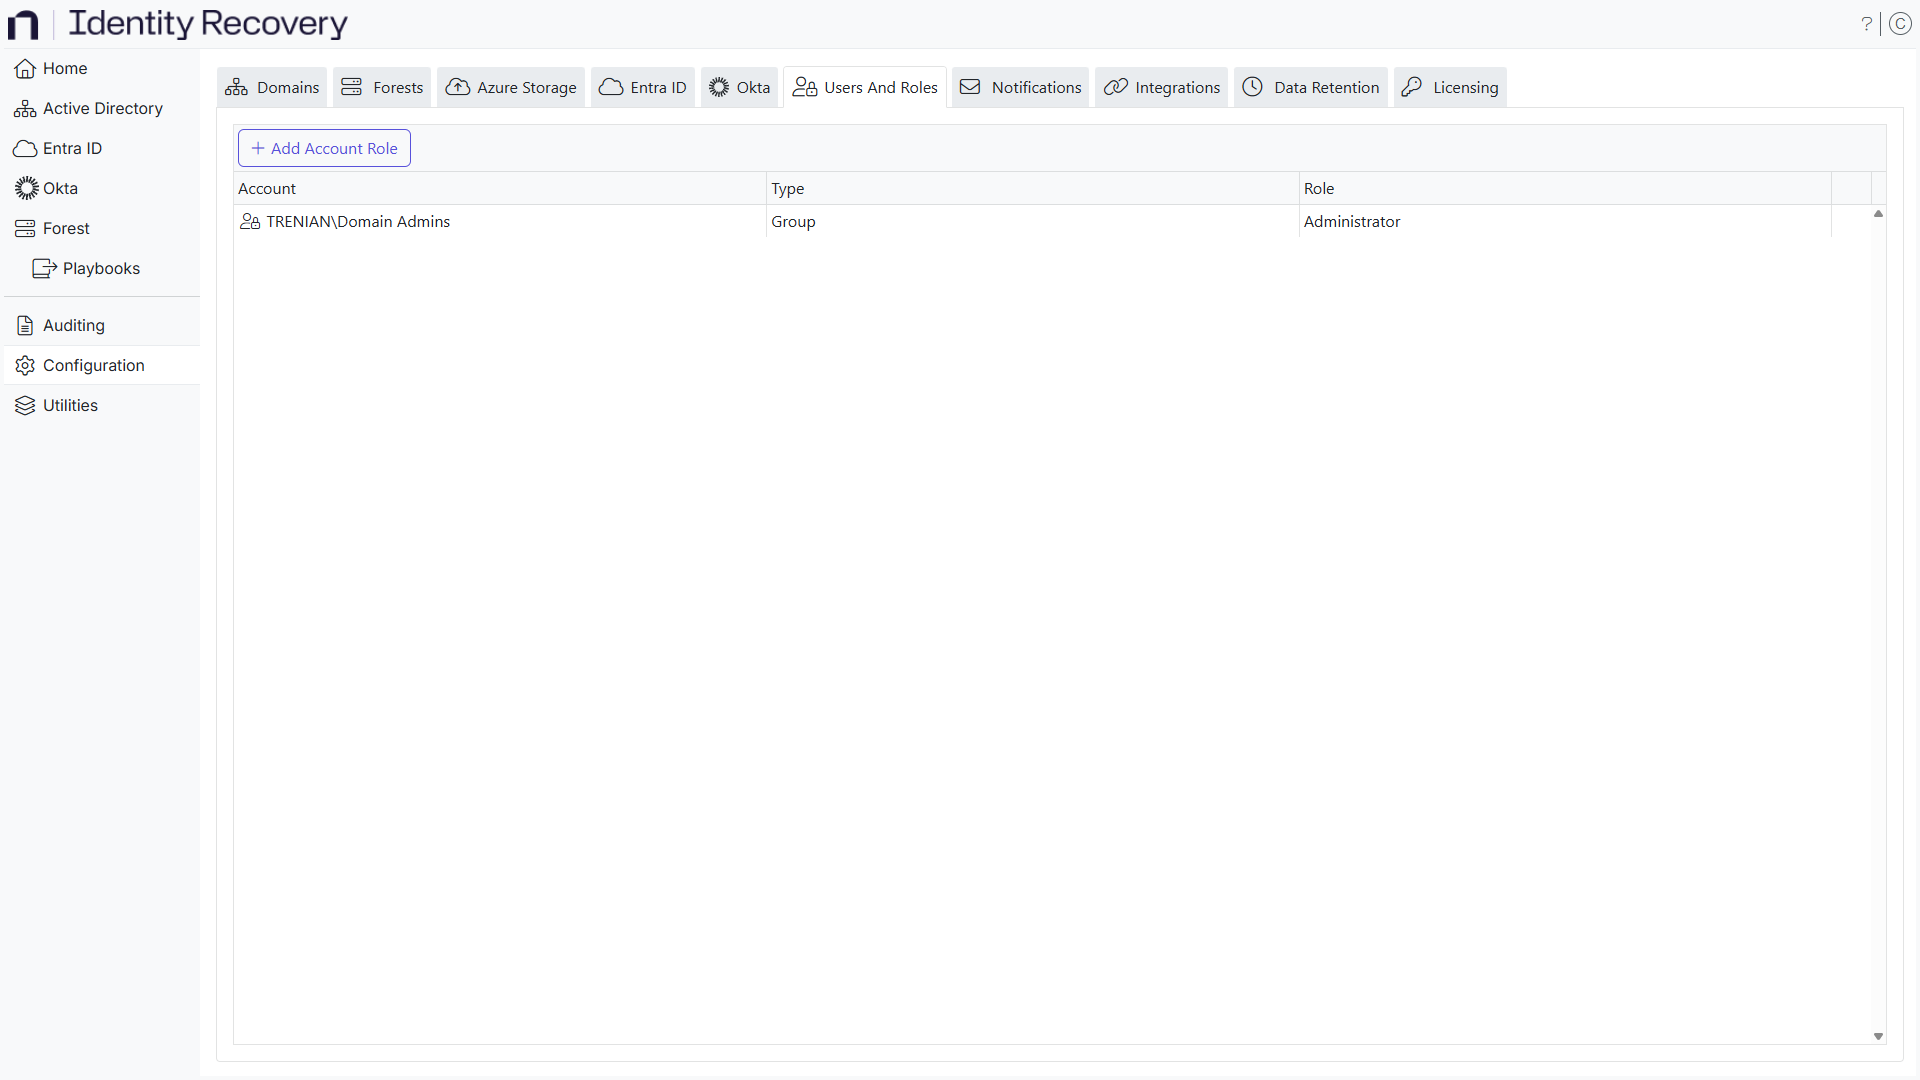
The table displays the following information:
-
Account – Login username displayed in the [DOMAIN\USERNAME] format for Active Directory accounts
-
Type – The type of account, an individual or group account
-
Role – The role assigned to the account.
- Administrator – This role allows full control of Identity Recovery, including adding domains, configuring notifications, and adding and removing users. It has access to the Configuration node in the left navigation pane of the application.
- Operator – This role allows access to the Active Directory and Forest nodes, and can perform rollback and recovery tasks for domains and forests through the Recovery Console.
-
Action – Actions that can be performed on user accounts
- Remove – Click Remove to remove the respective user or group from console access. See the Remove a User or Group topic for additional information.
Add a User or Group
To add a user or group that can log into the Recovery Console, follow these steps. If you add a group, all its members can log in.
Step 1 – Click the Add Account Role button on the Users and Roles page. The Add Account Role wizard opens.
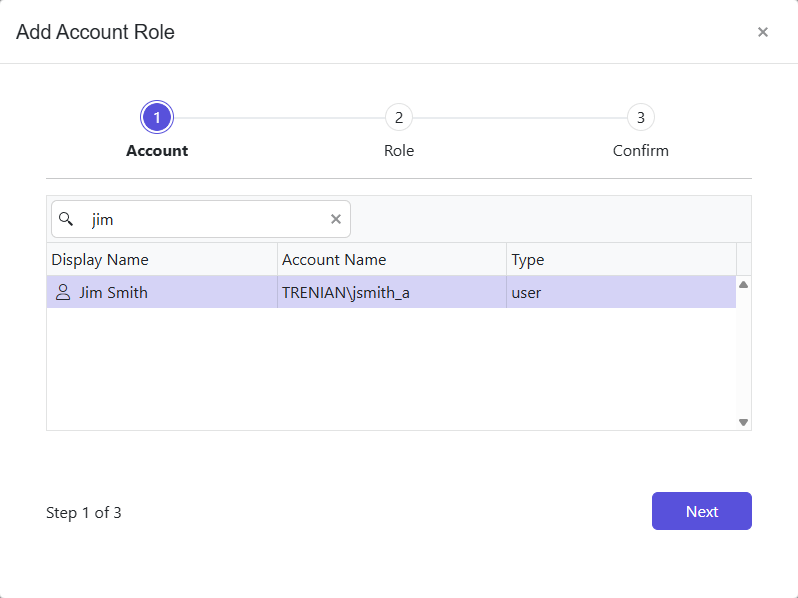
Step 2 – Enter a user's first or last name, display name, sAMAccountName, or group name in the Search field. As you type, the system will find matches in Active Directory and display the results.
Step 3 – Select the user you want and click Next.
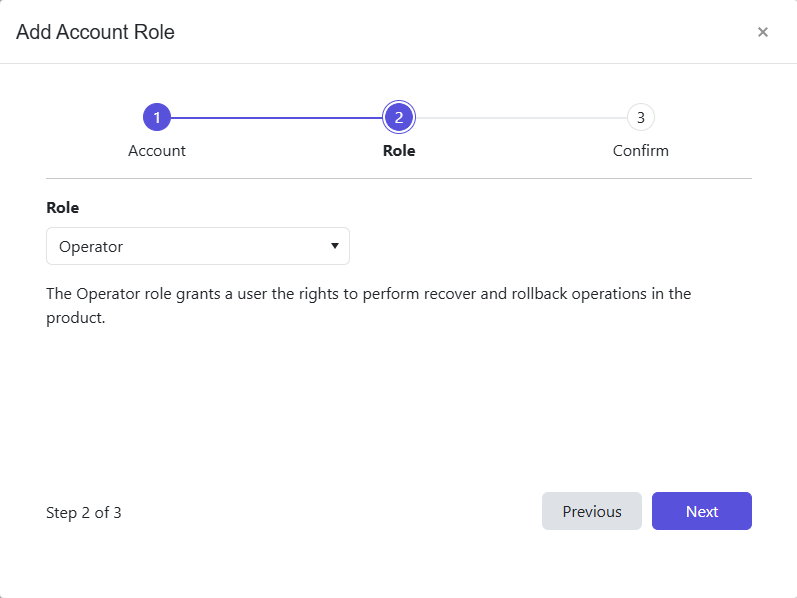
Step 4 – Select the Administrator or Operator role for the account from the Role dropdown menu.
- Administrator – This role allows full control of Identity Recovery, including adding domains, configuring notifications, and adding and removing users. It has access to the Configuration node in the left navigation pane of the application.
- Operator – This role allows access to the Active Directory and Forest nodes, and can perform rollback and recovery tasks for domains and forests through the Recovery Console.
Step 5 – Click Next.
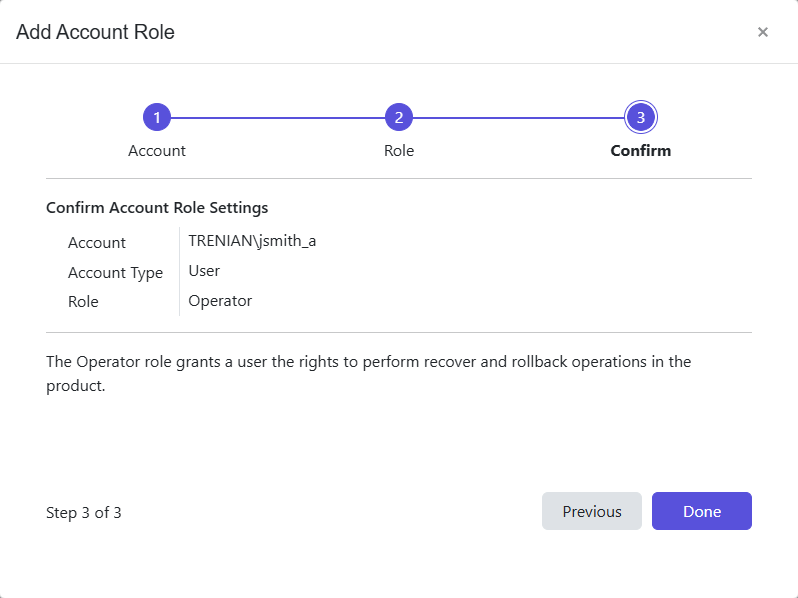
Step 6 – The Confirm page displays a summary of the settings you provided on the pages of the wizard. Use the Back button to return to a previous page and change any setting. Click Done to finish the wizard.
The system adds the selected user or group to the table with the specified role.
Change the Role Assigned to an Account
This action is only available for manually added accounts and not for the default account.
Step 1 – On the Users and Roles page, click the row for an account to make it editable.
Step 2 – Then use the dropdown menu in the Role column to select a different role for the account.
Remove a User or Group
This action is only available for manually added accounts and not for the default account.
Step 1 – On the Users and Roles page, locate the user or group for whom to remove access.
Step 2 – Click the Remove button to remove that user or group from the table.
Step 3 – Click OK to confirm the action.
The system removes the user's or group's access to Identity Recovery.