How to View Stored Sensitive Data Discovery (SDD) Matches
Question
How can you view stored Sensitive Data Discovery (SDD) matches in FileSystem Sensitive Data (SEEK)?
NOTE: To be able to view populated Sensitive Content Details reports, enable the Store discovered sensitive data option for the corresponding collector in Sensitive Data Settings. For additional information on the initial SDD setup in specific collectors, refer to the following documentation section: Administration − Data Collectors · v11.6.
Answer
NOTE: The Sensitive Data Discovery criteria searches in Access Information Center can be run exclusively by users with either the Security Team or Console Administrator role. Users with the Reader role will receive blank reports.
You can view stored SDD matches using one of the following methods.
Access Information Center − Sensitive Content Reports
- Select the server.
- In the right Reports pane, select Sensitive Content Details.
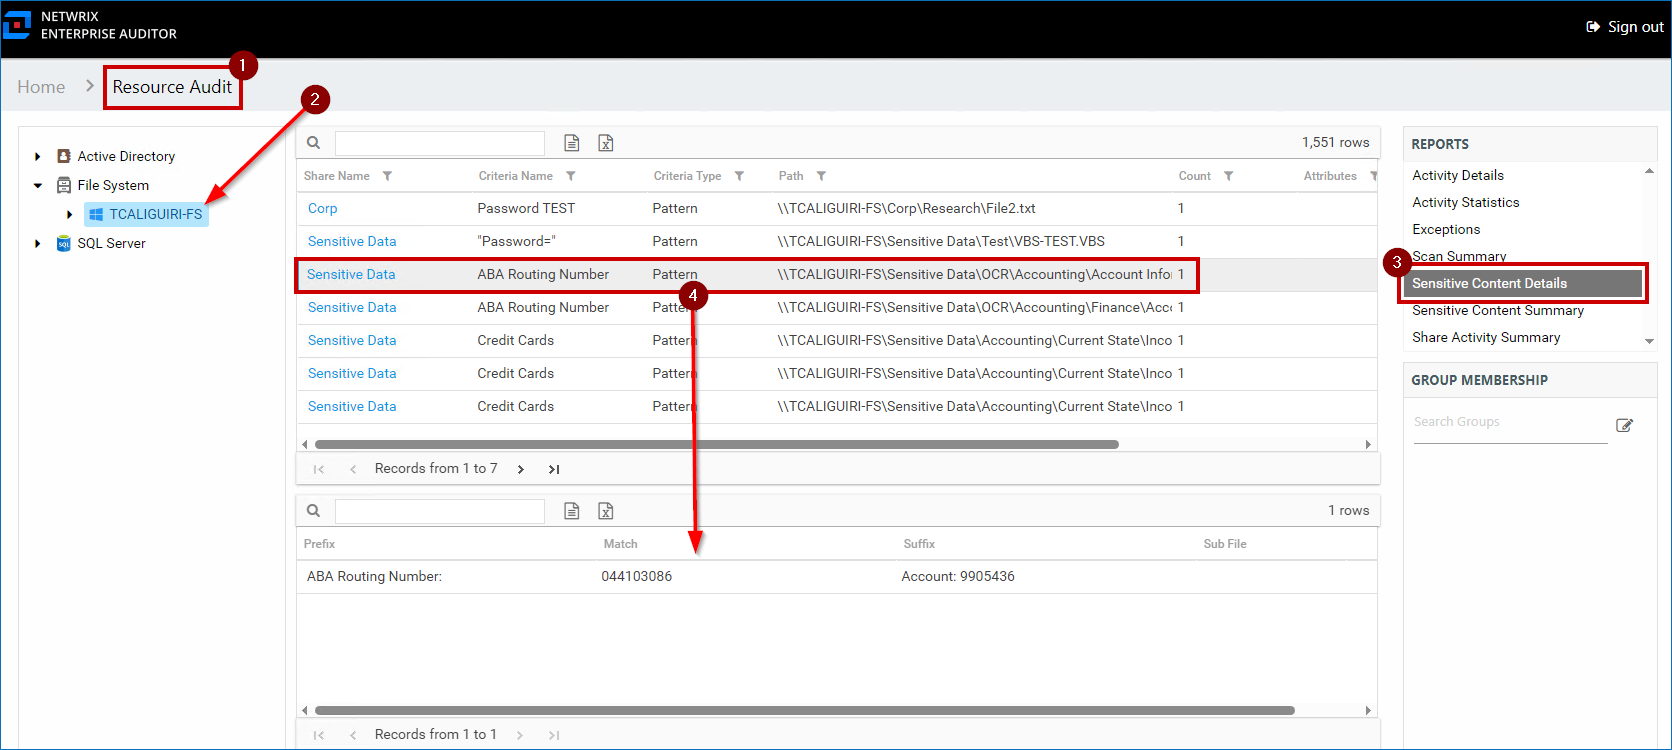
For additional information, refer to: Resource Audit Overview − Sensitive Content Reports · v11.6
https://docs.netwrix.com/docs/accessanalyzer/12_0)
Access Information Center − Resource Review
- Assign Resource Owners. Refer to: Resource Owners Overview · v11.6
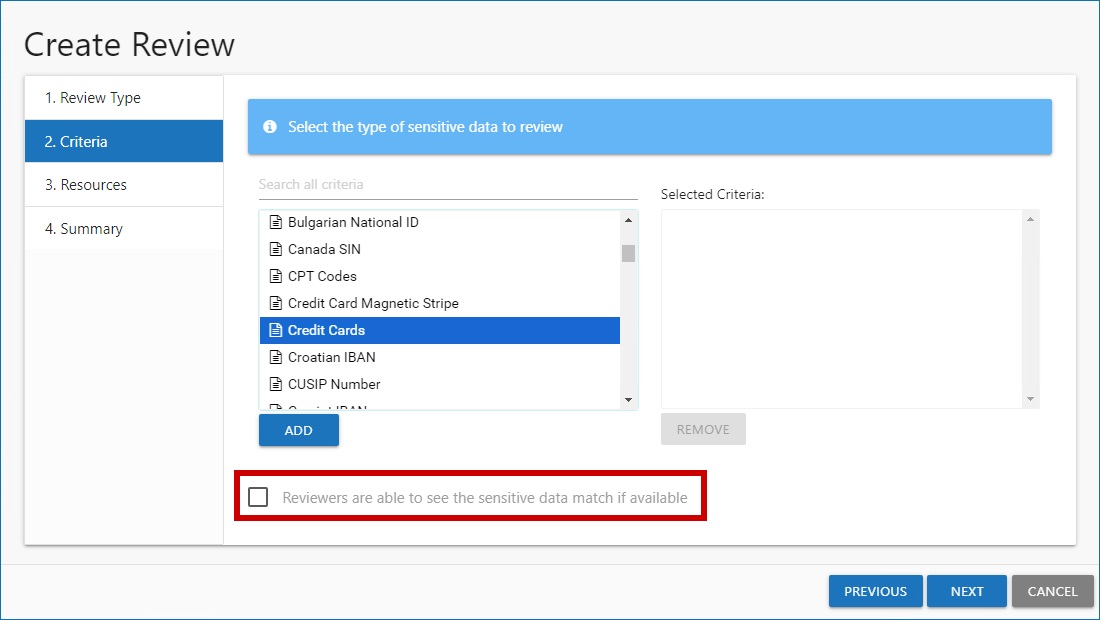
https://docs.netwrix.com/docs/accessinformationcenter/12_0) - Create a Sensitive Data Resource review. Refer to: Resource Ownership with the Access Information Center − Perform a Sensitive Data Review · v11.6
https://docs.netwrix.com/docs/accessinformationcenter/12_0)
IMPORTANT: Check the Reviewers are able to see the sensitive data match if available checkbox for the review to contain sensitive data matches.
Netwrix Access Analyzer − Custom report
- Create a new report under the FileSystem > 7.Sensitive Data > FS_DLPResults Job.
NOTE: For additional information on custom reports, refer to: Reporting − Report Configuration Wizard · v11.6
https://docs.netwrix.com/docs/auditor/10_8) - In the Authoring page of the Report Configuration Wizard, specify the report name and title.
- In E-mail and Publish Security pages, specify the recipients and intended audience for the report − refer to:
- Report Configuration Wizard − E-mail Page · v11.6
https://docs.netwrix.com/docs/auditor/10_8) - Report Configuration Wizard − Publish Security Page · v11.6
https://docs.netwrix.com/docs/auditor/10_8)
- Report Configuration Wizard − E-mail Page · v11.6
- In the Layout page, select the single block option and set the Select the number of rows counter to 1 row.
- In the Widgets page, configure the report layout − refer to: Report Configuration Wizard − Widgets Page · v11.6
https://docs.netwrix.com/docs/auditor/10_8) - In the DataSource Options window, uncheck the Current Job Only checkbox and select the
SA_FSDLP_MatchHitsViewtable.NOTE: You can omit the data columns included in the report via Column Chooser.
- After saving the report, generate it either by clicking the three-dot icon (the More button) > Generate, or by running the
FS_DLPResultsJob.
Related articles
- Administration − Data Collectors · v11.6
- Resource Audit Overview − Sensitive Content Reports · v11.6
- Resource Owners Overview · v11.6
- Resource Ownership with the Access Information Center − Perform a Sensitive Data Review · v11.6
- File System Solution − 7.Sensitive Data > FS_DLPResults Job · v11.6
- Reporting − Report Configuration Wizard · v11.6
- Report Configuration Wizard − E-mail Page · v11.6
- Report Configuration Wizard − Publish Security Page · v11.6
- Report Configuration Wizard − Widgets Page · v11.6