How to Generate a Report on All Groups with Report to Originator Set to False or True
Applies To
Netwrix Directory Manager – Reports ⸱ Imanami 🖽
Overview
Netwrix Directory Manager (formerly GroupID) allows you to generate reports on all groups with the Report To Originator attribute set to either false or true. The reportToOriginator parameter determines whether a delivery report is sent to the user (originator) who sends an email to a distribution group. This article explains how to generate these reports using the Reports module. The Reports module is a free tool for running reports on Active Directory and Microsoft Exchange/Office 365.
NOTE: The values of
reportToManagerandreportToOriginatorcannot both be set to$trueat the same time. If one is set to$true, the other must be set to$false; otherwise, all delivery status messages will be suppressed.
Instructions
Generate a Report for All Groups with Report to Originator Set to False
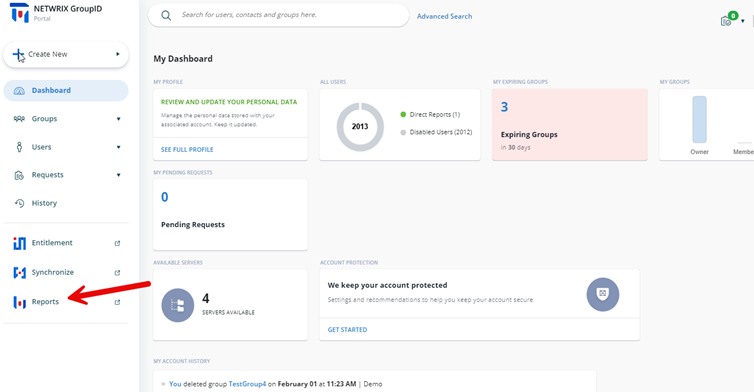
- Open the Netwrix Directory Manager Portal and go to the Reports options.
- Select Group Reports > All groups with report to originator set to False.

- Click Create Report to launch the Create Report wizard.
- On the first page, specify a custom title for your report in the Report Name box if desired. The default title is All Groups with Report to Originator Set to False.
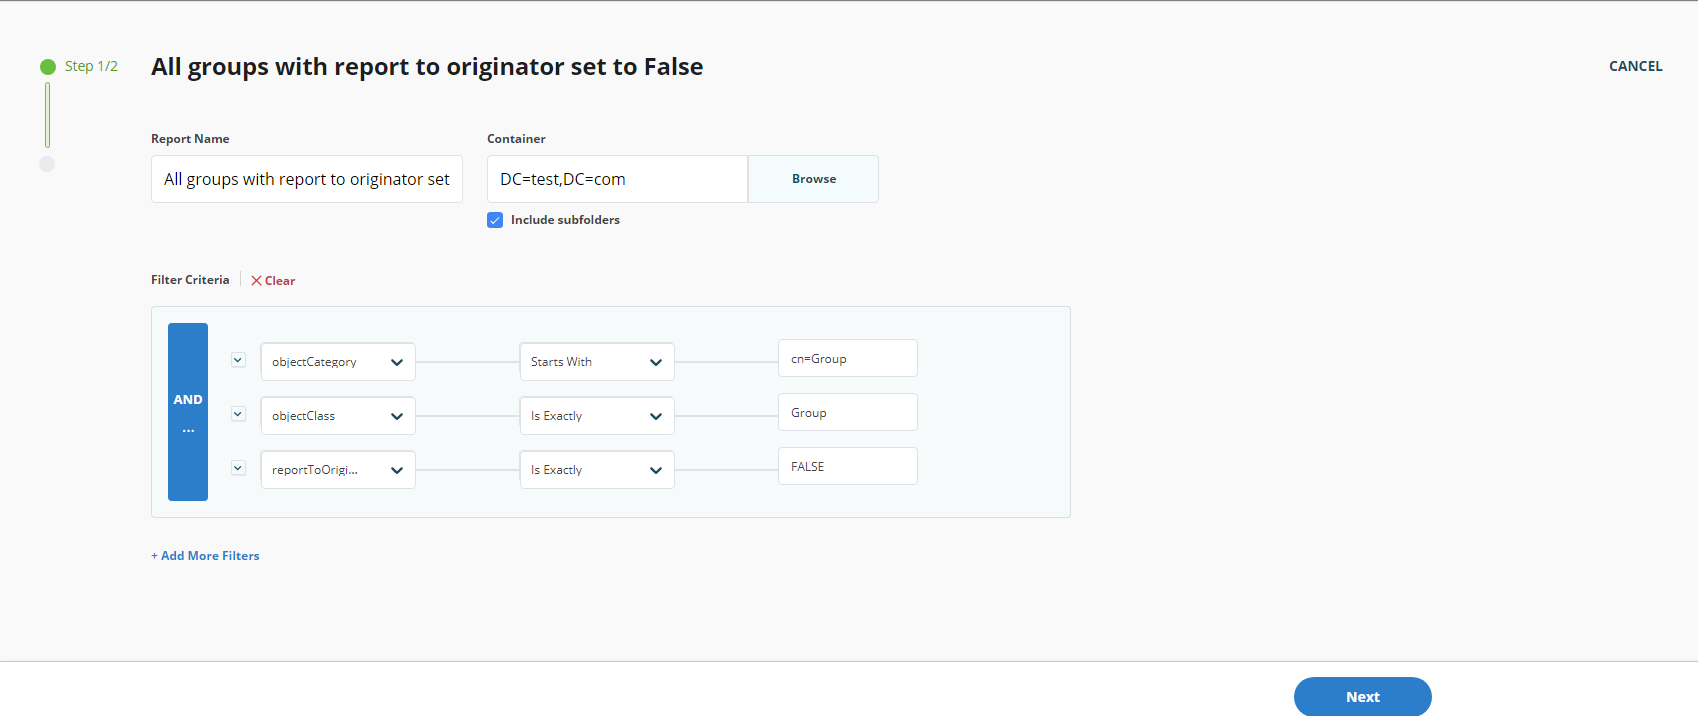
- Click Browse to open the Select Container dialog box and select the required source container. The default selection is the Global Catalog.
- Select the Include sub containers check box to include sub-containers for the selected container.
- In the Filter Criteria section, modify the default LDAP filter as required. To add additional filters, click Add More Filters.
- Click Next.
- In the Fields section, add or remove fields as needed and adjust their order.
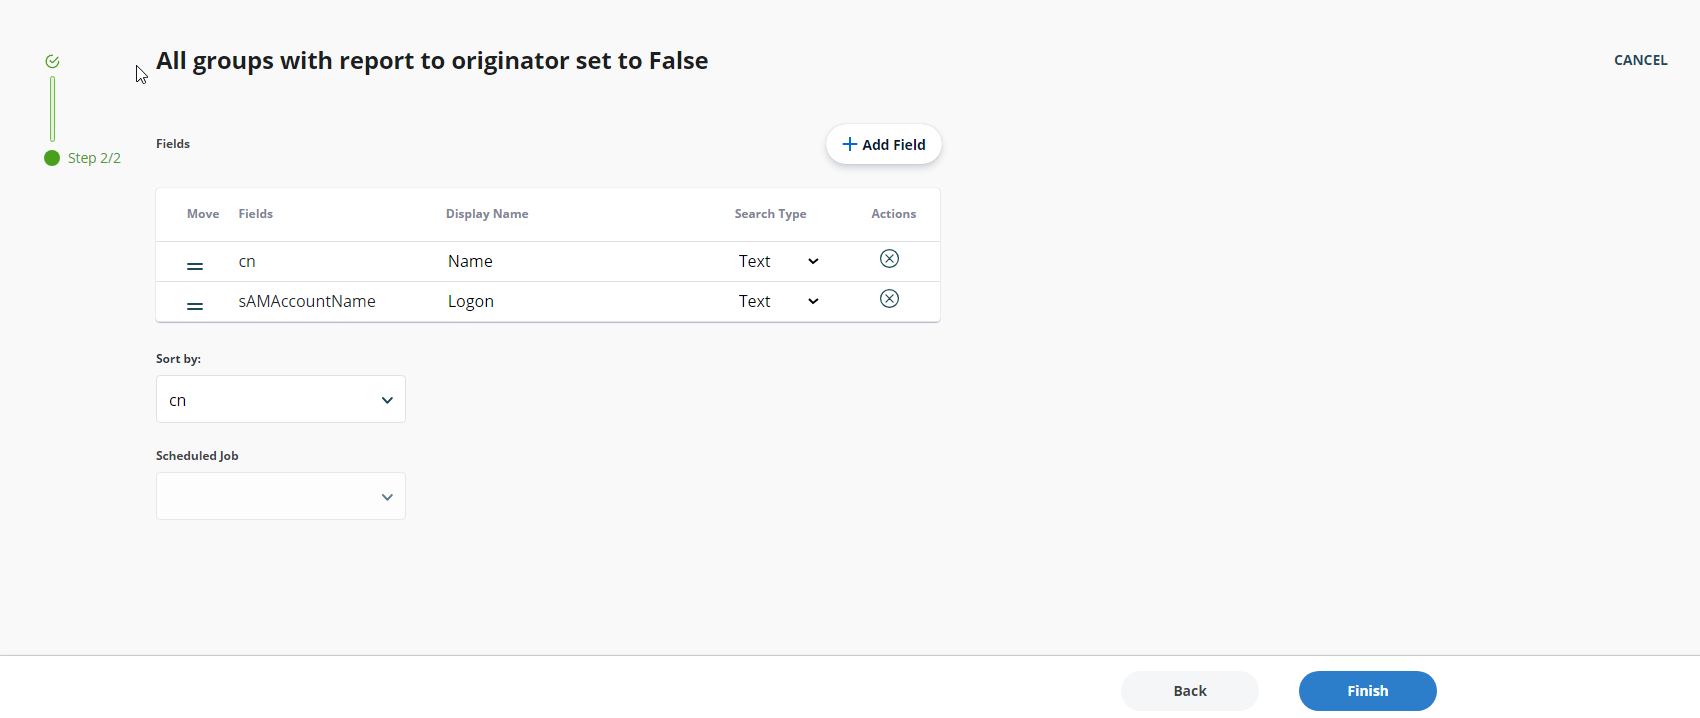
- From the Sort By drop-down list, select the field by which to sort the report results.
- From the Schedule drop-down list, select a schedule for the report if desired. The report will run automatically at the specified time.
- Click Finish.
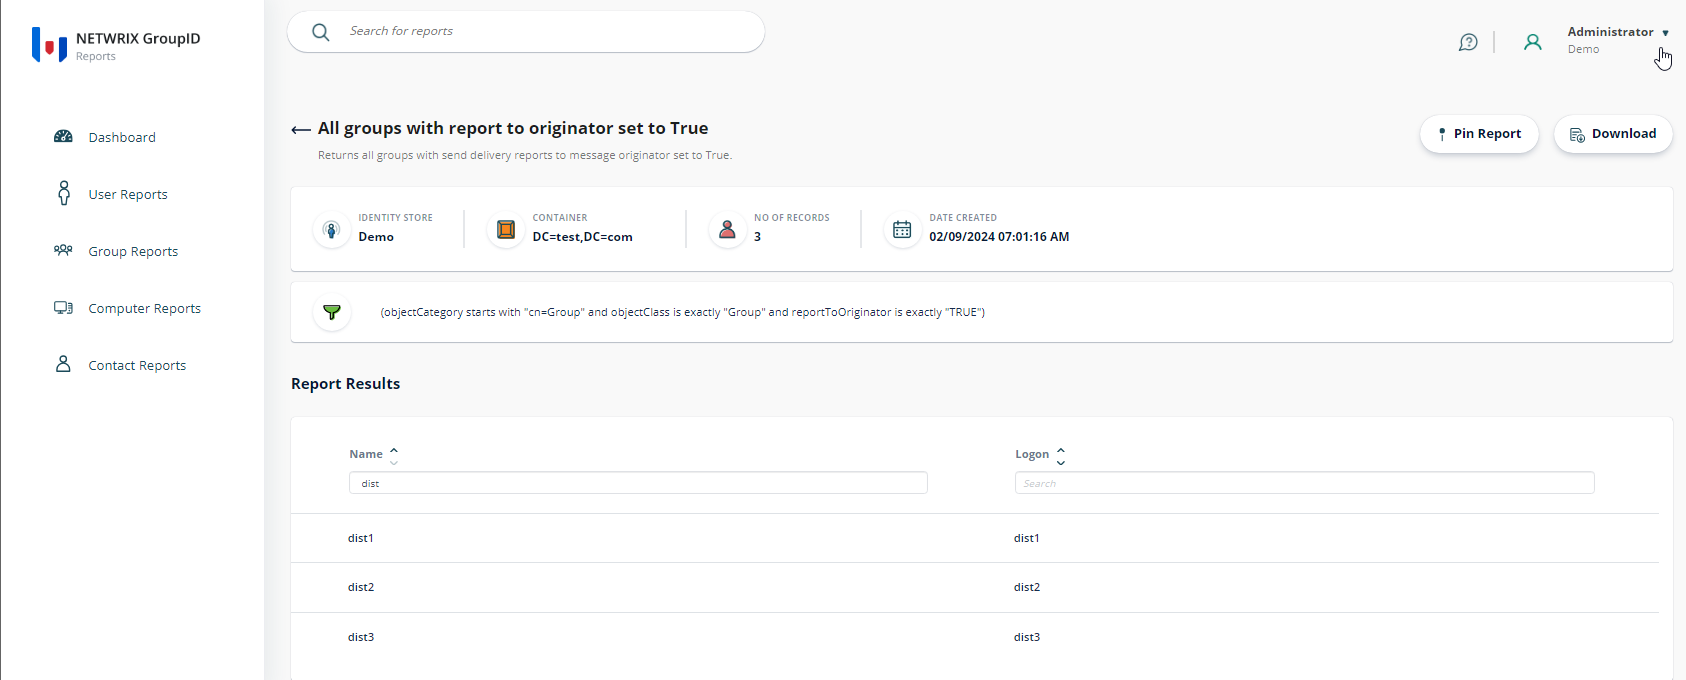
- The report is generated and displayed. The report includes:
- Connected identity store name
- Selected container
- Number of records fetched
- Date the report was created
- Filter applied
- List of report results
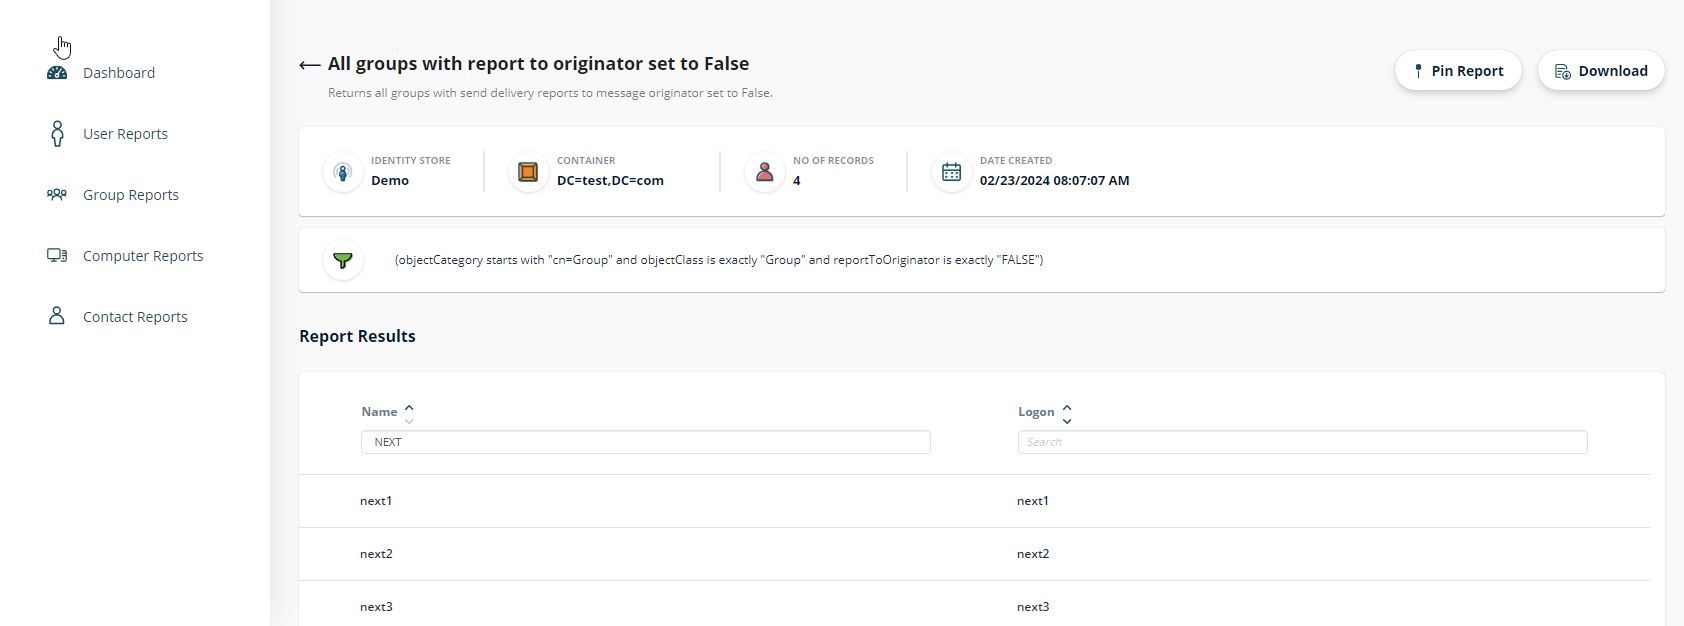
- The report is listed in the template's page. You can create multiple reports from the same template.
- To download the report, click Download and select the format (PDF, Excel, or HTML).
- You can also pin the report to the Dashboard by clicking Pin Report.
Generate a Report for All Groups with Report to Originator Set to True
- Open the Netwrix Directory Manager Portal and go to the Reports options.
- Select Group Reports > All groups with report to originator set to True.
- Click Create Report to launch the Create Report wizard.
- On the first page, specify a custom title for your report in the Report Name box if desired. The default title is All Groups with Report to Originator Set to True.
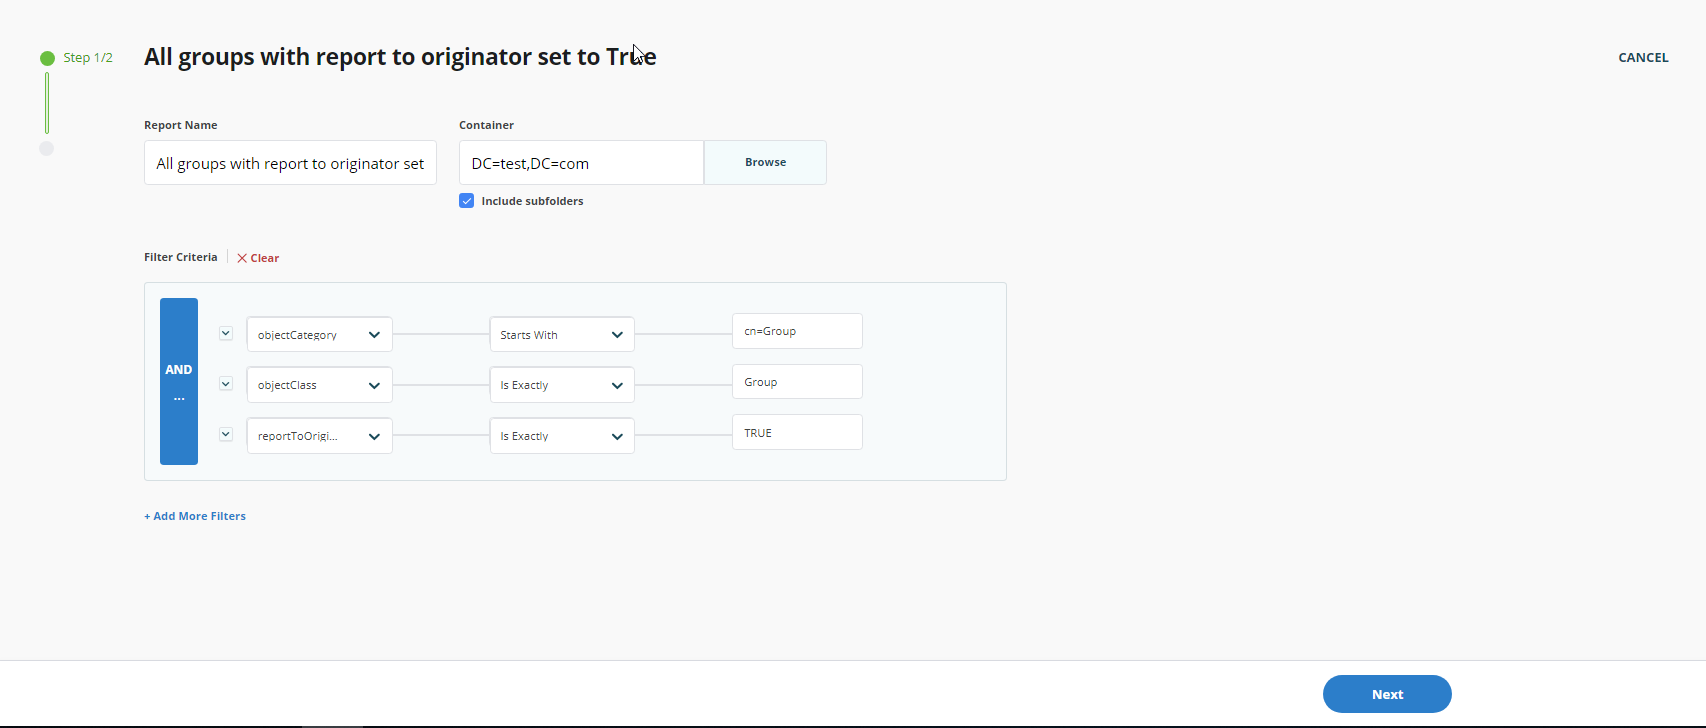
- Click Browse to open the Select Container dialog box and select the required source container. The default selection is the Global Catalog.
- Select the Include sub containers check box to include sub-containers for the selected container.
- In the Filter Criteria section, modify the default LDAP filter as required. To add additional filters, click Add More Filters.
- Click Next.
- In the Fields section, add or remove fields as needed and adjust their order.
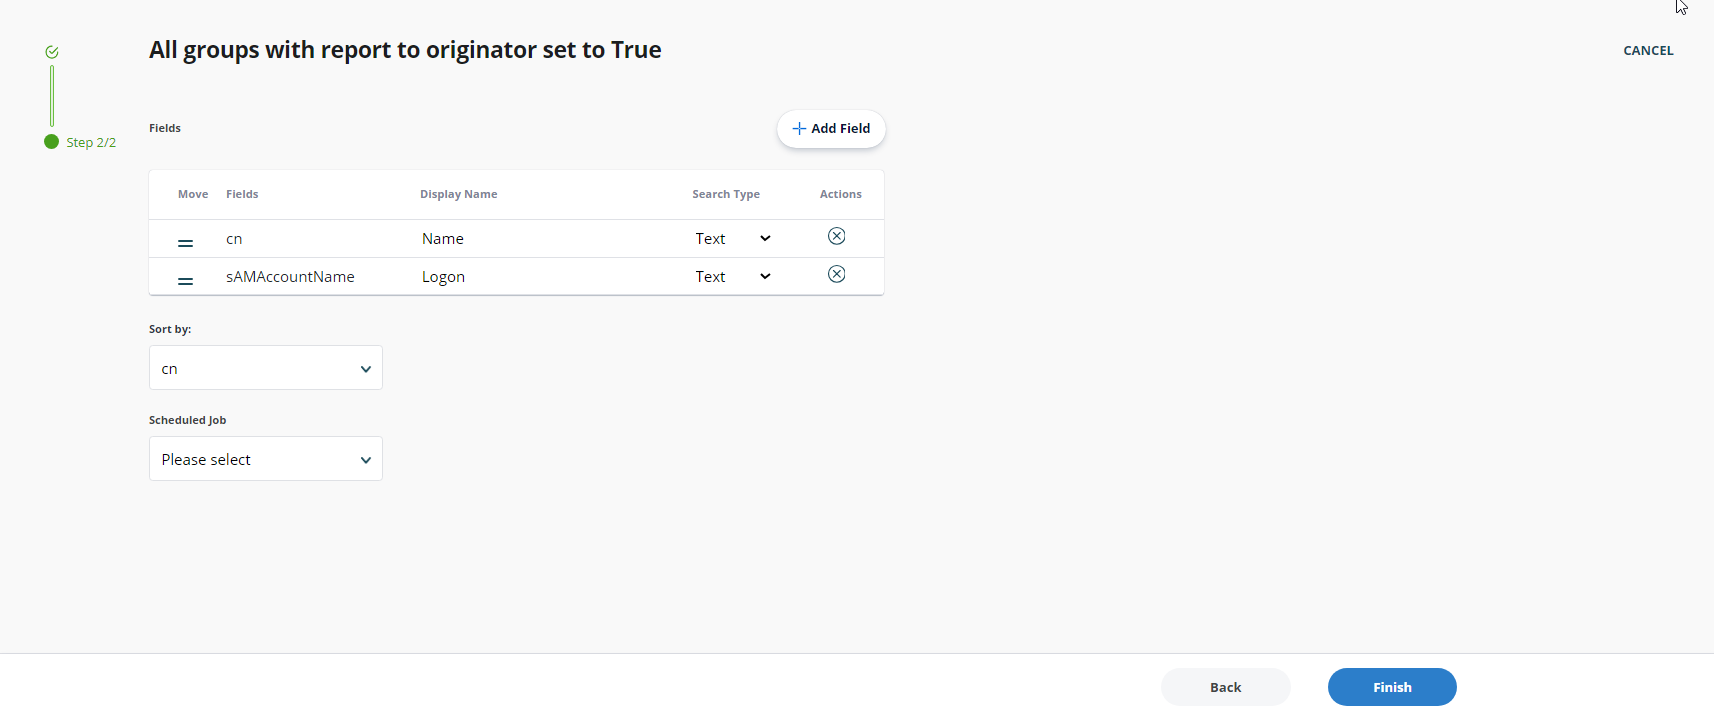
- From the Sort By drop-down list, select the field by which to sort the report results.
- From the Schedule drop-down list, select a schedule for the report if desired. The report will run automatically at the specified time.
- Click Finish.
- The report is generated and displayed. The report includes:
- Connected identity store name
- Selected container
- Number of records fetched
- Date the report was created
- Filter applied
- List of report results
- The report is listed in the template's page. You can create multiple reports from the same template.
- To download the report, click Download and select the format (PDF, Excel, or HTML).
- You can also pin the report to the Dashboard by clicking Pin Report.