Force Users to Validate Their Directory Profiles
Applies To
Directory Manager 11
Overview
Organizations need accurate employee directory profiles, but manual updates are often inefficient and lead to outdated information. Netwrix Directory Manager (formerly GroupID) addresses this by enabling administrators to require users to regularly review and update their own directory profiles. The Profile Validation feature automates this process and helps keep user information current.
Instructions
Configure User Profile Validation for an Identity Store
- In the Admin Center, click the Identity Stores node.
- On the Identity Stores tab, go to the settings of the required identity store.
- On the Configurations tab, click the Profile Validation option in the left pane.
- In the Profile Criteria area, specify a group to apply profile validation to. Members of this group must validate their profiles using the portal.
- In the User’s Profile Validation Life Cycle box, set the profile validation life cycle period. The default is 100 days, meaning users must validate their profiles once every 100 days. When a user validates their profile, the current cycle closes and the next cycle begins for that user.
- In the Extension Period Settings area, specify the number of days to grant as an extension period to expired users.
- In the Reminder Notification Settings area, add or edit the email notification information. These notifications remind users to validate their profiles.
- Click OK.

Define a User Life Cycle Job for the Identity Store
The profile validation feature is monitored by the User Life Cycle job. This job checks the profile validation dates for users in the specified group, sends reminder notifications, and expires users who do not validate their profiles within the given period.
- In the Admin Center, click the identity store node and open the properties of the required identity store.
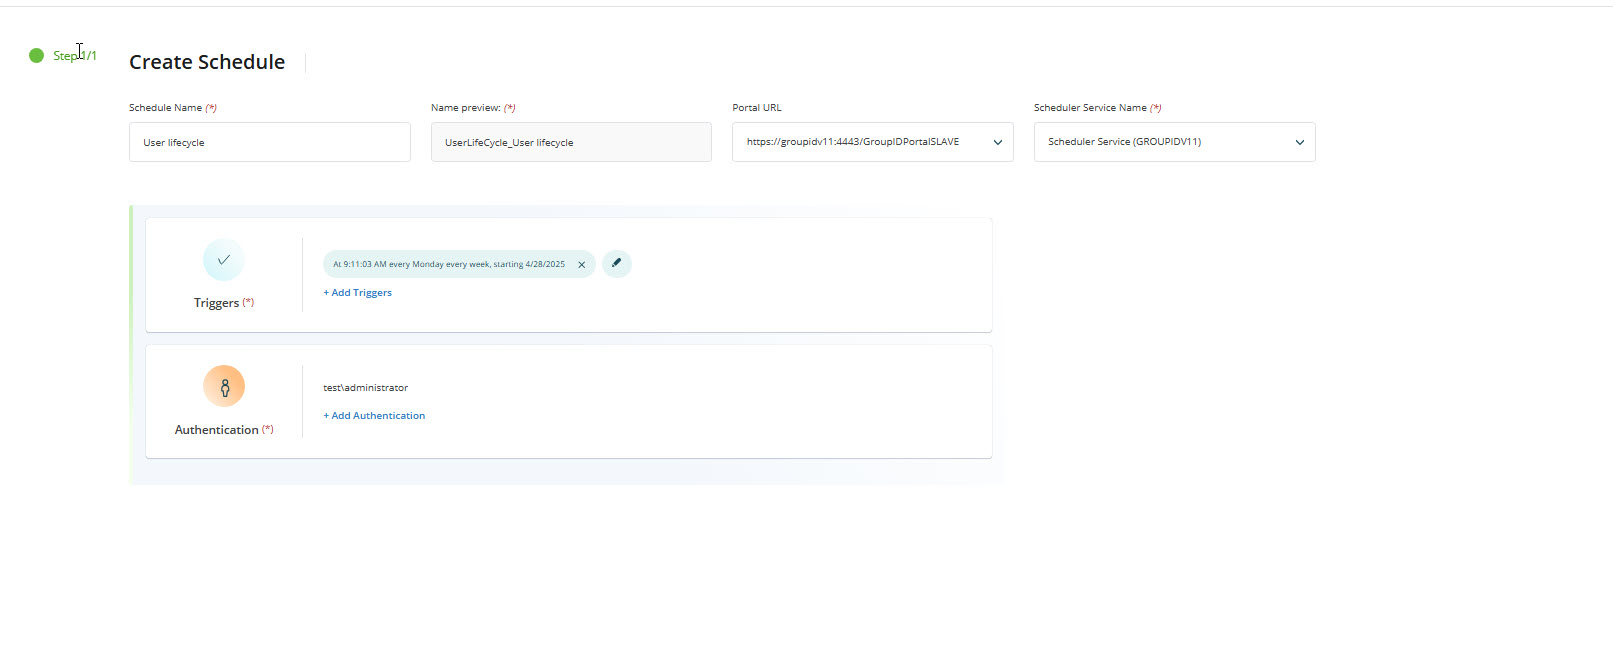
- Click the Schedules node and create a new schedule for the User Life Cycle Job.
- Provide a schedule name and portal URL.
- Set the trigger time and authentication for the scheduled job.
- Click Create Schedule and save the changes.
Specify Schema Attributes for Validation
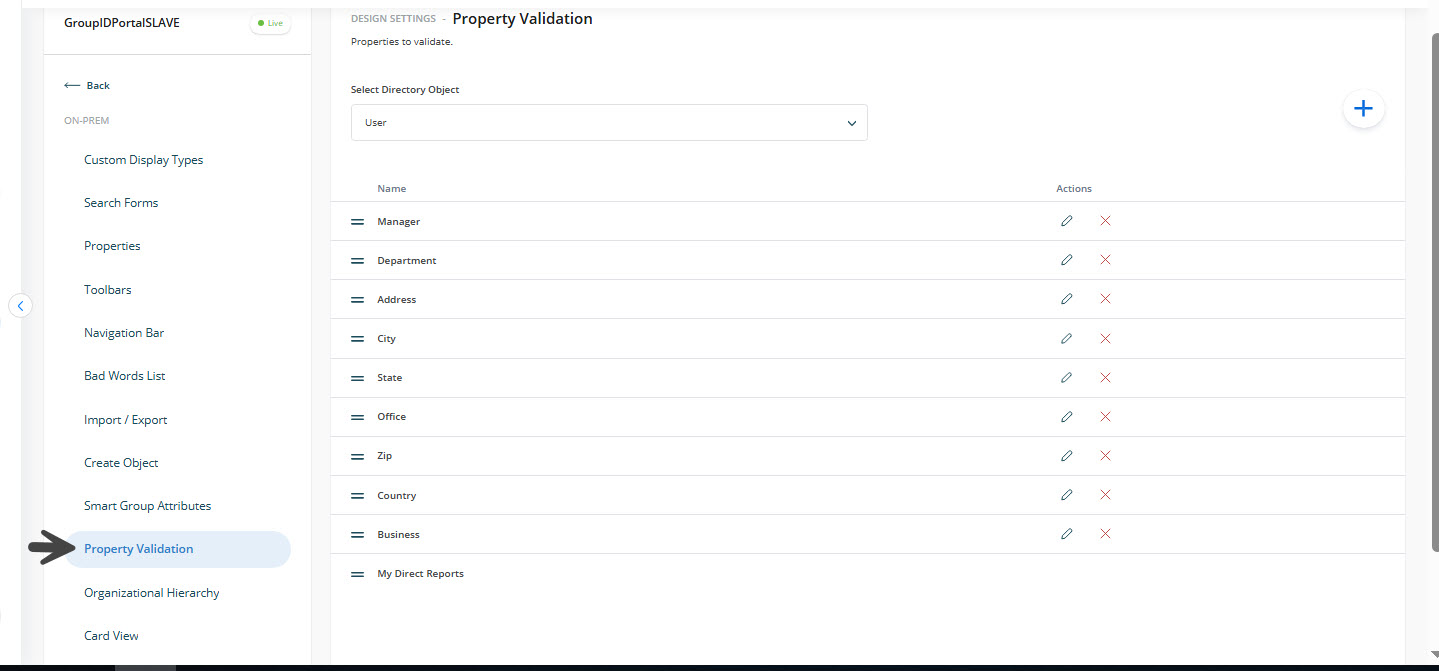
- In the Admin Center, click Applications and go to the settings of the portal.
- Select an identity store to specify fields for profile validation.
- Click the Property Validation tab.
- From the Select Directory Object list, select User. All fields currently available for profile validation in the portal are listed under Display Name.
- You can add, edit, or remove fields as needed.
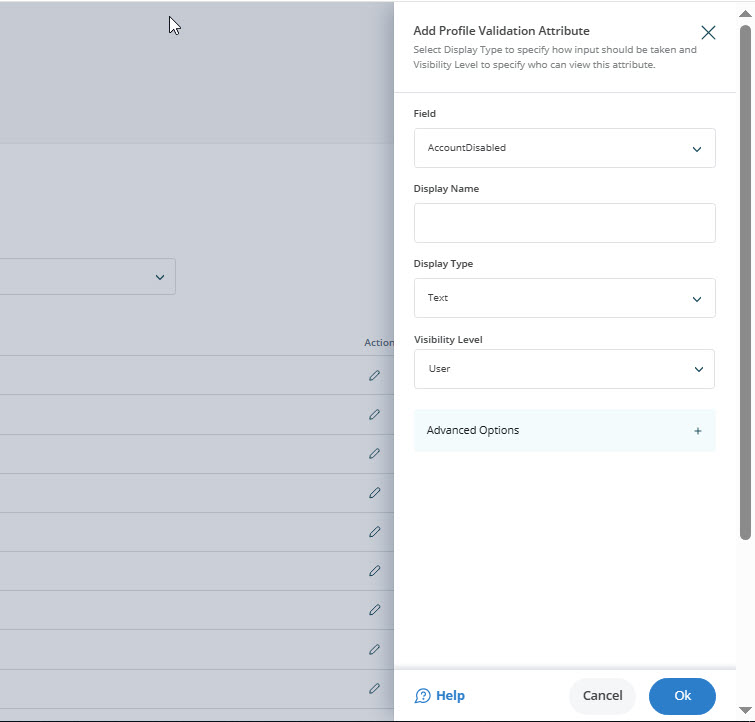
- To add a new field (schema attribute) for profile validation, click the + icon.
- Use the Field(s) box to specify a schema attribute.
- In the Display Name box, specify a name to display as the field’s label in the portal.
- From the Display Type drop-down list, select a display type for rendering the attribute(s) in the portal.
- From the Visibility Role drop-down list, select a security role. The field will be visible to users of the selected role and to roles with a higher priority value.
- Use the Exclude Role option to exclude a higher priority role or roles from seeing the field.
- Specify a tooltip for the field, the maximum number of characters the field can store, and other attributes as needed.
- Click OK to close the dialog box.
- Click Save to apply the changes.
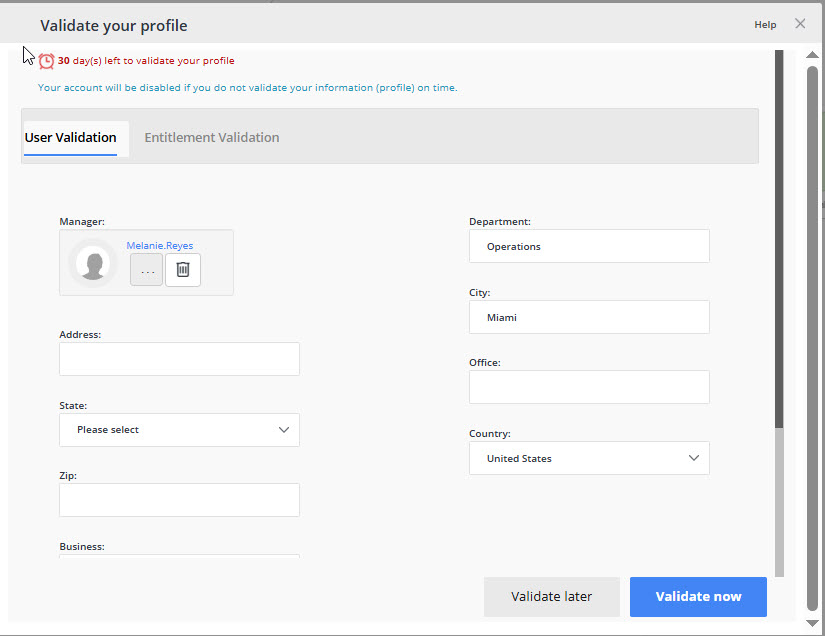
Profile Validation in the Portal
Directory Manager provides multiple alerts and reminder notifications to prompt users to validate their profiles by a certain date. The My Profile card on the portal dashboard changes color to indicate the warning level.
- Launch the Directory Manager portal.
- Click the My Profile card on the dashboard to open the Validate Profile Properties window.
- Update the attributes the administrator has exposed for profile validation. In the default portal template, you can:
- Update office information, such as address and contact numbers.
- Specify or change your primary manager.
- Transfer your direct reports to another manager.
- Terminate your direct reports.
- After verifying and updating the information, click the Validate Now button.
Grant an Extension Period to Expired Users
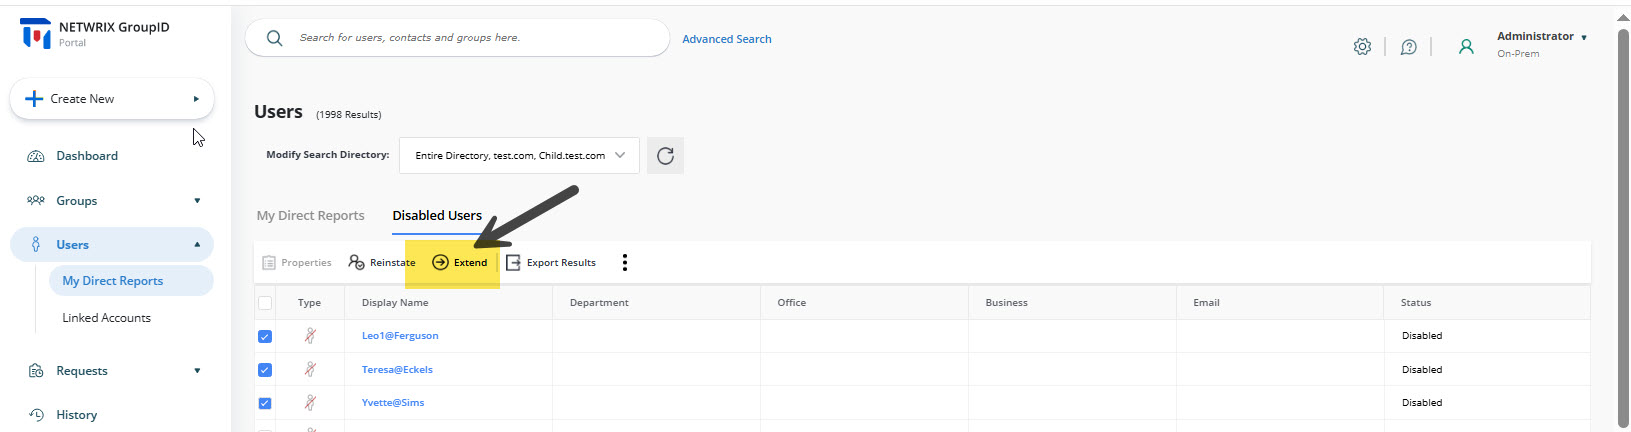
Directory Manager expires users who do not validate their profiles within the required time frame, disabling their accounts in the directory. Expired users can request the administrator or Helpdesk to temporarily unlock their accounts and grant an extension period. If users do not validate their profile information within the extension period, Directory Manager expires them again and notifies their managers by email. To reactivate these accounts, managers must send a request to Helpdesk.
- Log in to the Directory Manager portal.
- Click Users in the left pane and select My Direct Reports.
- Click the Disabled Users tab.
- Select an expired user and click Extend on the toolbar. The user's account is temporarily unlocked for the duration specified in profile validation configurations. See Step 1 for configuration details.