Uninstalling Directory Manager
Overview
This article explains how to uninstall previous versions of Netwrix Directory Manager (formerly GroupID) to upgrade to the latest version. It also provides instructions for completely removing Directory Manager from your machine.
Instructions
Follow these steps to uninstall Netwrix Directory Manager for an upgrade or to completely remove it from your machine.
NOTE: Before you uninstall Directory Manager, ensure that the logged-in user is a member of the local Administrators group on the machine. Make sure the Directory Manager portal is fully closed before you begin the uninstall process.
Uninstall Netwrix Directory Manager to Upgrade to a Newer Version
- Double-click the
setup.exefile in the Directory Manager installation package to launch the Directory Manager Installer.
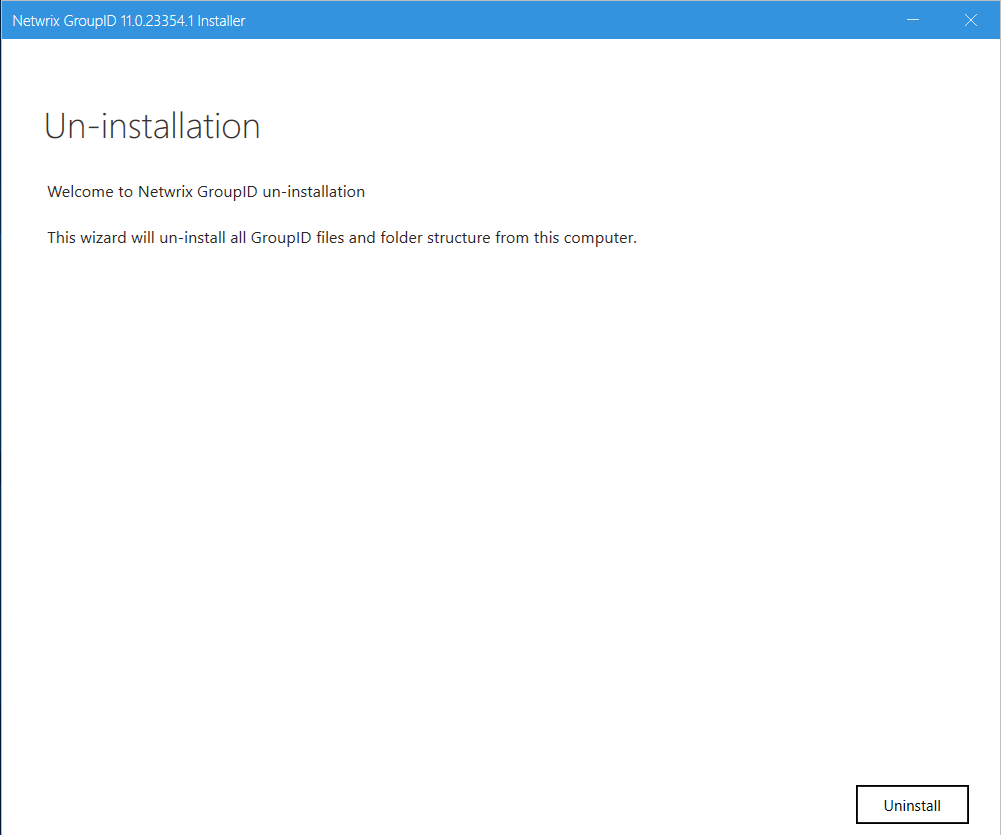
- Click Uninstall Directory Manager to remove the application files via Programs & Features in Control Panel.
- Proceed with the upgrade to the newer version of Directory Manager.
- Click the Install Directory Manager link on the Directory Manager Installer to install the latest version.
- After installation, run the Upgrade wizard to make earlier version data compatible with the new version.
Completely Uninstall Directory Manager from the Machine
- Click Uninstall Directory Manager on the Directory Manager Installer to uninstall the application files from your computer.
- Remove the following components to ensure complete uninstallation:
- Directory Manager installation directory
- Other relevant directories
- Directory Manager DLLs
- Registry keys
- Services files
- Directory Manager application pool
- Directory Manager certificates
Remove the Installation Directory, Other Directories, DLLs, Registry Keys, and Services Files
On the Directory Manager machine, complete the following cleanup steps:
-
Delete the installation directory: navigate to
X:\Program Files\Imanami(where X represents the installation drive) and delete the directory namedDirectory Manager [version](for example,Directory Manager 11). -
Delete other relevant directories: right-click the Windows button, select Run, type
%ALLUSERSPROFILE%\Imanami, press Enter, and delete theDirectory Managerfolder from the location referenced in the command. -
Delete the Directory Manager DLLs: navigate to
C:\Windows, search for all DLL files with names starting withNetwrix(typeNetwrix*.dllin the Windows Explorer Search box to find them), and delete these files. -
Delete the registry keys: open Registry Editor and delete the following registry key (for Directory Manager 11.0):
HKEY_LOCAL_MACHINE\SOFTWARE\Imanami\GroupID\Version 11.0 -
Delete the services files: navigate to
C:\Windows\Microsoft.NET\Framework64\v4.0.30319\Temporary ASP.NET Filesand delete therootfolder.
Remove IIS Portal Files, the Application Pool, and Certificates
On the Directory Manager machine, open the Internet Information Services (IIS) console by typing inetmgr in the Windows Run dialog box, then complete the following:
- Remove the portal files: under the GroupIDSite node in the console tree, locate the portals you have created using the portal names, and delete each portal by right-clicking it and selecting Remove from the shortcut menu. Then navigate to
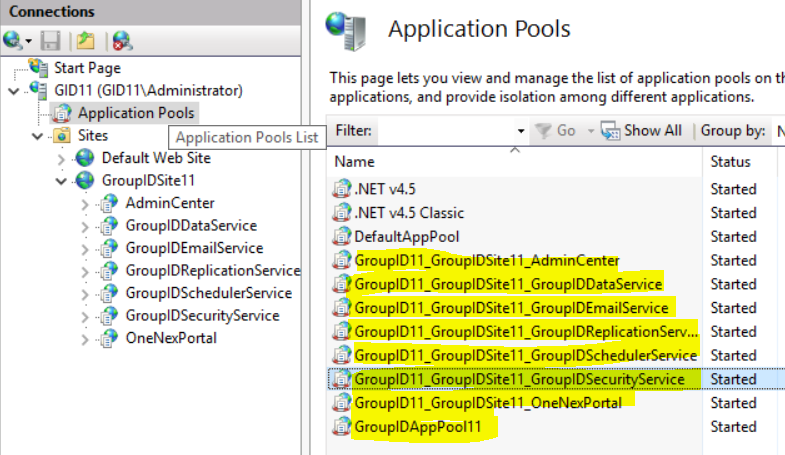
C:\Windows\Microsoft.NET\Framework64\v4.0.30319\Temporary ASP.NET Filesand delete each portal folder one by one. - Remove the application pool: expand the <machine name> node in the console tree and click Application Pools. On the Application Pools page, delete Directory Manager App Pool 11 and all other pools that start with GroupID11_GroupIDSite11 prefixes.
- Remove the certificates: click the <machine name> node in the console tree. On the Features View tab, select Server Certificates in the IIS section, then delete these certificates bound to GroupIDSite (the site deploying Directory Manager Data Service):
- GroupIDSecurityService
- Netwrix Directory Manager Certificate
NOTE: Do not remove these certificates if another Directory Manager version is installed on the machine.