Support Tools
Use the Support Tools page to create a Configuration Report that you can send to Netwrix Support, or to directly edit Password Policy Enforcer's configuration settings.
Configuration Report
Create a Configuration Report and e-mail it to Netwrix Support if Password Policy Enforcer is not working as expected. The Configuration Report will help us to diagnose the problem.
Follow the steps below to create a Configuration Report.
Step 1 – Click the Password Policy Server item to display the Password Policy Server view.
Step 2 – Click Support Tools in the right pane of the management console.
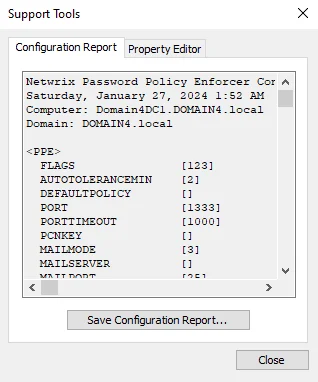
Step 3 – Click Save Configuration Report...
Step 4 – Enter a file name, then click Save.
Create Configuration Report as Text or HTML for Auditors
As of the release of Password Policy Enforcer 10.2, there is currently no way to export reports. However, you can export Password Policy Enforcer's domain configuration with the following command:
ldifde -f PPE10.1.txt -d "CN=Password Policy Enforcer 10.0,CN=System,DC=netwrix,DC=net" -l url,wWWHomePage
You will need to change the new domain name to match your domain. Your user, group, and OU assignments will not be valid in the new domain, so they will need to be updated after the import in the new domain. This is easily done after the import from the PPE Management Console in the Policy Properties page for each policy. See the Assigning Policies topic for additional information. Your license will also most likely need to be imported into the new domain. This is done from the About tab on the PPS Properties page.
Follow the steps below to edit the edit the PPE10.1.txt file .
Step 1 – Open the PPE10.1.txt file in a text editor.
Step 2 – Replace changetype: add with changetype: modify
Step 3 – Add the line replace: wWWHomePage above the line starting with wWWHomePage:
Step 4 – Add a line with just a "-" (hyphen) character below the line starting with wWWHomePage:
Step 5 – Add the line replace: url above the line starting with url::
Step 6 – Add a "-" hyphen near the end of the file, below the last line in the URL attribute
Step 7 – Open ADSIEdit or AD Users and Computers in the target domain and clear the URL and www wWWHomePage attributes for the Password Policy Enforcer configuration object (CN=Password Policy Enforcer 10.0,CN=System).
Step 8 – Import configuration with the following command:
ldifde -i -f PPE10.1.txt
Check URL and wWWHomePage attributes in ADSIEdit or AD Users and Computers before opening PPE Management Console to ensure that configuration has been maintained.
Property Editor Tab
The Property Editor allows you to directly edit the Password Policy Enforcer configuration. You should only use the Property Editor if instructed to by Netwrix Support.
CAUTION: Only configure the settings on the Property Editor tab if instructed to do so by Netwrix Support.
Follow the steps below to open and configure the Property Editor.
Step 1 – Click the Password Policy Server item to display the Password Policy Server view.
Step 2 – Click Support Tools in the right pane of the management console.
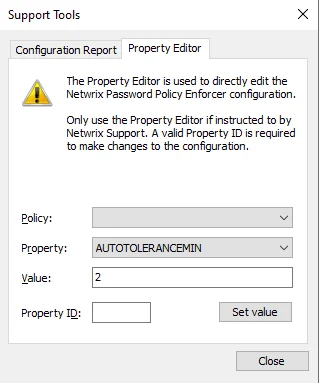
Step 3 – Click the Property Editor tab.
Step 4 – Select the desired policy from the drop-down list.
Step 5 – Select property from the drop-down list.
Step 6 – Enter a value directly related to the Property ID.
Step 7 – Provide a valid Property ID to make changes in the configuration.
Step 8 – Click Set value.
Step 9 – Click Close to save the updates.