Configuring the Password Policy Client
The Password Policy Client is self-configuring and doesn't require manual configuration in most cases. See the Install Password Policy Enforcer Client topic for additional details. You may need to manually configure the Password Policy Client if:
- You want to install it in a disabled state to be enabled later.
- You want to change the display settings for small screens.
- Password Policy Client displays policy messages in the wrong language.
- Default communication settings aren't suitable (for example, if you change the default Password Policy Server Port).
Password Policy Enforcer includes an administrative template to help configure the Password Policy Client. You can use Active Directory GPOs to configure many computers, or the Local Group Policy Editor to configure one computer. The Password Policy Client configuration is stored in the HKLM\SOFTWARE\Policies\ANIXIS\Password Policy Client\ registry key.
Install the Password Policy Client Administrative Template
Step 1 – Connect to any Domain Controller where you have Password Policy Enforcer installed and have the group policy management console available.
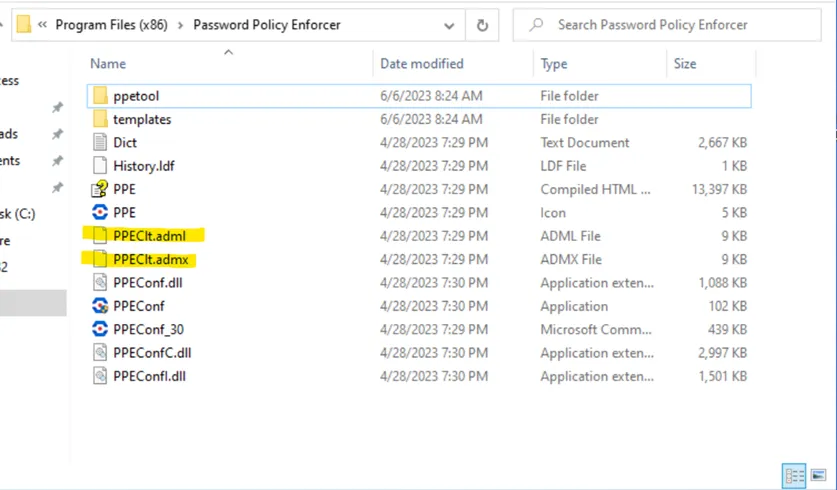
Step 2 – Go to Password Policy Enforcer install directory (C:\Program Files\Netwrix\Password Policy Enforcer) and copy the PPEClt.adml and PPEClt.admx files (highlighted in yellow):
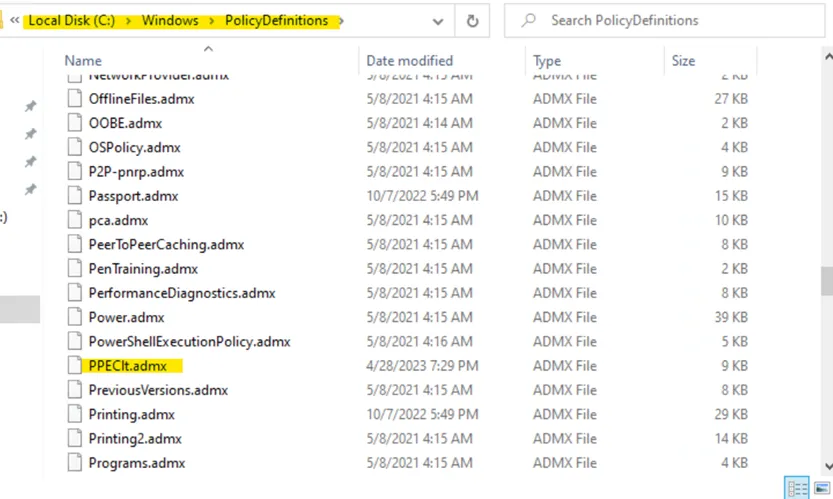
Step 3 – Go to C:\Windows\Policy Definitions and paste the .admx file in the root of this folder.
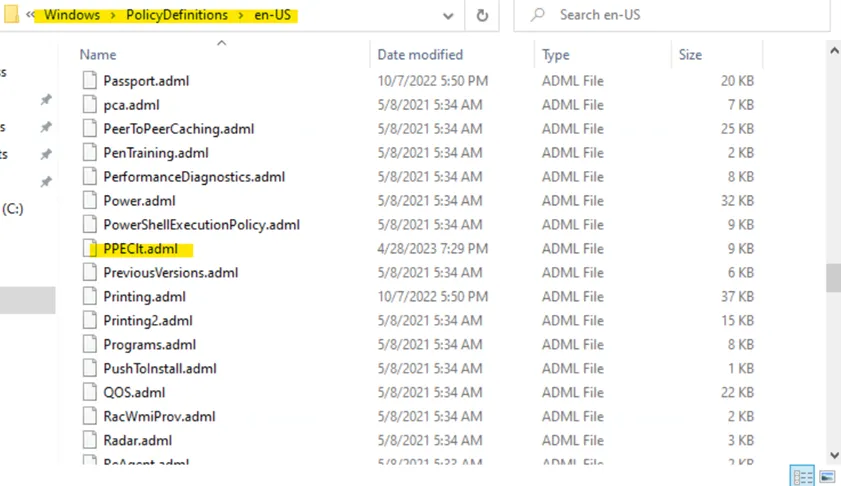
Step 4 – Go to C:\Windows\Policy Definitions\en-US and paste the .adml file in the root of this folder.
Step 5 – Open Group Policy Management console and check if you have a GPO created for Client. If not, see the topic's section for additional information.
Step 6 – In the left pane, navigate to Forest: <forest_name> > Domain >
<domain_name>, right-click <OU_name> and select Create a GPO in this domain and Link
it here.
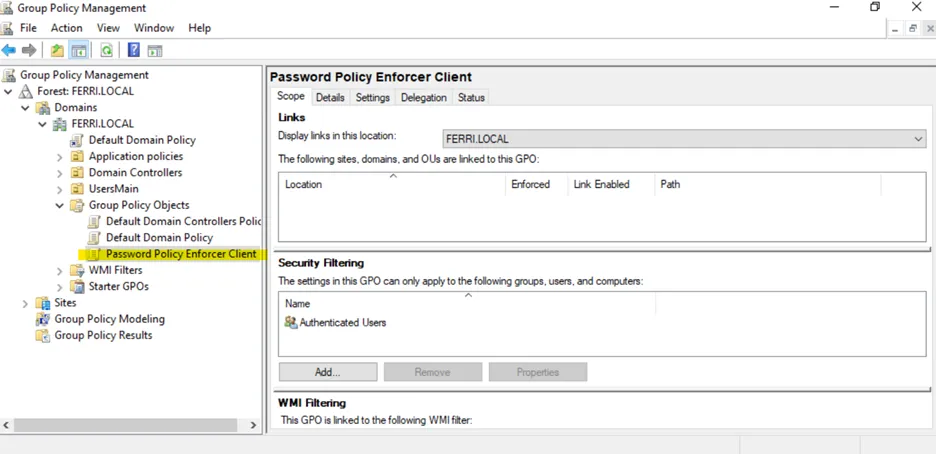
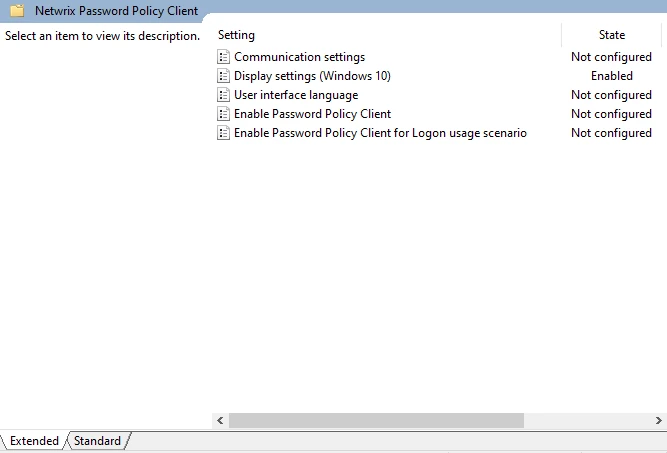
After the GPO is configured, this view is available:
Step 7 – Right-click the newly created GPO and select Edit from the pop-up menu.
Step 8 – Expand Computer Configuration > Policies > Administrative Templates > Netwrix Password Policy Enforcer
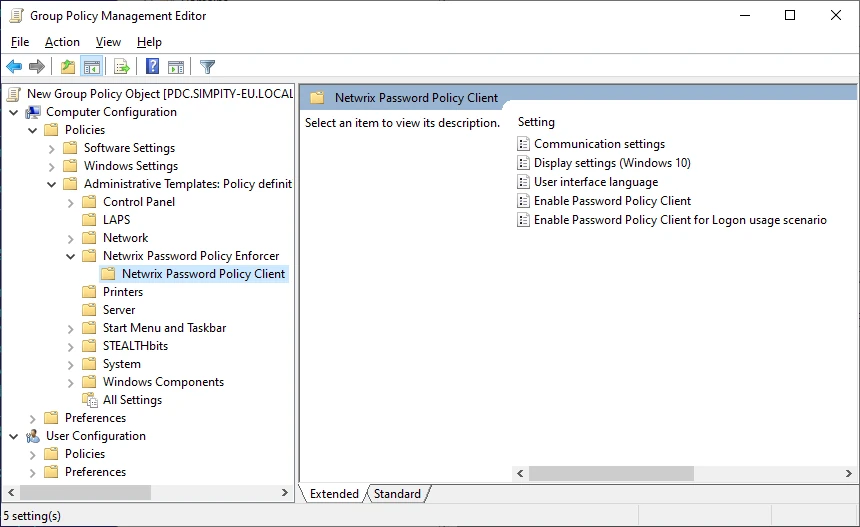
Step 9 – Click Netwrix Password Policy Client to open a list of modification settings.
Step 10 – Select the one you need, then modify and save it.
Changing the Default Display Settings
The Windows 10 and 11 Change Password screen has less space for the Password Policy message than earlier Windows versions. Users may need to scroll to see the message if their screen is small, or if their computer is set to use large fonts.
The Password Policy Client for Windows 10 and 11 maximizes the available screen space by hiding non-essential user interface elements on small screens. It can also display the Password Policy message in a message box to draw attention to the password policy.
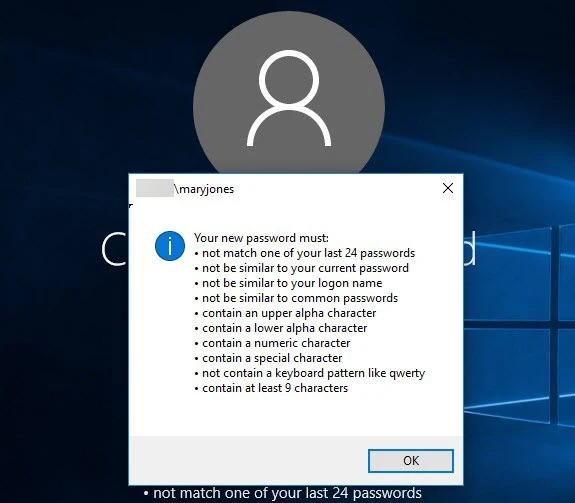
You can change the default display settings to control which user interface elements are hidden, and the point at which they are hidden. The display of the Password Policy message box is also configurable.
Follow the steps to change the default display settings for the Password Policy Client on Windows 10 and 11.
Step 1 – Use the Group Policy Management Console (gpmc.msc) to display the GPOs linked at the domain level.
If you aren't using Active Directory, then open the Local Group Policy Editor (gpedit.msc) and skip step 2.
Step 2 – Right-click the Password Policy Client GPO, then click the Edit... button.
Step 3 – Expand the Computer Configuration, Policies (if visible), Administrative Templates, Classic Administrative Templates (ADM), Password Policy Enforcer, and Password Policy Client items.
Step 4 – Double-click the Display settings (Windows 10) setting in the right pane of the Group Policy Management Editor.
Information about each option is shown in the Help box.