Changes in the Server Manager
Navigation
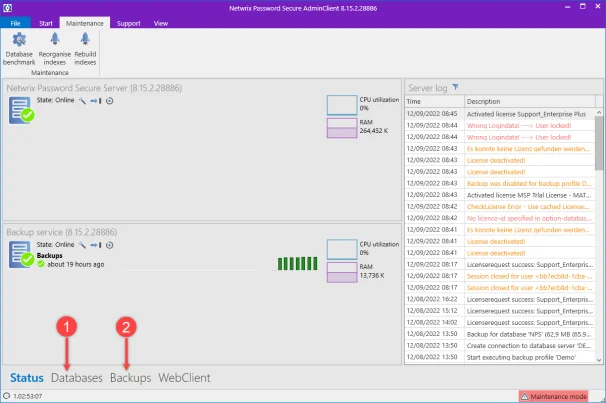
In the previous on-prem version, there are the modules Databases (1) and Backups (2).
In the new MSP version these have been replaced by the modules Customers (1) and Cost Overview (2).
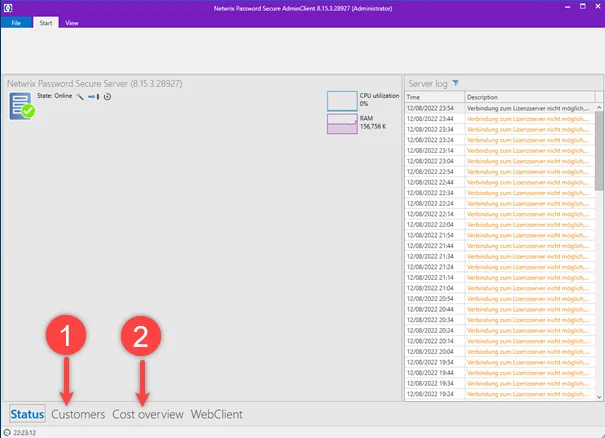
In the MSP version, you will find the individual customer databases under the Customers module.
NOTE: The Backup module has been removed, because Netwrix Password Secure's own backup is not suitable for environments with multiple customer databases. As a Managed Service Provider, you must back up your customer databases yourself using appropriate measures.
The Status and Web Application modules are identical in both versions.
Cost overview module
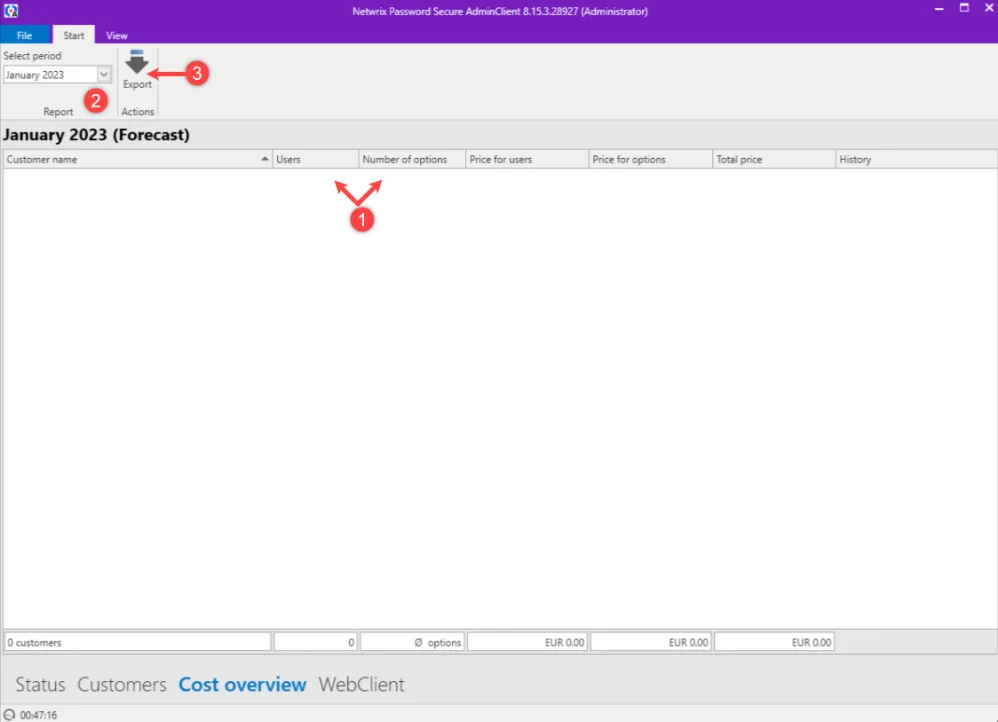
In the Cost overview module, all billed customers are displayed. Here you can see all changes in the number of users and options (1) for the current month (forecast) and the past months at a glance. This view can be filtered by month (2). If you use your own billing system, you can export the displayed or filtered values as a CSV file (3).
Customers module
Creating a new customer
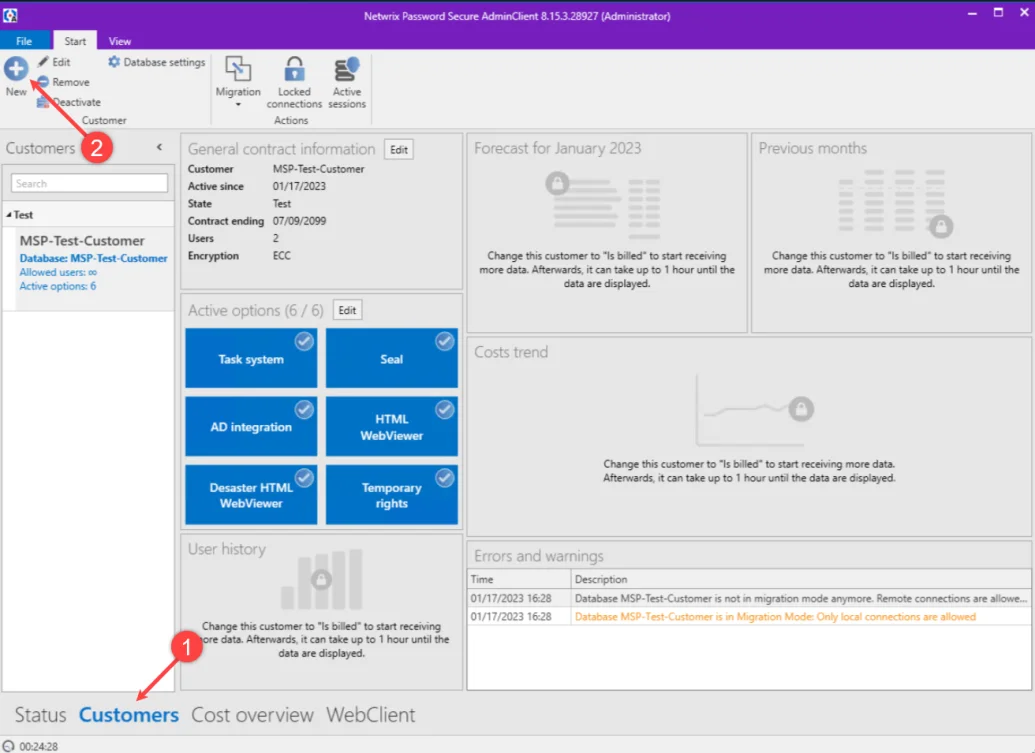
Creating a new customer is done via the Customers module (1). Here, click on New (2) in the upper left corner. This applies both to customers in a test phase and to customers who are to be billed immediately.
When creating a new customer, the customer name is specified under General (1).
If (2) is not checked, a test customer is created without billing. This is then a customer in the test phase. If (2) is checked, a customer will be created who will be charged by Netwrix from the current month.
At (3) a date is automatically entered that is four weeks in the future. This date can be changed by the managed service provider for test customers as well as billed customers, for example to limit the test period or if the date of a possible termination of a billed customer should be known in advance.
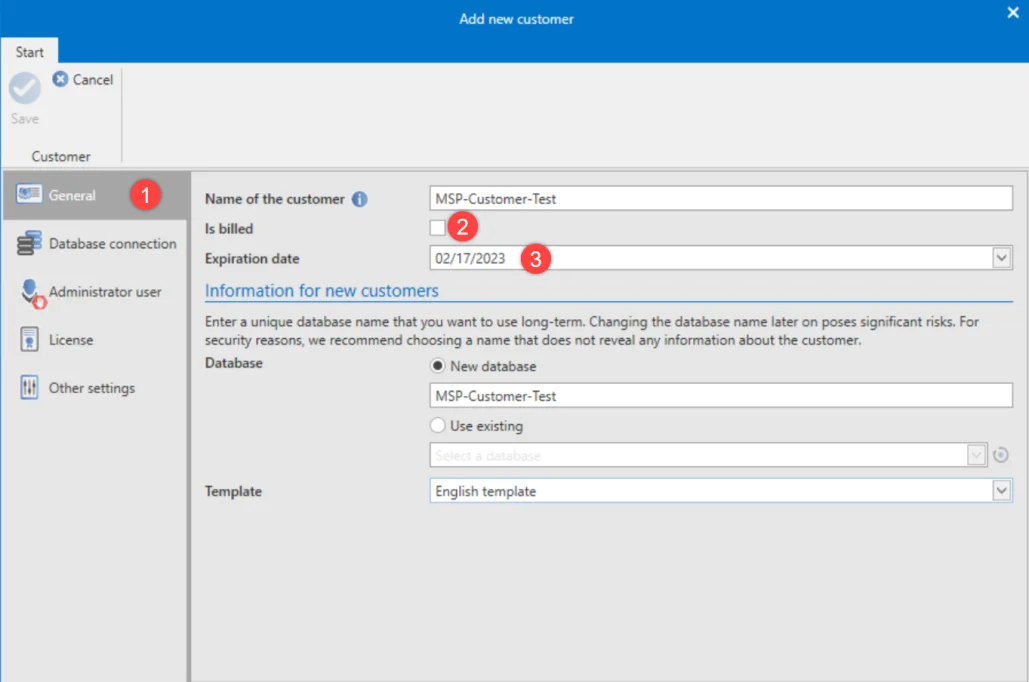
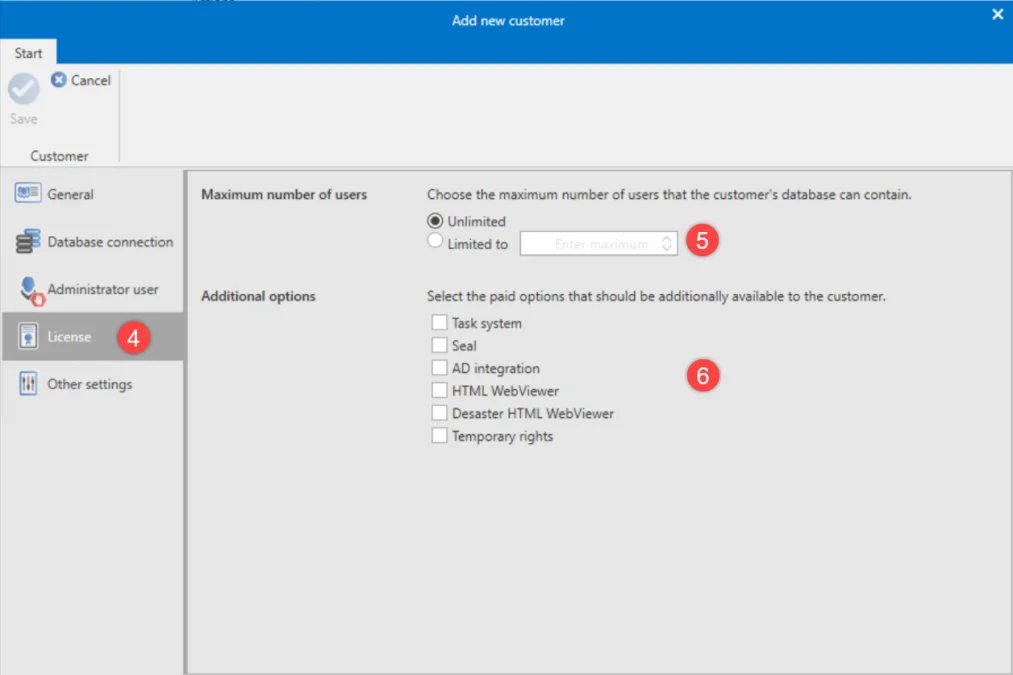
Under License (4) the maximum number of users can be specified. Here you have the possibility
(5) to limit the number up to which new users can be created or not. The options booked by the customer (6) can be activated or deactivated by ticking them off. All other settings are identical to the on-prem version.
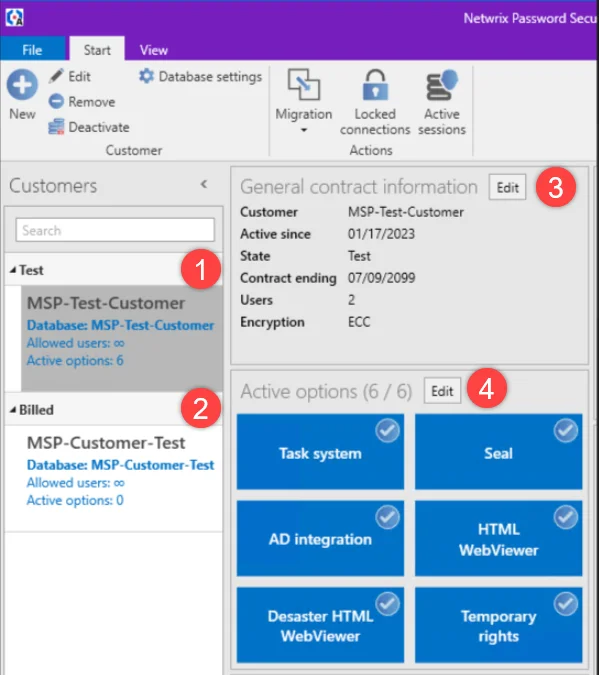
After saving, the test customers are displayed under Test (1) and the customers to be billed under Billed (2). When you click on a (test) customer, you will see the associated
information and activated options. By clicking the button Edit (3 + 4) you can make
adjustments can be made. The contract data can be adjusted by Edit (3).
The options can be activated or deactivated by Edit (4).
Test customer view
In the view of a test customer, the general contract data can be edited under the general contract information under Edit (1) and the test customer can be converted to a billed customer. Billing customers can no longer be converted back to test customers.
Under Active options, options can be selected and deselected with Edit (2). For test customers, no billing data is available in the Forecast, Last Months and Cost History fields.
Since no costs are incurred for test customers, no information is displayed here under User history (3), Forecast, Last months and Cost history.
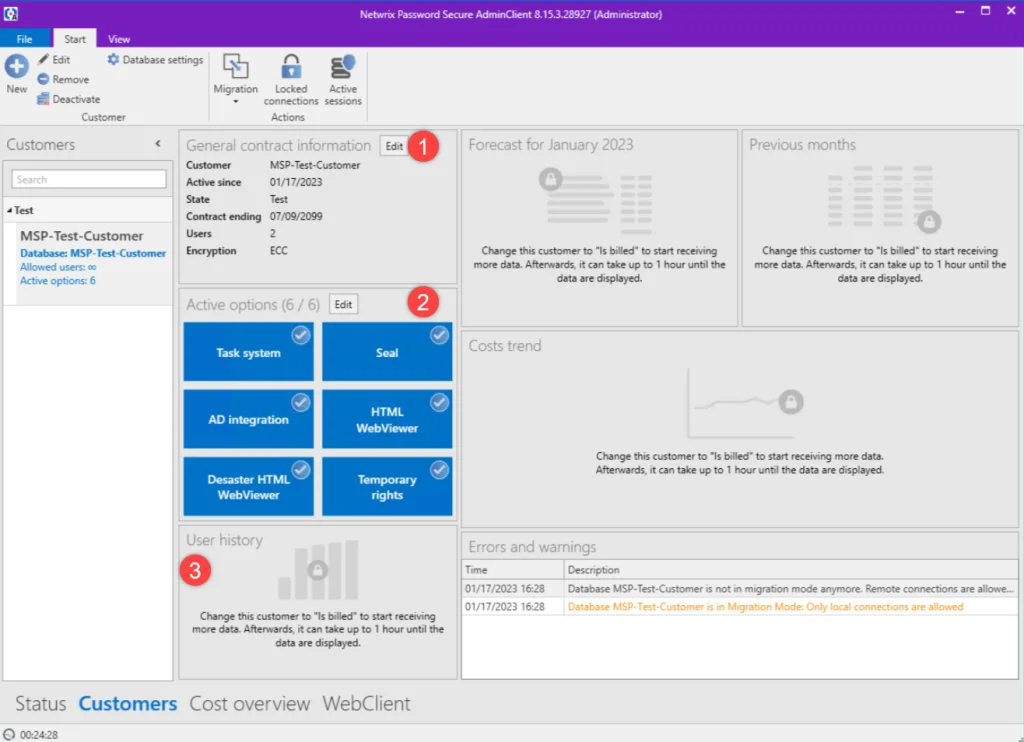
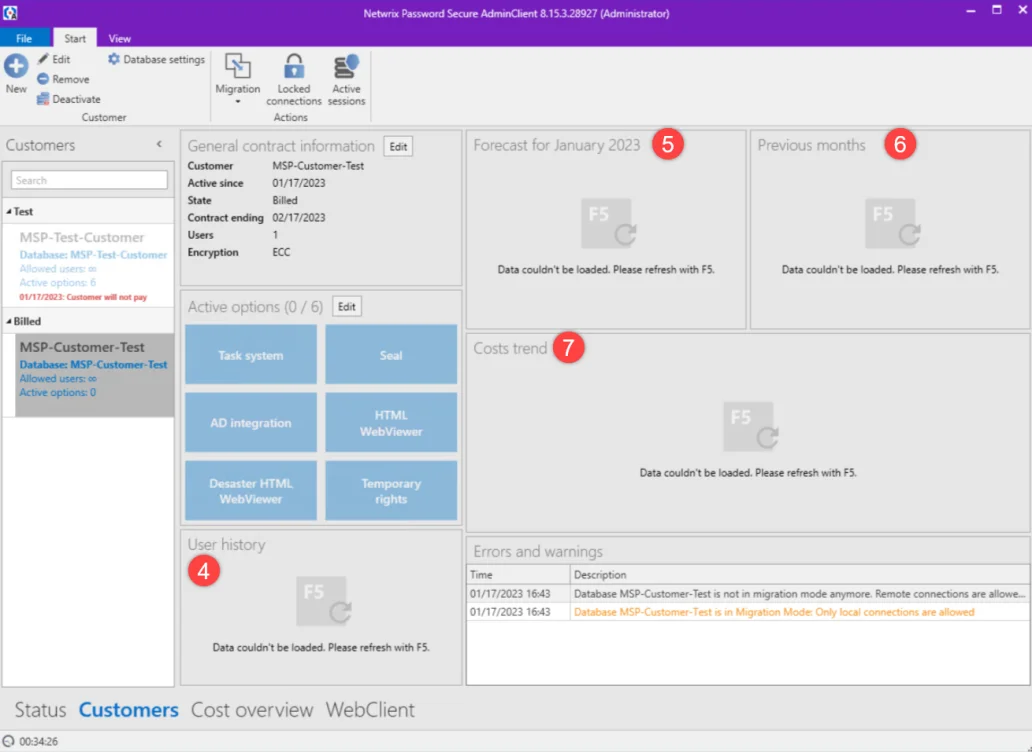
Billed customer view
Here you can also edit the contract details and activate or deactivate options. Additionally you can see the user history (4) of the last months, the forecast for the current month (5) including the expected costs for the users and options, as well as the total amount. Furthermore, you will find the statements of the last months (6) and a graphical representation of the cost history (7).
Deactivating and reactivating a customer
Both test customers and customers to be billed can be deactivated, e.g. if a test customer cannot continue testing until later or if a customer to be billed does not pay his invoice. When deactivating, all data is retained and the customer can be completely restored.
To deactivate a customer, select the database (1) and then Deactivate (2).

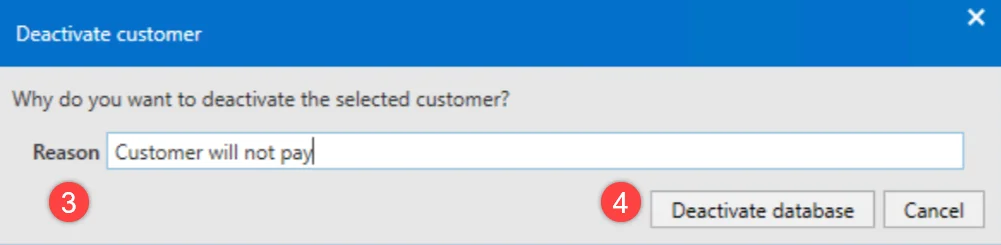
A reason (3) can be specified for the deactivation and then the database can be deactivated (4).
To reactivate a deactivated customer, select the deactivated database (1) and then Activate (2).

Deleting a customer
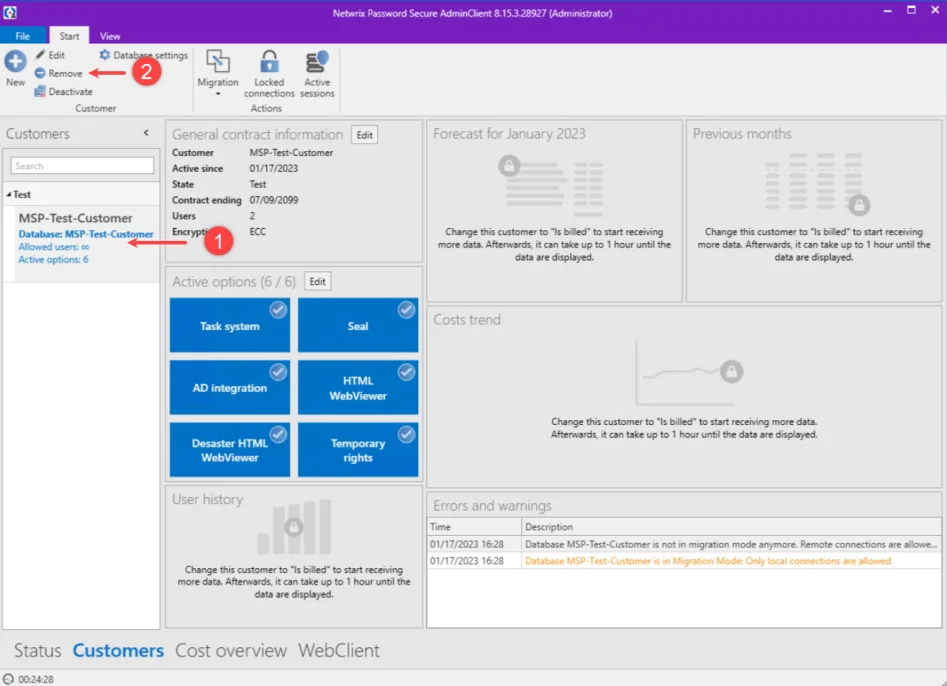
To delete a customer, select the database (1) and then Remove (2). Removal is possible with both active and deactivated customer databases.
Deletion must be confirmed (3).

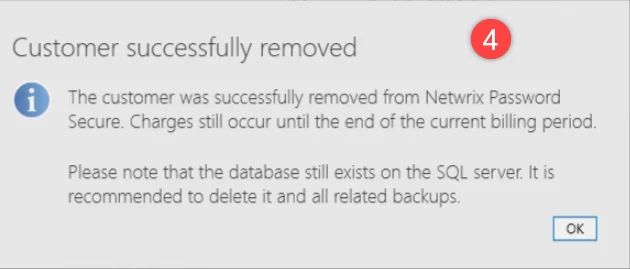
The following dialog box (4) indicates that the database has been deleted in Netwrix Password Secure, but you as an MSP are responsible for deleting the database in the SQL server as well as any existing backups.
MSP
Whether you are a partner or an end user of Netwrix Password Secure - this help will support you in getting started with MSP and guide you safely through the configuration and operation of the software.
We are pleased that you have chosen Netwrix Password Secure for your password protection needs.
We hope you enjoy discovering your new password manager!