Moving the server
Preparations
You must make some preparations so that you can complete the move without any problems.
1. Installing the database server
If the database server and the application server are on the same machine, install the database server on the new machine first. You must observe the database server for this process.
2. Installing the server
Install the Netwrix Password Secure application server next (see Application server). For the installation steps themselves, see Installation Server Manager.
3. Basic configuration
After you install the server, complete the Basic configuration. This creates a new configuration database on the SQL server. If you want to retain the old SQL server, you must give the configuration database a new name.
4. Deactivating the old server
Deactivate the license first before you activate it on the new server (see options under License settings). Now stop the server so that nothing else changes in the database.
Backing up the data
After you make these preparations, back up the data from the old server.
1. Backing up the system
If you use a virtual machine, create a backup of it. You can then restore the old version of the server if problems occur.
2. Backing up the database
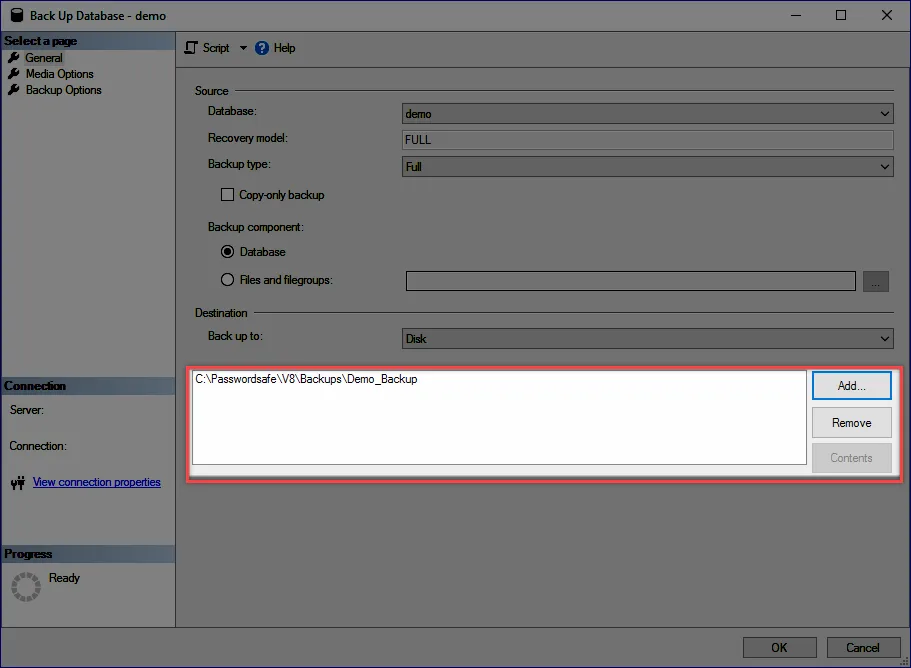
To transfer the data to the new server, create a backup of the database. Although this is also possible via the Server Manager, Netwrix recommends carrying out the backup at the SQL level: right click the database, then on Tasks and Backup. Select the target folder in the following window.
3. Backing up the server certificate
You must back up all available Certificates. The installation determines how many certificates you need.
Configuring the new server
After you transfer the backed up data (database and certificate) to the new server, you must still integrate it.
1. Integrating the database at the SQL level
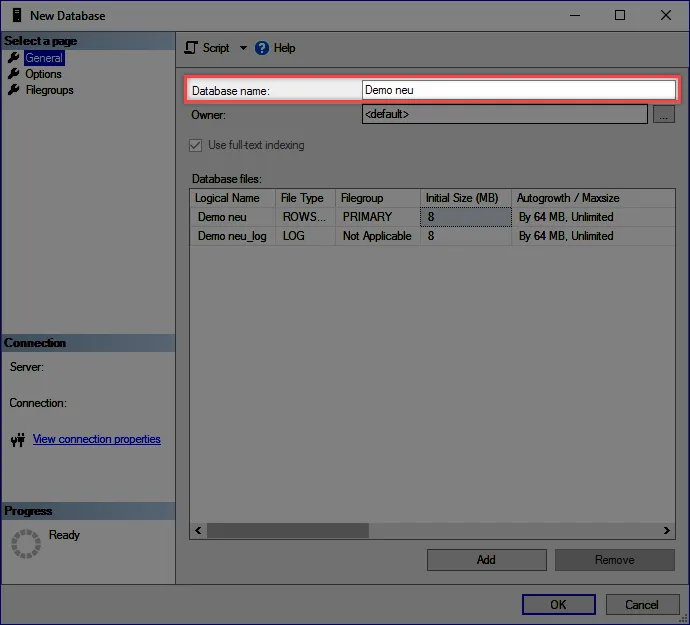
First, create a new database on the SQL server. You can find this option in the SQL Management Studio after right clicking on Databases. Usually, you only need to enter the database names.
As soon as the database exists, right click the server and select the option Restore (under Tasks). Select Database here. Now select the backup. You must also check whether the field "Target" shows the correct database.
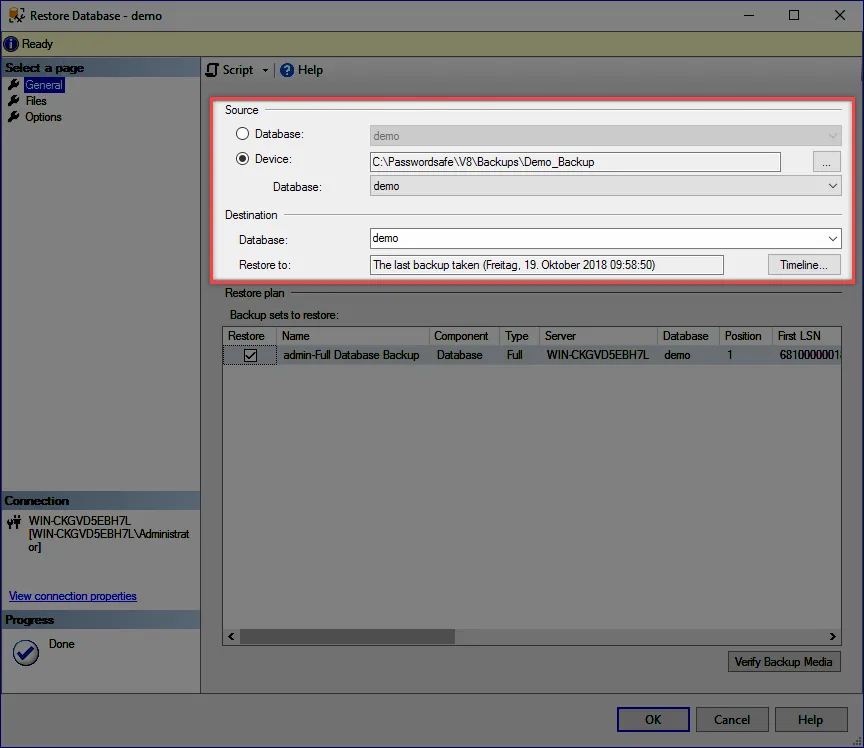
You can also use this method to import backups created directly from the Server Manager.
2. Setting up the server
After you install the backup on the new database, start the Server Manager and run the setup wizard. The Setup wizard reactivates the license, among other things. You can now enter all of the desired configurations for the server.
3. Importing the certificates
Import the backed up certificates via the certificate manager.
4. Integrating the database
Finally, integrate the database onto the server via the database wizard.
Modifications on the client
If the IP and/or host name for the server has changed, you must create/roll out new database profiles from the client.