Configuring Authentication for PingCastle Enterprise
Authentication
PingCastle Enterprise supports multiple authentication methods that can work simultaneously. You can configure any combination of Local Authentication, Windows Authentication, OpenID Connect, Entra ID Authentication, Header Authentication, SAML2, and Client Certificate authentication, allowing users to choose their preferred login method.
Set up each method's identity provider using the instructions on this page, then enter the resulting values on the Login options, Windows authentication, Certificate authentication, Header authentication, OIDC Connect, and SAML screens under Configuration > Settings in the PingCastle Enterprise web interface.
Most changes on these screens take effect within about 30 seconds, without a restart. Two setting groups — HTTPS redirection and allowed hosts settings, and database schema changes — restart PingCastle Enterprise automatically: it stops itself about 1 second after you save, then IIS restarts it. Six other restart-flagged settings — the three file logging settings, maximum concurrent scans, and both SCIM rate limit settings — require you to restart PingCastle Enterprise manually after saving.
You can enable OpenID Connect, SAML2, Windows Authentication, and Disable Password Login during installation, on the Authentication method screen of the installer. See Step 2 - Run PingCastleEnterpriseInstaller.exe (production). The instructions on this page apply whether you configure a method during installation or afterward on the Configuration > Settings screens.
- Local Authentication
- Windows Authentication
- OpenID Connect
- Header Authentication
- SAML2 Authentication
- Client Certificate
Local authentication
PingCastle Enterprise enables local authentication by default, using a username and password stored in the PingCastle Enterprise database. It needs no additional configuration.
To hide the local authentication option when you configure other authentication methods, enable Disable Password Login on Configuration > Settings > Login options.
When you enable both Disable Password Login and Windows Authentication, any account calling the API must be a member of the Windows group you set in Windows Group.
Windows authentication
If you haven't already, enable Windows Authentication
Step 1: Install Windows Authentication Package
Ensure you have installed the Windows Authentication package. It may not be part of the default IIS installation on older Windows Server versions.
Open Server Manager > Manage > Add Roles and Features > Server Roles > Web Server (IIS) > Web Server > Security and select Windows Authentication.
Step 2: Enable Windows Authentication in IIS
- Close and reopen the IIS Manager console to refresh the available options.
- Select the PingCastleEnterprise website in the left-hand tree view.
- Double-click the Authentication icon in the center panel.
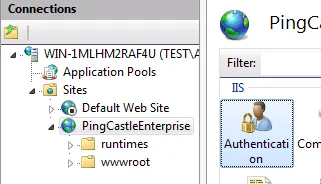
- In the Authentication settings, ensure the following:
- Anonymous Authentication: Enabled (should already be enabled)
- Windows Authentication: Right-click and select Enable

Windows Authentication uses Active Directory groups to provision access to PingCastle Enterprise. Create two security groups in Active Directory. You can call these whatever you like. This document uses the following names as examples:
- PingCastle_Users: Members of this group can log in and access PingCastle Enterprise
- PingCastle_Admins: Members of this group have administrator privileges
Add users to the appropriate groups based on the level of access they require.
Getting AD Group SIDs
PingCastle Enterprise needs the Security Identifiers (SIDs) of the groups for setup. Use the tabs to choose a method for retrieving them.
- Active Directory PowerShell
- ADSI Search
- whoami (Current User)
This method uses the ActiveDirectory PowerShell module to retrieve the group SIDs
Get-ADGroup "PingCastle_Users" | Select-Object Name, SID
Get-ADGroup "PingCastle_Admins" | Select-Object Name, SID
This method uses PowerShell with the native ADSI Searcher class to get the group SIDs
$searcher = [ADSISearcher]"(&(objectClass=group)(name=PingCastle_Users))"
$group = $searcher.FindOne()
$sid = New-Object System.Security.Principal.SecurityIdentifier($group.Properties["objectsid"][0], 0)
$sid.Value

$searcher = [ADSISearcher]"(&(objectClass=group)(name=PingCastle_Admins))"
$group = $searcher.FindOne()
$sid = New-Object System.Security.Principal.SecurityIdentifier($group.Properties["objectsid"][0], 0)
$sid.Value
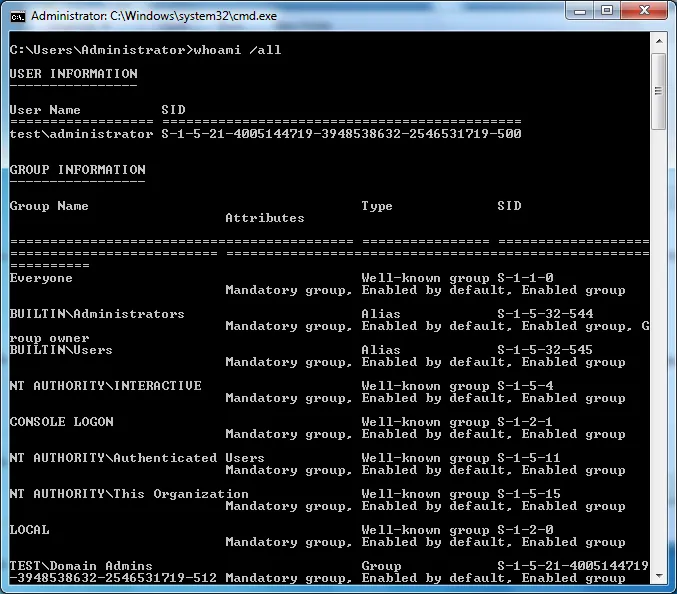
If you're already a member of the groups and have rebooted since joining them, run
whoami /all to get your group memberships and find the SID in the output
Configuration
On Configuration > Settings > Windows authentication, enter the SIDs you retrieved into the matching fields:
| Setting | Description |
|---|---|
| Windows Group | SID of the Active Directory group that grants login access (e.g., PingCastle_Users) |
| Windows Group Admin | SID of the Active Directory group that grants administrator privileges (e.g., PingCastle_Admins) |
PingCastle Enterprise can also remove a user's access if they no longer belong to the group set in Windows Group. The RemoveUserIfNotInWindowsGroupAnymore configuration key controls this behavior; PingCastle Enterprise checks the key at every Windows login. The key is off by default and has no toggle on the Settings screens — enable it by adding it to the application configuration.
Windows Authentication doesn't provide an email address when PingCastle Enterprise creates accounts. PingCastle Enterprise sets email addresses to a default value that disables notifications.
To hide the internal username/password login option, enable Disable Password Login on Configuration > Settings > Login options. This setup affects all pages for authentication. When you enable Disable Password Login with Windows Authentication, API calls require both an API key and a calling account that belongs to the group you set in Windows Group. To restrict NTLM authentication to specific pages, edit the 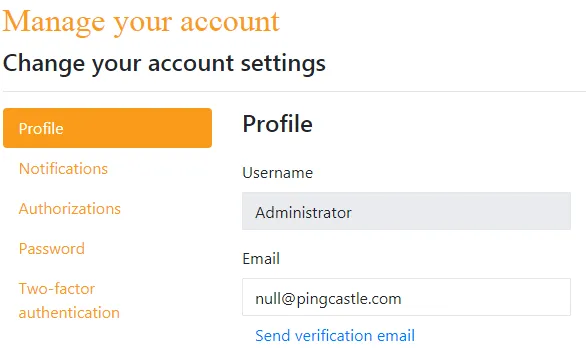
Want to hide the local authentication prompt?
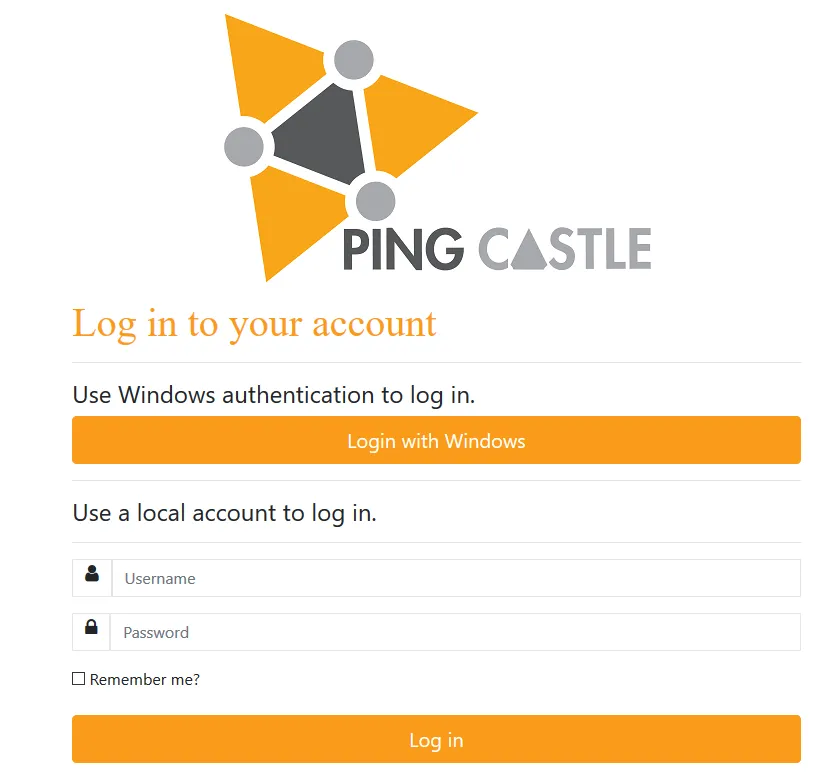
web.config file using the <location> directive to restrict authentication to the WindowsAuth page. See IIS URL Authorization documentation.
OpenID Connect
PingCastle Enterprise supports OpenID Connect authentication using the ASP.NET Core API. Configuration options are documented here.
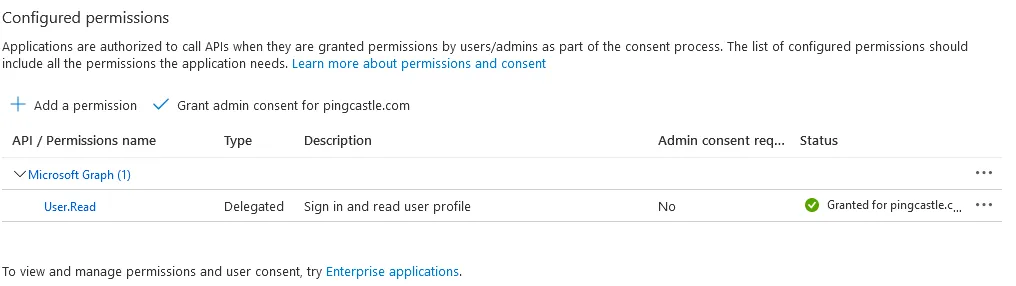
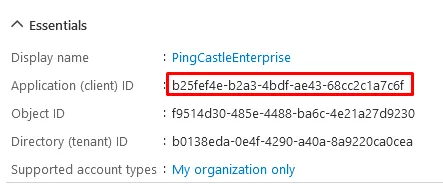
Proxy settings rely on the current user proxy configuration, which you can define using netsh for IIS running as SYSTEM. You can configure Entra ID as an OpenID Connect provider. Entra ID Portal Configuration Navigate to Entra ID Portal and go to "App registrations" Register a new application Set the Redirect URI as Web with the URL: The URL must end with Go to the API permissions page Click "Grant admin consent" for the application Verify the Status shows as granted Note the Application (client) ID and Directory (tenant) ID Go to the Authentication tab and enable ID tokensConfiguring Entra ID for OpenIDConnect Authentication
https://your-pingcastle-server.com/signin-oidc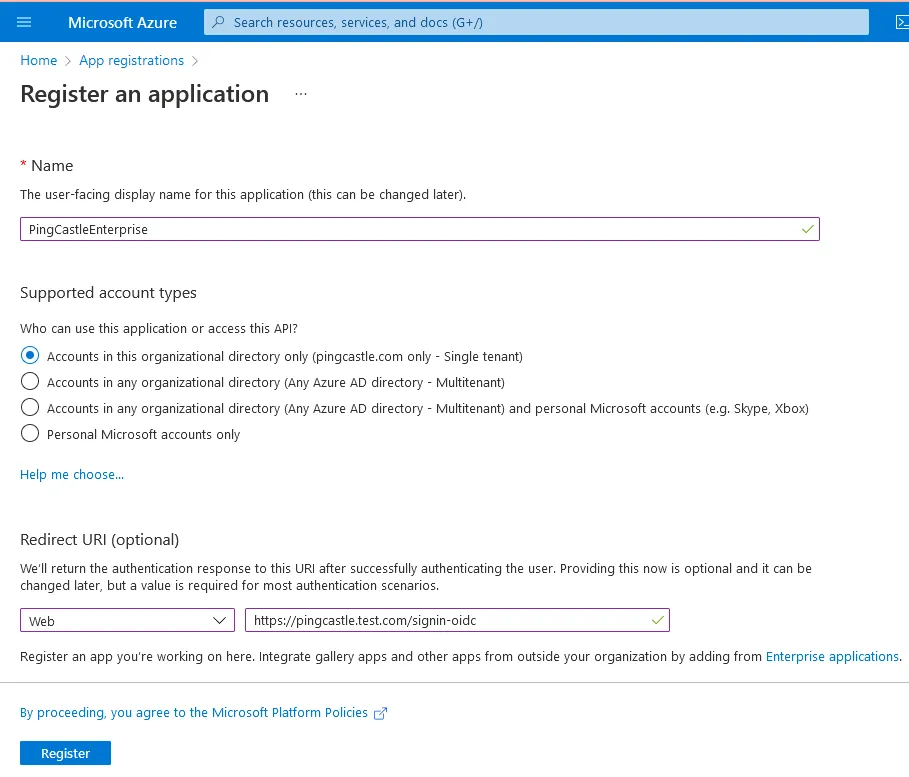
/signin-oidc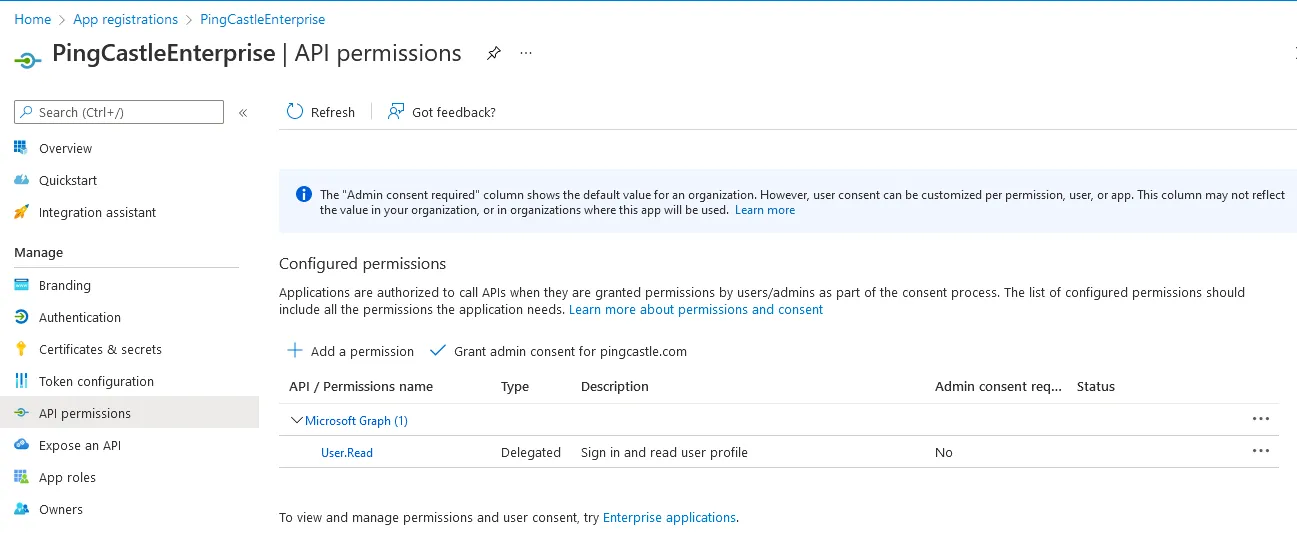

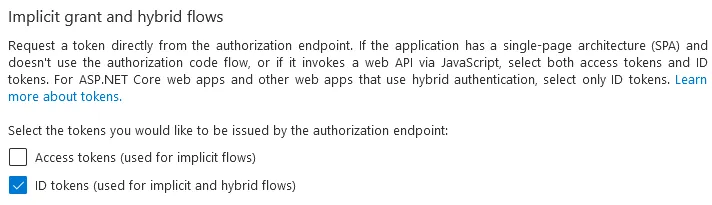
Configuration
On Configuration > Settings > OIDC Connect, enable OIDC login and enter the values from your identity provider:
| Setting | Description |
|---|---|
| Enabled | Turns on OIDC login. |
| Display Name | The text shown on the OIDC login button. |
| Client ID | The application (client) ID your identity provider assigned when you registered PingCastle Enterprise. |
| Client Secret | The client secret your identity provider issued for the application. |
| Authority | The base URL of your identity provider, used to discover its OIDC endpoints. |
| Callback Path | The path on PingCastle Enterprise where your identity provider redirects users after they sign in. |
| Response Type | The OIDC response type PingCastle Enterprise uses during the authentication flow, such as code. |
| Use PKCE | Enables Proof Key for Code Exchange (PKCE), which adds a layer of protection to the authorization code exchange. |
| Map Inbound Claims | Controls whether PingCastle Enterprise maps claim names from the identity provider to their .NET equivalents. |
| Scope | The list of OIDC scopes PingCastle Enterprise requests, such as openid, profile, and email. |
| Require HTTPS Metadata | Requires your identity provider to serve the OIDC metadata endpoint over HTTPS. |
All fields except Scope depend on your OpenID provider. To hide the internal username/password login option, enable Disable Password Login on Login options.
Header authentication
Header authentication delegates authentication to a reverse proxy, which sets a header indicating the authenticated user.
Configuration
On Configuration > Settings > Header authentication, enable Header Authentication and enter the header name your reverse proxy sets.
When a user accesses the login page, PingCastle checks for the specified header. If present, PingCastle considers the user authenticated and uses the header value as the username.
A reverse proxy must isolate the PingCastle application and prevent unauthenticated users from setting their own authentication header. Failure to properly secure this configuration allows authentication bypass.
To hide the internal username/password login option, enable Disable Password Login on Login options.
SAML2 authentication
PingCastle Enterprise supports SAML2 authentication using the ITfoxtec Identity SAML 2.0 package. Advanced configuration settings are documented here.
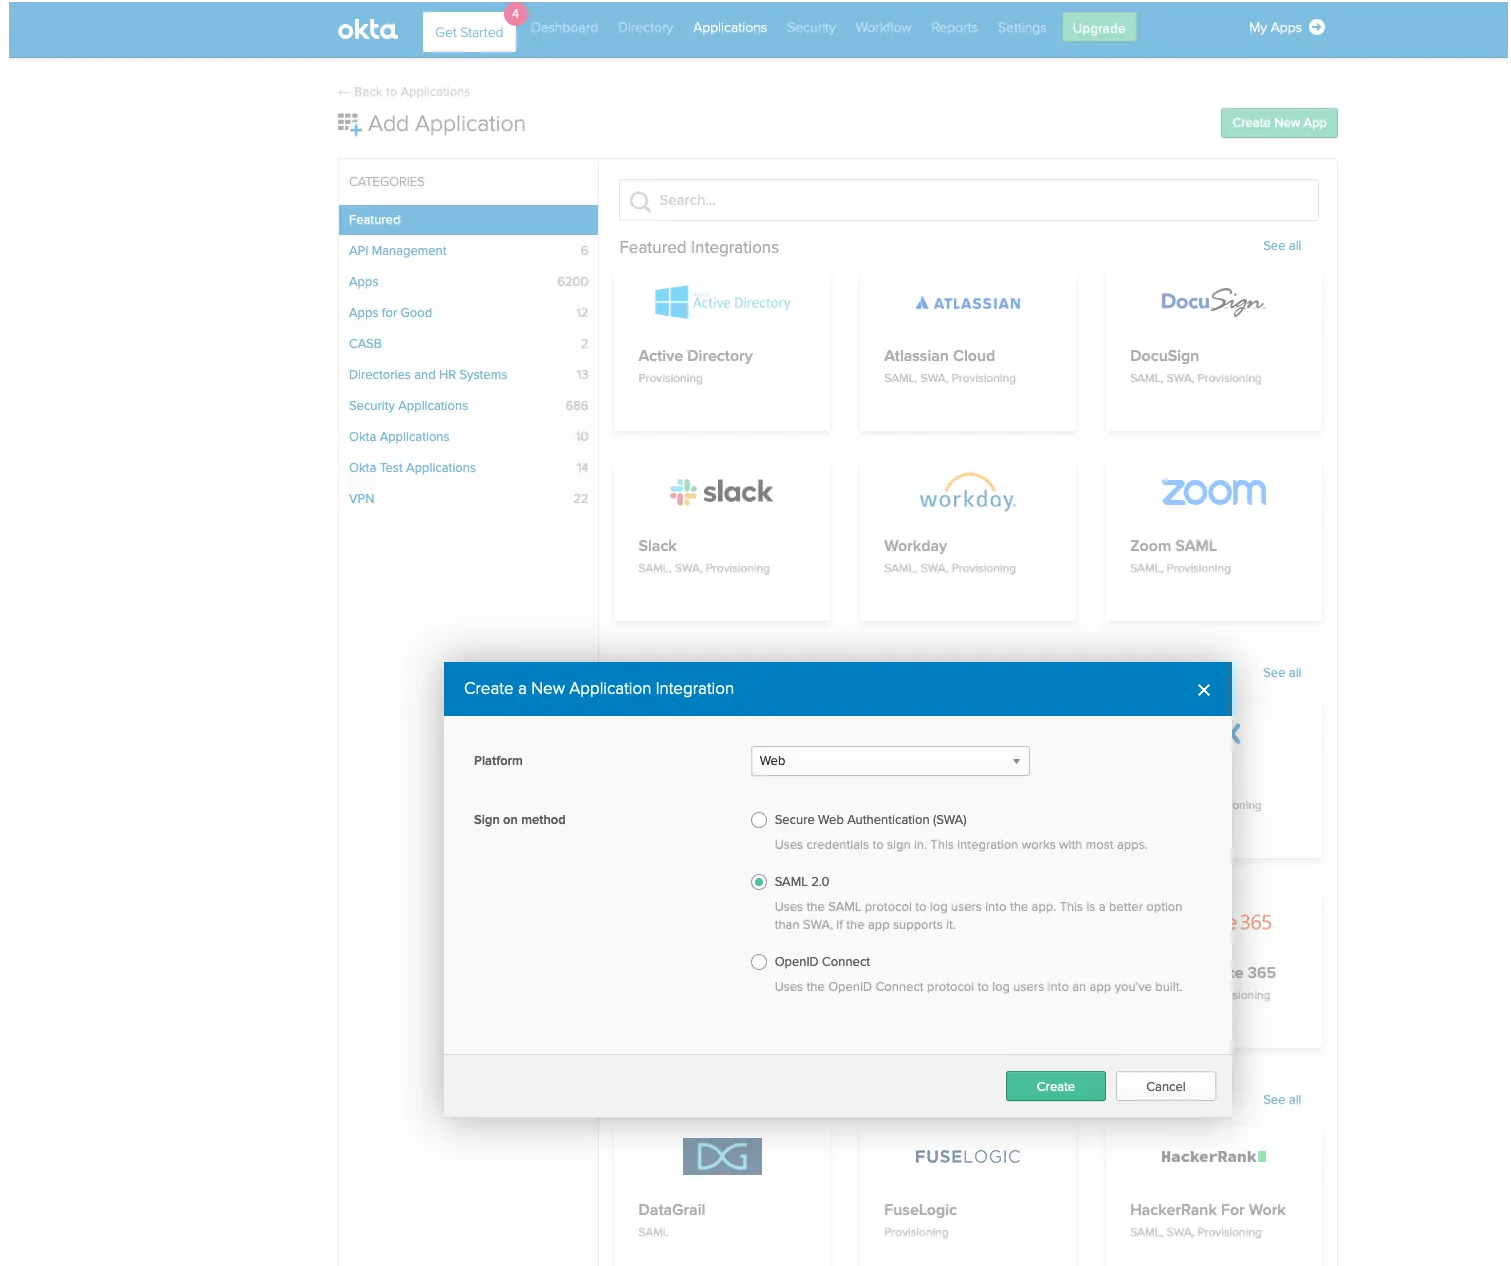
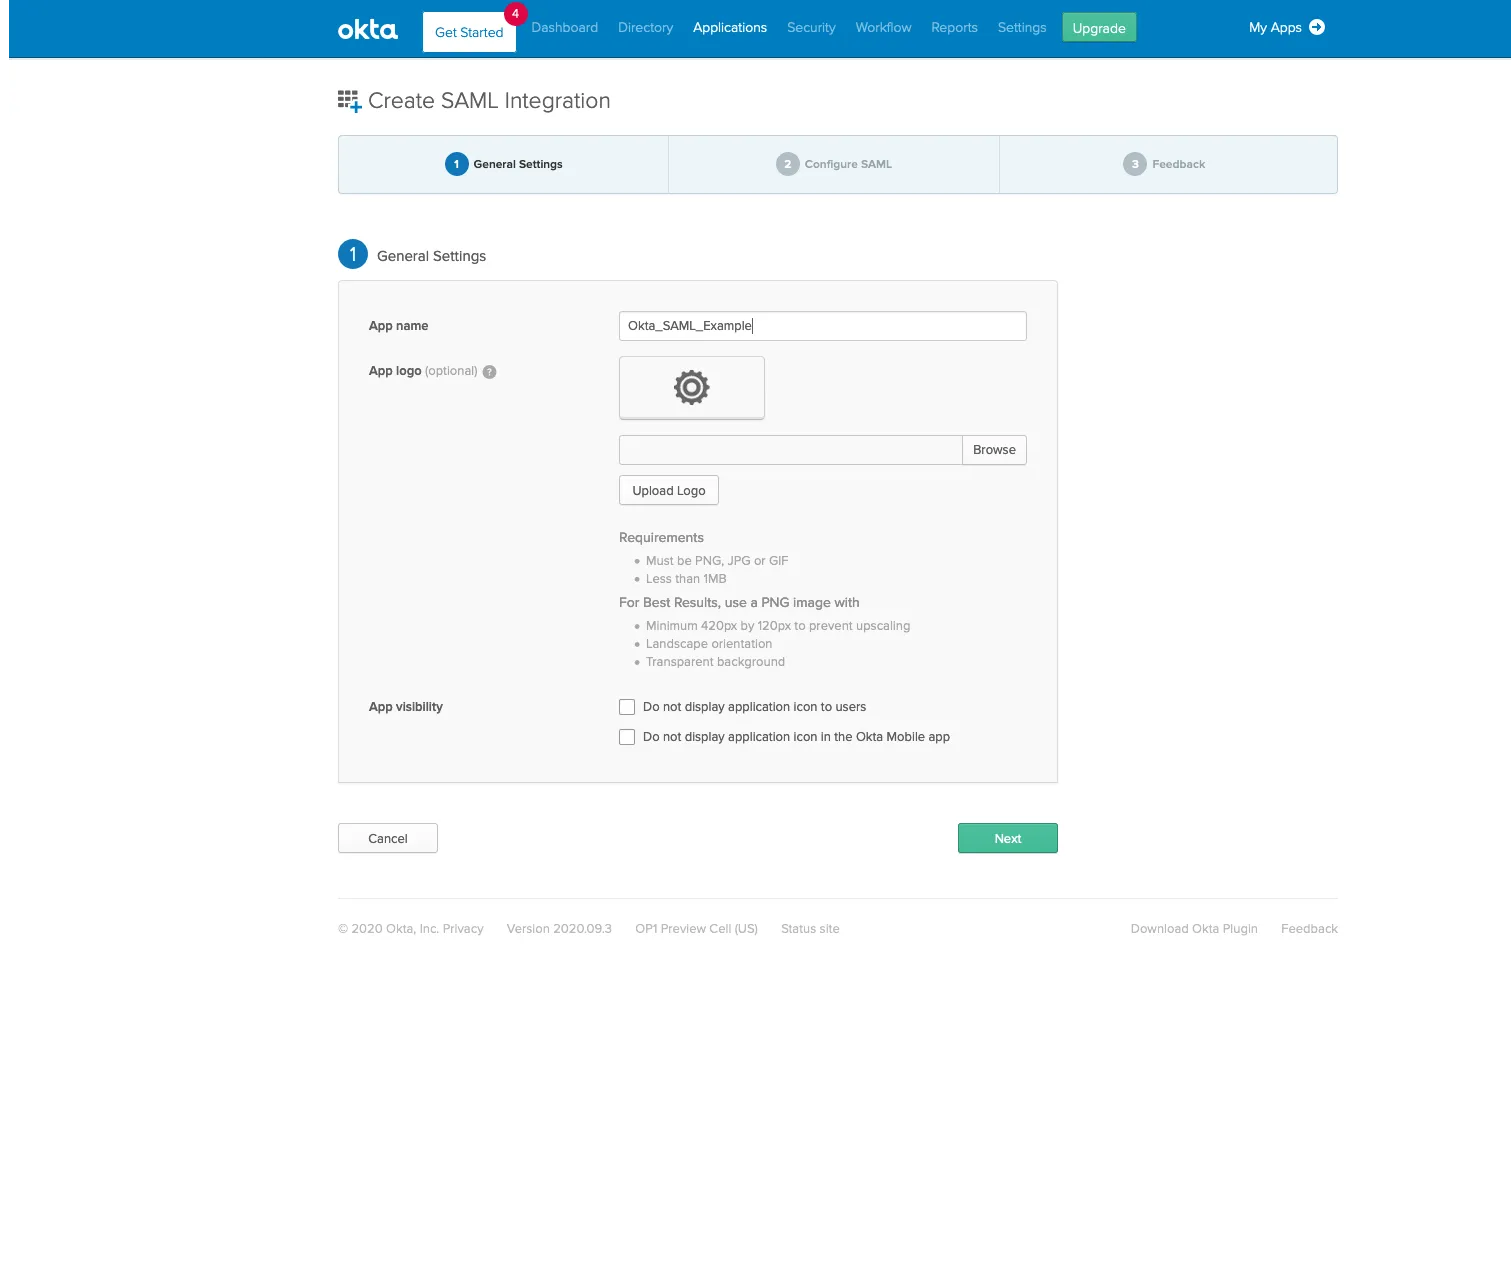
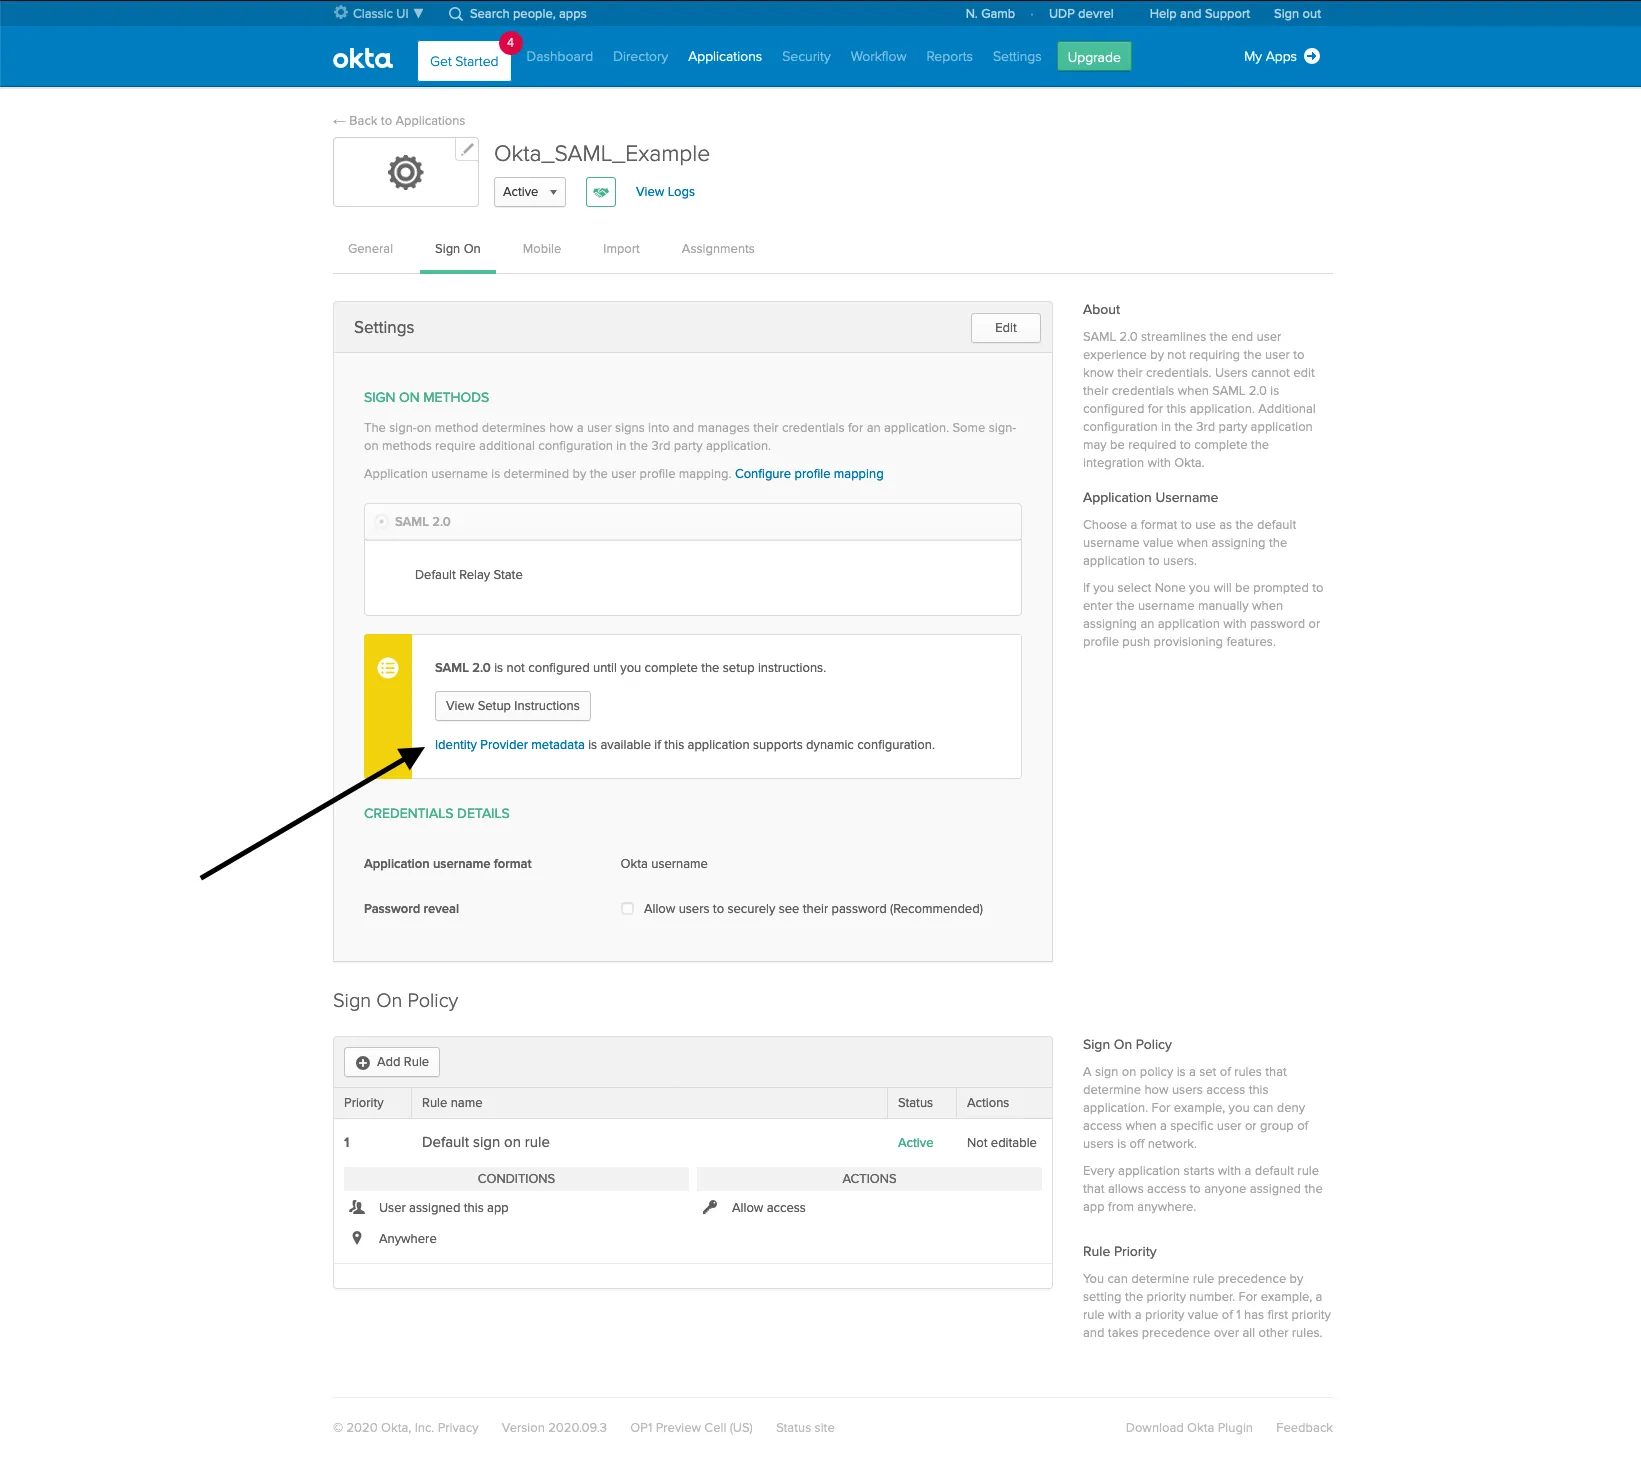
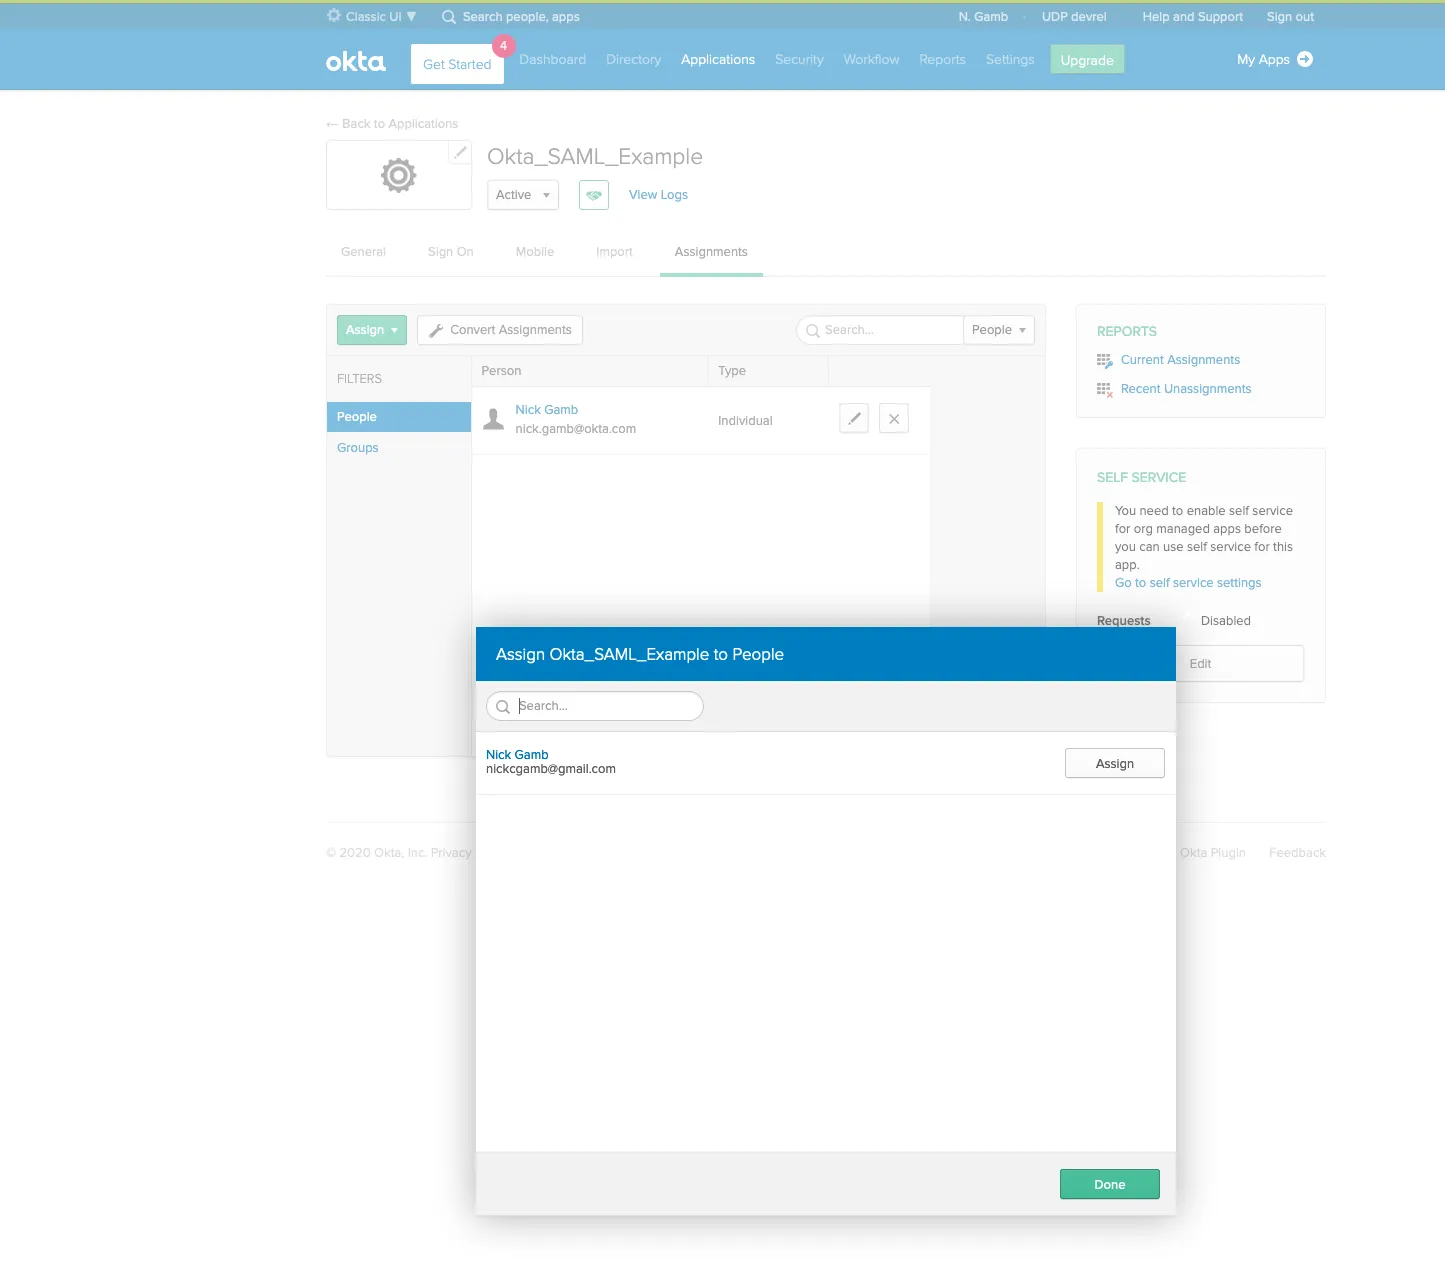
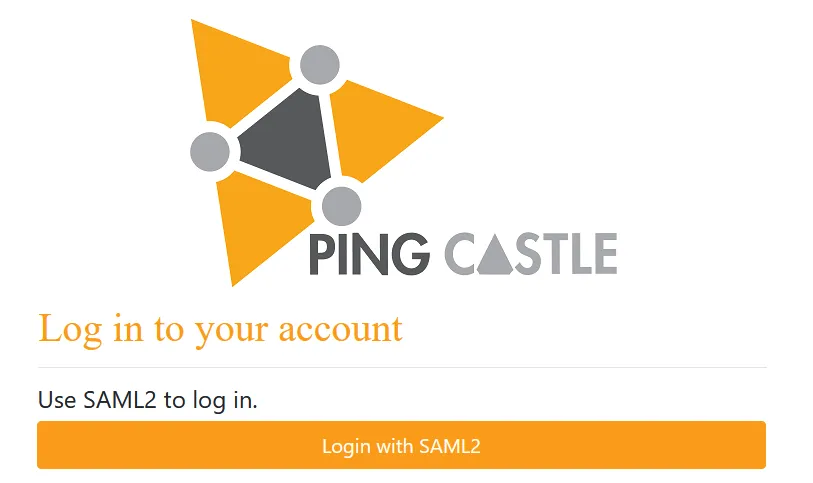
Proxy settings rely on the current user proxy configuration, which you can define using netsh for IIS running as SYSTEM. Configure PingCastle Enterprise with Okta as your SAML2 identity provider using the following steps. Log in to your Okta tenant and switch to the admin portal. Give your app a name and click Next. Configure the following SAML settings: Locate the IdP metadata URL for use in your PingCastle configuration. Assign users to the application: Assignments > Assign > Assign to People Restart the application. A SAML2 login option will appear on the login screen.Configuring SAML2 with Okta
Step 1 Access Okta Admin Portal
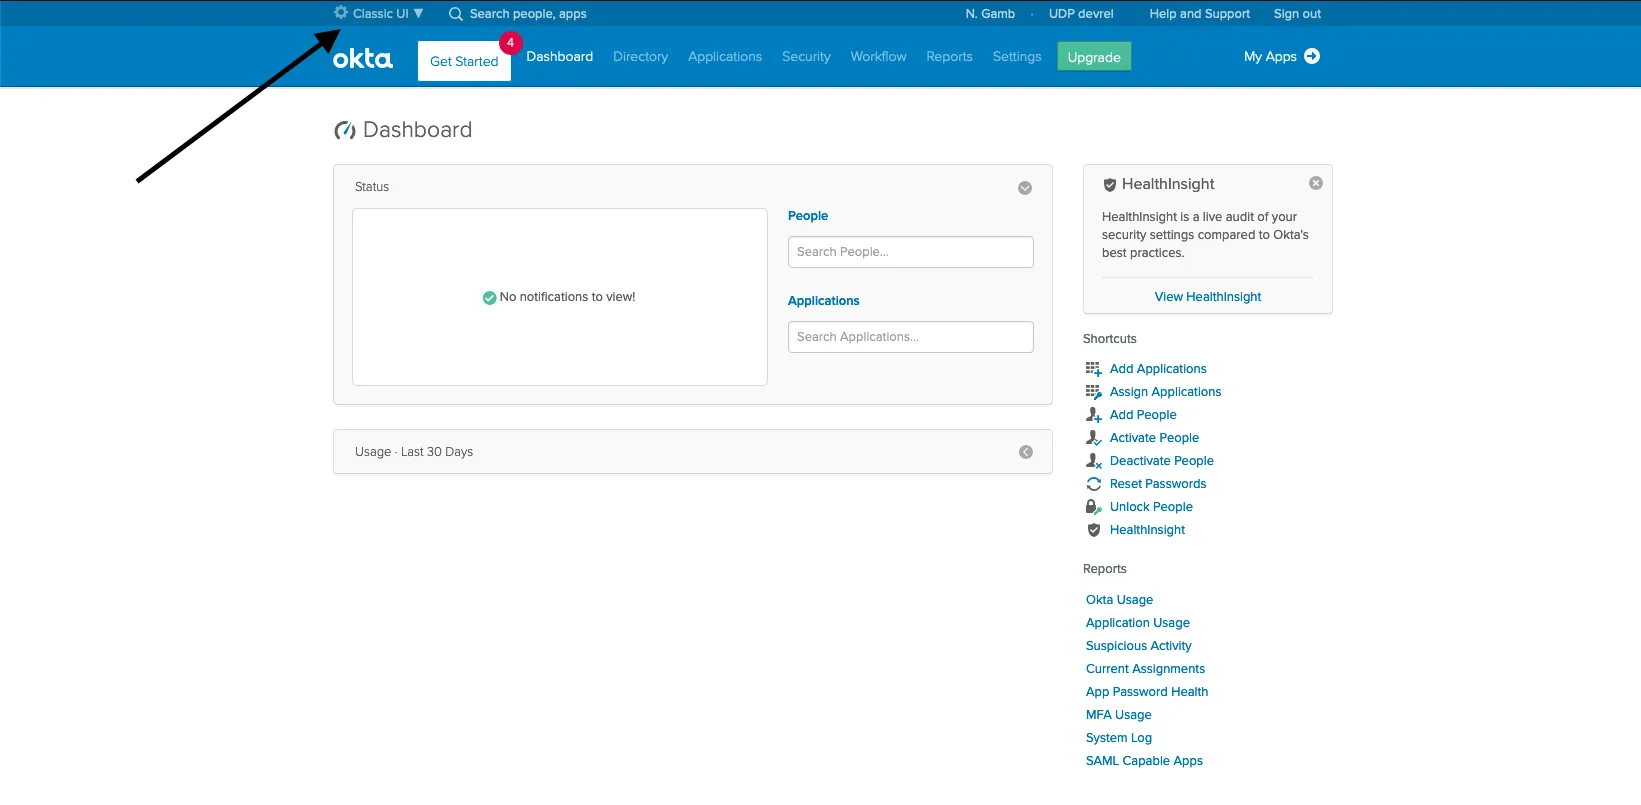
Step 2 Create New Application
Step 3 Name Your Application
Step 4 Configure SAML Settings
Setting Value Single Sign on URL https://your-pingcastle-server.com/Saml2/AssertionConsumerServiceAudience URI PingCastle (or match your Issuer setting)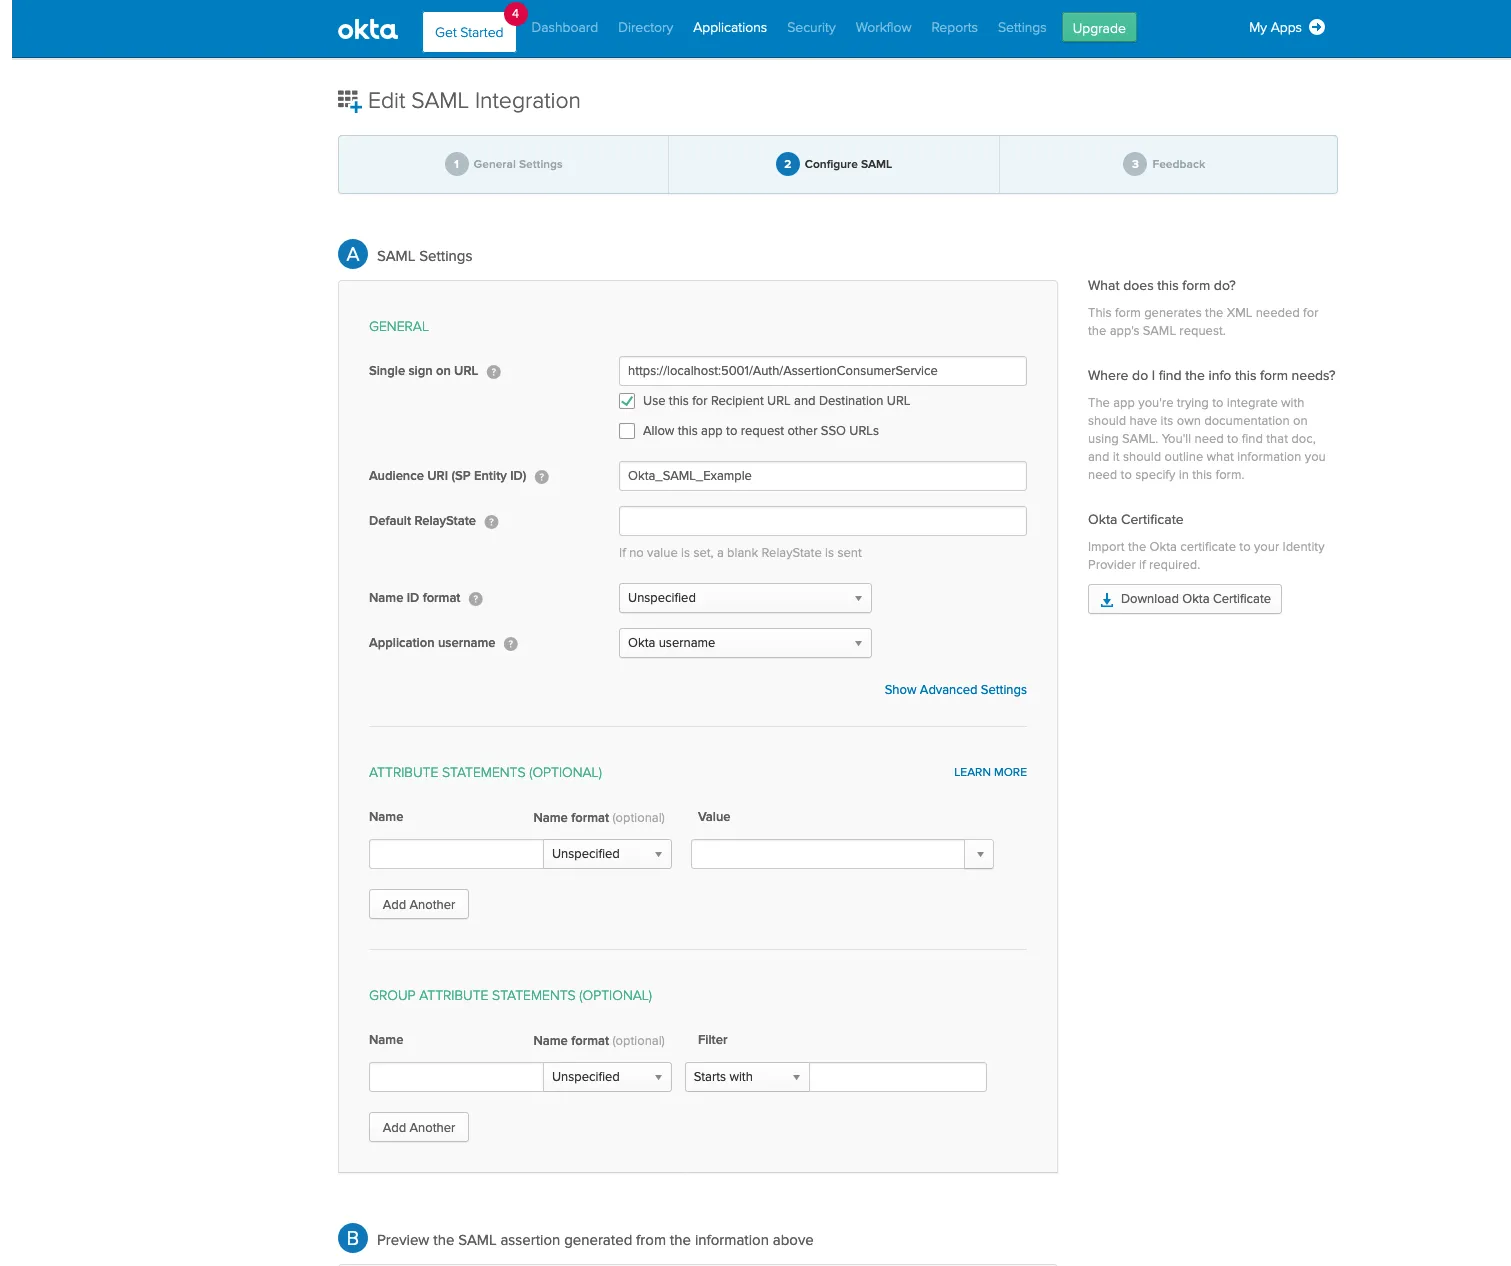
Step 5 Get IdP Metadata URL
Step 6 Assign Users
Step 7 Restart and Test
Configuration
On Configuration > Settings > SAML, enable SAML login and enter the values from your identity provider:
| Setting | Description |
|---|---|
| Enabled | Turns on SAML login. |
| Display Name | The text shown on the SAML login button. |
| Issuer | The identifier PingCastle Enterprise presents to your identity provider as the SAML issuer. |
| IdP Metadata | The URL of your identity provider's SAML metadata, used to fetch signing certificates and endpoint information automatically. |
| Single Sign-On Destination | The SSO endpoint on your identity provider, used when you configure SAML manually instead of through IdP metadata. |
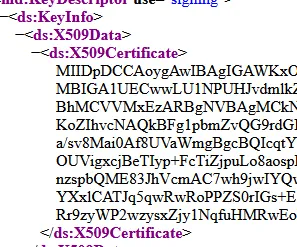
| Certificate | The base64-encoded signing certificate from your identity provider, used when you configure SAML manually. |
| Ignore Certificate Validation | Skips validation of the identity provider's certificate. Use this only for testing, since it removes a security check. |
Set IdP Metadata to fetch your identity provider's signing certificate and endpoints automatically, as with Okta or ADFS metadata URLs.
When using IdP Metadata, PingCastle Enterprise accesses the metadata URL at application startup. If the URL is unavailable, PingCastle Enterprise will be unavailable until the metadata becomes accessible again.
To avoid a startup dependency on the metadata URL, leave IdP Metadata blank and set Single Sign-On Destination and Certificate instead, using the values from your identity provider's metadata:


To hide the internal username/password login option, enable Disable Password Login on Login options.
Client certificate authentication
Client certificate authentication requires users to present a valid SSL client certificate when accessing PingCastle Enterprise.
IIS Configuration
Configure IIS to require or accept client certificates. This requires HTTPS access.
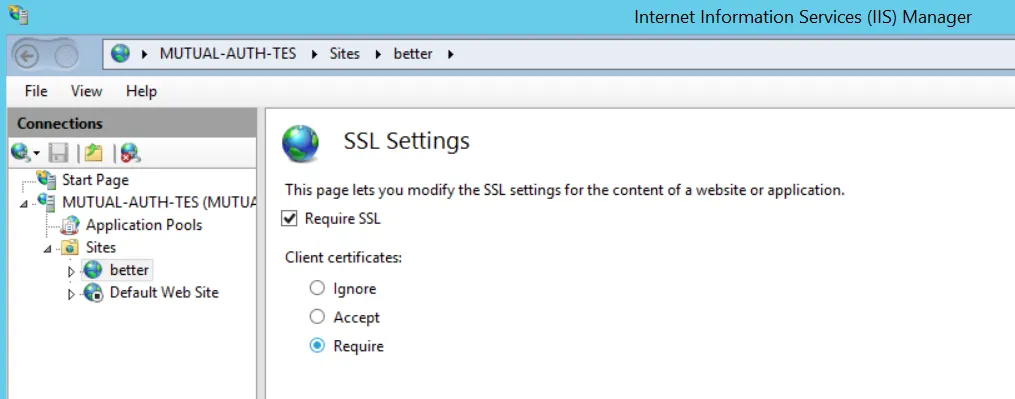
The server requests a certificate when a user accesses the website.
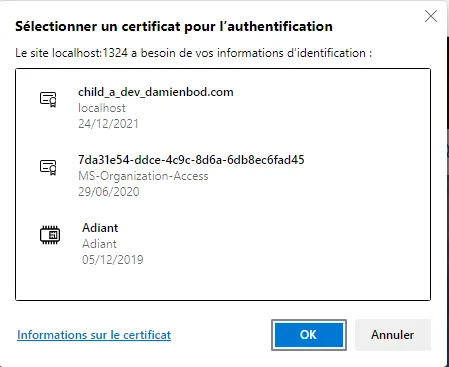
Set the certificate requirement to Accept (not Require) to allow API access without certificates, or configure a separate virtual host for API access.
Close and reopen the browser after changing certificate settings to avoid connection cache reuse.
PingCastle Configuration
On Configuration > Settings > Certificate authentication, enable Certificate Authentication. If your environment doesn't have CRL or OCSP revocation endpoints available, also enable Skip Revocation Check to skip certificate revocation checking.
When a user visits /Account/Login, PingCastle evaluates the certificate for trust (chain building, online verification) and maps it to a user account.
Certificate Mapping
PingCastle maps certificates to user accounts using these identifiers (in order):
- DNS Name (CN from subject)
- UPN from SubjectAlternateName
- RFC email from SubjectAlternateName
User Account Setup
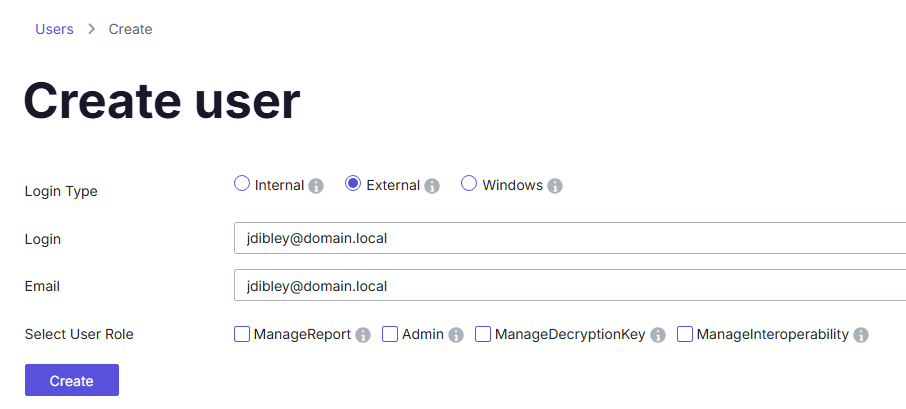
Create a user account with a login matching the certificate subject (DNS form). You don't need to set a password. Use an external user account for this, though any account type works.
Troubleshooting
If PingCastle can't recognize the certificate, it displays an error. Ensure the user account login matches one of the preceding certificate identifiers.
Login options
The Login options screen also includes these fields:
| Field | Description |
|---|---|
| Minimum Password Length | The minimum number of characters required for local authentication passwords. Applies only when you enable Local Authentication. |
| Session Timeout | The number of minutes a user session can remain idle before PingCastle Enterprise logs the user out. |
Custom login message
You can display a custom message on the login page, such as an internal notice or an authorized-use banner, by setting Custom Login Message on Configuration > Settings > Login options.
Example:
<p>The PingCastle UK Instance for Consto</p>
The custom message appears on the login page within about 30 seconds:

The Custom Login Message setting renders raw HTML without escaping. While this allows formatting flexibility using Bootstrap CSS styles, Content Security Policy (CSP) protections prevent injection of custom CSS or JavaScript.