Installing PingCastle Enterprise
Installation
- Production Installation
- Test/POC Installation
Follow these steps for a production-ready installation of PingCastle Enterprise.
Prerequisites
- Download PingCastleEnterpriseInstaller.exe
- Windows Server (see Requirements page)
- SQL Server (Express, Standard, or Enterprise)
PingCastleEnterpriseInstaller.exe installs and configures IIS, Windows Authentication, and the ASP.NET 10.0 Hosting Bundle for you. You don't need to install these components manually before running the installer.
Installation Steps
Step 1 - Install SQL Server
Install SQL Server (Express, Standard, or Enterprise edition) based on your needs. See the Database section for guidance on which edition to choose.
For SQL Express, visit SQL Server Express Downloads.
Step 2 - Run PingCastleEnterpriseInstaller.exe (production)
The installer wizard walks you through prerequisite checks, licensing, and configuration screens in the following order.
-
Prerequisite check: the installer checks the server for IIS and the ASP.NET 10.0 Hosting Bundle. If either is missing, it offers to install them for you.
warningInstalling IIS or the ASP.NET 10.0 Hosting Bundle can require a server restart. If the installer prompts you to restart, restart the server and run the installer again to continue.
-
License agreement: review the license agreement and select the checkbox to accept it. You can't proceed until you accept.
-
License key: enter your license key, or browse to the license file Netwrix provides.
infoIf the license key is missing, contact Netwrix support or your account manager.
-
Install type: choose Simple or Custom.
- Simple (default): installs to
C:\Program Files\Netwrix\PingCastleEnterpriseand skips the directory picker. - Custom: choose your own install directory. You can't select a path inside a system directory, such as
WindowsorSystem32.
- Simple (default): installs to
-
Application pool identity: choose the Windows identity the IIS application pool runs as.
- ApplicationPoolIdentity (default, recommended): no credentials needed.
- Local System.
- Custom account: specify a domain or local account. This account needs local administrator rights to use the built-in task scheduler. If you're using Windows Authentication against a remote SQL Server, use a domain service account.
-
Database connection: choose one of two options.
- Let the installer create the database: provide SQL Server connection details, and the installer creates the database and grants permissions automatically.
- Provide a custom connection string: use an existing database by providing the complete connection string.
noteUninstalling the software doesn't automatically remove the database.
Remote SQL Server SetupIf you're configuring a remote SQL Server (not on the local machine), see the Remote Database Configuration section for detailed setup instructions including SQL Authentication and Windows Authentication options.
-
Authentication method: enable Windows Authentication, OpenID Connect, SAML2, or a combination, and optionally disable local password login. See Authentication for full configuration details for each method.
warningIf you enable Windows Authentication, don't select a built-in privileged group such as
BUILTIN\Administratorsor "Domain Admins" as the restriction group. Windows strips these groups from the token it presents to the application, so authentication always fails for members of that group. Runwhoami /allto confirm which groups appear in your token before choosing one. -
HTTPS configuration: the installer enables HTTPS by default. Choose a certificate source:
- Self-signed (default): the installer generates a 10-year self-signed certificate. Use this for proof-of-concept environments only.
- Existing certificate file: provide a
.pfxfile and its password. - Existing certificate from the certificate store: select the certificate from a list.
See Configuring HTTPS for guidance on using a CA-issued certificate in production.
-
Email configuration: choose SMTP, Microsoft Graph, or None. See Email for configuration details for each provider.
-
Ready to install: review your selections, then click Install. The installer applies your configuration and shows a progress bar. Click Finish to close the wizard.
-
The installer removes the IIS Default Web Site to free up ports 80 and 443 for PingCastle Enterprise. If you need the Default Web Site for something else, plan accordingly before installing.
-
On upgrades, the installer skips most of these screens and preserves your existing configuration.
For testing and proof-of-concept environments, you can streamline the installation process using automation tools such as Chocolatey.
Use this simplified setup for testing only. For production environments, use the Production Installation tab for proper configuration and upgrade support.
Prerequisites
- Download PingCastleEnterpriseInstaller.exe
- Windows Server or Windows 10/11
- Administrative PowerShell access
PingCastleEnterpriseInstaller.exe installs and configures IIS, Windows Authentication, and the ASP.NET 10.0 Hosting Bundle for you. You don't need to install these components manually before running the installer.
Installation Steps
Step 1 - Install SQL Server Express with Chocolatey
For test and POC systems, you can use Chocolatey to automate SQL Server Express installation:
# REQUIRES Administrative PowerShell
# Install Chocolatey (https://chocolatey.org/install)
Set-ExecutionPolicy Bypass -Scope Process -Force; [System.Net.ServicePointManager]::SecurityProtocol = [System.Net.ServicePointManager]::SecurityProtocol -bor 3072; iex ((New-Object System.Net.WebClient).DownloadString('https://community.chocolatey.org/install.ps1'))

# Install SQL Server Express (https://community.chocolatey.org/packages/sql-server-express)
choco install sql-server-express
Step 2 - Run PingCastleEnterpriseInstaller.exe (test/POC)
-
Run PingCastleEnterpriseInstaller.exe. The installer checks for IIS and the ASP.NET 10.0 Hosting Bundle and offers to install them if they're missing.
warningInstalling missing prerequisites can require a server restart. If prompted, restart the server and run the installer again to continue.
-
Accept the license agreement and enter your license key.
-
Choose the Simple install type to use the default install path, or Custom to pick your own directory.
-
Choose an application pool identity. ApplicationPoolIdentity (default) doesn't need credentials.
-
Configure the database connection, typically using the local SQL Express instance you installed in Step 1.
-
Choose your authentication method and, if you keep HTTPS enabled (the default), your certificate source.
-
Configure email settings, or select None to skip email configuration.
-
Review your selections and click Install.
For a detailed description of each wizard screen, see the Production Installation tab.
If you're configuring a remote SQL Server instead of using the local instance, see the Remote Database Configuration section for detailed setup instructions including SQL Authentication and Windows Authentication options.
External Database Configuration
PingCastleEnterpriseInstaller.exe handles database creation and permissions automatically when it creates the database itself (see Step 2 - Run PingCastleEnterpriseInstaller.exe (production), database connection step). Use this section when connecting to an existing SQL Server database instead, such as a remote or pre-provisioned instance.
General Database Requirements
Database backups are the customer's responsibility.
PingCastle Enterprise requires a database user account with database owner permissions. The application automatically creates and updates database tables during initial setup and software updates.
SQL Server Permissions
When connecting to an existing database, the account PingCastle Enterprise uses requires database owner permissions. If PingCastle Enterprise runs under the IIS application pool's Windows account, grant permissions with the following SQL:
IF NOT EXISTS (SELECT loginname FROM master.dbo.syslogins
WHERE loginname = 'IIS APPPOOL\PingCastleEnterprise')
BEGIN
    CREATE LOGIN [IIS APPPOOL\PingCastleEnterprise] FROM WINDOWS;
END

USE PingCastleEnterprise;
EXEC sp_addrolemember 'db_owner', 'IIS APPPOOL\PingCastleEnterprise';
Remote Database Configuration
- SQL Authentication
- Windows Authentication
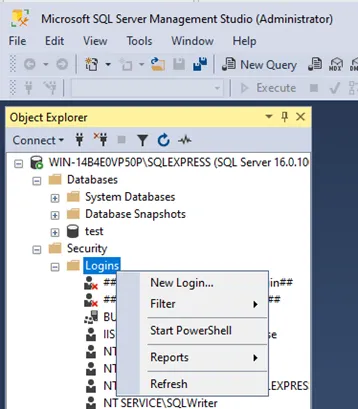
- Create a local SQL Server account:
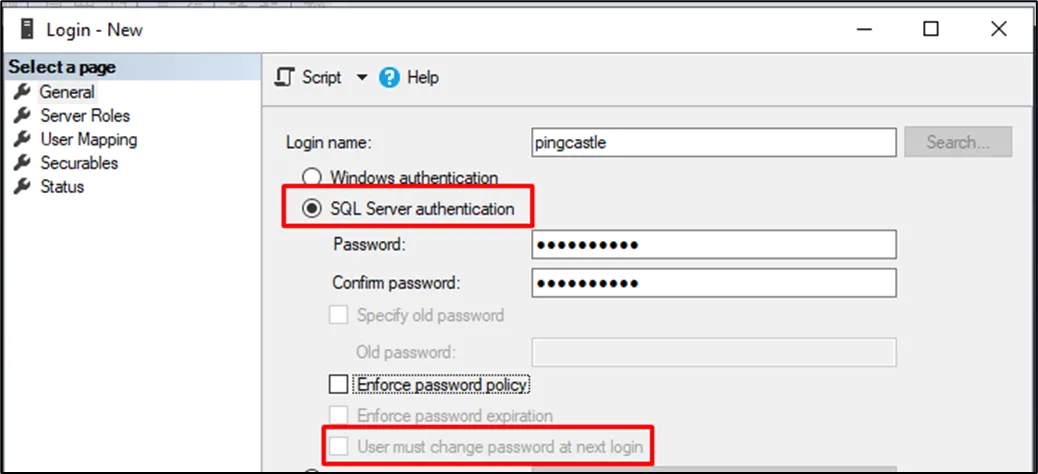
- Use SQL Server authentication
- Uncheck "User must change password at next login" (PingCastle Enterprise doesn't support automatic password rotation)
- You can manually update the password later in the
appsettings.Production.jsonfile
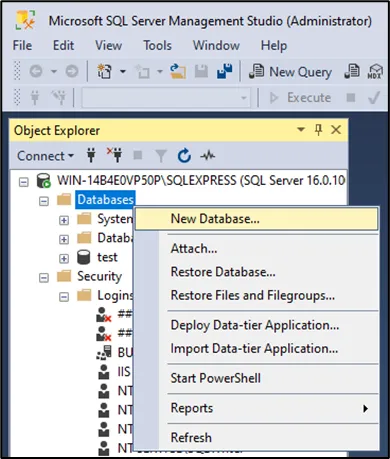
-
Create a database and set the user you created as the owner.
-
Verify the credentials and server connectivity before proceeding.
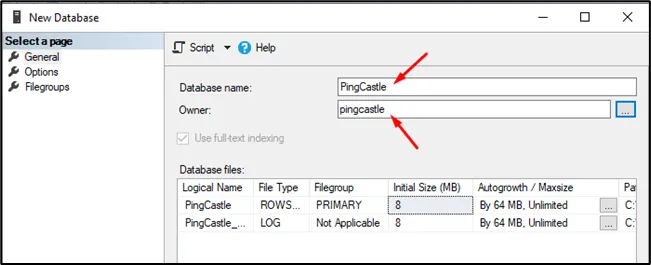
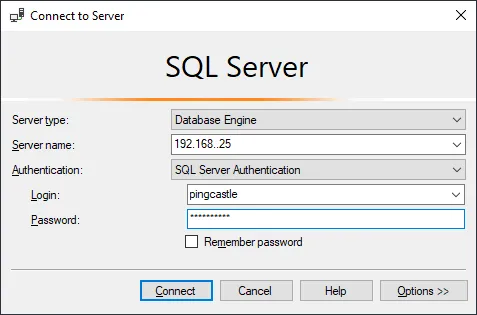
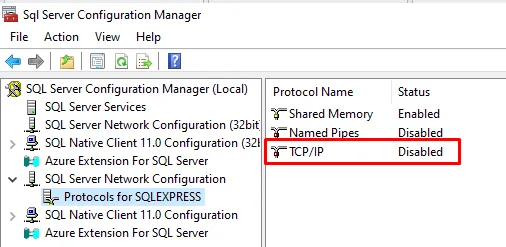
A common configuration issue is TCP/IP connectivity. SQL Server disables TCP/IP by default, so you must enable it manually in SQL Server Configuration Manager.
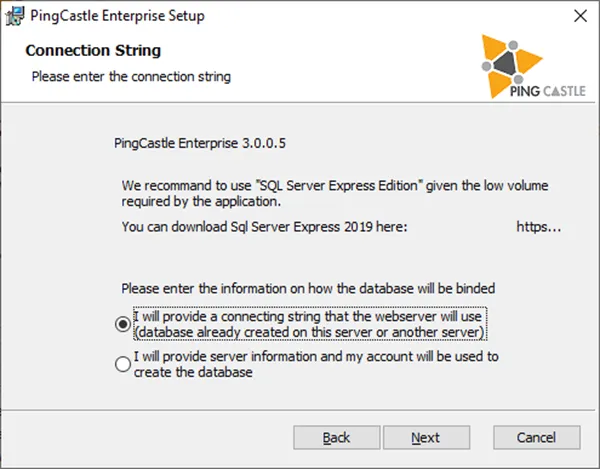
- During installation, specify a custom connection string:
Server=tcp:server.fqdn.com;Database=PingCastle;User Id=pingcastle;Password=pingcastle;Trusted_Connection=True;MultipleActiveResultSets=true
Installation doesn't create the database schema. Any connection issues will appear on first run. Check the Windows Event Log and the Serilog logs in the logs folder of the CloudAPI and PingCastle Enterprise installation directories for detailed error messages. You can update the connection string after installation by editing appsettings.Production.json. Remember to escape special characters in JSON strings (e.g., \ becomes \\).
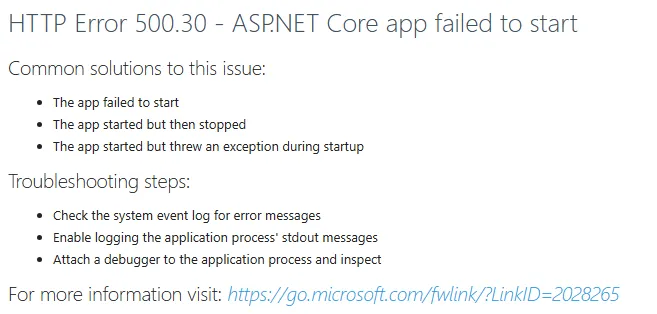
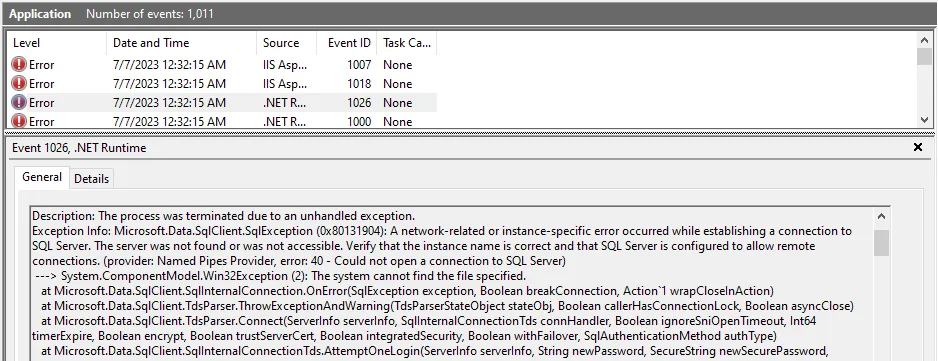
-
Create a Windows user in your Active Directory.
-
In SQL Server, create a new Windows login for this user.
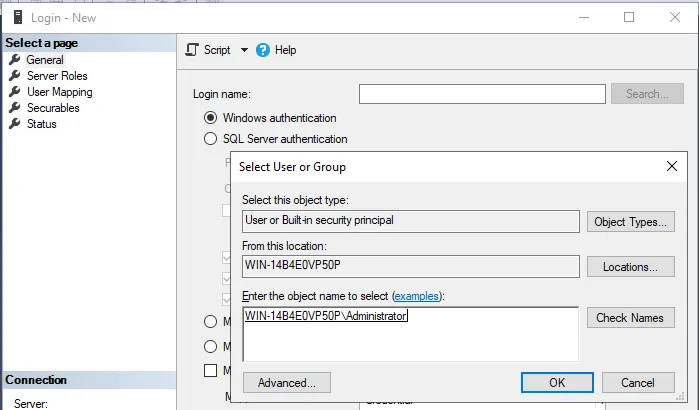
- Create a database with the Windows user as the owner.
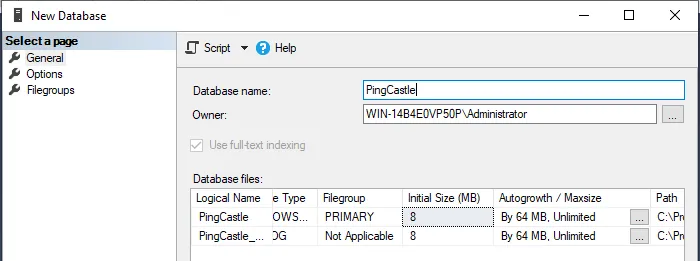
- During installation, specify a custom connection string:
Server=tcp:server.fqdn.com;Database=PingCastle;Trusted_Connection=True;MultipleActiveResultSets=true
- After installation, configure the IIS Application Pool to use the Windows user identity:
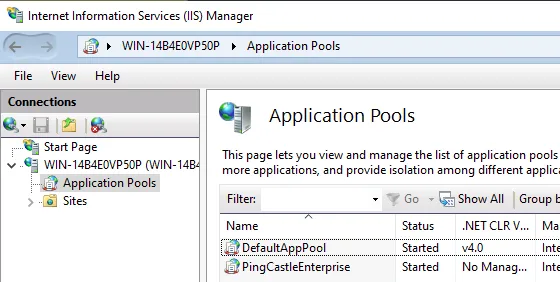
- In IIS, select the PingCastle Enterprise application pool
- Go to Advanced Settings
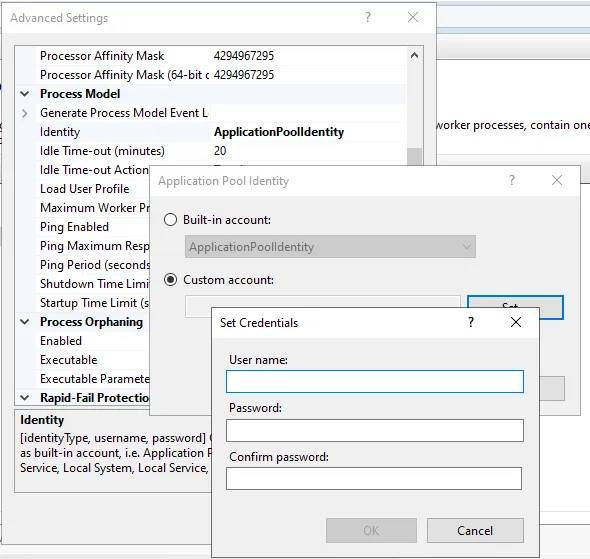
- Under Identity, select "Custom account" and specify the Windows user credentials
- Restart IIS