Multi-Environment Change Management
Multi-Environment Change Management helps you manage changes between your Production and Development/Testing accounts. The design is based on:
- Changes to production accounts go through appropriate development and testing in separate NetSuite accounts to ensure that the performance and data in production are not compromised.
- Documenting the process of transitioning changes through these accounts is critical to ensure that the process is followed to manage the risks associated with changes in NetSuite.
- Change Requests and Deployment Records, along with Environment Comparison enable the documentation and validation of this process to ensure changes are deployed properly and can be reported for audits.
Platform Governance for NetSuite must be deployed on the target environment. You need to have a least the Strongpoint Developer Role to perform a Change Request Push.
Create a Master Change Request in Production
A best practice is to create change requests in your production account so that they are not lost, they have an audit trail and approvals can be shown.
- Open Strongpoint > Change Management Tools > ITGC Change Request.
- Enter all required fields and additional approver(s).
- Click Pending Approval. Wait until the Change Request is approved.
- Open Strongpoint > Change Management Tools > ITGC Change Request.
- Click Edit on the appropriate Change Request.
- Open the Sync Tool tab on the Change Request.
- Set the Target environment (where the Change Request will be pushed).
- Set the Target login credentials: Target Email and Target Password.
- Set the Account ID Target (this is automatically loaded upon selecting Target account).
- Set the Account Target Role.
- Click Push.

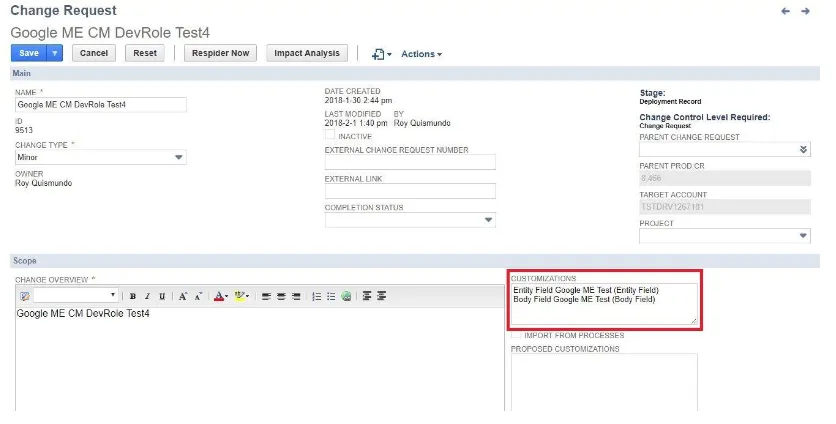
Update the Change Request in Testing/Development
- Open Strongpoint > Change Management Tools > Change Request
- Click Edit on the Change Request that came from Production.
-
Attach customizations created/updated.
-
Stage: Deployment Record
-
Set Approval Status: Approved (this is optional)

- Open the Sync Tool tab.
- Push the updated Change Request back into Production. This adds a related deployment record to the Master Change Request in Production.
Run Pre-Deployment Environment Comparison
- Run Strongpoint > Change Management Tools > Compare Environments
- Enter the login credentials of the Target and Source Accounts.
- Set the Comparison Type to Target Newer than Source.
- Click the Compare button.
Refer to Comparing Environments for more details.
Create the Deployment Record
Once you have compared your environments, get the deployment record approved. When your deployment record is approved, deploy the customizations listed on the change request.
In your Production environment:
-
Open Strongpoint > Change Management Tools > Change Request
-
Edit your master Change Request.
-
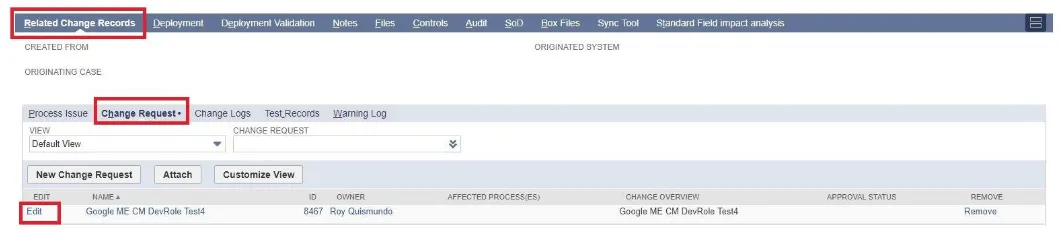
Open Related Change Records tab.
-
Open Change Request tab.
-
Click Edit (deployment record).
-
Push the Change Request from Production to Development/Testing.
-
Install any customizations in Development/Testing.
Run Post-Deployment Environment Comparison
- Run Strongpoint > Change Management Tools > Compare Environments
- Enter the login credentials of the Target and Source Accounts.
- Set the Comparison Type to Target Newer than Source.
- Click the Compare button.
Refer to Comparing Environments for more details.
Completing the Process
If testing fails, continue to update the Change Request on Testing/Development and comparing the environments until test passes. Once testing passes:
-
Edit the Change Request in Testing/Development.
- Set Approval Status: Approved
- Set Stage: Deployment
-
Push the Change Request back to Production.
-
Set the (Master) Change Request Status to Completed.