Installing ServiceNow in NetSuite
Install NetSuite Bundle
-
Open Customization > SuiteBundler > Search & Install Bundles
-
Search for bundle id 311232
-
Click on bundle name ServiceNow Integration
-
When the Bundle Details opens, click Install.

-
When Preview Bundle opens, review the bundle and click Install to finish.
-
Open Strongpoint > Strongpoint Support > Installation Settings > View
-
Open the ServiceNow Integration tab.
-
If the Service Now URL is not present:
- Click Edit.
- Add the url. The format is: https://dev67367.service-now.com/
- Click Save.
Install ServiceNow
-
Open Connections & Credentials > Credentials.
-
Click New.
-
Select Basic Auth Credentials.

-
Enter the user credentials:
User Name: sp-integrations
Password: Contact your Customer Success Manager to receive the password.
Click Submit when complete. -
Open System Applications > Studio or enter Studio in the Menu Search box.

-
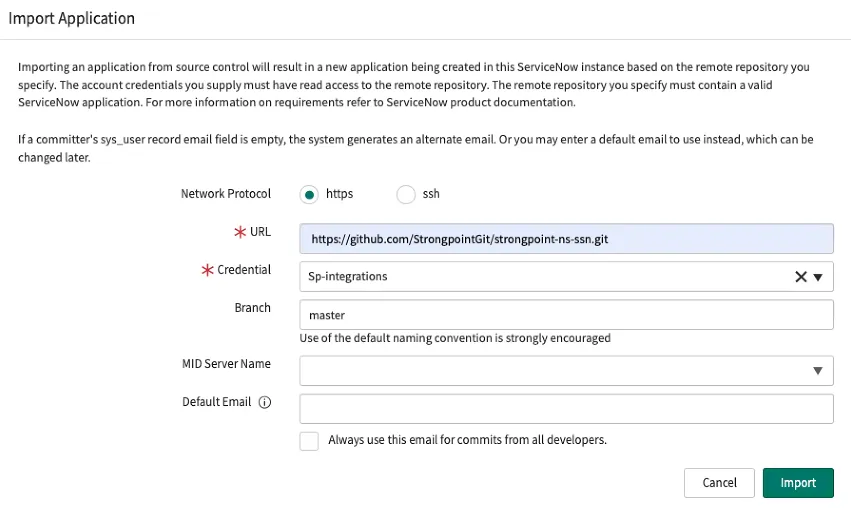
If a pop-up window appears, click Import From Source Control.

Otherwise, open File > Import From Source Control.

-
Enter the required information:
URL: https://github.com/StrongpointGit/strongpoint-ns-ssn.git
Credential: Select your credential from the drop down list
User Name: sp-integrationsBranch: master
-
Click Import. You see the Strongpoint NetSuite Integration.

-
Click Strongpoint NetSuite Integration to open the Application Explorer. You use this for the Configure ServiceNow procedure.
-
In NetSuite, open Strongpoint > Strongpoint Support > Installation Settings
-
Click Edit.
-
Open the ServiceNow Integration tab and enter your credentials.
-
Save your credentials.
Configure ServiceNow
You can configure ServiceNow for your users:
Display Action Buttons Only for Specific Conditions
Display Push Deployment Record Only Based on State
Display Strongpoint NetSuite Tab for Selected Users
Display Action Buttons Only for Specific Conditions
You can set conditions on NetSuite integration buttons to control when they are displayed on specific change records. If you use ServiceNow, you can set Configuration Items to manage change requests for different platforms, projects or products.
You need to know the IDs of the configuration items to set conditions. Ask your ServiceNow administrator for help.
-
In the ServiceNow Application Explorer for the NetSuite Integration, open Server Development > UI Action > Select Account

To open the Application Explorer, open System Applications > Studio and select Strongpoint NetSuite Integration
-
Set the Condition field to restrict display based on specific configuration items. If your company uses a different solution to identify changes for the NetSuite platform, contact your ServiceNow administrator to help determine the conditions to be set. In this example, we set the condition to be:
current.cmdb_ci == 'configuration_item_sys_id'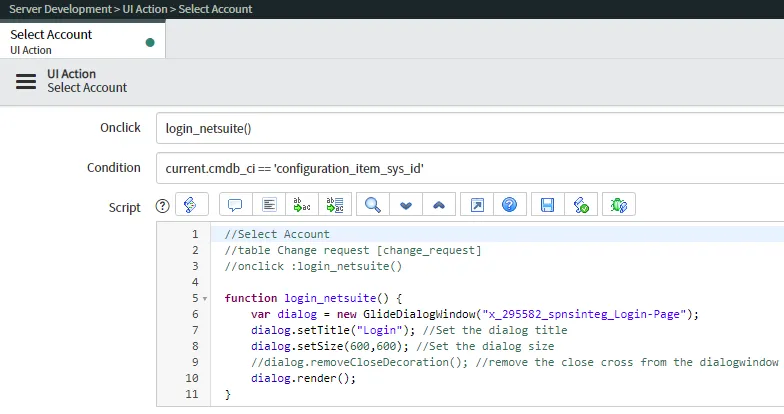
-
Click Update.
-
Repeat these steps to complete the setup on the other UI Actions: ERD, Push Deployment Record, Select Customizations and View Impact Analysis.
Display Push Deployment Record Only Based on State
This is an example procedure to display the Push Deployment Record button once a change request has passed the Authorize state. Your organization may have a different approval process.
You can set any other stage (standard or custom) depending on your approval processes.
If you need help to determine the correct conditions per your customizations, please contact your
Service Now Administrator.
-
In ServiceNow, open System Applications > Studio
-
Select Strongpoint NetSuite Integration.
-
Open Server Development > UI Action > Push Deployment Record
-
Set Condition to current.state > -3
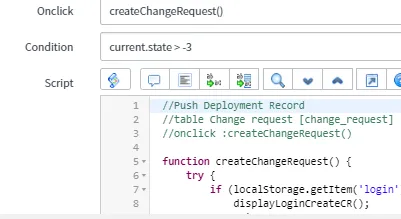
If you set action button conditions in the Display Action Buttons Only for Specific Conditions procedure, add this condition to the existing ones. For example,
current.cmdb_ci == 'configuration_item_sys_id' && current.state > -3 -
Click Update.
Display Strongpoint NetSuite Tab for Selected Users
By default, all user can see the Strongpoint NetSuite tab in ServiceNow Change Requests. You can modify this to only allow configured users to see the tab.

-
Log in to ServiceNow as an administrator to manage your instance.
-
Obtain the system identifiers for each user you want to have access to the Strongpoint NetSuite tab:
-
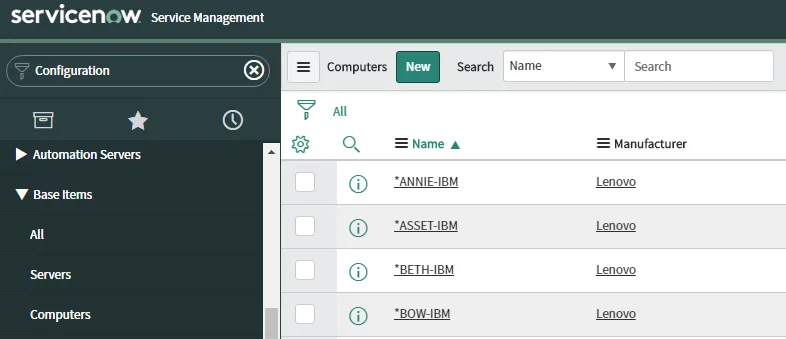
Filter for configuration
-
Open Base Items > Computers
-
Select the system for the user to grant access to the tab.
-
Select Copy sys_id from the drop down menu.

-
Paste the identifier in a file where you can access it to add to the script when you are finished locating the system identifiers. An example identifer is b4fd7c8437201000deeabfc8bcbe5dc1
-
-
Filter for Studio
-
Select Strongpoint NetSuite Integration.
-
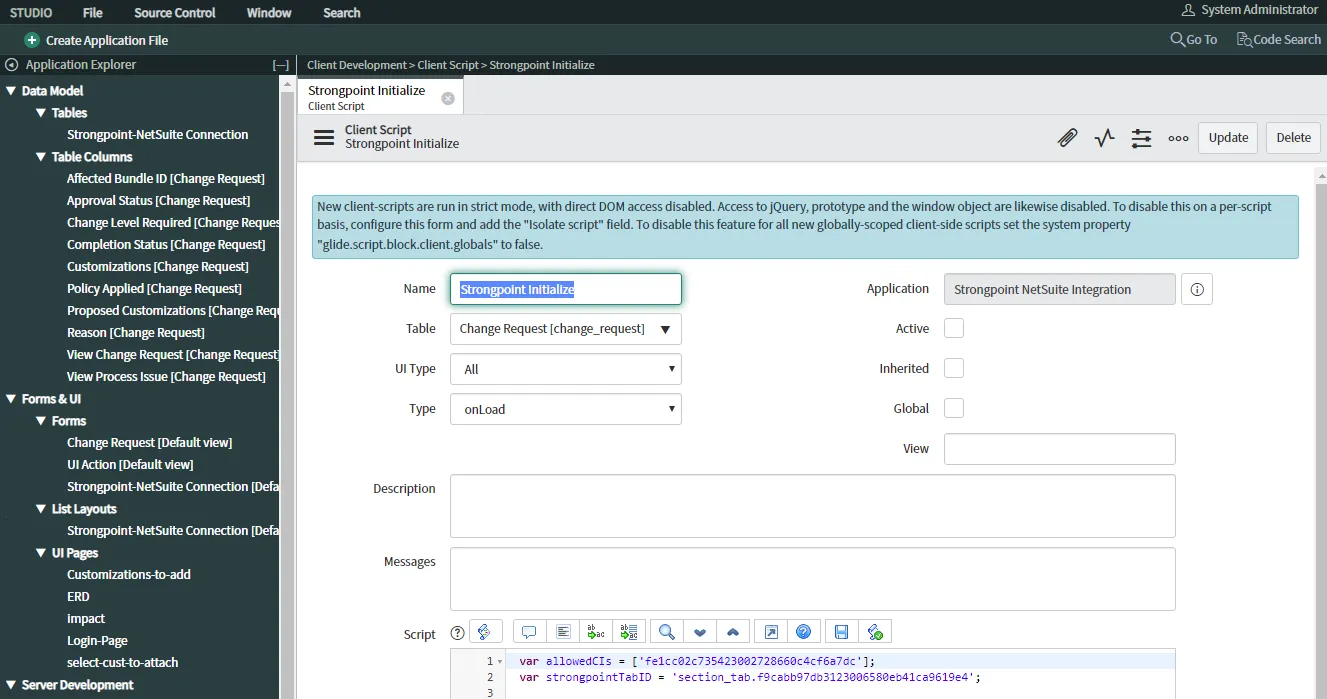
Open Client Development > Client Scripts > Strongpoint Initialize
-
Add all of your copied System Identifiers to the allowedCIs. Separate multiple IDs with a comma (,). For example:
var allowedCIs = ['fe1cc02c735423002728660c4cf6a7dc','b4fd7c8437201000deeabfc8bcbe5dc1']; -
Click Update.