Installing User Access Review
The User Access Review app must be installed and licensed before it can be used.
- Installing the Bundle
- Licensing New Users for the UAR App
- Licensing Existing Users for UAR
- Adding UAR Center Tab to Custom Roles
Installing the Bundle
-
Log into your NetSuite account with the administrator role.
-
Open Customization > SuiteBundler > Search & Install Bundles
-
Enter 433078 in Keywords.
-
Click Search.

-
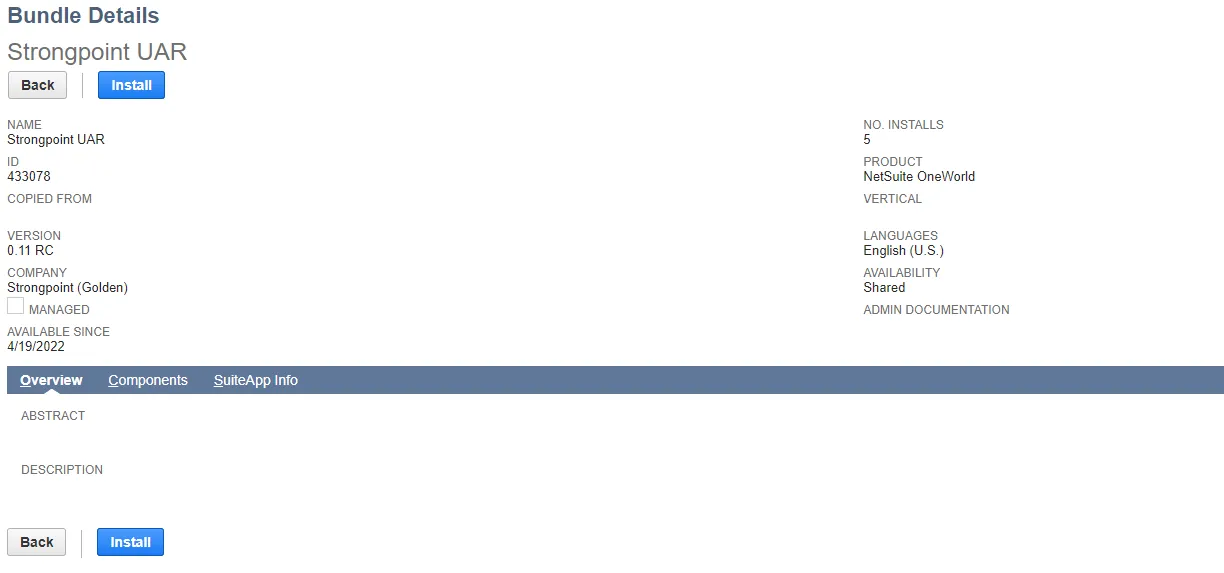
Click Strongpoint UAR.
-
Click Install to start the bundle installation.
-
Verify the installation is complete. Open Customization > SuiteBundler > Search & Install Bundles > List
-
In the Installed Bundles list, the Strongpoint UAR bundle is marked with a green check in the Status column when the bundle is installed.
A Strongpoint administrator grants users access to the UAR app. Continue with Licensing New Users for the UAR App or Licensing Existing Users for UAR.
Licensing New Users for the UAR App
This procedure is used to add a UAR license to an existing NetSuite user who is not licensed for Platform Governance for NetSuite.
-
Open Strongpoint > Strongpoint Support > License Manager.
-
Click View.
-
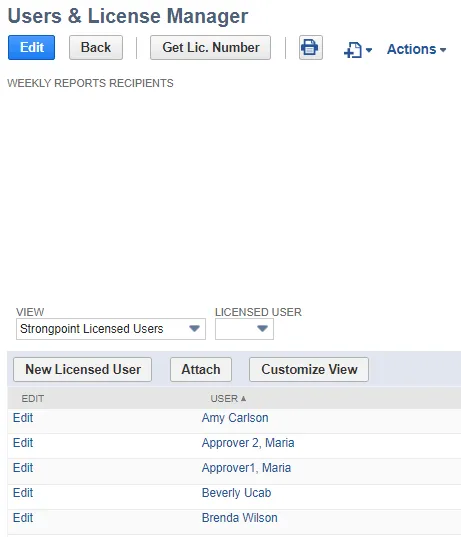
Set the View to Strongpoint Licensed Users.
-
Click New Licensed User.

-
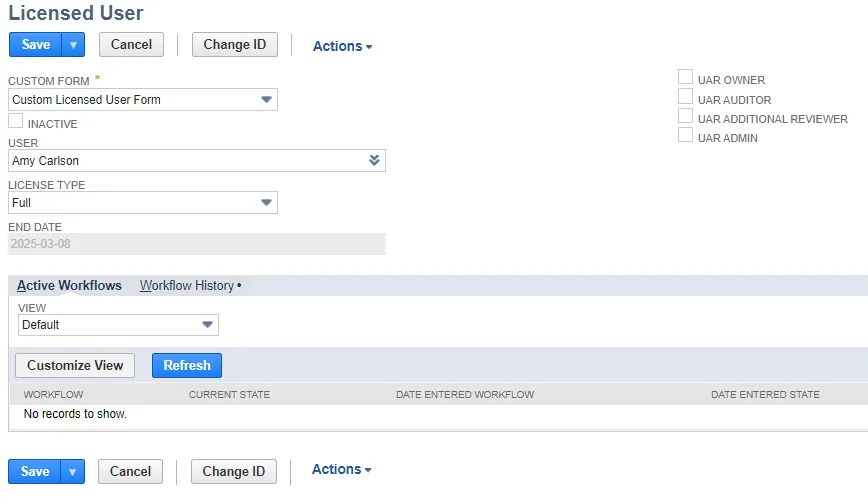
Select the User.
-
Set License Type to Full.
-
Assign one or more UAR roles:
- UAR Owner reviews Role Permissions and/or Role Membership.
- UAR Auditor read-only access.
- UAR Additional Reviewer performs assigned Role Membership reviews.
- UAR Adminmanages the UAR process, assigns Role Owners to a role, creates Reviews, and views Reviews.
- Click Save.
Licensing Existing Users for UAR
-
Open Strongpoint > Strongpoint Support > License Manager.
-
Click View.
-
Set the View to Strongpoint Licensed Users.
-
Click Edit beside the User name.
-
Set License Type to Full.
-
Assign one or more UAR roles:
- UAR Owner reviews Role Permissions and/or Role Membership.
- UAR Auditor read-only access.
- UAR Additional Reviewer performs assigned Role Membership reviews.
- UAR Adminmanages the UAR process, assigns Role Owners to a role, creates Reviews, and views Reviews.
- Click Save.
Adding UAR Center Tab to Custom Roles
Determine the Roles and Center Types that need access to UAR.
-
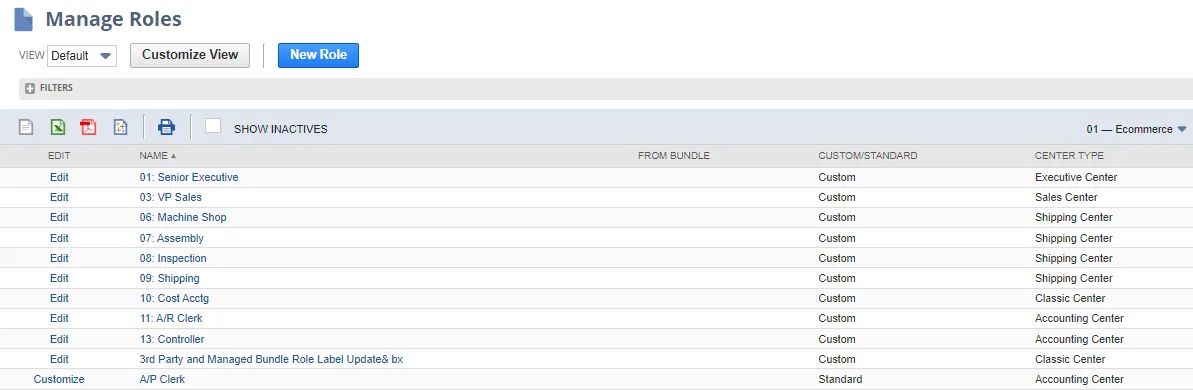
Open Setup > Users/Roles > Manage Roles to review your roles. The Center Type is listed for each Role. For example, if you are adding UAR to the Controller role, you can see the Center Type is Accounting Center.
-
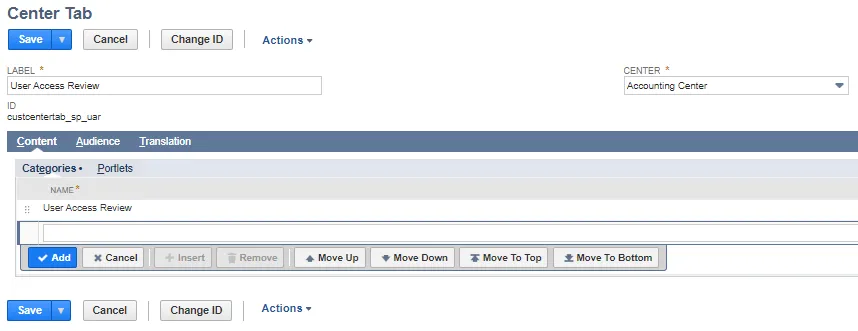
Open Customization > Centers and Tabs > Center Tabs
-
Click Edit by User Access Review.
-
Select the Center. This example shows the Accounting Center.
-
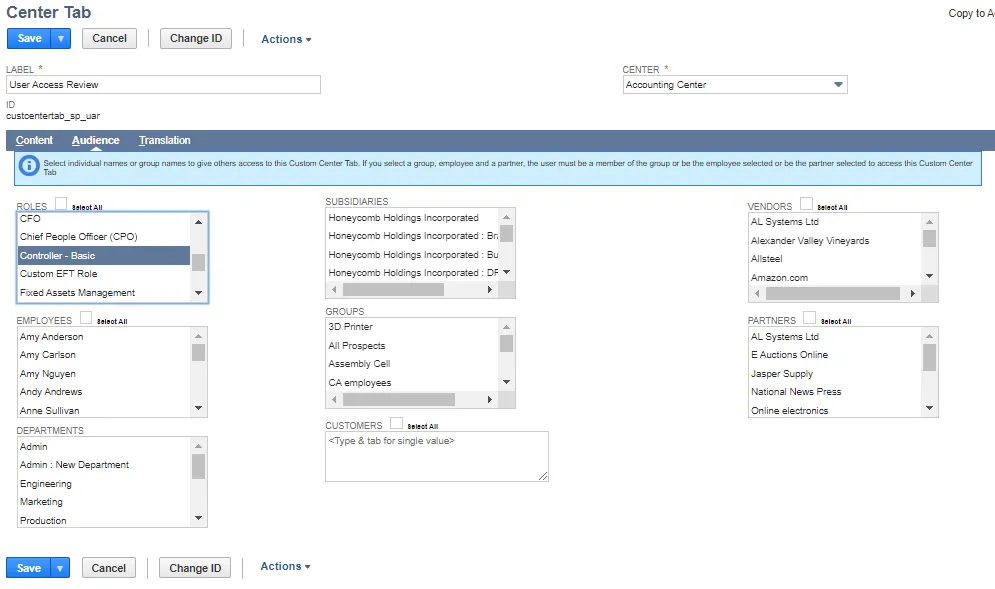
Open the Audience tab.
-
Select the Role. This example show the Controller - Basic role.
-
Select Save > Save a Copy.
-
Repeat for each Center Type and Role.