Using Enhanced User Provisioning
Access management for onboarding/offboarding and access change is streamlined into a new, efficient Enhanced User Provisioning work flow. The new User Access Change Request is used to add or remove access, or grant temporary access. You can specify the access by Affected Employees or Affected Roles. The existing approval process is used.
The administrator role cannot be automatically provisioned.
The new form is accessed from Strongpoint > Change Management Tools > User Provisioning Change Request.
The Enhanced User Provisioning feature is enabled as part of the Installation Settings.
If you choose to continue with the original method, use the Strongpoint > Change Management Tools > ITGC Change Request. When you view the Change Log, you see Change Type is set to User Role Assignment Change instead of User Onboarding.
You can create a custom change request form for User Provisioning. Refer to Using Custom Change Request Forms for information on implementing your custom form.
Enable Enhanced User Provisioning
-
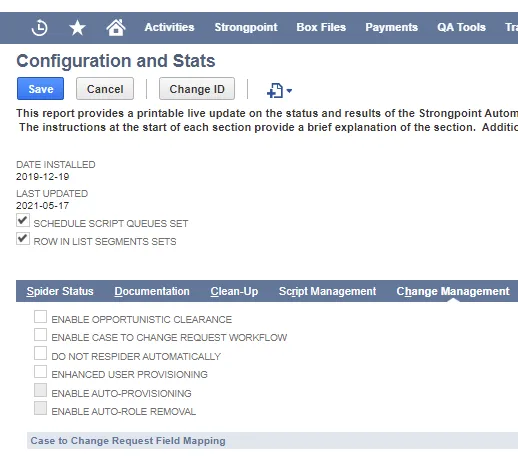
Open Strongpoint > Strongpoint Support > Installation Settings.
-
Open the Change Management tab.
-
Enable Enhanced User Provisioning.
-
Enable the Auto-Provisioning and Auto-Role Removal options to automatically implement the changes when a User Access Change Request is Complete.
-
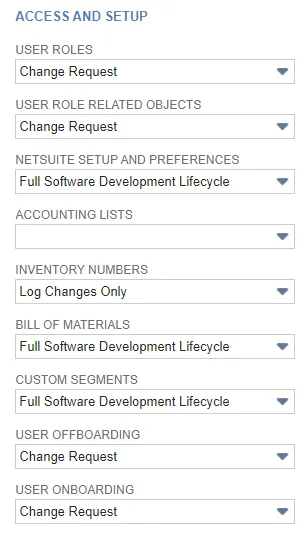
When Enhanced User Provisioning is enabled, there are new Access and Setup controls added to the Policy Change Controls tab: User Offboarding and User Onboarding:
Onboarding Users
-
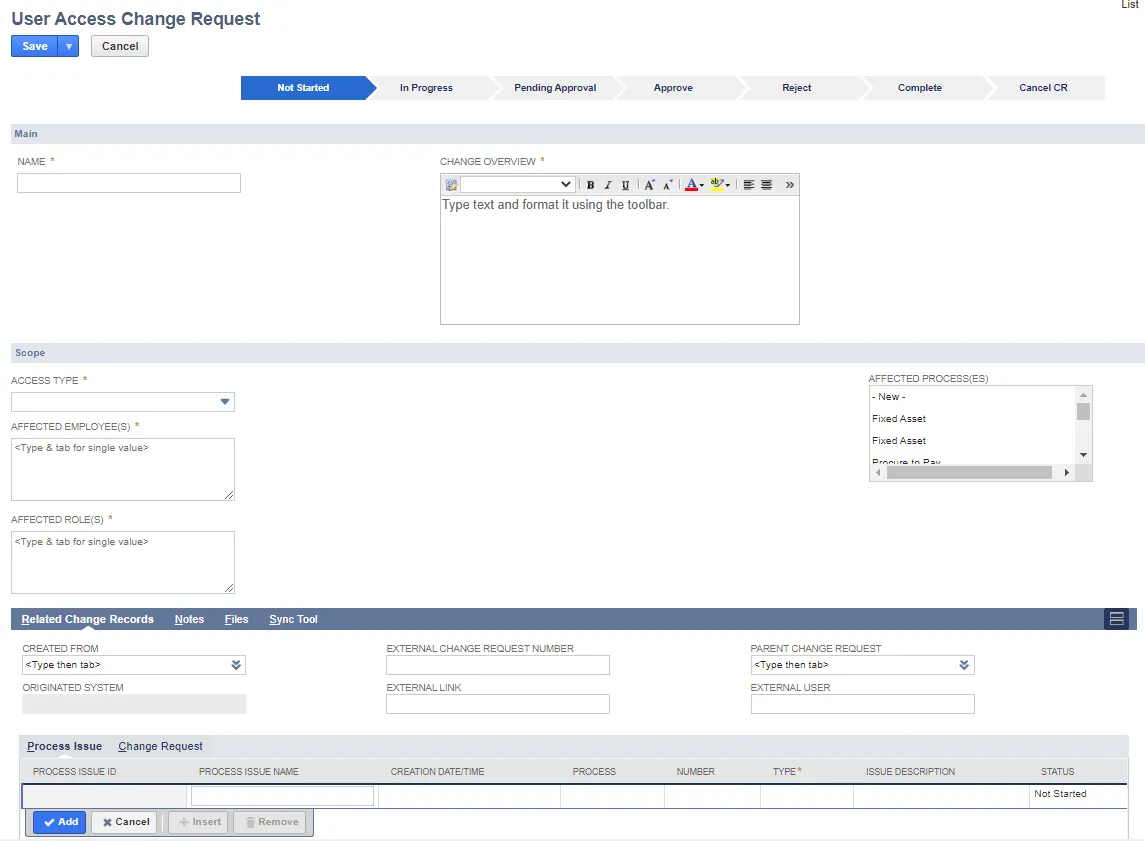
Open Strongpoint > Change Management Tools > User Provisioning Change Request.
-
Enter a descriptive Name and Change Overview.
-
Select Role Additions for Access type.
-
Enter one or more Affected Employees.
-
Enter one or more Affected Roles.
-
Save the change request.
-
Click Pending Approval in the status bar.
Once the request is approved, the roles are automatically added if you enabled Auto-Provisioning. The change request status is shown as Complete. Otherwise, once the request is approved, you need to manually add the roles and update the status.
A compliant Change Log is generated:

The Values tab shows the details of the role changes.
Offboarding Users
-
Open Strongpoint > Change Management Tools > User Provisioning Change Request.
-
Enter a descriptive Name and Change Overview.
-
Select Role Reductions for Access type. The Offboarding detail fields are now visible.
-
Check Inactivate After Removal if the affected employees should be inactivated. This should only be checked if you are removing all of the employee's roles.
-
Enter one or more Affected Employees. The Get Roles for Affected Employees button is now visible.

-
Enter one or more Affected Roles. Or, click Get Roles for Affected Employees to select from the current roles.

-
Enter an Offboarding Date (YYYY-MM-DD) or select a date using the Calendar icon.
-
Enter an Offboarding Time (hh:mm am/pm).
-
Select the Timezone.
-
Save the change request.
-
Click Pending Approval in the status bar.
Once the request is approved, the roles are automatically removed at the specified time if you enabled Auto-Role Removal. The change request status is shown as Complete. Otherwise, once the request is approved, you need to manually remove the roles and update the status.
A compliant Change Log is generated. The Values tab shows the details of the role changes.
If there are more than15 employees or 20 roles, multiple runs are processed. The User Provisioning Error field reports the Change Request is in process until all of the runs are complete.
Viewing User Provisioning Change Requests
To view the list of all User Access change requests: Strongpoint > Change Management Tools > User Provisioning Change Request List.
Managing Users
Users are managed through the License Manager.
Add a User:
- Open Strongpoint > Strongpoint Support > License Manager
- Click View
- Click New Licensed User
- Open the User dropdown. Select an existing NetSuite user name or select New to open a new Employee Form.
- Select the License Type.
- Click Save.
Edit a User
- Open Strongpoint > Strongpoint Support > License Manager
- Click View
- Select Strongpoint Licensed Users from View.
- Click Edit by the User name.
- Change the information and click Save.
Inactivate a Licensed User
- Open Strongpoint > Strongpoint Support > License Manager
- Click View
- Select Strongpoint Licensed Users from View.
- Click Edit by the User name.
- Click to mark the Inactive box.
- Click Save.
Next Step: Setting Tab Access
User Management
These reports are available on the User Management Menu:
- Employees with Standard Roles identifies all employees assigned to standard roles.
- Employees with Unused Logins identifies any employees who have not logged in.
- Employee Permission Changes identifies all permission changes that have occurred.
- Unused Roles - Not Assigned identifies roles not assigned to any user.
- Unused Roles - Assigned But Not In Use identifies roles assigned to a user, but never used.
- Role Assignments with No Login in Six Months identifies assigned roles where a user has not logged in within the past six months.
- Employees with Multiple Roles identifies users with multiple roles. Multiple roles create conflicts. Users who require multiple roles for support or administration can be isolated in a sandbox using Platform Governance for NetSuite to keep the sandbox the same as production for troubleshooting and support.
- Current Global Permission identifies users with global permissions, which can cause conflicts. Best practice is to not use global permissions on a long-term basis.