Manual Scanners
When the initial scan is complete, you can run additional on demand scans as required.
When you add or change a specific customization, you can choose to run an on demand scan of only the Metadata type of the affected customization, instead of scanning the entire environment. This type of scan reduces the run time. For example if you change a Report, pick reports as the Metadata type and Platform Governance for Salesforce only scans reports.
The scanner is only available to Administrators.
To run the scanner:
-
Open Netwrix Dashboard > Scanner > Manual Scanners
-
Use the optional Search Types to narrow the focus of the list if you are looking for a specific type.
-
You can select + beside one or more types to scan or you can scan the whole environment by clicking + on the Name row to select all the types.

-
Click Run Scanner.
-
The batch runs in the background. You receive an email notification when the scan is complete.
You can create your own Salesforce view for the scanners.
- Open Salesforce Setup.
- Search for apex jobs or navigate to Environments > Jobs > Apex Jobs.
- Click Create New View.
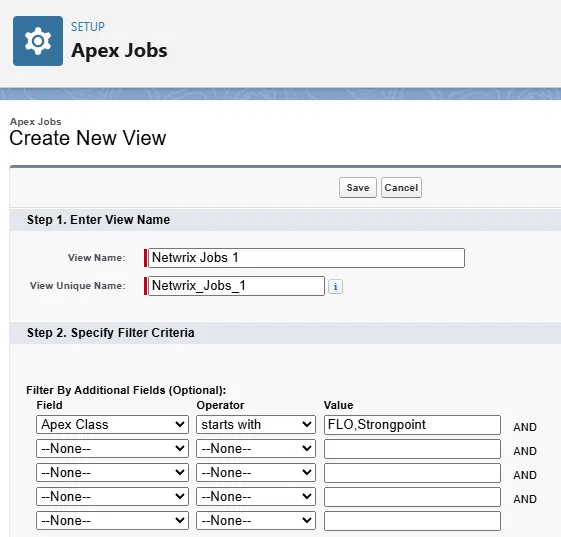
- Enter a View Name. The system assigns View Unique Name. Netwrix Jobs1 is used in this example.
- Select Apex Class for the Field.
- Select starts with for the Operator.
- Assign FLO, Strongpoint for the Value.
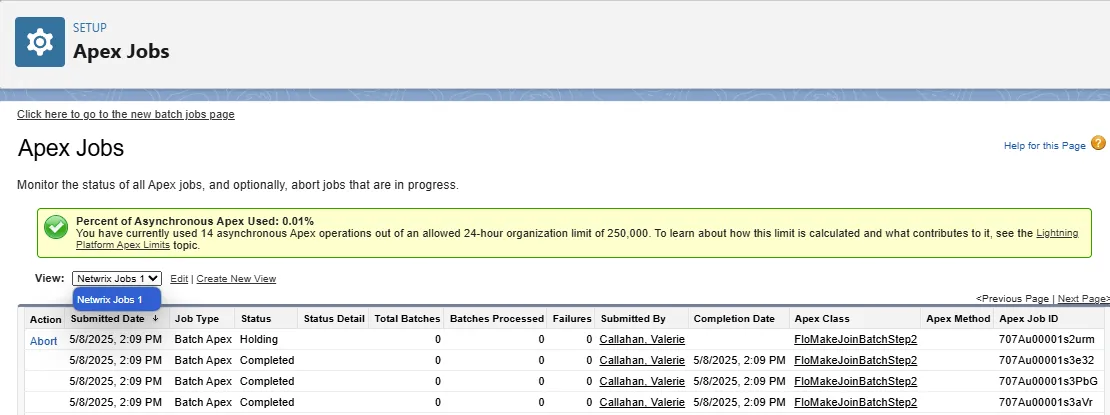
- Click Save. You can now see the status of all of the Strongpoint jobs.
-
From the Netwrix Dashboard: click Configuration and Stats in the Resources section, or open Settings > Configuration and Stats.
Next Step: Validate the Data
Scanner Overview
The Scanner menu is located on the Netwrix Dashboard page.
- Scheduler schedules automatic scans.
- Manual Scanners accesses the list of scanners where you can select one or more to run. Manual Scanners can also be run from Netwrix Dashboard.
- Daily Scan Configuration enables an administrator to select object types for daily scanning, instead of defaulting to all types.
- Field Level Security Scanner displays all fields using the selected Salesforce object.
Daily Scan Configuration
Administrators can use this feature to only scan specified objects on a daily schedule. The default is to scan all objects.
Open Netwrix Dashboard > Scanners > Daily Scan Configuration
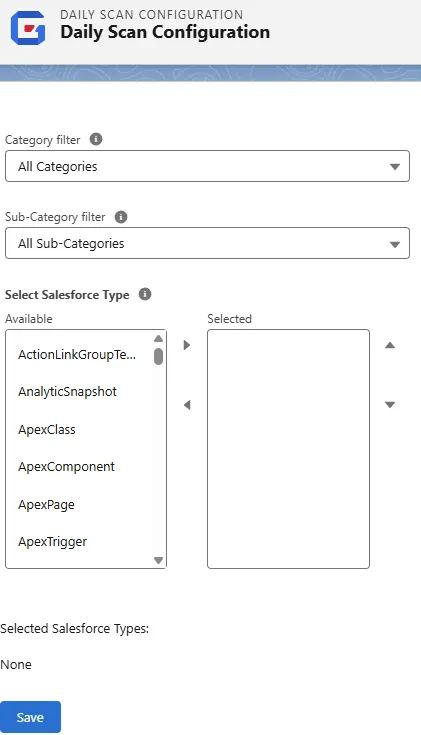
- Select an optional Category filter.
- Select an optional Sub-Category filter.
- Select one or more Salesforce Types in the Available pane. Click the right arrow to add them to the Selected pane. You can use the up/down arrows to reorder the selected types. Select and use the left arrow to remove a type from the Selected pane.
- Click Save to save the configuration.
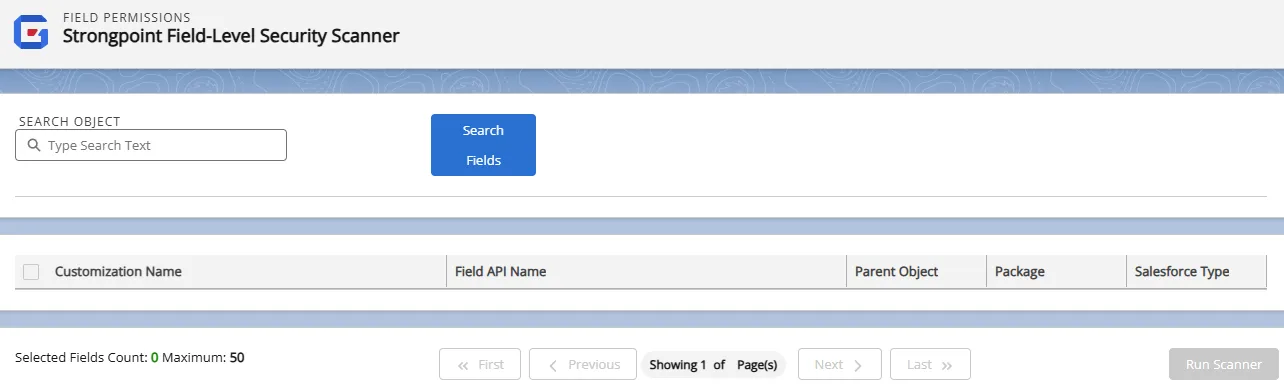
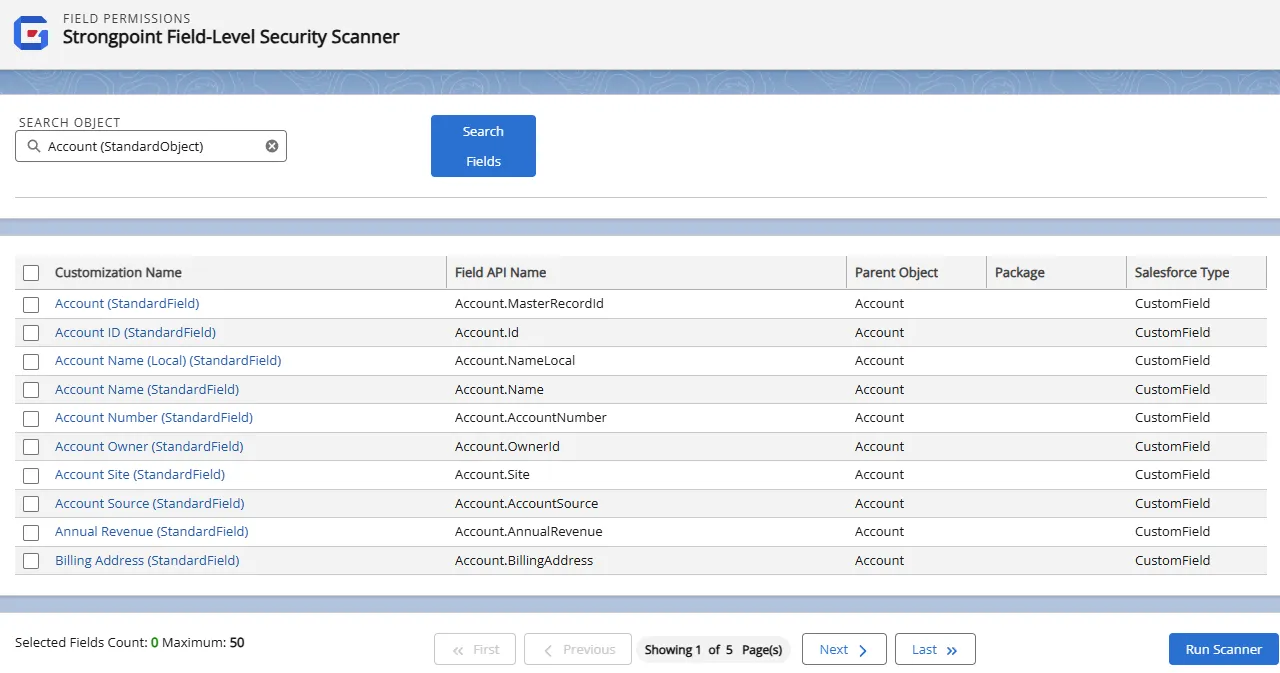
Field Level Security Scanner
The Field Level Security Scanner creates a comprehensive list of Customizations, Field API Name, Parent Object, Package, and Salesforce Type for a selected Object.
Run the scanners before you search to ensure you have the latest data.
-
Open Netwrix Dashboard > Scanner > Field-Level Security Scanner.
-
Start typing the name of a Salesforce Object. Pick from the completion list.
-
Click Search Fields.
-
Select one or more fields to scan. The Customization Name is a link to the Customization Record.
NOTE: It is not technically possible to scan permissions on all fields in each object.
-
Selected fields are shown in a list at the bottom of the form. You can uncheck individual fields or all fields from the Selected Field list.

-
Click Run Scanner.
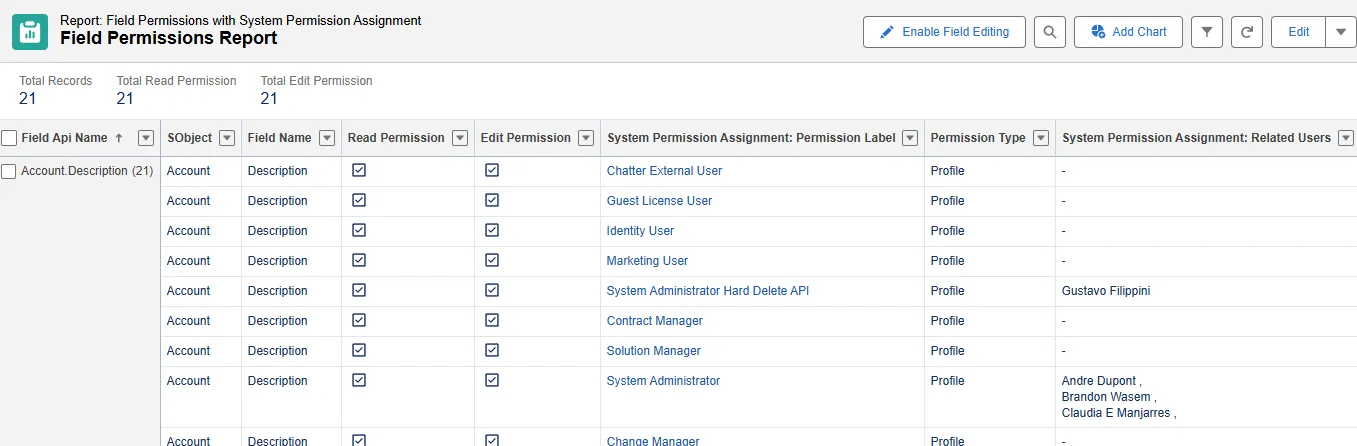
Once the scan is complete, open the Reports tab and select Field Permissions Report. The report is also available from the Netwrix Dashboard: Reports > Access Reports > Field Permissions.
Scheduler
Platform Governance for Salesforce's scheduler creates automated scans, manages scripts, uses the Agent and finds the date last used (DLU). The schedules are validated to prevent scanners from running concurrently, potentially causing conflicts and incomplete documentation. A warning message is displayed if you create an overlapping scanner schedule.
To use the scheduler tool:
-
Open Netwrix Dashboard > Scanner > Scheduler
All categories are initially disabled by default.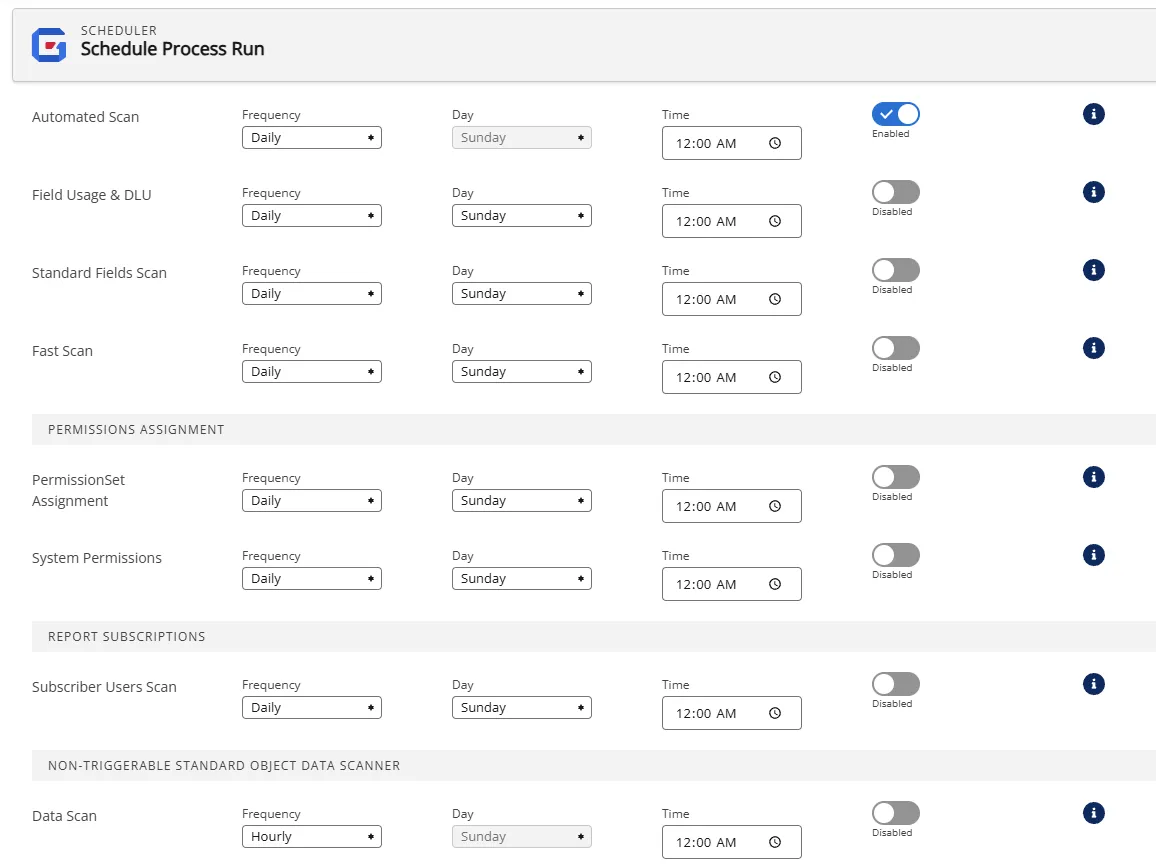
-
Select the category to automate by clicking on Disabled to enable it. There is no save button, automation is turned on and saved by toggling Disabled/Enabled.
-
Select the Frequency , Day and Time. Your selections are automatically saved.
-
Click any menu item to close the Scheduler.