Set Up the Jira Integration
Platform Governance for Salesforce's Change Enablement capabilities are integrated with Jira, one of the most popular issue ticketing and development project management systems. Customers are able to look for and include Salesforce Customizations, assess impacts for requested changes, and push Jira change tickets into a Change Request. This enables easy management of changes, seamless tracking of compliant changes and automating the reconciliation of change logs during an audit.
User benefits include:
- Avoid duplicate effort of creating tickets in two different systems.
- Perform impact analysis assessment.
- Navigate to DRD views.
- Enable automatic synchronization of Jira and Platform Governance for Salesforce change tickets.
Change Requests are not automatically created, as not all tickets result in a Change Request. Tickets must be pushed to Platform Governance for Salesforce to begin the process. If Automatic Synchronization is turned on, then changes to the Status and Customizations are synchronized between Jira and Platform Governance for Salesforce without the need to keep manually pushing the changes.
To set up the Jira integration:
- Review Your Jira Statuses
- Install the App
- Set Up Jira Cloud Integration Credentials
- Set Up Status Mapping
You can map custom fields between Change Requests and Jira. Refer to Jira Field Mapping for details.
Review Your Jira Statuses
To take advantage of the automatic synchronization feature, we recommend reviewing your Jira statuses to be mapped to the Change Request statuses. When a ticket status is updated to a mapped status, Platform Governance for Salesforce handles the synchronization between Jira and Salesforce.
The mapping allows multiple Jira statuses to map to each Change Request status.
The mapping is part of the Set Up Status Mapping procedure.
Refer to the Atlassian documentation for instructions on Defining status field values.
Install the App
Use the Jira Cloud Installation, then complete the Access Data with API Integration or Set Up Jira Cloud Integration Credentials after installing the app.
Jira Cloud Installation
You must be a Jira system administrator to install the Strongpoint for Salesforce app. Contact your Jira system administrator if you do not have administrative permissions.
-
Open your Jira Software Dashboard.
-
Select Apps > Explore more Apps >
-
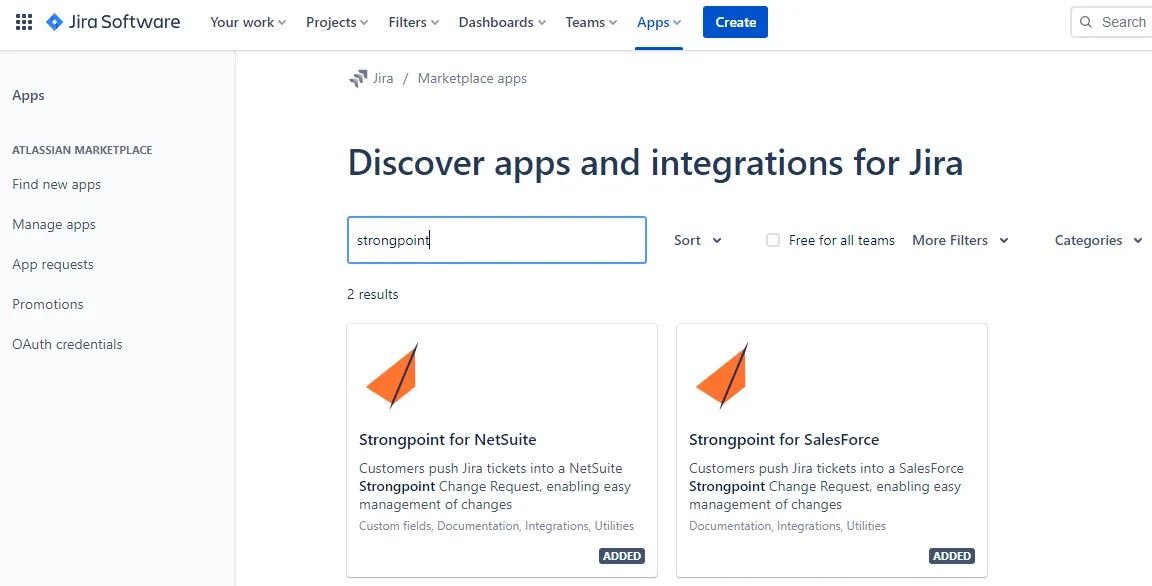
Search for Strongpoint.
-
Click Strongpoint for Salesforce to install the app.
Access Data with API Integration
You can use a connected app to request access to Salesforce data. These steps connect your Jira Cloud app to your Salesforce instance.
For a connected app to request access, it must be integrated with the Salesforce API using the OAuth 2.0 protocol. OAuth 2.0 is an open protocol that authorizes secure data sharing between applications through the exchange of tokens.
Configure the connected app:
-
Log in to your Salesforce org.
-
Open the Connected App:
Setup > Apps > App Manager > Strongpoint (where App Type = Connected)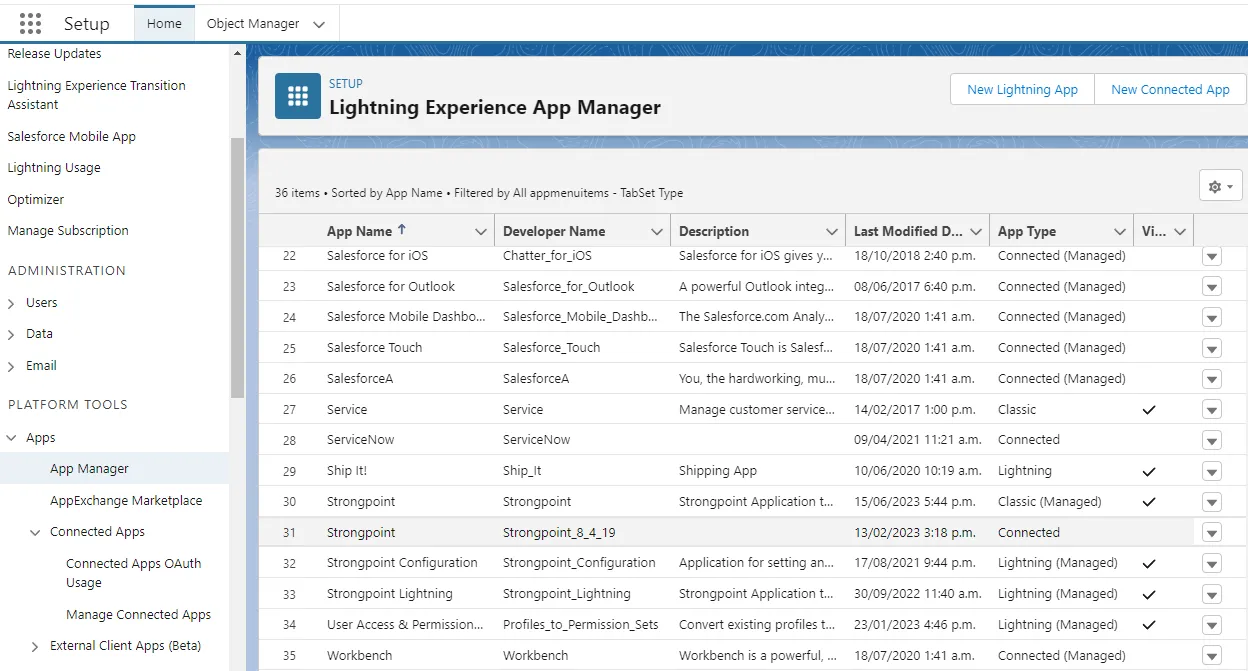
-
Click the drop down arrow on the right side and select Edit.
-
Set the Callback URL to https://spjira.my.salesforce-sites.com/SpHandleJiraAuth
-
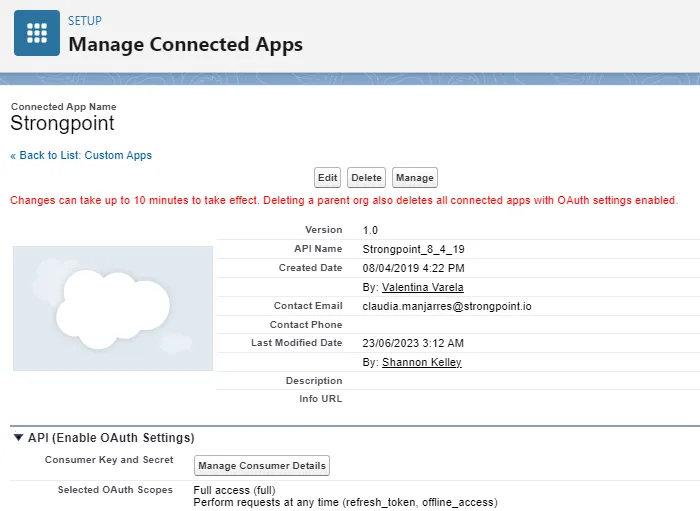
These Oauth Scopes must be selected:
Full access (full)
Perform requests at any time (refresh_token, offline_access) -
Click Save.
Your connected app requires 2-10 minutes after you save before it is available.
-
Click Manage Consumer Details.
-
Copy the Consumer Key and the Consumer Secret codes to a clipboard. You are prompted for this information when you use the app.
If you do not use a connected app, you can set up Jira Cloud Integration Credentials as an alternative.
Set Up Jira Cloud Integration Credentials
-
From the Netwrix Dashboard: click Configuration and Stats in the Resources section, or open Settings > Configuration and Stats.
-
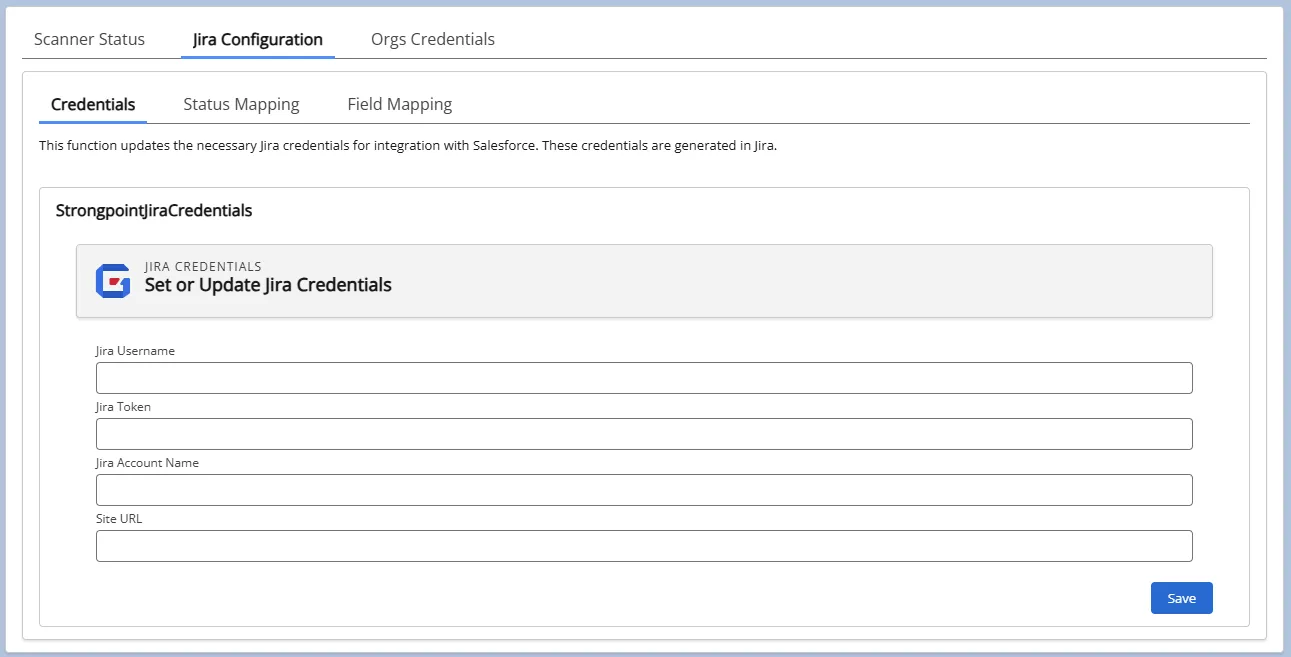
Open the Jira Configuration tab.
-
Enter your credentials:
- Jira Username is your Jira login email associated with your Jira API token.
- Jira Token is your Jira API token. If you do not have your token, follow the steps in the Atlassian documentation.
- Jira Account Name is the company specific part of the Jira site URL (https://_JiraAccountName**_.atlassian.net**). Only enter the JiraAccountName, not the entire URL.
- Site URL is https://site.force.secure.com
-
Click Save.
Restricting Access to a Project
By default, all projects are visible for the Jira Platform Governance for Salesforce integration. You can restrict this by project or profile.
Users opening a restricted project receive a information message, instructions for enabling access, and a link to this topic. Follow the instructions for Restricting Access to a Project or Setting Groups/Profiles Visibility to grant the user appropriate access.
The Strongpoint Salesforce Integration is not supported for this project.
-
Open a Jira project.
-
Select Strongpoint Sf Settings.
-
Select the Project Visability Settings tab.
-
Enter the name of the project in the Visibility Settings. The specified project is the only one that is available to the Platform Governance for Salesforce integration. Leave Visibility Settings blank to allow all projects access.
-
Click Save.
Only the specified project has access to the Platform Governance for Salesforce Jira installation. If Visibility Settings is blank, all projects have access.
Setting Groups/Profiles Visibility
Access to the Jira Platform Governance for Salesforce integration can also be performed with Profile groups.
Users opening a restricted project receive a information message, instructions for enabling access, and a link to this topic. Follow the instructions for Restricting Access to a Project or Setting Groups/Profiles Visibility to grant the user appropriate access.
The Strongpoint Salesforce Integration is not supported for this project.
-
Open a Jira project.
-
Select Strongpoint Sf Settings.
-
Select the Profile Visability Settings tab. There are two lists:
Existing Groups are all of the current groups in Jira
Selected Groups are groups that can see the Platform Governance for Salesforce Jira integration. If Selected Groups is blank, all groups have access to the integration.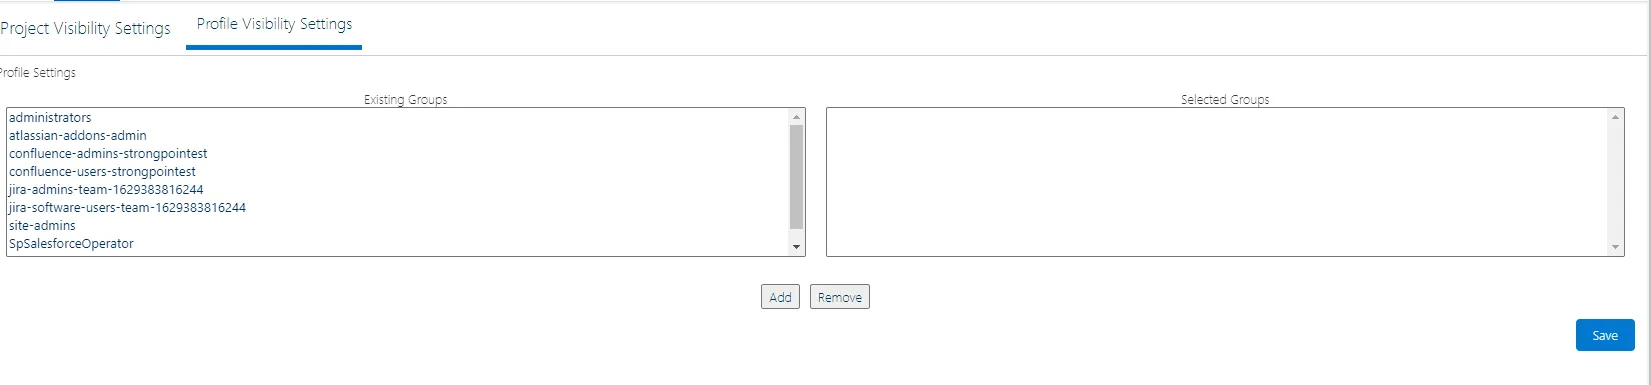
-
Select an existing group and click Add to include it as a Selected Group. To remove a group from the selected list, select it and click Remove. If Selected Groups is blank, all groups have access to the integration. If there are one or more groups, then access is restricted to the specified group.
Set Up Status Mapping
-
From the Netwrix Dashboard: click Configuration and Stats in the Resources section, or open Settings > Configuration and Stats.
-
Open the Jira Configuration tab.
-
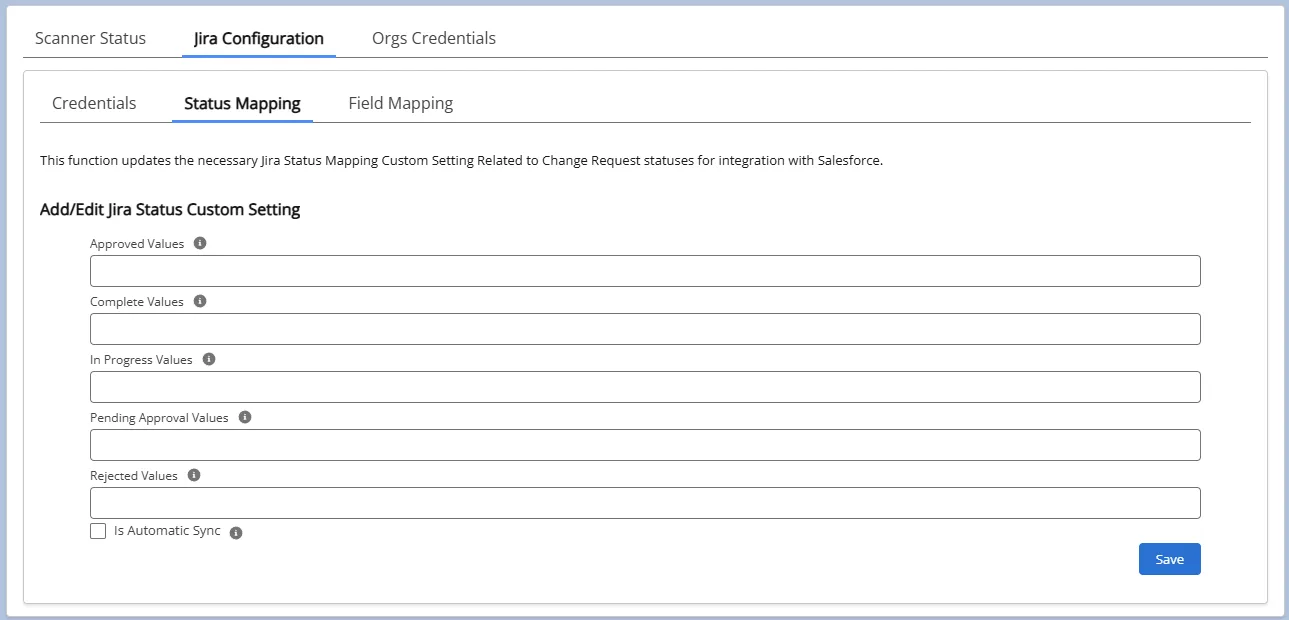
Open the Status Mapping tab.
-
Enter the mappings between your Jira statuses and the Change Request statuses. You must define your Jira statuses prior to this step. You can enter multiple Jira statuses for each Change Request status, separated by commas. For example, In Progress, Backlog. Assign your mapping for each of the Change Request statuses:
- Approved Values
- Complete Values
- In Progress Values
- Pending Approval Values
- Rejected Values
-
Check Is Automatic Sync to enable Platform Governance for Salesforce to handle the synchronization between Jira and Salesforce when a Ticket status is updated to a mapped status. without having to click Push. If you are using an org where you do not want to create a Change Request, leave this unchecked so you can do your research or testing without generating Change Requests.
-
Change Requests are not automatically created, as not all tickets result in a Change Request. Tickets must be pushed to Platform Governance for Salesforce to begin the process. If Automatic Synchronization is turned on, then changes to the Status and Customizations are synchronized between Jira and Platform Governance for Salesforce without the need to keep manually pushing the changes.
-
Click Save.
Next Step: Jira Walkthrough Example
Find Change Requests from Jira
To find your change requests that originated in Jira:
Create a Report:
- Open Reports
- Click New Report
- Choose a Report Type : Other Reports and Change Requests.
- Click Continue.
- Add a filter: Change Type
Equals
Select Jira - Add any additional columns you want to display.
- Once the report is created, click Save. Best practice is to title the search something meaningful, such as Find Change Requests from Jira.