Export Objects
Administrators can use this to export one or more objects, including all child objects, into a single view for easy review and management. For each export, you select the settings and optional profiles and permission sets to include in the object details. The export is done in the background to avoid timing out or exceeding the Salesforce Governor Limits. You will receive an email with a link to the Export Object Attachment record, where you can download your file.
NOTE: Strongpoint stores Object-level permissions in a Custom Object. There are two reports
(Flashlight > Reports / List Views > Customizations) for easy access to this
information:
Permissions by Object
Object Permissions by Profile
- Open Flashlight > Tools > Export Objects
Objects is the default tab. Profiles and Permission Sets and Users exports are on their own tabs.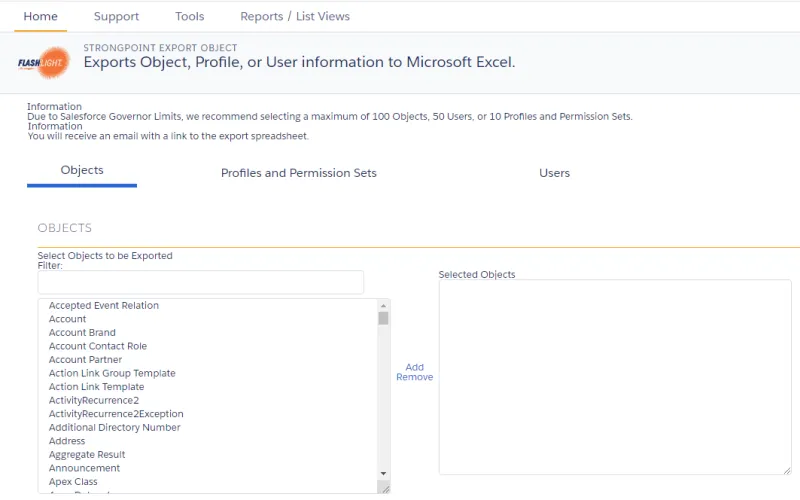
- Scroll through the Select Objects to be Exported, or enter all or part of a name in Filter to filter the list.
- Select one or more objects in the scroll box. Use Shift or Ctrl to select multiple objects.
- Click the right arrow to move the items to the Selected Objects list. To remove an item from the Selected Objects list, select it and click the left arrow.
- Select the Settings to be exported.

- Optional: Select one or more profiles to be included for more security
information.
- Optional: Select one or more permission sets to be included for more security
information.

- Click Download XLS to export your selections. The file ObjectExport.xls is created in your download folder.
ObjectExport.xls File
When you open an exported file, this message may be displayed, as the exported ObjectExport.xls file is in XML instead of the Excel format. Click Yes to load the file.

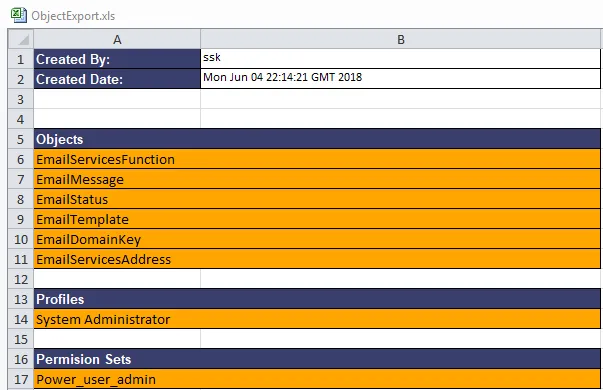
The ObjectExport.xls file contains a Summary tab and a separate tab for each selected object.
The Summary tab shows who created the export, the creation date and time, list of selected
objects, and lists of any selected optional Profiles and Permission Sets.
The Object tabs contain all of the requested information for each
object.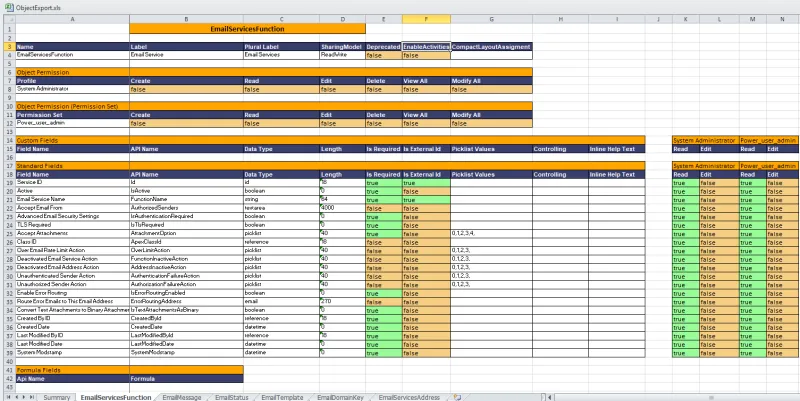
Export Profiles and Permission Sets
Administrators can use this tool to export all user permissions into a single view for easy review and management. The export is done in the background to avoid timing out or exceeding the Salesforce Governor Limits. You will receive an email with a link to the Export Object Attachment record, where you can download your file.
- Open Flashlight > Tools > Export Objects.
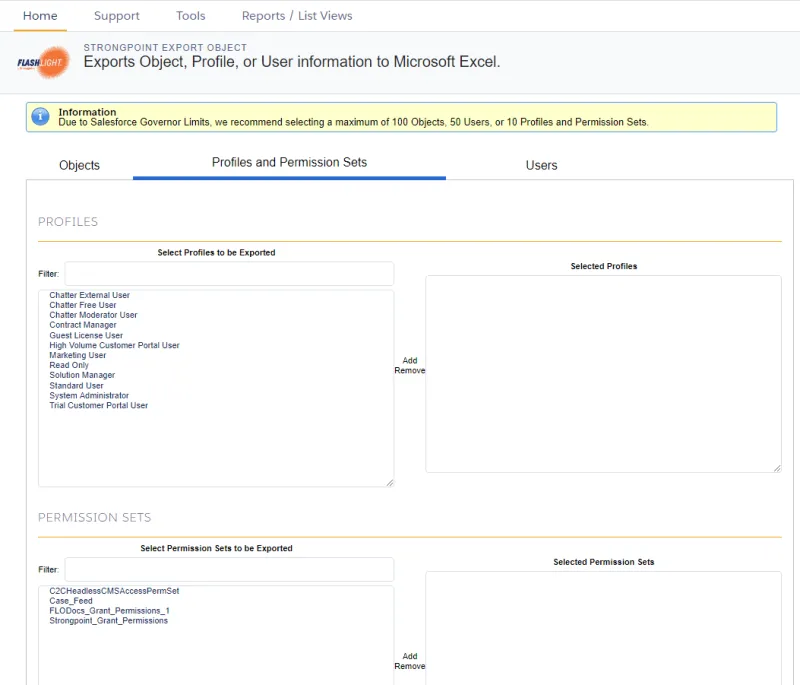
- Open the Profiles and Permission Sets tab.
- Scroll through the Select Profile to be Exported.
- Select one or more objects in the scroll box. Use Shift or Ctrl to select multiple objects.
- Click the right arrow to move the items to the Selected Profiles list. To remove an item from the Selected Profiles list, select it and click the left arrow.
- Select the Settings to be exported.

- Click Test Connection.
- Click Download XLS. The file ProfileExport.xls is created.
ProfilesExport.xls File
When you open an exported file, this message may be displayed, as the exported ProfilesExport.xls file is in XML instead of the Excel format. Click Yes to load the file.
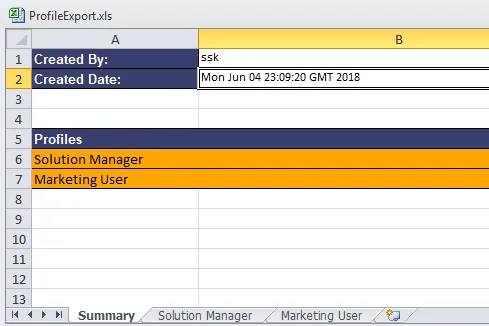
The ProfilesExport.xls file contains a Summary tab and a separate tab for each selected profile.
The Summary tab shows who created the export, the creation date and time, and the list of
selected profiles.
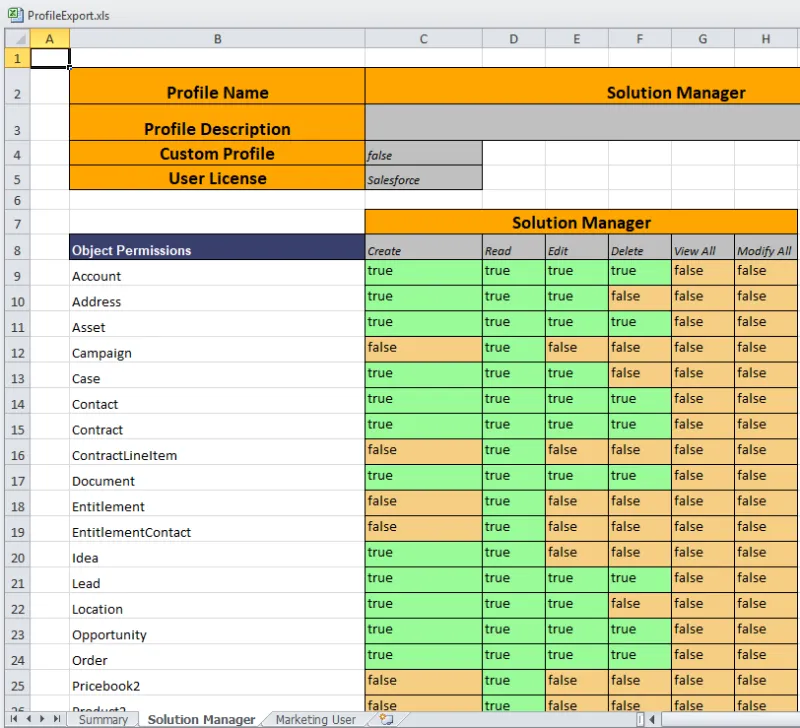
The Profile tabs contain all of the requested information for each profile.
Export Users
Exports user information to an XLS file.
Administrators can use this tool to export all user information into a single view for easy review and management. The export is done in the background to avoid timing out or exceeding the Salesforce Governor Limits. You receive an email with a link to the Export Object Attachment record, where you can download your file.
- Open Flashlight > Tools > Export Objects
- Open the Users
tab.
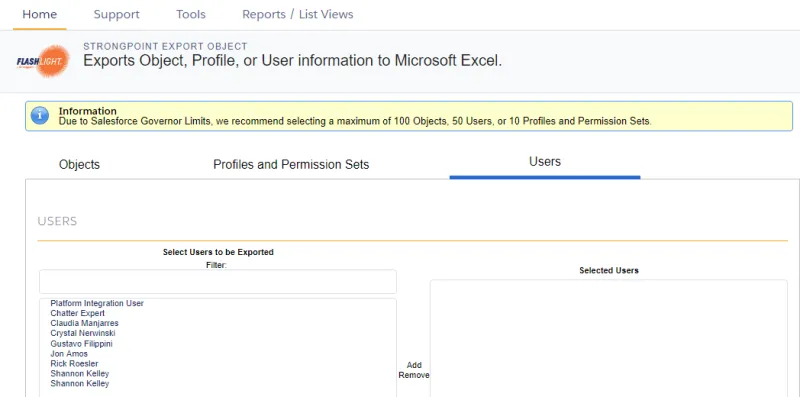
- Scroll through the Select User to be Exported or enter all of part .of a user name in the Filter field.
- Select one or more objects in the scroll box. Use Shift or Ctrl to select multiple objects.
- Click the right arrow to move the items to the Selected Users list. To remove an item from the Selected Users list, select it and click the left arrow.
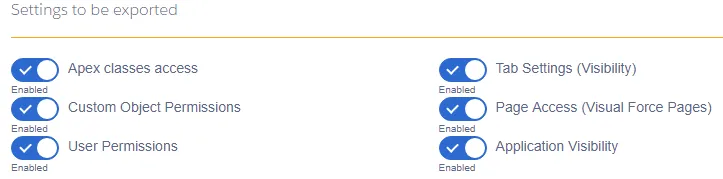
- Select the Settings to be exported.
- Click Download XLS. The file UserExport.xls is created.
UserExport.xls File
When you open an exported file, this message may be displayed, as the exported UserExport.xls file is in XML instead of the Excel format. Click Yes to load the file.
The UserExport.xls file contains a Summary tab and a separate tab for each selected user.
The Summary tab shows who created the export, the creation date and time, and the list of
selected
users.
The User tabs contain all of the requested information for each exported
user.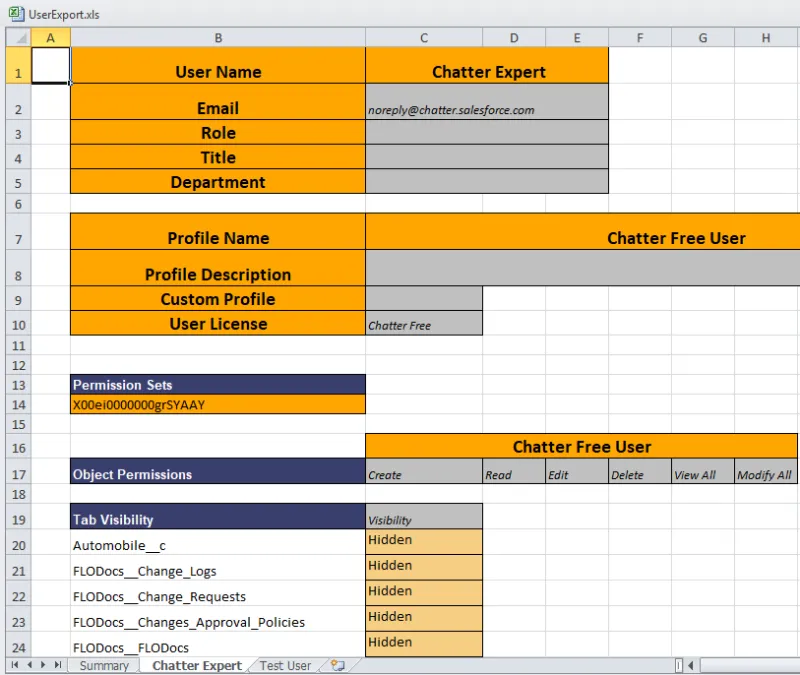
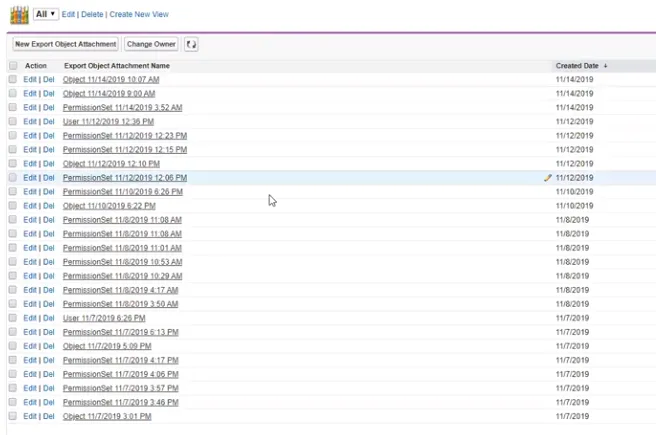
Export Object Attachment Records
When Object, Profile and Permission Set or User information is exported, an Export Object Attachment Record is created for the export. When an export request is completed, you receive an email notification your export file is ready. The link in the notification opens the Export Object Attachment Record in Salesforce. Your download file is available under Notes & Attachments.

The export history is saved in Salesforce. You can view the list, or add the Export Object Attachments tabs to your menu bar.
Salesforce Classic View
Salesforce Lightning
Salesforce Classic View
View the List
- Click the + in the menu bar to open the All Tabs list (Salesforce Classic).
- Select Export Object Attachments.
Add the Export Object Attachments Tab
- Click the + in the menu bar to open the All Tabs list.
- Click Customize My Tabs
- Select Export Object Attachments from the Available Tabs and add it to the Selected
Tabs.
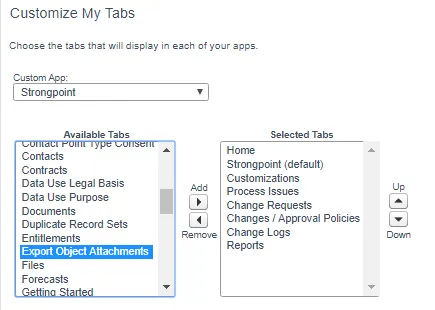
- Click Save.
Salesforce Lightning
View the List
Enter Export Object Attachments in the Search Salesforce entry box on the top of your page.
Add the Export Object Attachments Tab
- Open Setup > Apps > App Manager
- Locate Strongpoint in the list. From the pull down menu on the right, select Edit.
- Select Export Object Attachments from the Available Tabs and add it to the Selected
Tabs.
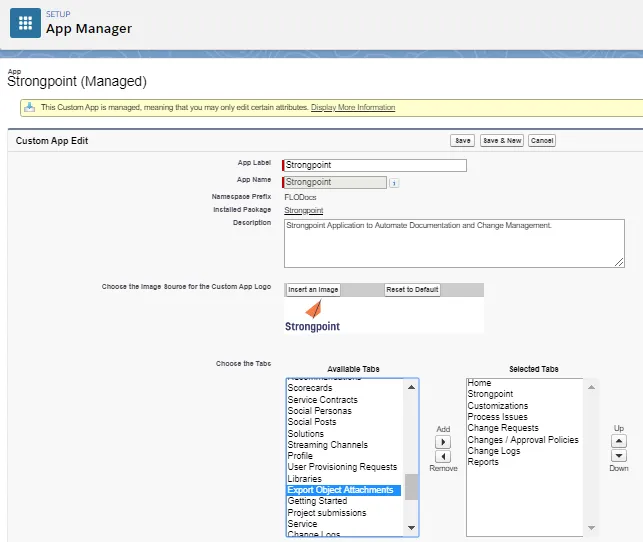
- Click Save.