Version Control of PolicyPak Extension DLLs
From time to time, you may wish to update your original source PolicyPak XML that you created using the PolicyPak DesignStudio. The most common reasons for doing this ares:
- Targeting application updates (e.g., WinZip14 to WinZip15)
- Correcting errors from your original implementation (for example, some action data was incorrectly assigned using PolicyPak DesignStudio)
- Adding more PolicyPak Applock™ data or elements to a project if the vendor has an update (for example, if WinZip has a minor update, and a new control is available)
- Adding more PolicyPak Applock™ data when controlling another operating system (for example, you captured WinZip on Windows 7 and now want to perform AppLock on Windows 10)
- Updating the name of an element (for example, you introduced a typo when creating an element using PolicyPak DesignStudio)
If you need to update an AppSet, you will need to understand PolicyPak Application Settings Manager's version control methodology.
Transitioning from one DLL to another DLL isn't difficult, but a strong cautionary note is needed. That is, when you provide the next version of a DLL, you could be removing elements or whole tabs with a lot of elements. When you do this, you could lose the ability to manage previously deployed elements from existing AppSets. Please read this whole section in its entirety to understand the issues surrounding version control before attempting to perform an upgrade. Additionally, you'll likely want to test out the version control mechanism in a test lab before rolling out an update into your production environment.
An AppSet is defined by its project name. You can see the project name when you utilize an AppSet and also when you're working with the project within PolicyPak DesignStudio by selecting the Project Properties tab on the left (See the figure here).
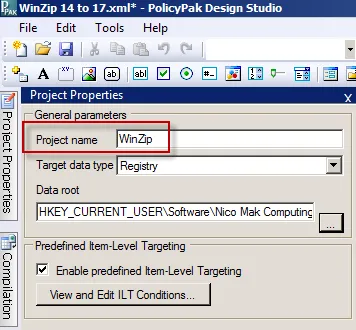
The figure shown. The project name on the Project Properties tab in PolicyPak DesignStudio.
Note that the project name is NOT the same name as the file name, which you used for the pXML (XML) file. The project name is internal to the project itself.
In this example, our existing WinZip project file was opened and a new checkbox was added, v2, for
the sake of adding something new for this example (See the figure here). Then the file was saved with a
different name (WinZipc.xml). Finally, the project was compiled. The result is as follows:
- The original output file is pp-WinZip 14 to 17.dll because the original pXML filename
was Winzip 14 to 17.xml. - The new output file is
pp-WinZipc.dllbecause the updated pXML filename isWinZipc.xml.
However, in both cases, the internal project name is WinZip, as seen In the figure shown, because it did not change between projects.

The figure shown. An example showing that, while the file names may change, the project name remains the same.
Version Control When Leveraging Only the Local Storage
In a previous section, we explained how to leverage the Central Storage, and we'll cover version
control with regard to the Central Storage in the next section. However, let's first examine what
happens if you're not using the Central Storage and have the situation we've seen in the last
section where the local c:\Program Files\PolicyPak\Extensions directory has two versions of the
same project (with the same underlying project name)—each with different compiled PolicyPak extensions and filenames.
Step 1 – Creating a new GPO. While creating a new GPO, you will still be able to right-click the PolicyPak | Applications node and select your application. In fact, even though multiple PolicyPak extension DLLs exists for the same project, you'll only see one entry appears in the flyout menu. You can switch to different DLL at any time by right-clicking the item and selecting "Reconnect PolicyPak DLL," as shown In the figure shown.

The figure shown. You can connect to any version at any time when working with GPOs.
Step 2 – Now select the DLL you want as shown In the figure shown. You'll be able to select which local storage version you want based on compiled date and time. The file names are also shown as a convenience.
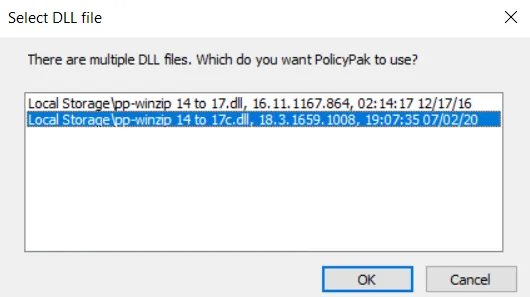
The figure shown. Pick the version you want, either according to DLL name or date.
Now the item is updated with the newer DLL as shown In the figure shown.
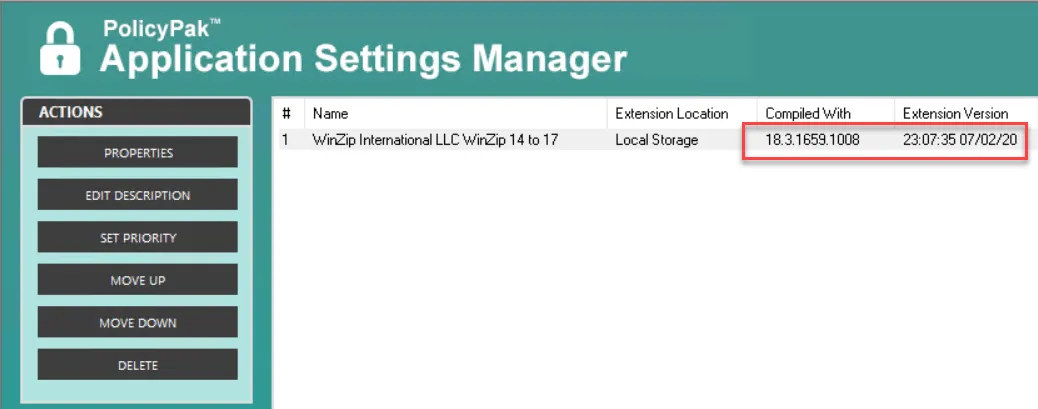
The figure shown. Note the new version is listed now.
Version Control When Leveraging the Central Storage
Using the Central Storage is the ideal solution for dealing with version control. For this section, we'll assume you have the Central Storage set up and have placed at least one PolicyPak extension DLL inside.
If you use PolicyPak DesignStudio to update your original pXML file and recompile, a new DLL will be created, as described in the "PolicyPak Application Settings Manager: DesignStudio Quickstart" section in Appendix B: PolicyPak Application Settings Manager DesignStudio Guide.
If the underlying project name is the same, you will have to understand how the version control system will work with regards to the original DLL already in Central Storage and the newly created DLL that was just compiled and saved locally.
The PolicyPak DesignStudio will automatically place newly compiled DLLs in the same
place: the Local Store at c:\Program Files\PolicyPak\Extensions. Now that there is an older DLL in
the Central Storage and a newer DLL locally, here is what happens.
Creating a new GPO. While creating a new GPO, you will still be able to right-click the PolicyPak | Applications node and select your application. In fact, even though multiple PolicyPak extension DLLs exist for the same project, you'll only see one entry appear in the flyout menu. When you click the desired project, you'll be prompted for which version you want to use, as seen In the figure shown.
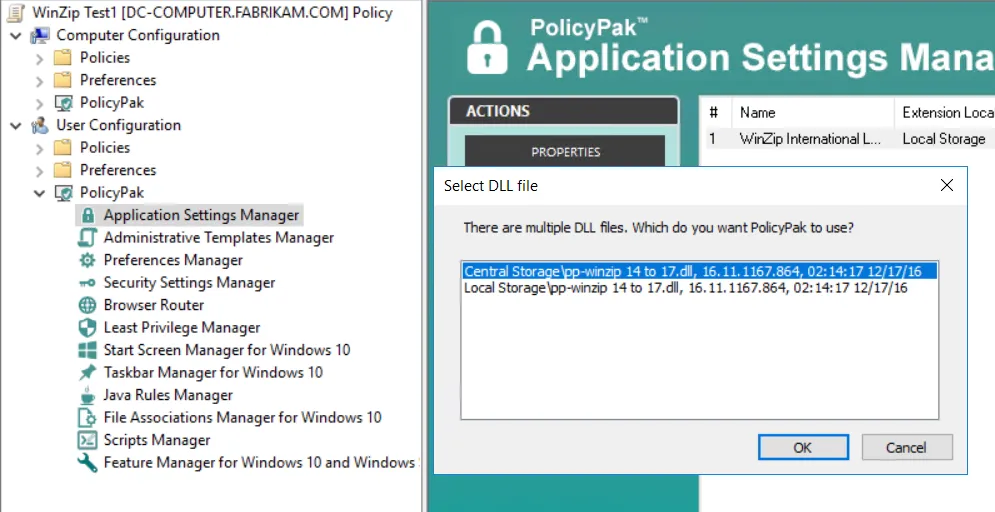
The figure shown. For projects with the same name, you'll be prompted to choose which version you want to use while creating a new GPO.
Since there is a DLL in both the Local Store and the Central Storage, you can choose which one you would like to use.
Editing an existing GPO. If you decide to edit an existing version of a GPO with an AppSet item—when one DLL is already in the Central Storage—then there is no immediate change. That is, you can double-click the AppSet item, and it will be edited using the original DLL that was already placed in the Central Storage. However, you can also upgrade an existing AppSet item with a newer DLL. To do this, right-click the item and select "Update PolicyPak DLL," as seen In the figure shown. If the newer DLL is selected, it will update the underlying GPO data.
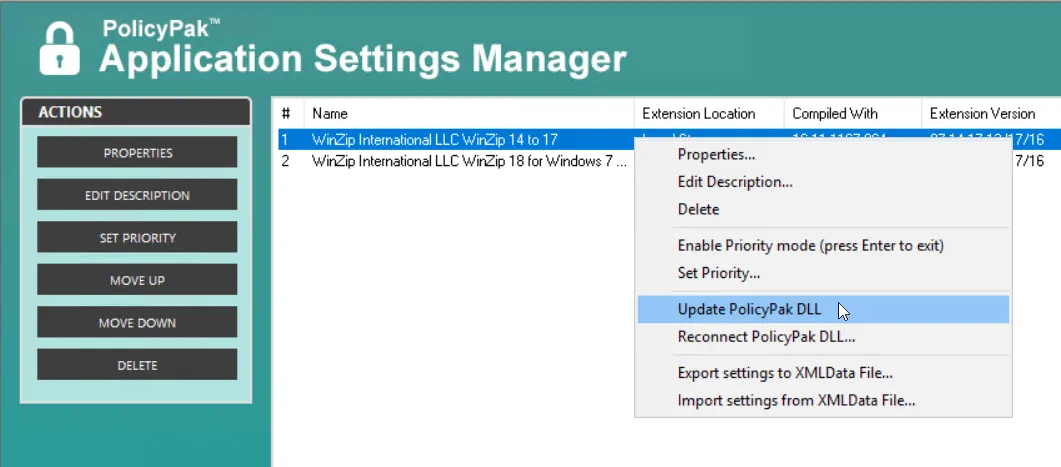
The figure shown. Upgrading an existing Pak item with a newer DLL.
Manually Migrating to Newer AppSet DLLs in the Central Storage
If you would like to see a video overview of how to manually migrate to newer DLLs and update GPOs, please watch this tutorial video: Understanding and fixing PolicyPak DLL Orphans.
With the versioning system, you will be able to create PolicyPak DLLs locally and create and test GPOs, as needed, to make sure the new DLL works exactly as expected. Then, when you're ready, you can update the existing DLL in the Central Storage with the one that you have created and tested locally.
To do so, simply
Step 1 – copy the new DLL (even if it has a different name) from the Local Store into the Central Storage and
Step 2 – remove the older DLL from the Central Storage.
You can see this In the figure shown.
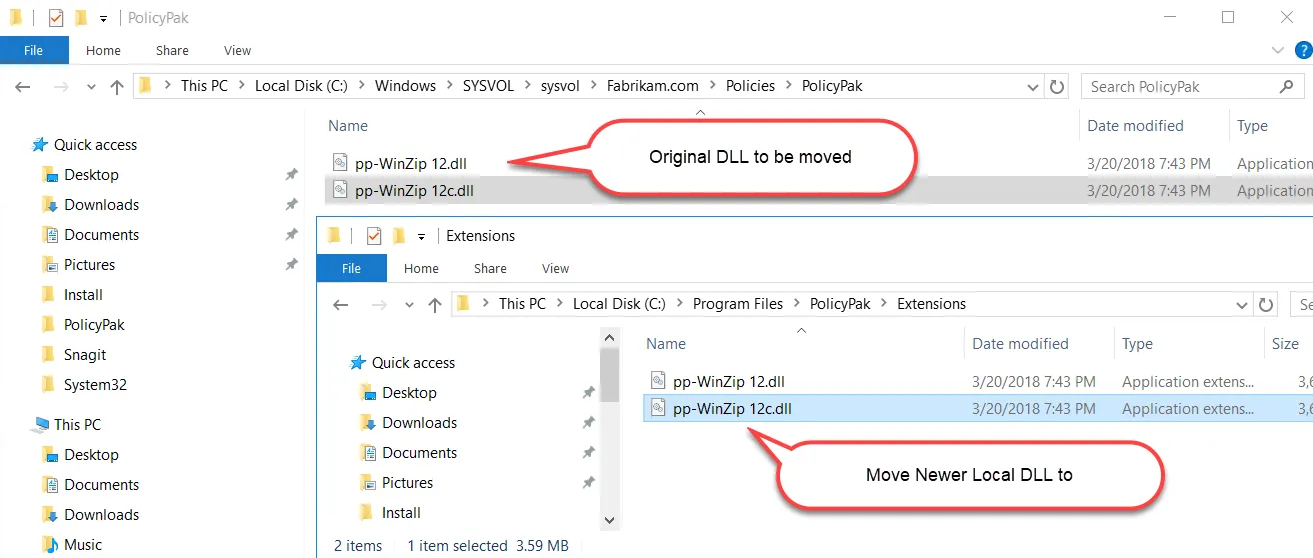
The figure shown. The process of removing old DLLs.
When you complete this process, the next time you (or other administrators) create new GPOs, you'll be using the version contained in the Central Storage. If you (or other administrators) edit an existing GPO, you will get the familiar notice shown In the figure shown.
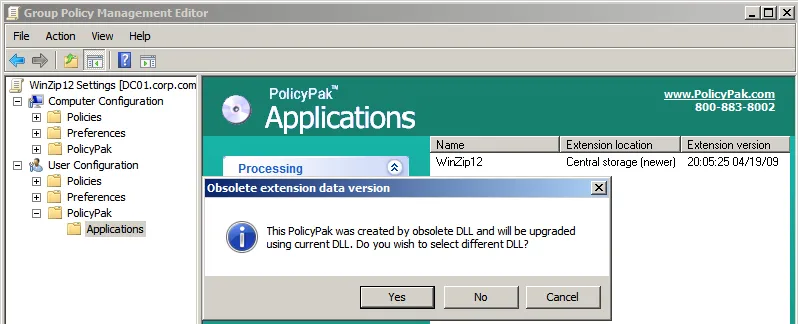
The figure shown. The notice received when editing an existing GPO.
Selecting "No" confirms that you want to upgrade the data inside the GPO using the only DLL available—the one you placed in Central Storage.
When you update the DLL (whether you're upgrading or downgrading), be aware of these very important cautions:
- If an element has been removed from the selected DLL, the data will be wiped out inside the GPO data and is not recoverable. For instance, if you set a checkbox on or off, put data such as "Hello, World" into a text box, or set a spinner to "12," this information will be erased from the GPO.
- Since the element is gone inside the DLL, PolicyPak Application Settings Manager has no way to control it anymore. So the last known setting for that element will be left on the client machine even if "Revert this policy setting to the default value when it is no longer applied" was originally configured for that element.