Exporting Directives as XML Data Files
Creating PolicyPak XML data files is easy. But each PolicyPak component has a slightly different way to make and export XML data files. The XML data files you export can then be used with PolicyPak Exporter (with MEMCM, KACE, Microsoft Intune, etc.) or with PolicyPak Cloud. We will discuss these processes in the following sections. Note that instructions are not included for all components. We've provided a representative sample of most of the components, and most will export in a similar way. All the exceptions are noted here, however, like Admin Templates Manager, Application Settings Manager, and Security Settings manager, which are somewhat different than the others.
For a video overview of how to wrap up XML data and license files into MSI files, see the following link: Deploying PolicyPakdirectives without Group Policy (PolicyPak Exporter Utility).
Now that you have your XML data files, you're ready to bundle them up and make them into an MSI for easy deployment using any software distribution utility, such as Microsoft Endpoint Configuration Manager (MEMCM), Microsoft Intune, MobileIron, VMware Workspace ONE, KACE, LANDesk, or anything else that uses MSI files.
Step 1 – When you install the PolicyPak Admin Console MSI, you automatically install the PolicyPak Exporter utility. In order to launch it, locate the utility's icon in the Start menu within PolicyPak Application Settings Manager, as shown in Figure 3.
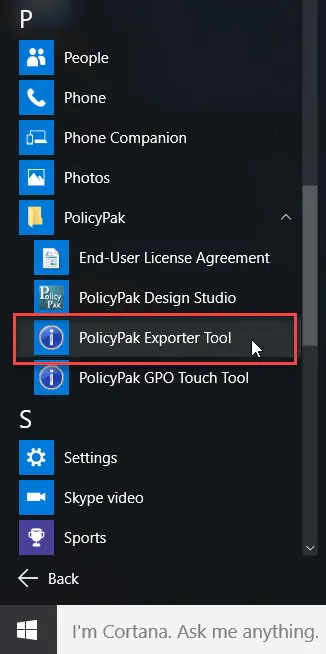
Figure 3. The PolicyPak Exporter utility icon in the Start menu.
This utility enables you to do any of the following:
- Create new PolicyPak Application Settings Manager XML data files
- Use existing XML data files from all PolicyPak products
- Use PolicyPak licensing files
- Map which XML data files should be installed for which users on target machines
- Open existing MSI files you previously created and quickly edit and enable modifications and upgrades
In this demonstration of PolicyPak Exporter, we'll assume you have a collection of PolicyPak XML data files or a PolicyPak licensing file you want to wrap up into an MSI file for easy deployment. Let's assume you had the following XML data files (as shown in Table 1) and wanted to ensure that the following users received the directives when logging on to specific machines.
Table 1: Example files.
| File Name | File Type | Users Receiving the File |
|---|---|---|
| WinZip1.xml | PolicyPak Application Settings Manager XML data file | EastSalesUser1, EastSalesUser2, Active Directory users |
| FireFox1.xml | PolicyPak Application Settings Manager XML data file | Computer (All Users) |
| Enforce Default Browser.xml | PolicyPak Browser Router Manager XML data file | Computer (All Users) |
| Control Panel Settings.xml | PolicyPak Admin Templates Manager XML data file | Computer (All Users) |
| Important Security Settings.xml | PolicyPak Security Settings Manager XML data file | Computer (All Users), forced |
| Fabrikam.Local-License-Key-file.xml | PolicyPak license file | Computer (All Users), forced |
When PolicyPak Exporter is launched, you'll be able to perform the actions shown in Figure 4.
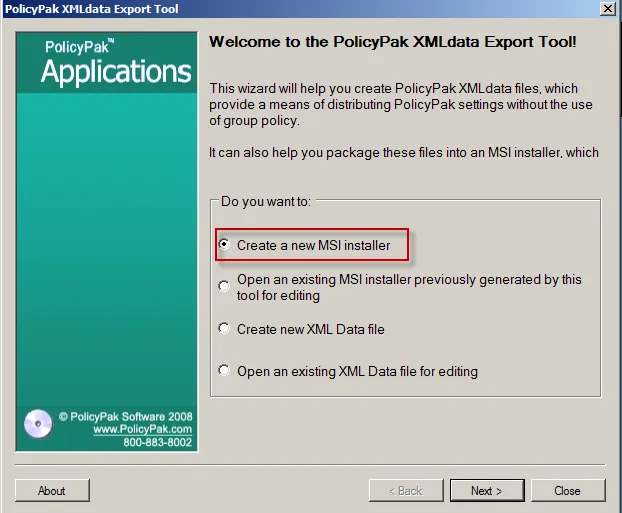
Figure 4. The PolicyPak Exporter tool helps the user create XML data files and package the files into an MSI installer.
Step 2 – PolicyPak Exporter will create MSIs from your existing XML data files and PolicyPak licensing files or open up an existing MSI that you created earlier using this tool. For now, select "Create a new MSI installer." Then, you'll see the option, "Add Existing Files," as shown in Figure 5.
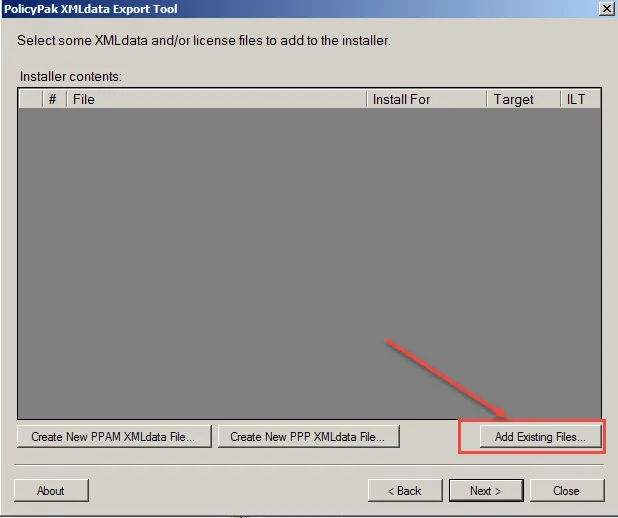
Figure 5. The option to add existing files.
The "Add Existing Files" button lets you bring in the following types of files:
- Any PolicyPak XML data files (such as from PolicyPak Application Settings Manager, PolicyPak Browser Router, PolicyPak Least Privilege Manager, etc.)
- Microsoft Group Policy Preferences XML data files
- Microsoft Security Group Policy settings exported as XML data files using PolicyPak Security Settings Manager
- Microsoft Admin Template settings exported using PolicyPak Admin Templates Manager
- PolicyPak licensing files for PolicyPak and the PolicyPak Group Policy Compliance Reporter
With PolicyPak Exporter you can wrap these up into an MSI. In Figure 6, we have added a variety of exported XML settings.
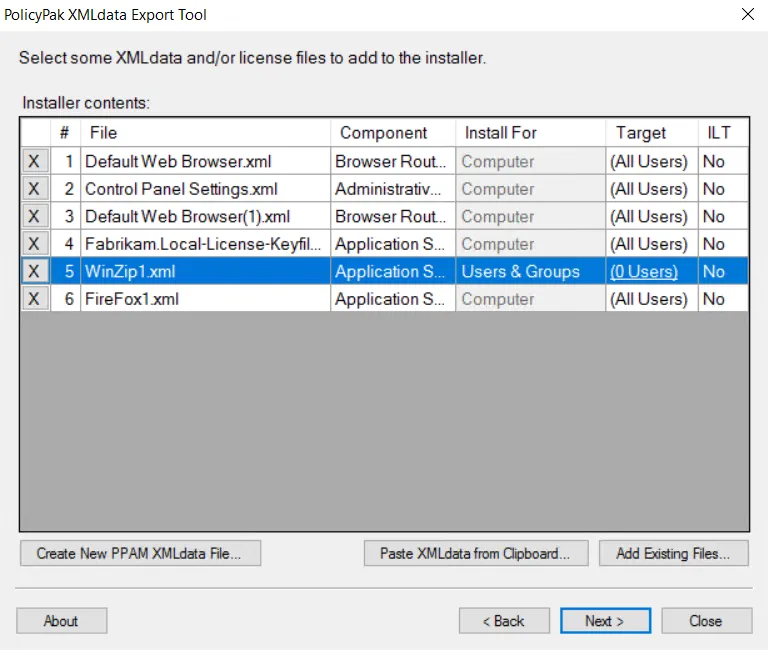
Figure 6. Exported XML settings.
You cannot add more than one licensing file of the same product type to an MSI project.
Step 3 – Next, you can dictate which files will be delivered to which users, or to Computer (All Users).
For MDM and PolicyPak Cloud scenarios, it's common to specify the settings affecting Computer (All Users), so you can guarantee that whoever is on the machine will get the settings.
Step 4 – By default, newly added XML data files will be delivered to all users, as shown in Figure 7. This means the settings get delivered to the Computer side, and the result is that all users must receive the settings. However, in our example, we want the WinZip1.xml file to be delivered to EastSalesUser1 and EastSalesUser2. Therefore, use the dropdown menu under "Install For," and change it from "Computer" to "Users & Groups." After you do this, the Target column populates with "0 Users," as illustrated in Figure 7.

Figure 7. Selecting which group will get the XML data files.
Step 5 – Click on "0 Users" to specify the users you want the WinZip1.xml file to work with. In the Select Users or Groups dialog, click "Add Users / Groups," and specify the users (or groups) you want this XML data file to apply to (see Figure 8). Then click "OK."
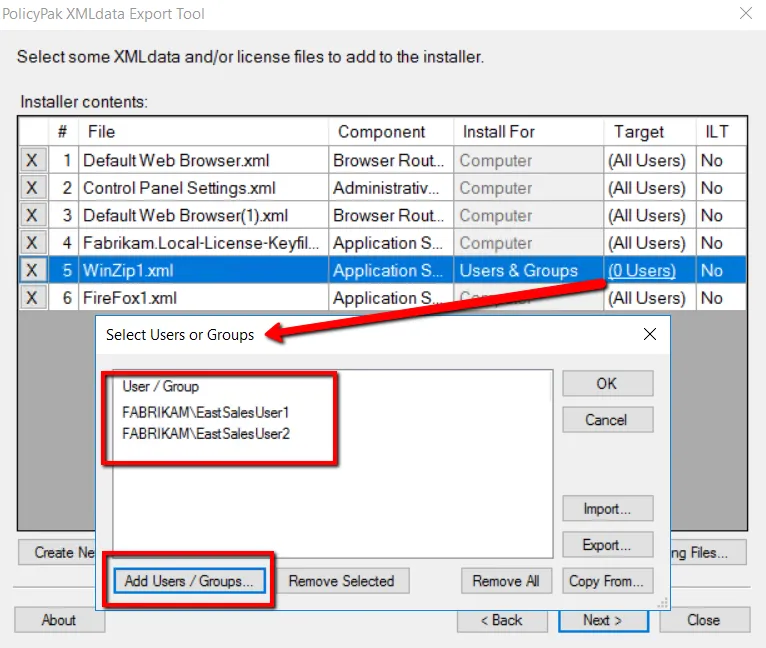
Figure 8. Selecting the targeted users.
Notice that theWinZip1.xml file is now set to be delivered to two users (see Figure 9). You can
also specify Active Directory groups instead of just users. To help specify these types of users,
the Target column will express how many users and how many groups are being targeted.
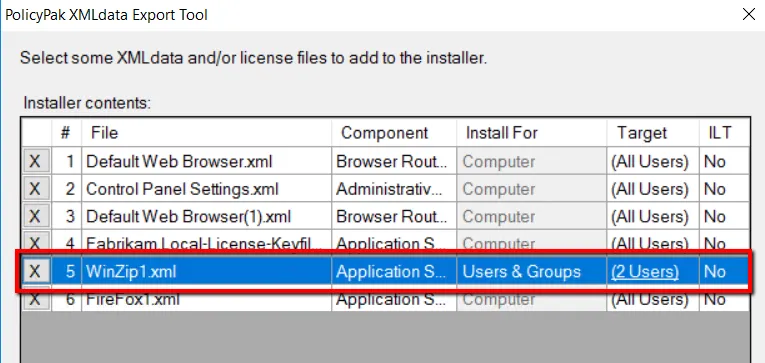
Figure 9. The Target column shows how many users and how many groups are being targeted.
Licensing files are always set to deliver to all users.
Step 6 – You can repeat the process by clicking on "Create New PPAM XMLdata File" or "Add Existing Files" and then specifying which users you want the directives to apply to. When you are done, click "Next" to continue. This will initiate the Installer Properties page where you can name the MSI and manufacturer however you wish (as shown in Figure 10).
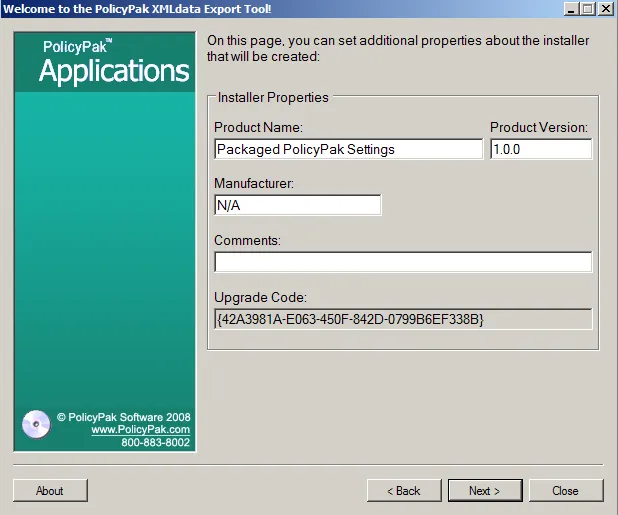
Figure 10. Naming the MSI.
Step 7 – When you click "Next" in the Installer Properties page, you will be prompted to save your MSI file. If you need it later, the MSI file can be opened and edited again (see the section "Modifying Existing MSI files with PolicyPak Exporter").