Bring your own vault® (BYOV) for Password Secure
Netwrix Privilege Secure now integrates with Netwrix Password Secure to enable centralized, secure management of privileged credentials. This allows organizations to perform actions as specific users using credentials stored and managed in Password Secure, without exposing or manually handling those credentials. The integration streamlines privileged access workflows across both platforms, enhancing security and operational efficiency.
Password Secure Configuration
Prerequisites
Before you begin configuring the integration, you must have a working Password Secure server and Web Application set up.
Password Secure should be installed on a separate server from NPS and properly configured before integration. It also requires its own database to store credentials.
Follow the instructions in the official documentation to install and configure the Password Secure server (installation guide) and to start the Web Application (web application guide).
after the server and web application are installed and configured, continue with the following steps.
Generate an API Key
This API key enables NPS to connect to the Password Secure vault.
Step 1 - Log in to Password Secure as an administrator.
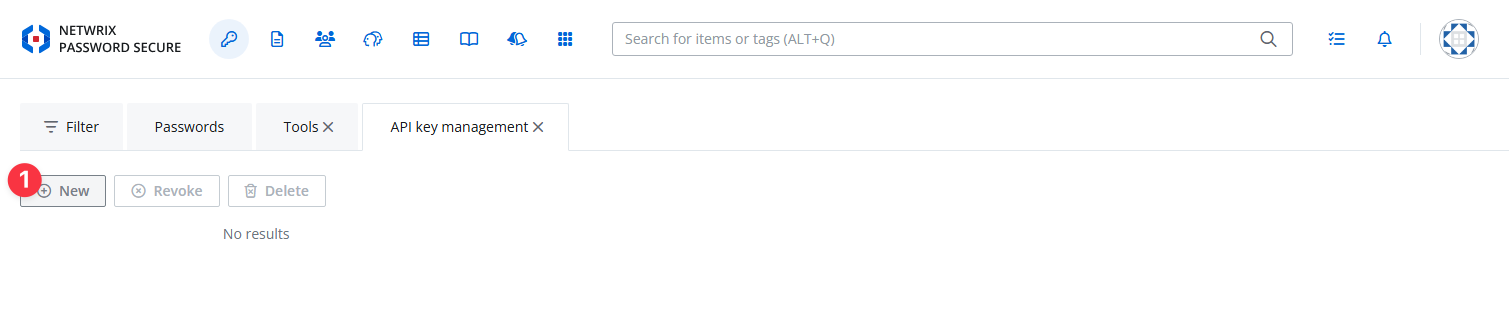
Step 2 - Navigate to Tools → API Keys.

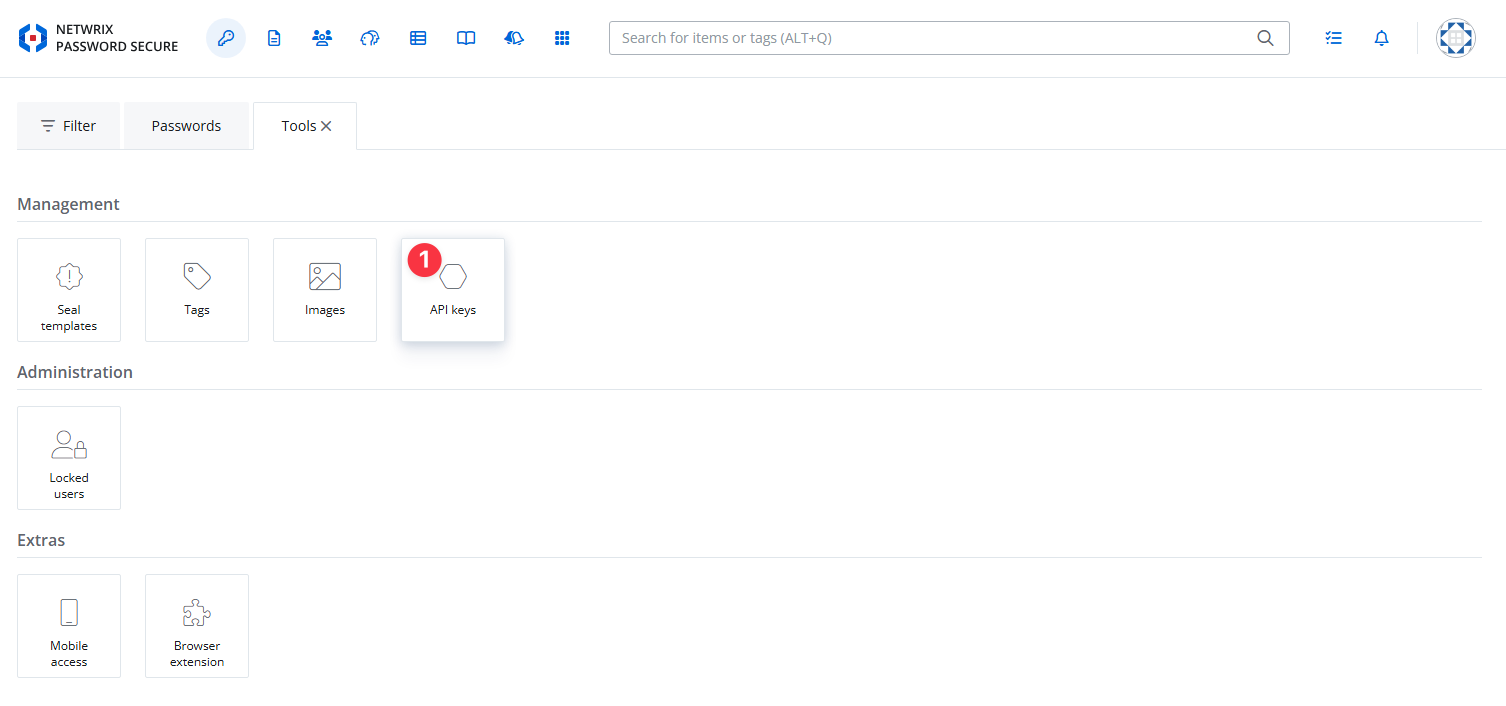
Step 3 - Click Create a new API key.
Step 4 - Fill out the form:
- Name: (e.g., "NPS Integration")
- Expires: Set a validity period (e.g., one year)
- Access Rights: Read
- Access Scopes: Select "Password"
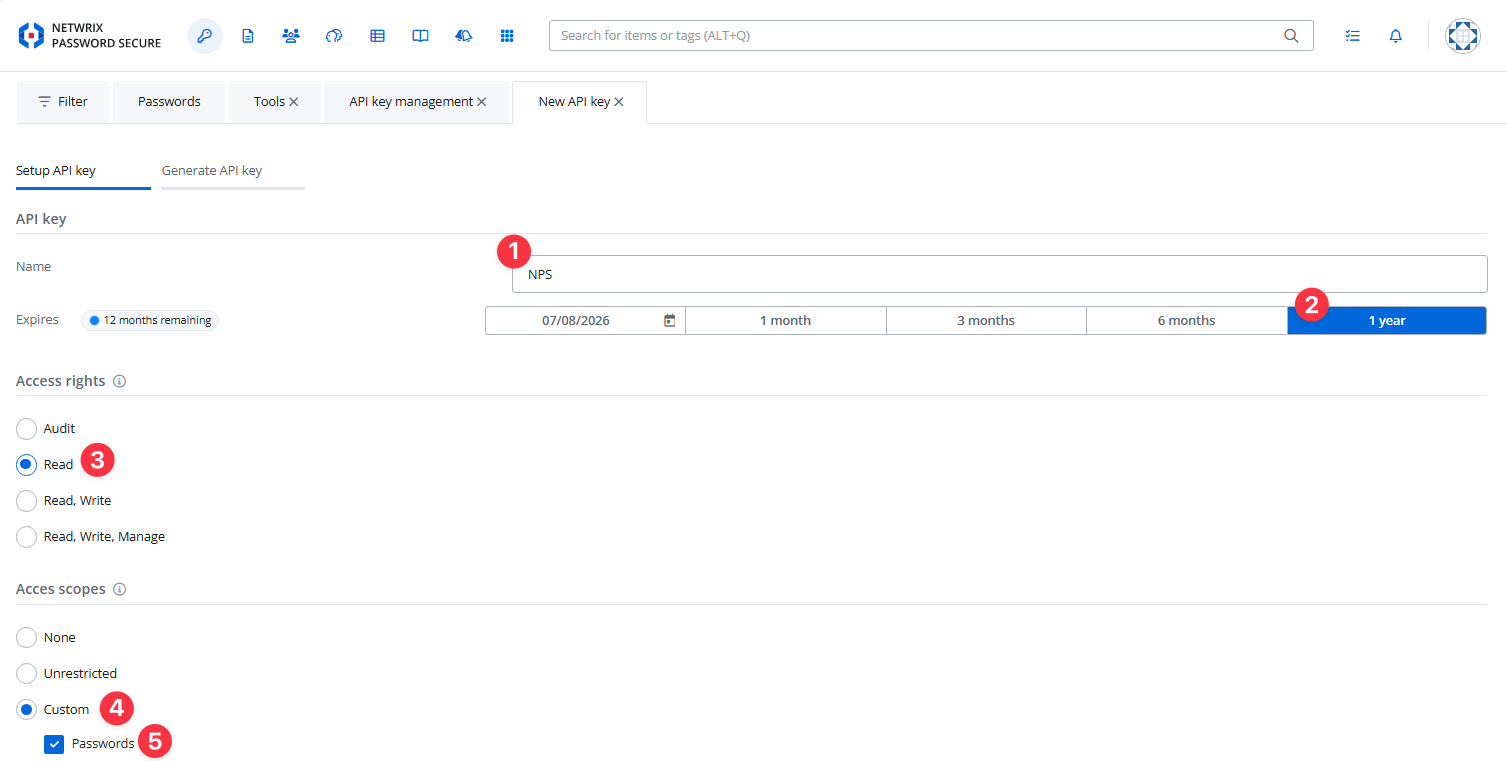
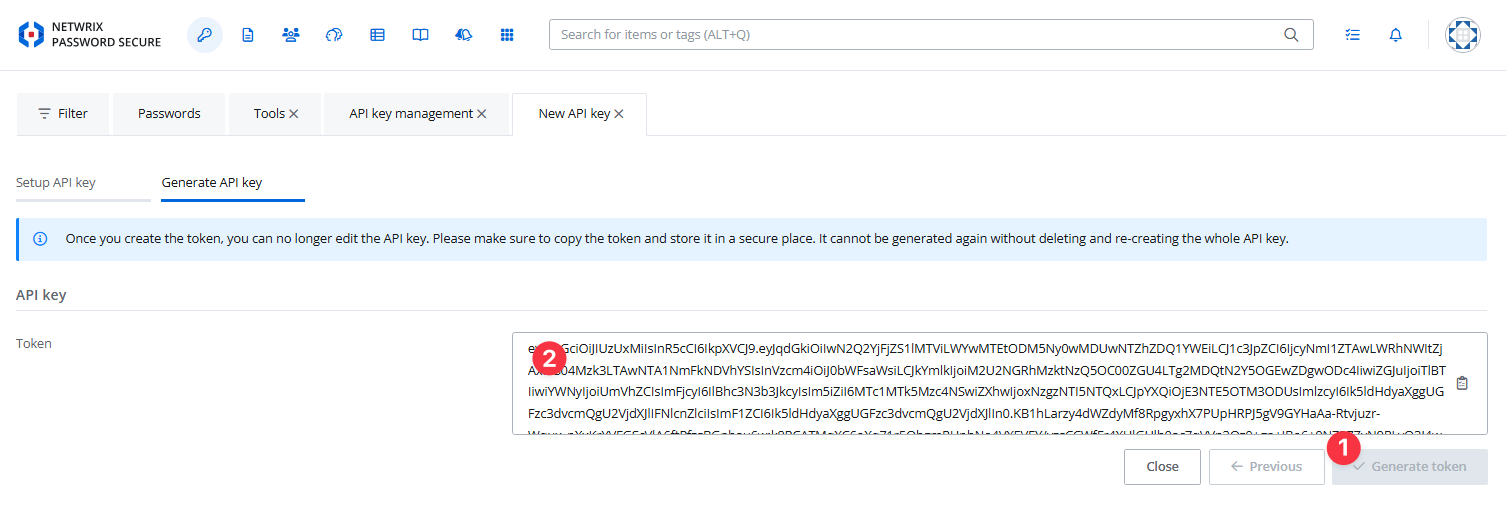
Step 5 - Click Next to generate the API token and copy it to a safe location (you'll use this in the NPS configuration).
after you create the token, you can't see it again. If you lose the token, you must generate a new one without deleting the old one. A newly generated token without deleting the old one will be valid.
Create a New Password (AD User Template)
If you already have users created with the AD User template, you can skip this step.
The AD User template is the standard/default form required for NPS ↔ Password Secure integration.
In production environments, you will typically use existing users.
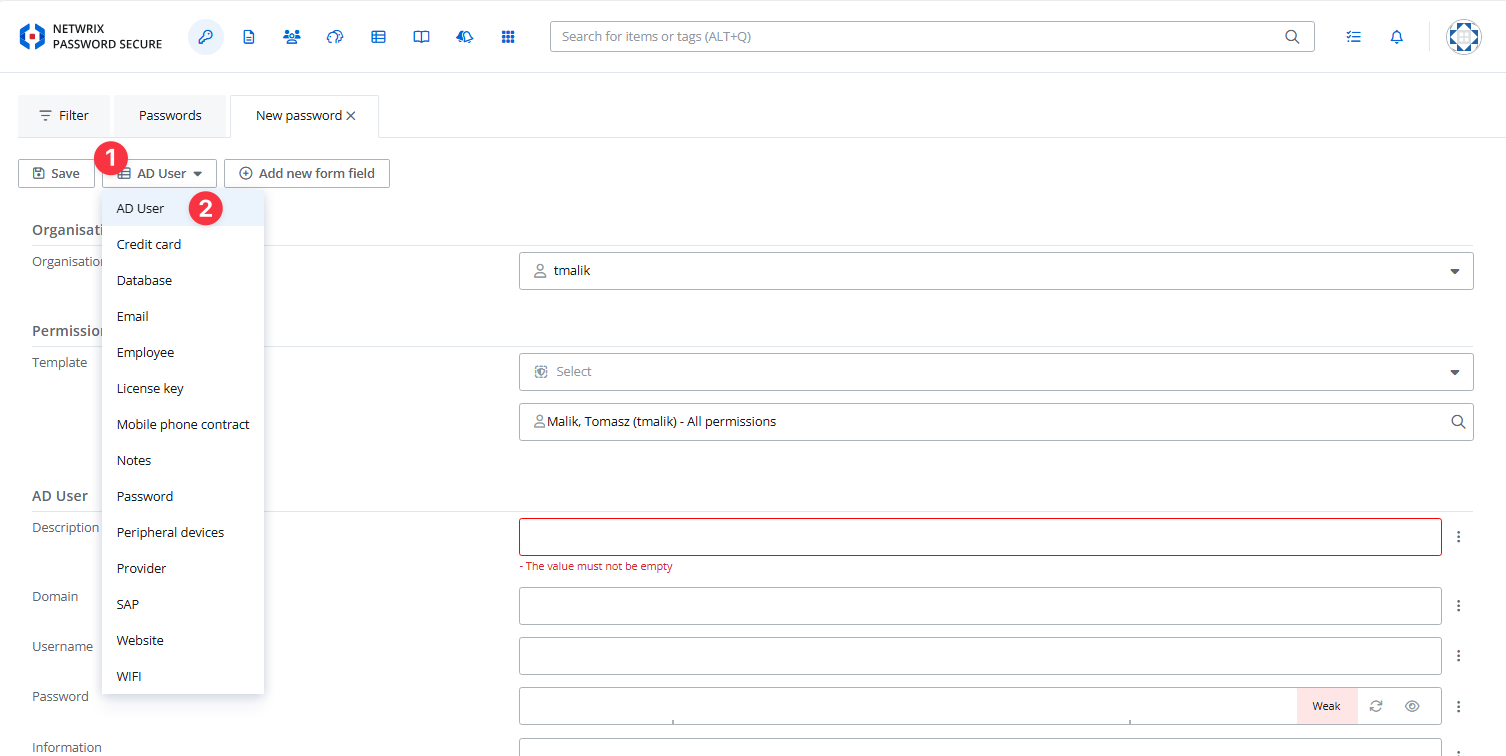
Step 1 - Go to Passwords → New Item.
Step 2 - Select Item Type = AD User.
Step 3 - Fill out the New AD User Password form:
- Description: Short description of the password/user
- Domain: Your AD domain
- Username: (e.g., "administrator")
- Password: (strong password)
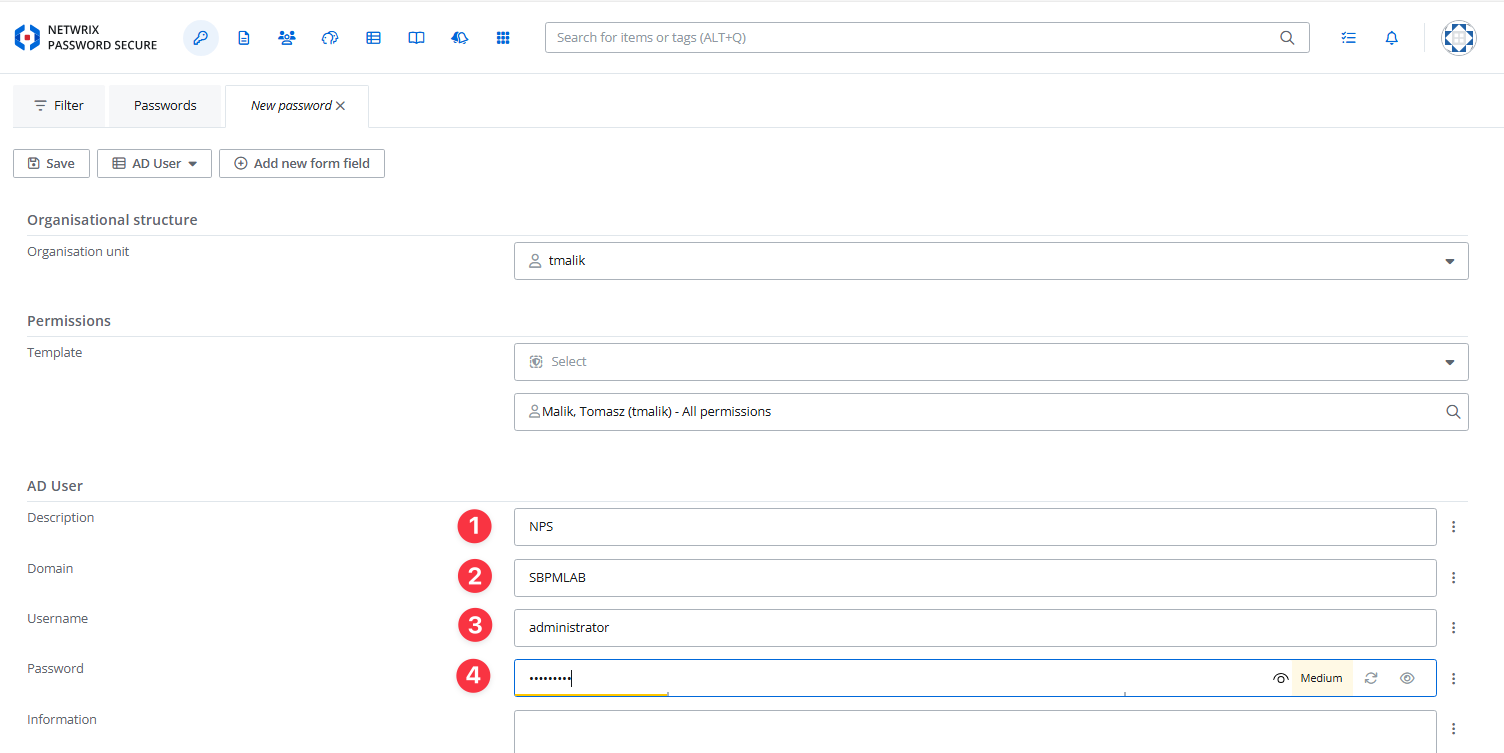
Step 4 - Save the password entry.
NPS Configuration
Add a Service Account with the Password Secure API Key
Step 1 - Log in to the Netwrix Privilege Secure admin console.
Step 2 - Go to Configuration > Service Accounts.
Step 3 - Add a new Service Account, using the API key generated in Password Secure:
- Name: (e.g., "NPS Password")
- Username: (e.g., "NPS" or any identifier)
- Password: Paste the Password Secure API key here.
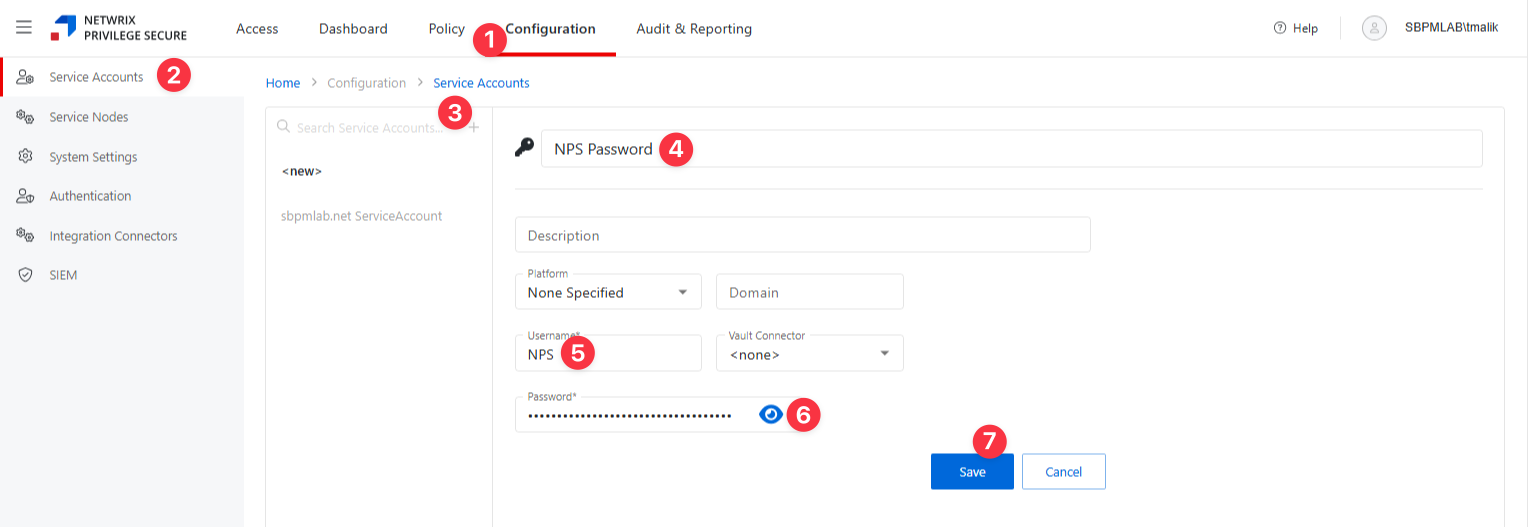
Step 4 - Save the Service Account.
Configure the Password Secure Vault Connector in NPS
Step 1 - In the admin console, navigate to Configuration > Integration Connectors.
Step 2 - Click the Add Integration Connector icon.
Step 3 - Fill in the connector details:
- Connector Name: (e.g., "NPS Password")
- Connector Description: (optional)
- Connector Template: Select Password Secure from the dropdown.
- API URL: Enter the base URL for Password Secure's API (e.g.,
https://your-ps-server/api/) - Service Account: Select the service account you set up earlier (e.g., "NPS Password")
- Advanced: Check "Skip Certificate Check".
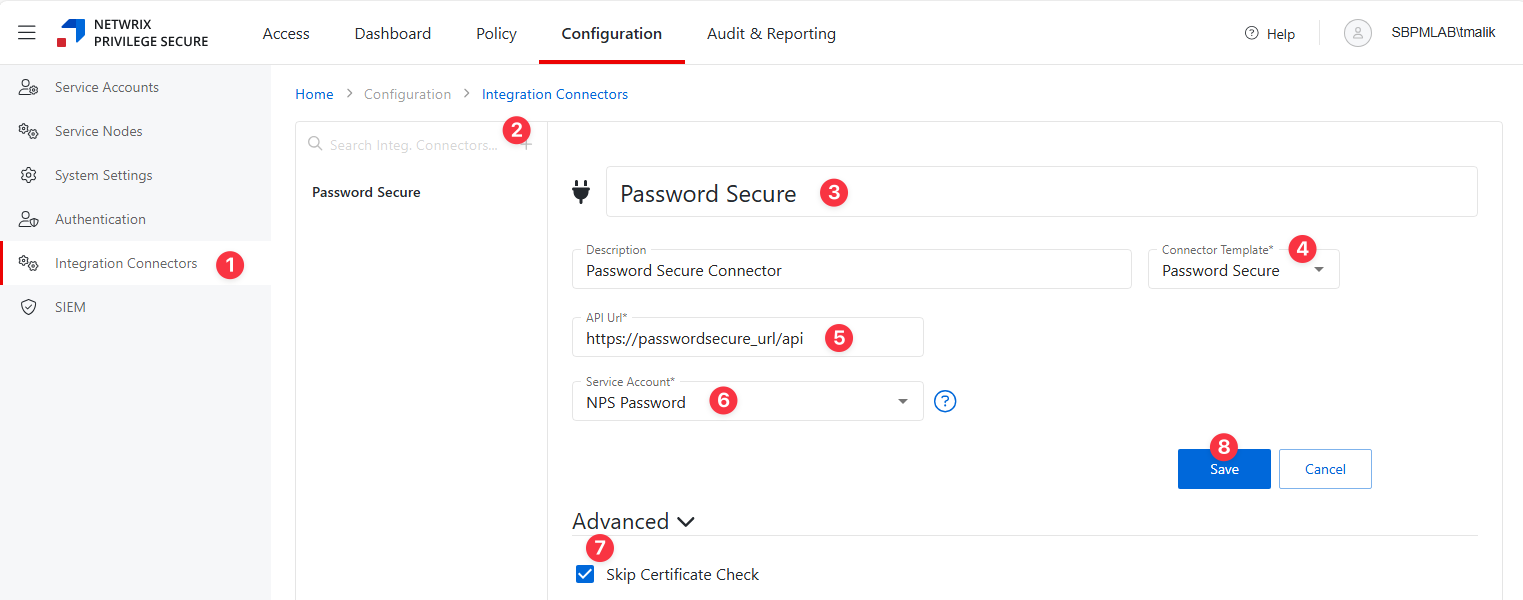
Step 4 - Click Save to create the connector.
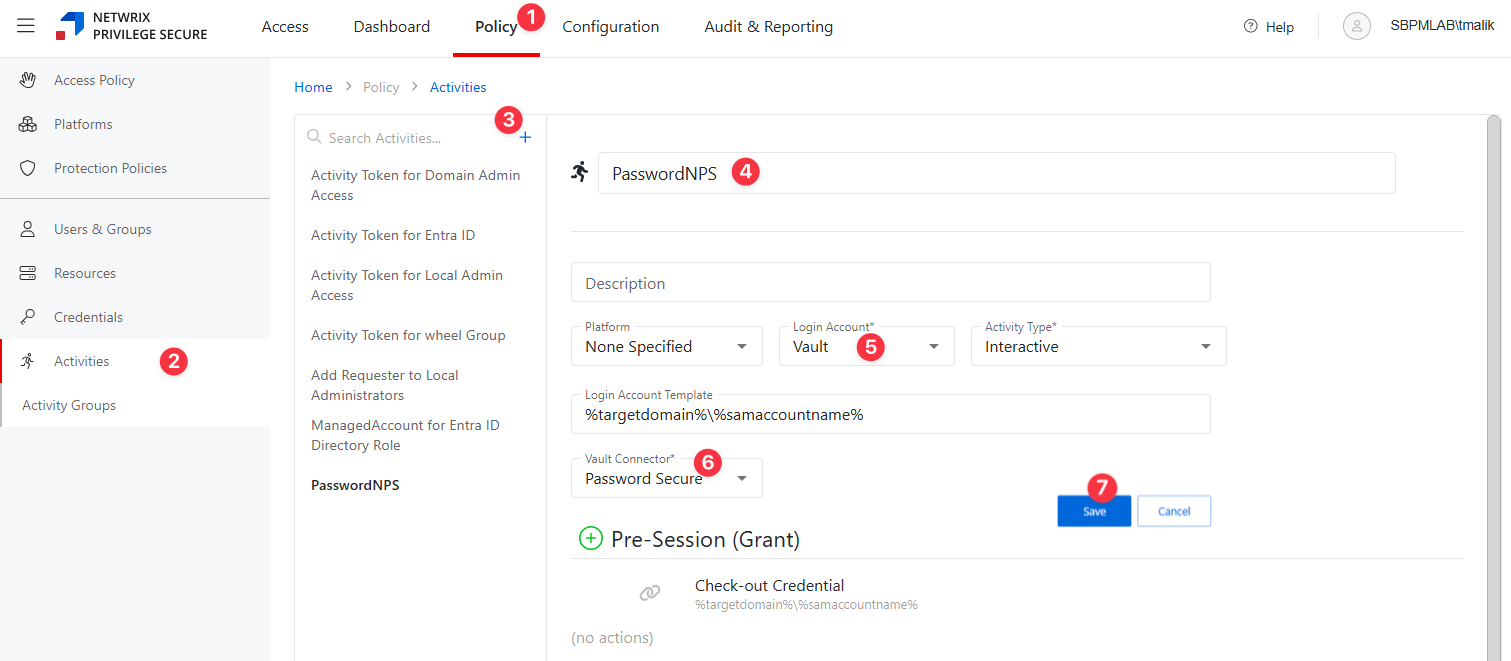
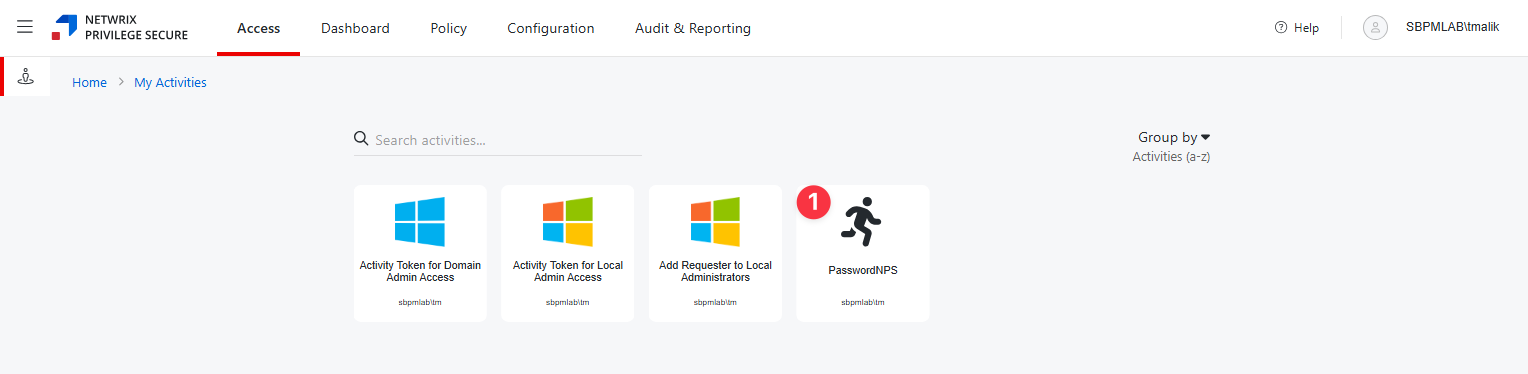
Create an Activity
Step 1 - Navigate to Policy tab > Activities.
Step 2 - Click the blue plus icon to create a new activity using the Password Secure connector.
Step 3 - Configure the activity:
- Name: Activity name
- Description: Activity description
- Platform: — Type of platform, which defines the resource
- Login Account — The account used to log onto the resource. Select "Vault" from the dropdown.
- Activity Type — Controls the type of actions for the activity. Select Interactive from the dropdown menu.
- Vault Connector — Displays a list of previously configured connectors. Select the Password Secure connector.
Step 4 - Click Save to create the Activity.
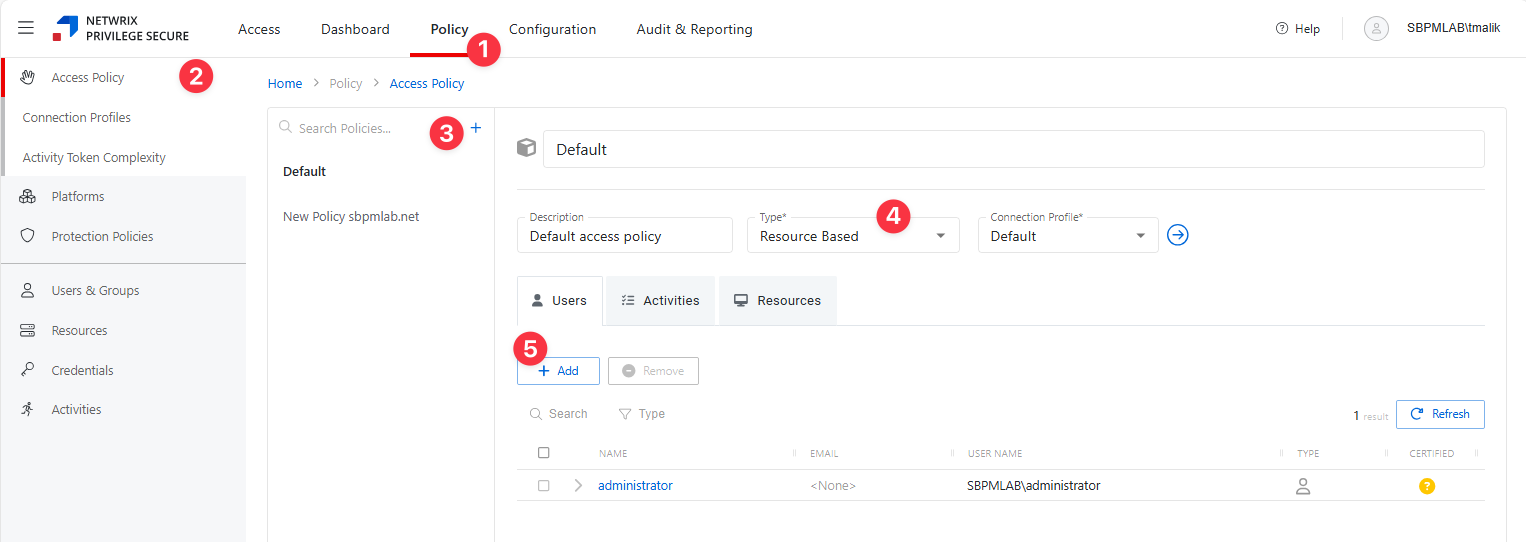
Configure a New Policy
Step 1 - Navigate to the Policy tab > Access Policy.
Step 2 - Click the Plus icon and create a new Policy. See the Add Access Policy topic for additional information.
Step 3 - Set the Type as Resource Based and select a Connection Profile, with Default being sufficient for most setups.
Step 4 - Click Save to create the Access Policy.
- Users: Assign users to the policy. See the Users Tab for Resource Based Access Policies topic for additional information.
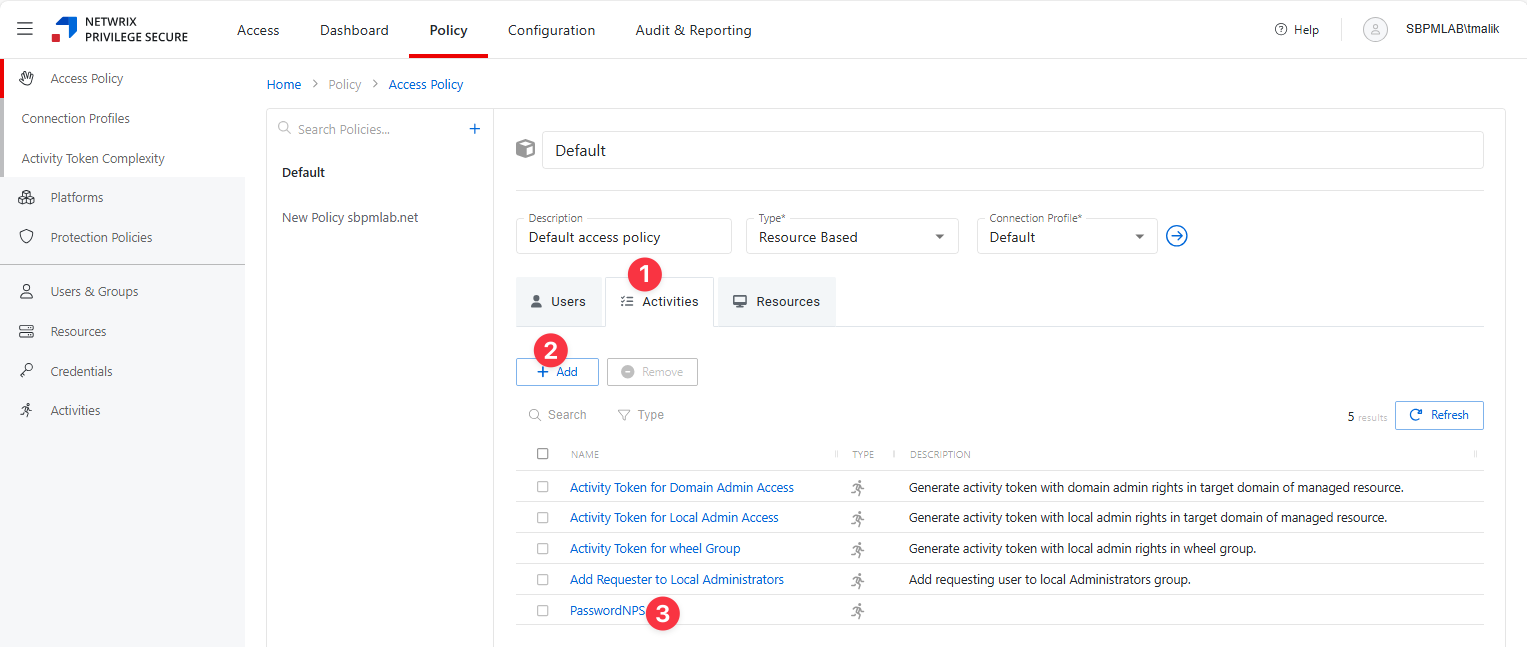
- Activity: Add the activity you created for the Password Secure connector. See the Activities Tab for Resource Based Access Policies topic for additional information.
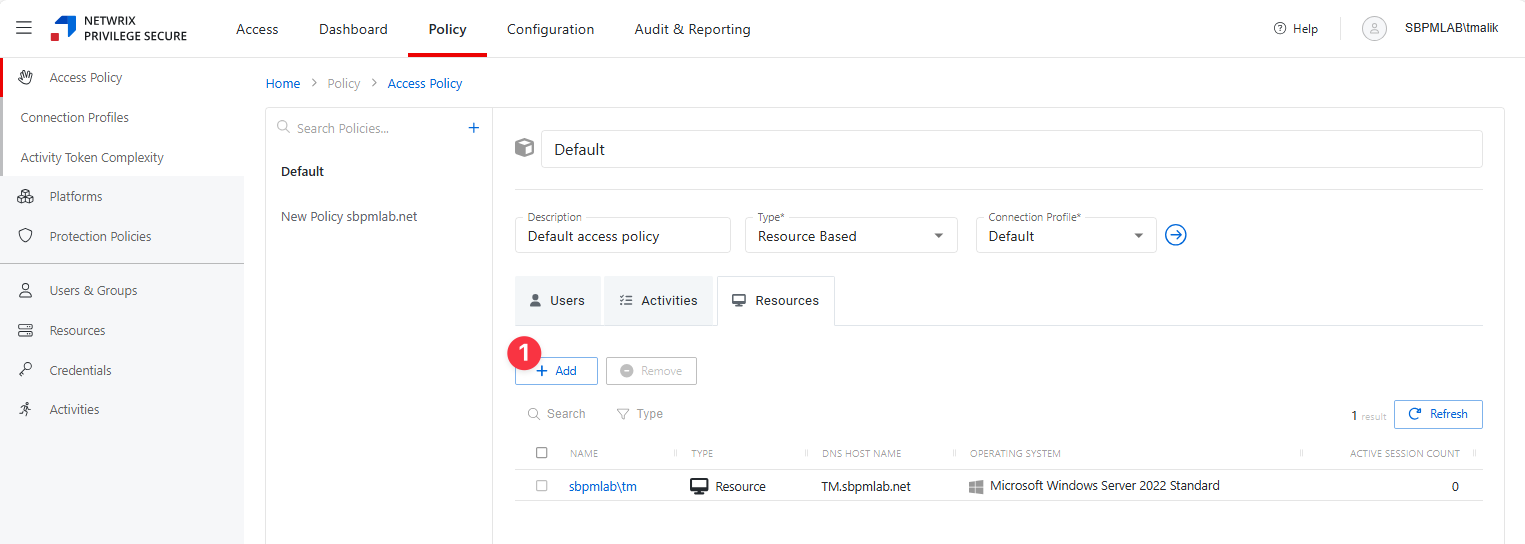
- Resources: Add resources for this Activity. See the Resources Tab for Resource Based Access Policies topic for additional information.
After completing these steps, you can use the specified user accounts on the defined resources.
This setup is ideal for scenarios where a single account is used across multiple resources but must be managed securely with credentials stored in Password Secure.
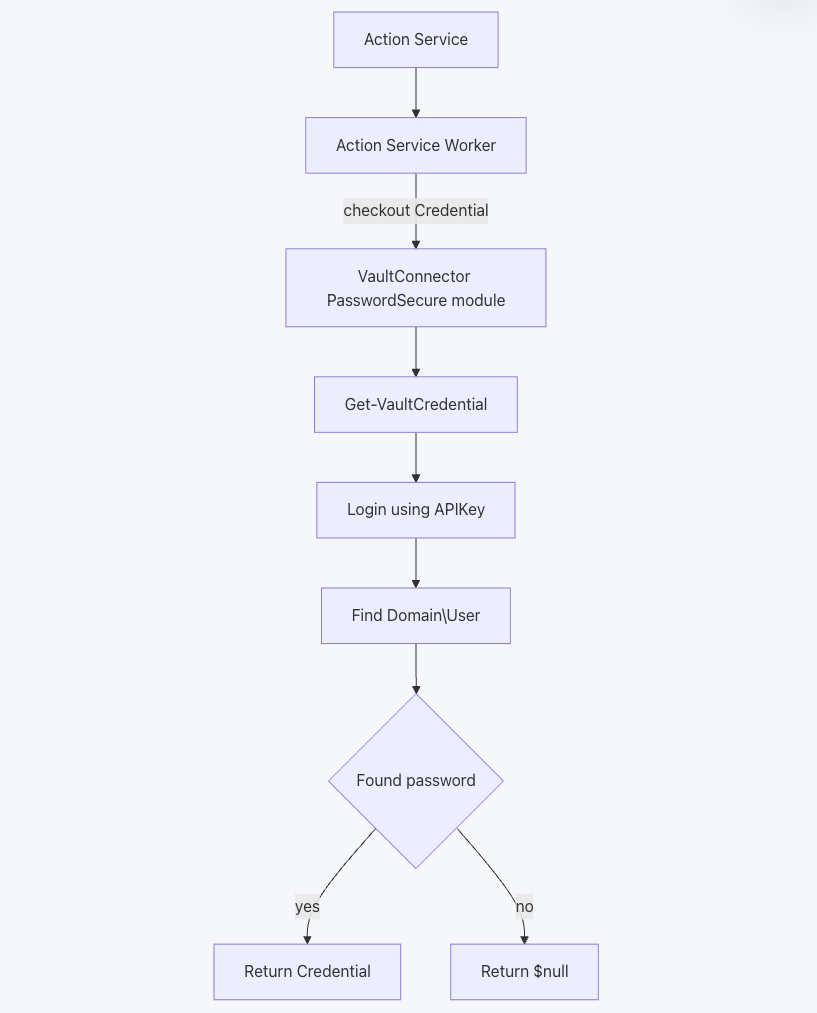
System Diagram: Vault Login Activity with Password Secure Integration
When a vault login-type activity is initiated and the selected vault is of type PasswordSecure, the following process occurs:
- Action Service triggers the start of the activity.
- The Action Service Worker takes over and initiates a credential checkout request.
- The VaultConnector PasswordSecure module receives the request and calls the appropriate cmdlet (Get-VaultCredential).
- The cmdlet logs in to Password Secure using the configured API Key.
- The module searches for the specified Domain\User in Password Secure.
- If the user's password is found, the credential is returned to the requester.
- If the user's password isn't found, a null value is returned.
Always verify configurations and permissions, especially when integrating with systems like AD and using specific user accounts for critical operations.
SDK Compatibility and Updates
- The integration uses Password Secure SDK DLL files and the Password Secure API for communication.
- The DLLs shipped with NPS are compatible with Password Secure versions 9.2.0 and above
- If you need to use a newer version of Password Secure, manually replace (“hot-swap”) the DLLs in:
C:\Program Files\Stealthbits\PAM\ActionServiceWorker\PsrApi - Updated DLLs are included in new NPS product releases, but for immediate compatibility with the latest Password Secure releases, manual updates is required. The SDK can be downloaded from the Password Secure Customer Information System.