Renewing the JWT Signing Certificate
Overview
This article describes how to regenerate the JSON Web Token (JWT) signing certificate for Netwrix Privilege Secure for Access Management. Complete these steps only if instructed by Netwrix Support.
Instructions
IMPORTANT: While many of these steps use drive letter
C:in the path, this differs for Program Files paths if Privilege Secure was installed to a different drive letter. All references toC:\ProgramData\Stealthbits\PAMuse drive letterC:in all environments.
-
Stop all Privilege Secure and IIS services by running the following in an elevated PowerShell window:
Stop-Service sbpam* -ForceStop-Service w3svc -Force -
In Windows Explorer, go to the Program Data directory for Privilege Secure (for example,
C:\ProgramData\Stealthbits\PAM\). From here, open the WebService folder, and then openappsettings.jwt.jsonin Notepad. Inappsettings.jwt.json, locate the"Jwt"section (such as the following example) and delete all of it. This is the trigger to generate a new JWT signing certificate:"Jwt": {"CertificateFile": "C:\ProgramData\Stealthbits\PAM\Web\jwtsign.pfx","CertificatePassword": "...","CertificateThumbprint": "...","Encryptionkey": "..."}, -
Go to
C:\ProgramData\Stealthbits\PAM\Weband delete thejwtsign.pfxfile. -
Go back up one level to the PAM folder, and then to the Webservice folder. Open
appsettings.log.jsonin Notepad and repeat step 2 if it also has a"jwt"section. -
Run the following commands in an elevated PowerShell window (changing the path to the PAM folder depending on the install path):
cd C:\Program Files\Stealthbits\PAM\KeyGen& .\SbPAM.KeyGen.Exe -
Open
appsettings.jwt.jsonagain from step 2, and verify the"Jwt"section has been recreated. -
Start all Privilege Secure and IIS services by running the following in an elevated PowerShell window:
Start-Service sbpam*Start-Service w3svc -
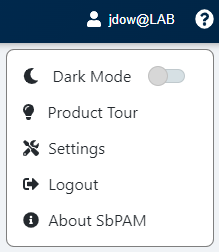
Log in to the Privilege Secure web application as an Admin, and re-register services. Click the logged-in user's name in the upper-right, click Settings, and then click Register Services.