Sign in to the console
The Privilege Secure console is a web application. You open it in a browser, sign in, and work from the Dashboard. Every user signs in the same way, whether they request sessions, approve requests, review access, or audit sessions.
Before you begin
-
Use a supported browser. See Client requirements.
-
Get the console address from your administrator. The address has this form:
https://<nps-server>:6500<nps-server>is the NetBIOS name, fully qualified domain name (FQDN), or IP address of the server that runs Privilege Secure. A firewall can restrict access to the server, so ask your administrator if the page doesn't load. -
If you're the administrator who installed the product and this is the first sign-in, see Run the setup wizard for the setup wizard.
To reach the console from outside the network through a browser, see Sign in to the Remote Access Gateway portal.
Sign in with a username and password
- Open
https://<nps-server>:6500in a browser. The sign-in page opens. - Enter your Username and Password.
- Select your Domain from the list. Select
<none>if you use a local console account, which includes the built-in Admin account. - Click Login.
- If the console asks for a verification code, enter the code from your authenticator application. See Register multi-factor authentication.
If you enter your username as <DOMAIN>\<username> or <username>@<domain>, the console fills in the Domain field for you.
After you sign in, the console opens on the Dashboard.

Sign in with single sign-on
When your administrator configures a SAML or OpenID Connect connector, the sign-in page shows an Or login using: button for each connector. With a connector, you don't enter a username or password in the console.
- Click the button for your identity provider. The browser redirects to the identity provider's sign-in page.
- Sign in to the identity provider. Complete any multi-factor authentication (MFA) that the identity provider requires.
- After authentication, the browser returns to the console Dashboard.
If the identity provider returns an error, the console shows it and waits. Click Sign Out before you try again.
If your administrator makes a connector exclusive, the sign-in page shows only that connector's button and hides the username and password form.
To sign in with a different account than the one the console offers, click Login with a different account to show the other sign-in options.

Register multi-factor authentication
Your administrator assigns an authentication connector to each user. The assigned connector decides whether you must use MFA. Administrators can assign a connector that doesn't require MFA. For the connector types, see Authentication.
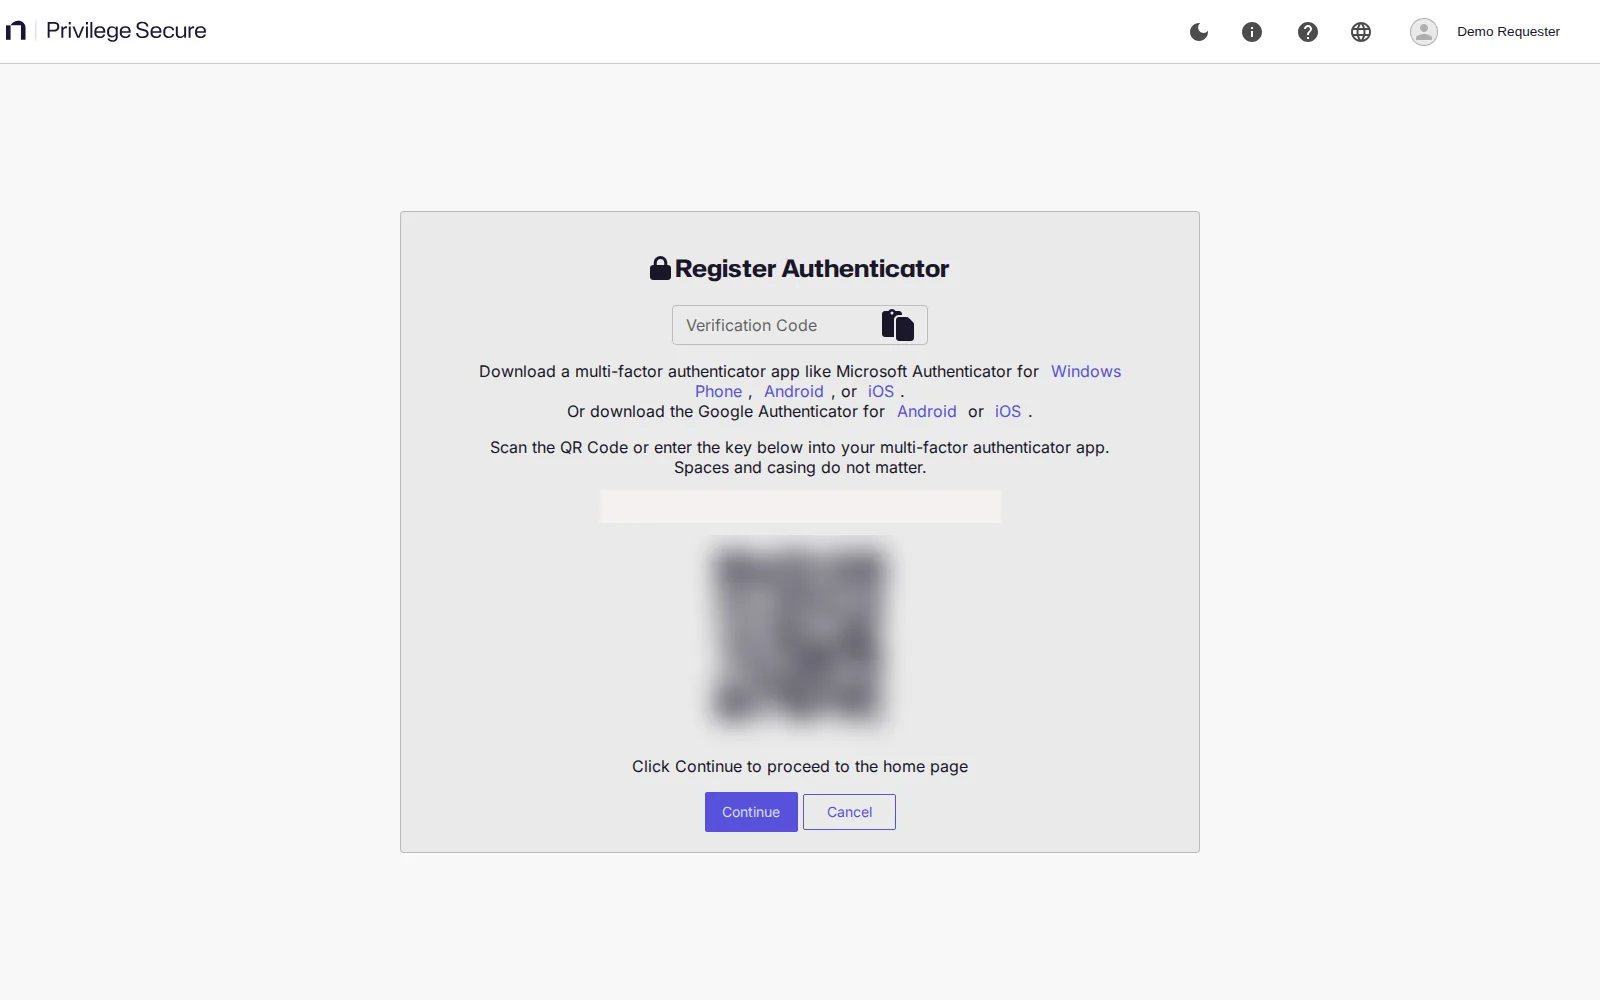
If your connector uses the built-in MFA, you register an authenticator application the first time you sign in.
- Sign in with your username and password. The console shows a QR code and a manual key.
- In your authenticator application, scan the QR code or enter the manual key. For example, use Microsoft Authenticator or Google Authenticator.
- Enter the verification code that the application shows.
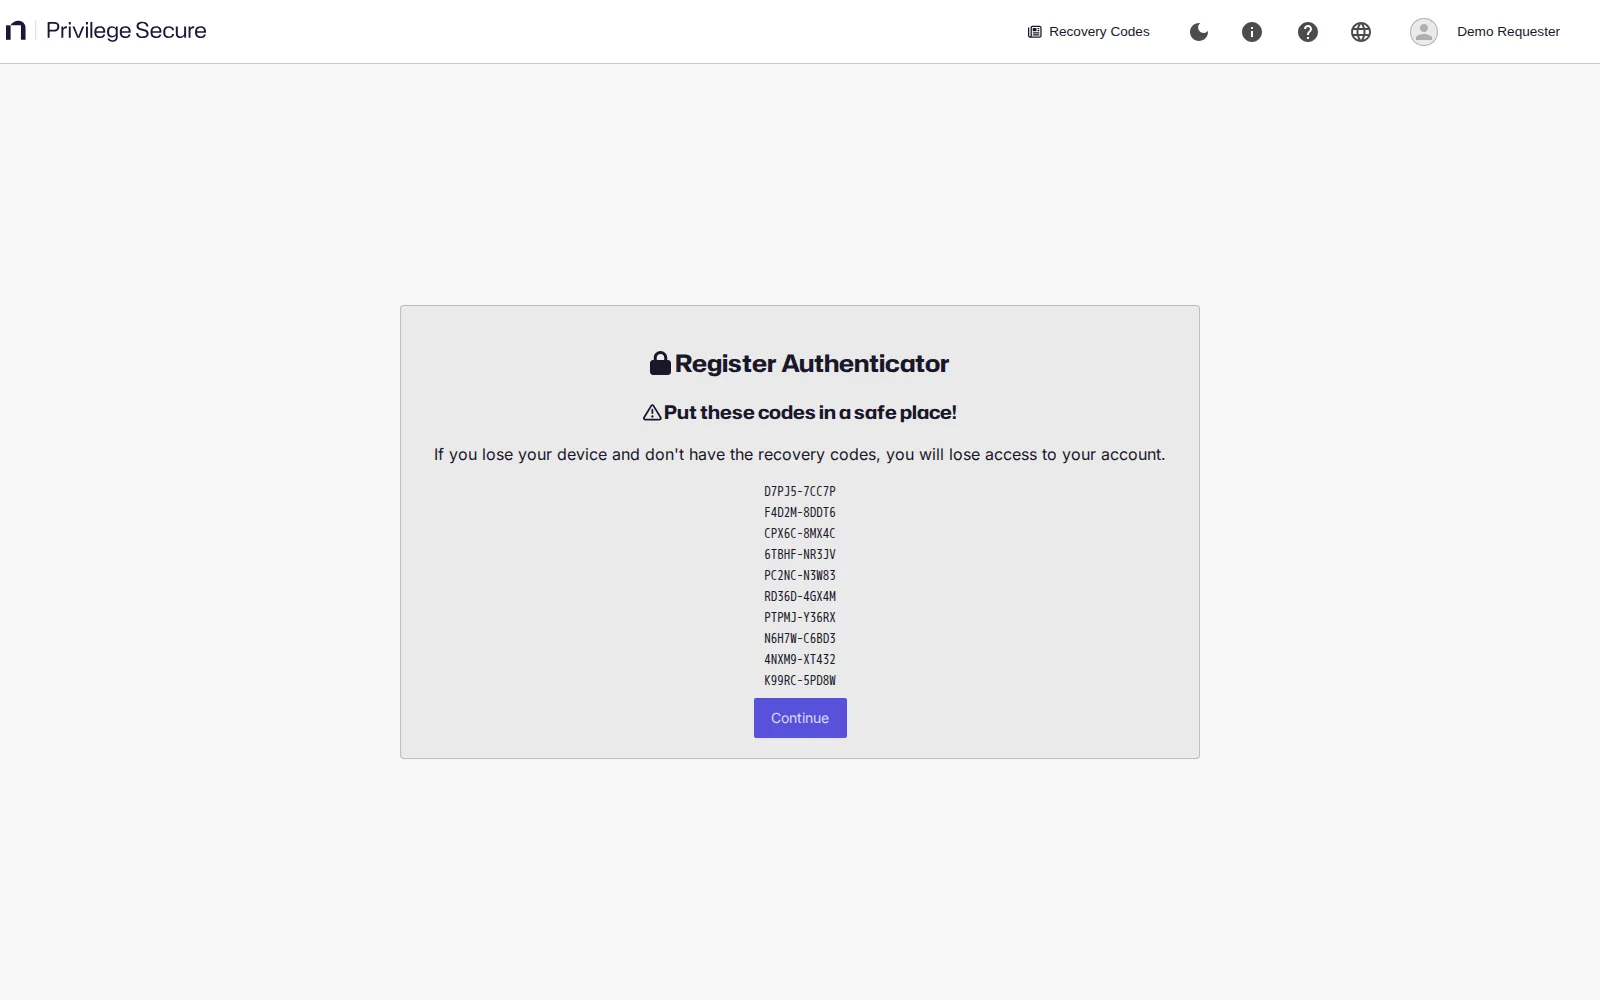
- Save the recovery codes that the console displays.
The console shows the recovery codes once, after registration. Copy them to a secure location before you close the dialog. The Recovery Codes button in the page header appears only at that time, and the codes aren't available to view again.
After registration, each sign-in asks for a code from your authenticator application. The console opens on the Dashboard after you enter a valid code. If your authenticator application is unavailable, enter one of your recovery codes in the same code box instead of the authenticator code.
Change an expired password
When the password for your account has expired, the console shows a change-password page after you enter your credentials. The page lists the password complexity rules. Enter a new password that meets them, and confirm it.
This page appears only for local console users. If you sign in with a domain account whose Active Directory password has expired, the sign-in fails. Change your domain password the way your organization changes Windows passwords, and then sign in again.
Idle timeout
The console signs you out when you're idle. The Idle Timeout (minutes) setting under System Settings controls how long the console waits. The default is 10 minutes. Your administrator can change it. See System settings reference.
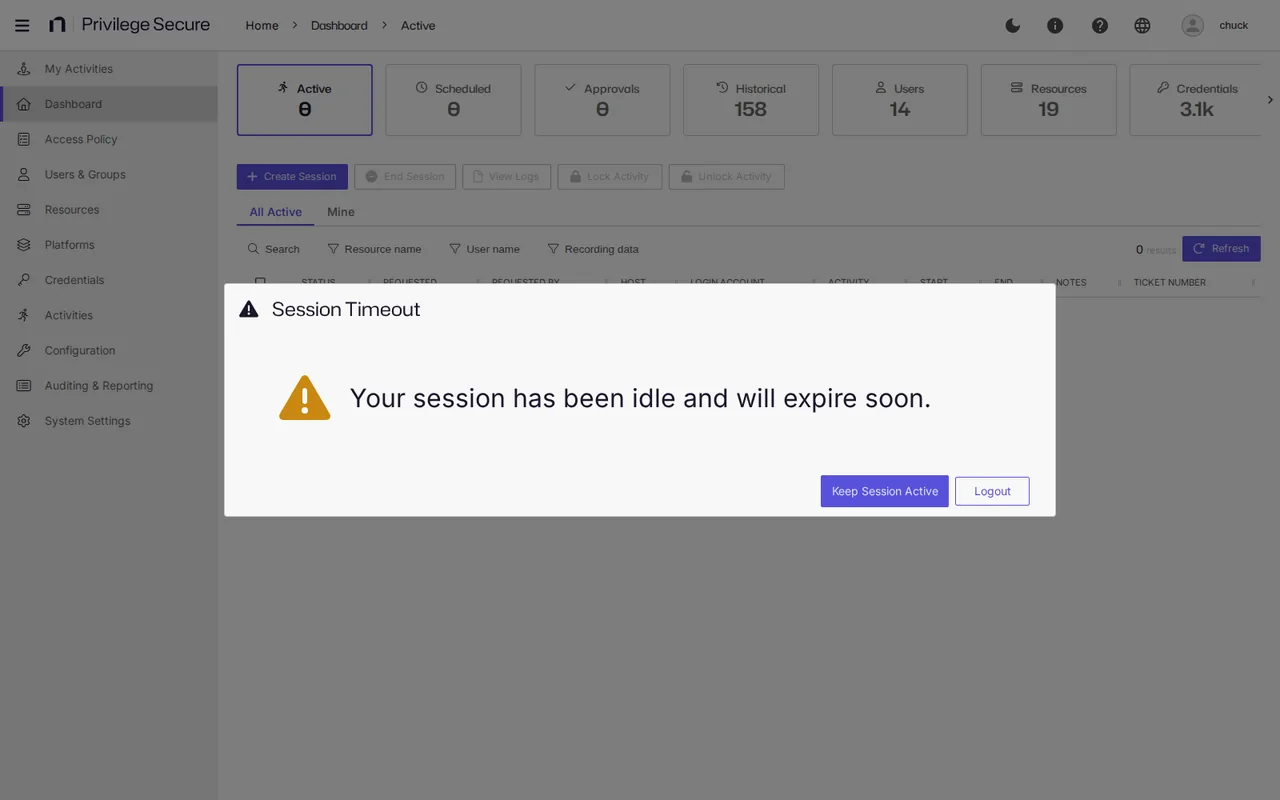
When the idle timeout passes, the Session Timeout dialog displays "Your session has been idle and will expire soon." Click Keep Session Active to keep working, or click Logout to sign out. If you take no action, the console signs you out 5 minutes later. With the default setting, you're signed out after about 15 minutes of inactivity.
Session closed
The console shows a Session Closed dialog with the message "Your session has been closed." This happens when your session token is revoked, for example when you sign in again elsewhere. Click Logout to return to the sign-in page. When another sign-in caused it, the message adds "due to a login at IP Address" and the address.
Account lockout
Repeated failed sign-in attempts lock the account. See User and group details for how an administrator unlocks it.
You also can't sign in while an administrator has locked your account in Privilege Secure. The console shows "Invalid Username or Password", the same message as for a wrong password.