Allowed Members Tab for Protection Policies
The Allowed Members tab shows the configuration options for managing the groups governed by the selected protection policy. Any group member(s) discovered that are not in the list will be removed from the local group on the resource during the next scheduled sync.
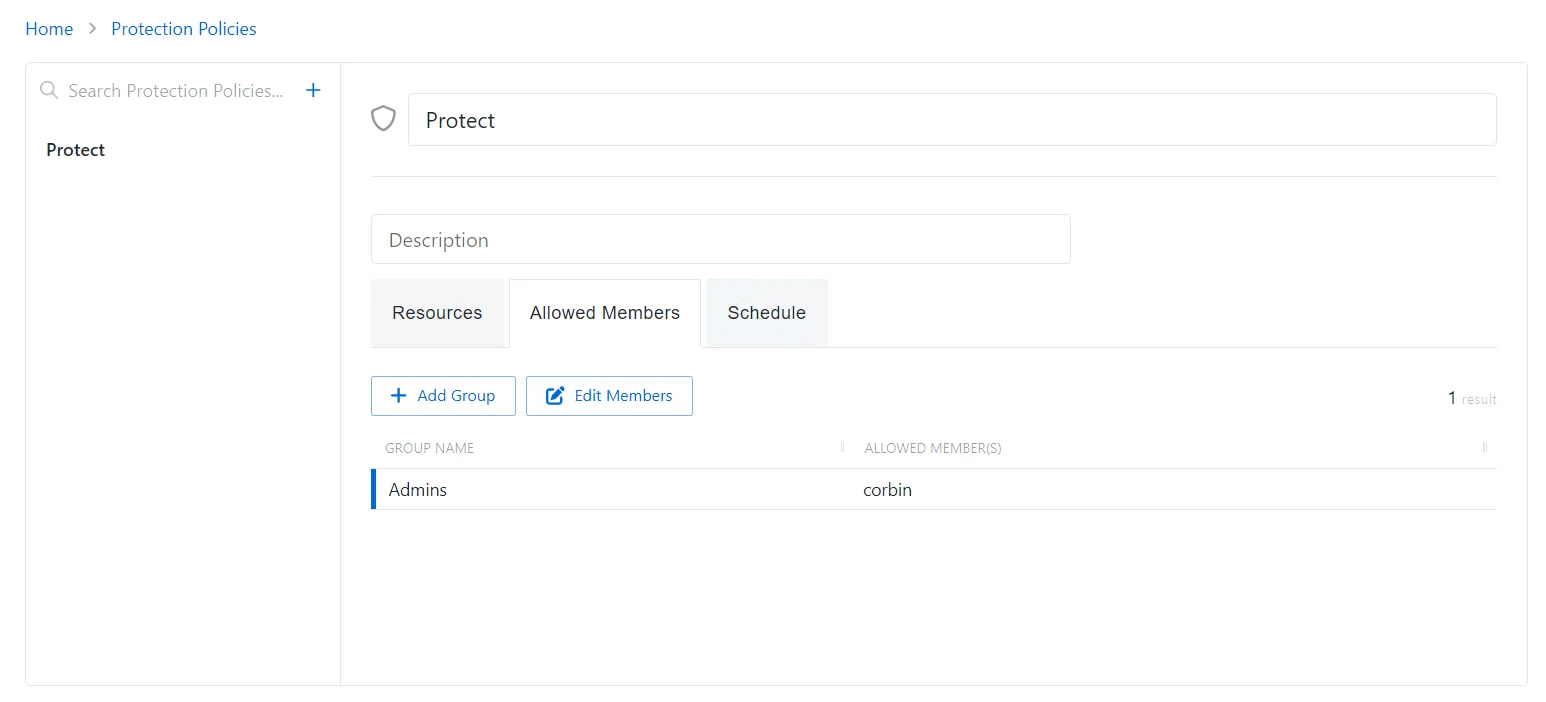
The Allowed Members tab has the following features:
- Add Group — Opens the Add Protected Group and Member window. See the Add Groups to a Protection Policy topic for additional information.
- Edit Members — Opens the Edit Protected Group Members window to edit the selected group within the protection policy. See the Edit Protected Group Members topic for additional information.
The table has the following columns:
- Group Name — Displays the name of the group
- Allowed member(s) — Authorized account that will not be removed from the local group when the protection policy runs. If a domain is not specified in the name, the account is assumed to be local to the resource.
Add Groups to a Protection Policy
Follow the steps to add local groups to the selected protection policy.
Step 1 – Navigate to the Policy > Protection Policies page.
Step 2 – In the Protection Policy list, select the name of the protection policy and select the Allowed Members tab.
Step 3 – Click Add Group to open the Add Protected Group and Member window.

Step 4 – Enter the following information:
-
Group Name – Displays the name of the group.
NOTE: Privilege Secure cannot be used to create a group. The group must already exist on the resource.
-
Group Member – The name of the group member
Step 5 – Click Save to add the group to the protection policy.
The new group is added to the protection policy and is shown on the Allowed Members Tab for Protection Policies. When the resource is scanned, any group members not permitted by the protection policy will be removed from the local group on the resource.
Edit Protected Group Members
Follow the steps to edit the members of a local groups within the selected protection policy.
Step 1 – Navigate to the Policy > Protection Policies page.
Step 2 – In the Protection Policy list, select the name of the protection policy and select the Allowed Members tab.
Step 3 – Click Edit Members to open the Add Protected Group and Member window.

Step 4 – Click the Trashcan icon next to a member to remove them from a Protected Group. A confirmation window will appear.
Step 5 – (Optional) Enter a Group Member in the provided field.
Step 6 – Click Add.
Members of the Protected Group have been edited for this protection policy.
Resources Tab for Protection Policies
The Resources tab shows the resources associated with the selected protection policy.
![]()
The Resources table has the following features:
- Add — Opens the Add Resources window. See the Add Resources Window for Protected Policy topic for additional information.
- Remove — Removes the selected item from being associated with the policy
The table has the following columns:
- Checkbox — Check to select one or more items
- Name — Displays the name of the resource. Click the link to view additional details. The details vary based on the type of resource. See the Resources Page topic for additional information.
- DNS Host Name — Displays the DNS host name for a host resource or the FQDN for a domain resource
- Operating System — Displays the operating system of the resource
The table columns can be resized and sorted in ascending or descending order.
Activities Tab for Resource Based Access Policies
The Activities tab shows the activities associated with the selected access policy.
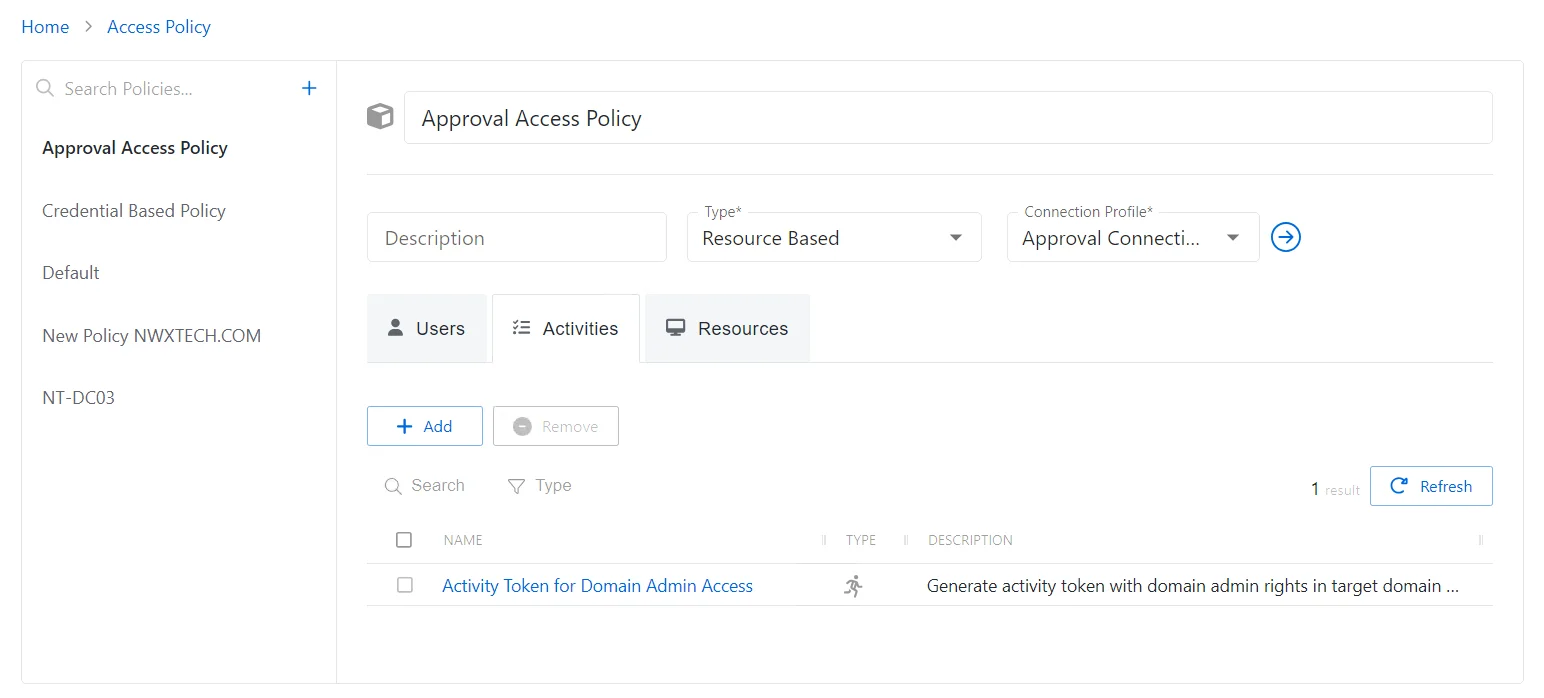
The Activities tab has the following features:
-
Search — Searches the table or list for matches to the search string. When matches are found, the table or list is filtered to the matching results.
-
Type— Provides options to filter results based on a chosen criterion:
- All — Displays all activity for users and groups
- Activity — Displays user activity
- Activity Group — Displays group activity
-
Add — Opens the Add Activities and Activity Groups window. See the Add Activities and Activity Groups Window topic for additional information.
-
Remove — Removes the selected item from being associated with the policy
-
Refresh — Reload the information displayed
The table has the following columns:
- Checkbox — Check to select one or more items
- Name — Displays the name of the activity . Click the link to view additional details. See the Activities Page topic for additional information.
- Type — Classification of the activity. Click the link to view additional details.
- Description — Description of the policy
The table columns can be resized and sorted in ascending or descending order.
Resources Tab for Resource Based Access Policies
The Resources tab shows the resources associated with the selected access policy.
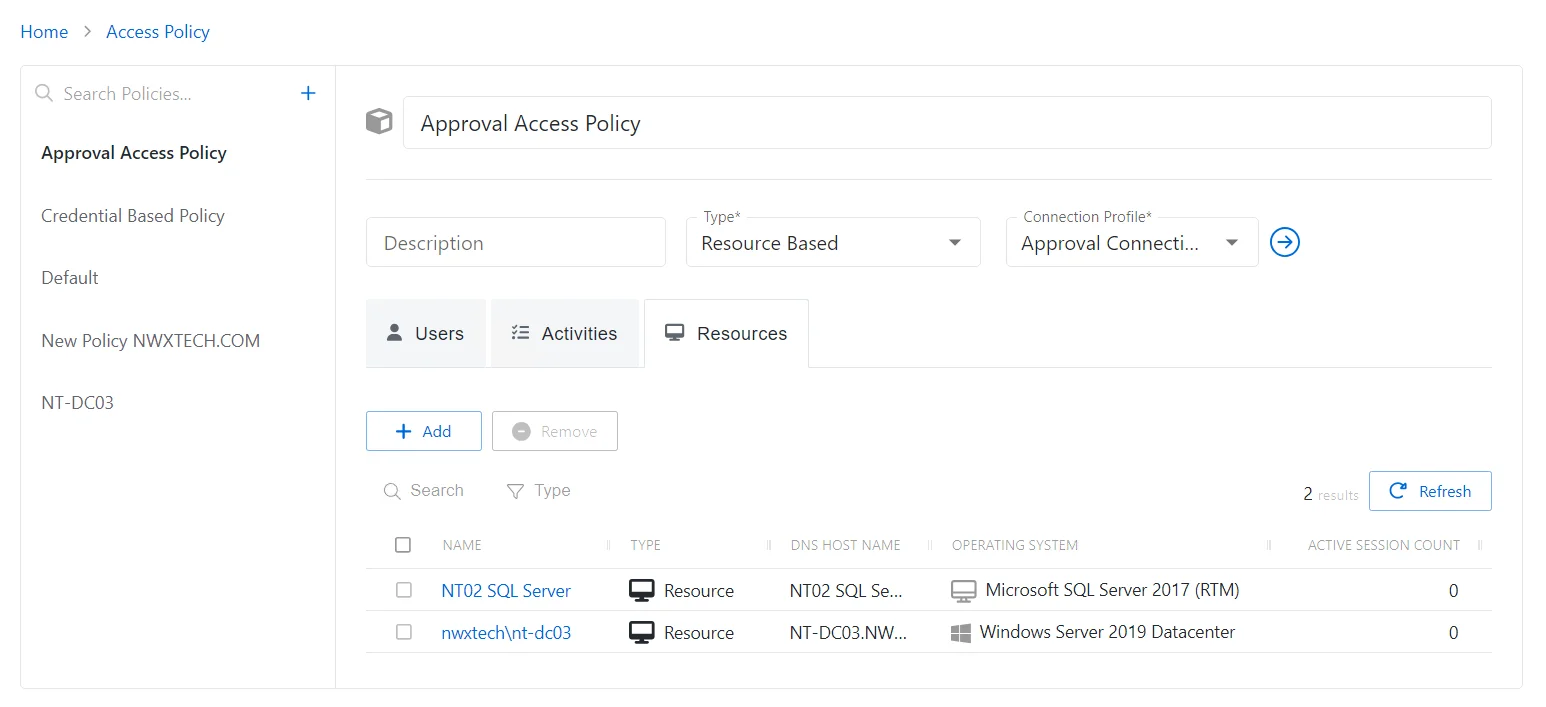
The Resources table has the following features:
-
Add — Opens the Add Resources and Resource Groups window. See the Add Resources and Resource Groups Window topic for additional information.
-
Remove — Removes the selected item from being associated with the policy
-
Search — Searches the table or list for matches to the search string. When matches are found, the table or list is filtered to the matching results.
-
Filter — Provides options to filter results based on a chosen criterion:
- All — Displays all individual and group types
- Resource — Displays individual types
- Resource Group — Displays group types
-
Refresh — Reload the information displayed
The table has the following columns:
- Checkbox — Check to select one or more items
- Name — Displays the name of the resource. Click the link to view additional details. The details vary based on the type of resource. See the Resources Page topic for additional information.
- Type — Icon indicates the type of object
- DNS Host Name — Displays the DNS host name for a host resource or the FQDN for a domain resource
- Operating System — Displays the operating system of the resource
- Active Session Count — Displays the number of active sessions on the resource
The table columns can be resized and sorted in ascending or descending order.
Users Tab for Resource Based Access Policies
The Users tab shows the users and groups associated with the selected access policy.
The Users tab has the following features:
-
Add — Opens the Add Users and Groups window. See the Add Users & Groups Window topic for additional information.
-
Remove — Removes the selected item from being associated with the policy
-
Search — Searches the table or list for matches to the search string. When matches are found, the table or list is filtered to the matching results.
-
Type — Provides options to filter results based on a chosen criterion:
- All — Displays all individual and group types
- User — Displays user types
- Group — Displays group types
- Application — Displays application types
- Collection — Displays collection types
- Local User — Displays local user types
-
Refresh — Reload the information displayed
The table has the following columns:
-
Checkbox — Check to select one or more items
-
Expand — Click the expand () icon to show additional information about the activities and resources authorized for the selected user or group
-
Name — Displays the name of the account. See the User, Group, & Application Details Page topic for additional information.
-
Email — Displays the associated email address, if available
-
User Name — Displays the sAMAccountName for the account
-
Type — Icon indicates the type of object
-
Certified — Indicates the access entitlement for the user or group. See the Access Certification Page topic for additional information.
- Approved — Access entitlements have been approved
- Denied — Access entitlements have been revoked
- Incomplete — No access entitlement review has been completed
The table columns can be resized and sorted in ascending or descending order.
Add Activities and Activity Groups Window
The Add Activities and Activity Groups window provides a list of Activities that have been created. Activities are created in the Activities Page.
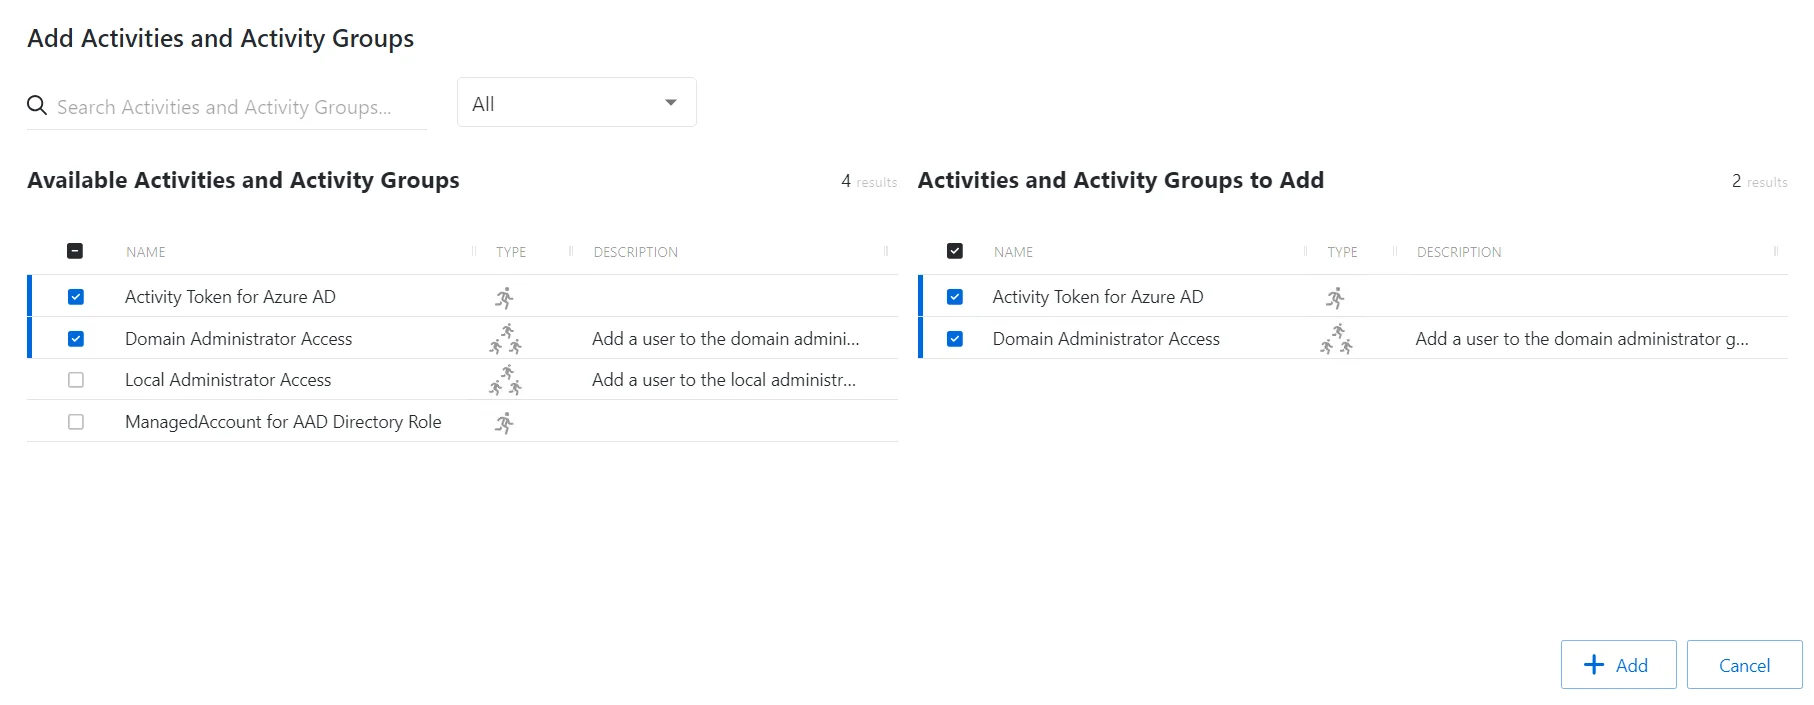
The window has the following features:
- Search — Searches the table or list for matches to the search string. When matches are found, the table or list is filtered to the matching results.
- Filter — Provides options to filter results based on a chosen criterion: All, Activity or Activity Group
- Available Activities — Shows all available activities and activity groups
- Activities & Activity Groups to Add — Shows selected activities and activity groups
- Add — Adds modifications and closes window
- Cancel — Discards modifications and closes the window
Both tables have the following columns:
- Name — Displays the name of the activity
- Type — Classification of the activity
- Description — Description of the policy
Add Activities
Follow the steps to add activities to the selected access policy.
Step 1 – Navigate to the Policy > Access Policies page.
Step 2 – In the Access Policy list, select the name of the access policy and select the Activities tab.
Step 3 – Click Add to open the Add Activities and Groups window.
The Add Activities and Groups window has the following features:
-
Search – Searches the table or list for matches to the search string. When matches are found, the table or list is filtered to the matching results.
-
Available Activities and Groups – Shows all activities and groups that have been added to the console
-
Activities and Groups to Add – Shows all activities and groups that have been added to the protection policy
-
Column headers can be sorted in ascending or descending order
- Name — Displays the name of the activity
- Type — Classification of the activity
- Description — Description of the policy
Step 4 – To add an activity to the access policy, click a row in the Available Activities list and it is immediately moved to the Activities & Groups to Add list.
Step 5 – (Optional) Click a row in the Activities & Groups to Add list to move it back to the Available Activities list.
Step 6 – Click Add to add the activities and activity groups to the access policy.
The new activities and activity groups are added to the access policy and are shown in the Activities Tab for Resource Based Access Policies.
Add Credentials Window
The Add Credentials window provides a list of Credentials that have been onboarded. Credentials are onboarded in the Credentials Page.
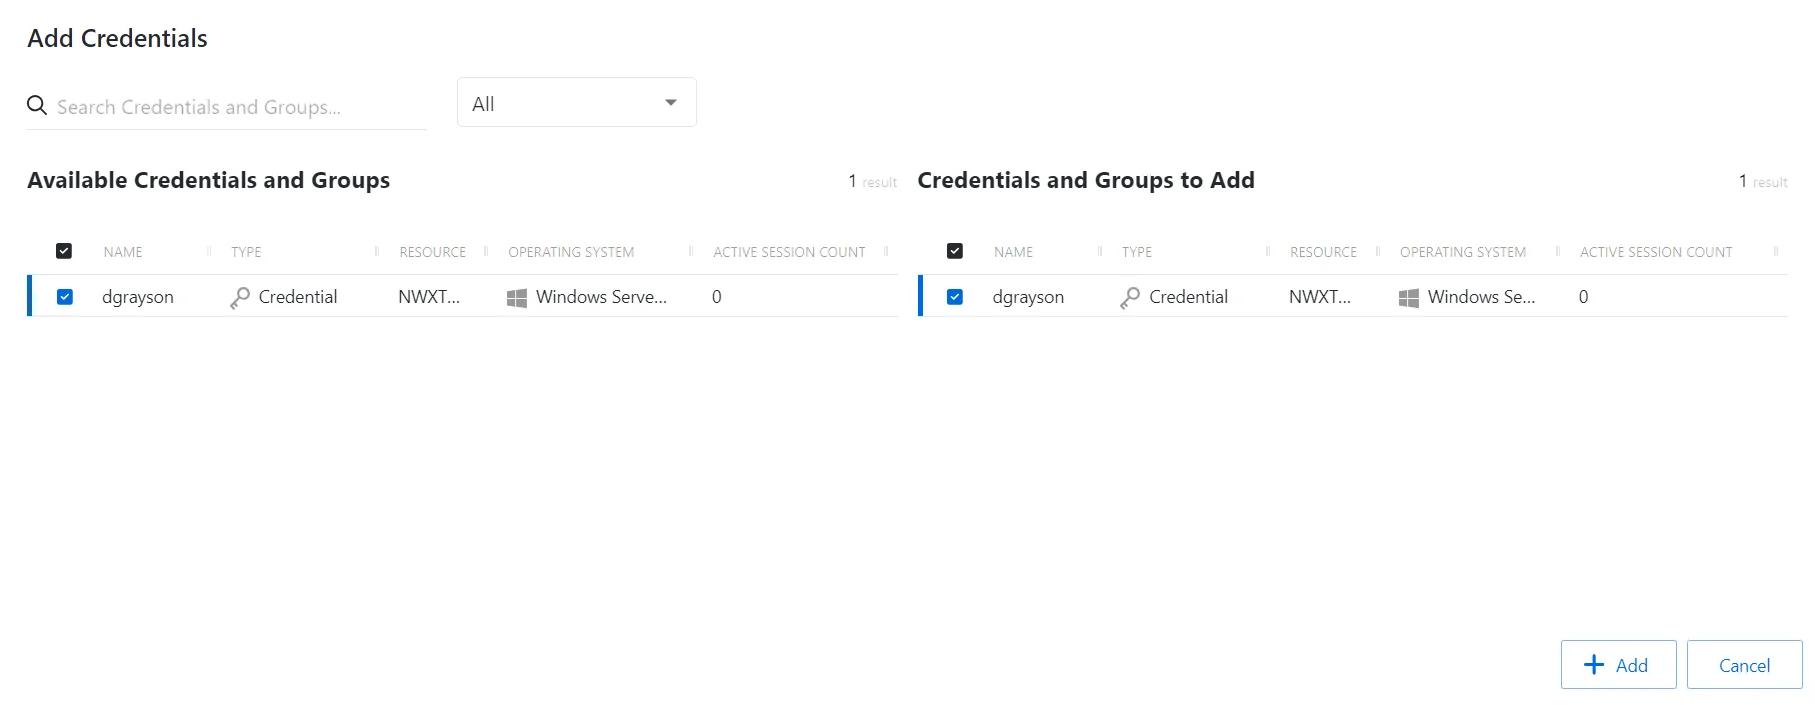
The window has the following features:
- Search — Searches the table or list for matches to the search string. When matches are found, the table or list is filtered to the matching results.
- Filter — Provides options to filter results based on a chosen criterion: All, Credential or Credential Group
- Available Credentials and Groups — Shows all available credentials and credential groups
- Credentials And Groups to Add — Shows selected credentials and credential groups
- Add — Adds modifications and closes window
- Cancel — Discards modifications and closes the window
Both tables have the following columns:
- Checkbox — Check to select one or more items
- Name — Displays the name of the credential
- Type — Icon indicates the type of object
- Resource — Displays the name of the resource
- Operating System — Displays the operating system of the resource
- Active Session Count — Displays the number of active sessions
Add Credentials to an Access Policy
Follow the steps to add credentials to the selected access policy.
Step 1 – Navigate to the Policy > Access Policies page.
Step 2 – In the Access Policy list, select the name of the access policy and select the Credentials tab.
Step 3 – Click Add to open the Add Credentials window.
The Add Credentials window has the following features:
-
Search – Searches the Name and Operating System columns to match the search string. When matches are found, both tables are filtered to the matching results.
-
Available Credentials and Groups– Shows all Credentials and Groups that have been added to the console
-
Credentials and Groups to Add – Shows the Credentials and Groups to be added to the protection policy
-
Column headers can be sorted in ascending or descending order
- Name – The name of the credential
- Type – The type of credential, individual or group
- Resource – Name of the domain
- Operating System – Operating System of resource
- Active Session Count – Number of active sessions
Step 4 – _(Optional)_Toggle between Credentials or Credential Groups.
Step 5 – To add a credential to the access policy, click a row in the Available Credentials table and it is immediately moved to the Credentials to Add table.
Step 6 – Click Add to add the credential(s) to the access policy.
The new credential(s) are added to the access policy and are shown in the Credentials Tab for Credential Based Access Policies.
Add Resources and Resource Groups Window
The Add Resources and Resource Groups window provides a list of resources that have been onboarded. Resources are onboarded in the Resources Page.
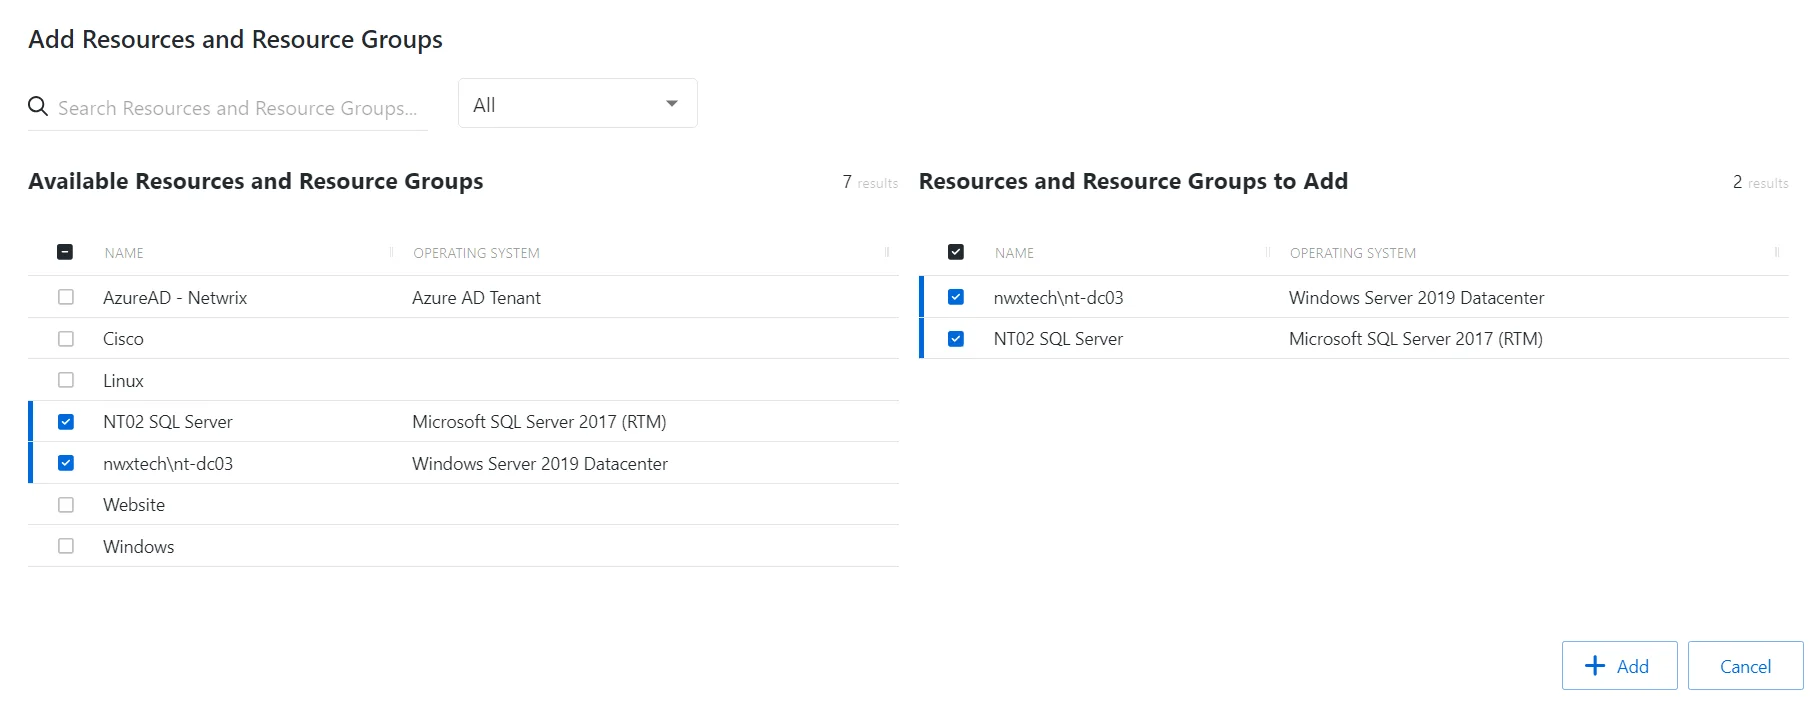
The window has the following features:
- Search — Searches the table or list for matches to the search string. When matches are found, the table or list is filtered to the matching results.
- Filter — Provides options to filter results based on a chosen criterion: All, Resource or Resource Group
- Available Resources and Resource Groups — Shows all available resources and resource groups that have been onboarded
- Resources and Resource Groups to Add — Shows selected resources and resource groups
- Add — Adds modifications and closes window
- Cancel — Discards modifications and closes the window
Both tables have the following columns:
- Name — Displays the name of the resource
- Operating System— Displays the operating system of the resource
Add Resources
Follow the steps to add resources and resource groups to the selected access policy.
Step 1 – Navigate to the Policy > Access Policies page.
Step 2 – In the Access Policy list, select the name of the access policy and select the Resources tab
Step 3 – Click Add to open the Add Resources and Resource Groups window.
The Add Resources and Resource Groups window has the following features:
-
Search – Searches the table or list for matches to the search string. When matches are found, the table or list is filtered to the matching results.
-
Available Resources and Resource Groups – Shows all resources that have been added to the console
-
Resources and Resource Groups to Add – Shows the resources to be added to the protection policy
-
Column headers can be sorted in ascending or descending order
- Name – The name of the resource
- Operating System – Operating System of resource
Step 4 – Filter by Resources or Resource Groups, and use the search feature.
Step 5 – To add a resource or resource group to the access policy, click a row in the Available Resources / Resource Groups table and it is immediately moved to the Resources and Resource Groups to Add table.
Step 6 – (Optional) Click a row in the Resources and Resource Groups to Add table to move it back to the Available Resources / Resource Groups table.
Step 7 – Click Add to add the resource(s) and resource group(s) to the access policy.
The new resource(s) and resource group(s) are added to the access policy and are shown in the Resources Tab for Resource Based Access Policies.
Add Resources Window for Protected Policy
The Add Resources window provides a list of resources that have been onboarded. Resources are onboarded in the Resources Page.

The window has the following features:
- Search — Searches the table or list for matches to the search string. When matches are found, the table or list is filtered to the matching results.
- Available Resources — Shows all available resources
- Resources And Groups to Add — Shows selected resources
- Arrow icons — Use the arrows to move selection in and out of the Resources to Add section
- Add — Adds modifications and closes window
- Cancel — Discards modifications and closes the window
Both tables have the following columns:
- Checkbox — Check to select one or more items
- Type — Classification of the activity
- Name — Displays the name of the resource. Click the link to view additional details. See the Resources Page topic for addition information.
- DNS Host Name — Displays the DNS host name for a host resource or the FQDN for a domain resource
- Operating System— Displays the operating system of the resource
Add Resources
Follow the steps to add resources to the selected protection policy.
Step 1 – Navigate to the Policy > Protection Policies page.
Step 2 – In the Protection Policy list, select the name of the protection policy and select the Resources tab.
Step 3 – Click Add to open the Add Resources window.
The Add Resources window has the following features:
-
Search – Searches the Name and Operating System columns to match the search string. When matches are found, both tables are filtered to the matching results.
-
Available Resources – Shows all resources that have been added to the console
-
Resources to Add – Shows the resources to be added to the protection policy
-
Column headers can be sorted in ascending or descending order
- Type – The type of the resource
- Name – The name of the resource
- DNS Host Name – The DNS host name for a host, or FQDN for a domain
- Operating System – Operating System of resource
Step 4 – To add a resource to the protection policy, click a row in the Available Resources table and it is immediately moved to the Resources to Add table.
Step 5 – (Optional) Click a row in the Resources to Add table to move it back to the Available Resources table.
Step 6 – Click Add to add the resources to the protection policy.
The new resource(s) are added to the protection policy and are shown on the Resources Tab for Protection Policies.