Add Schedule Policy
Follow the steps to add a schedule policy to the console.
Step 1 – Navigate to the Policy > Platforms > Schedule Policies page.
Step 2 – In the Schedule Polices list, click the Plus icon.
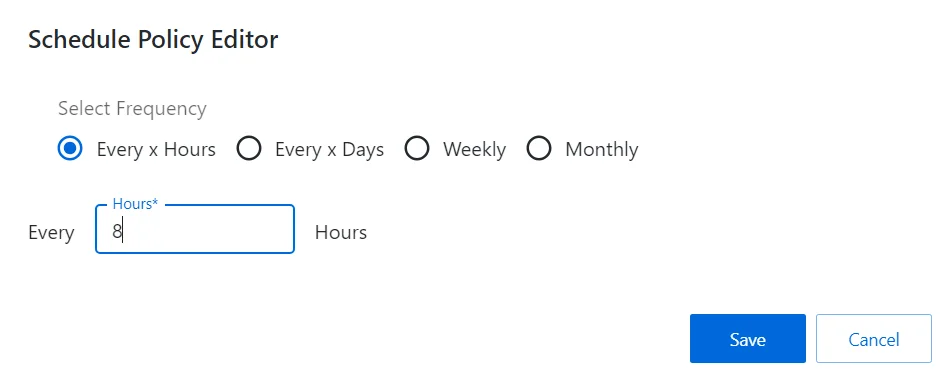
Step 3 – Enter the following information:
NOTE: The fields will change depending on the selected frequency.
-
Select the desired frequency:
- Every X Hours – Enter the number of hours between executions
- Every X Days – Enter the number of days between executions and the time of day
- Weekly – Select the day of the week from the drop-down menu and enter the time of day
- Monthly – Enter a number representing the day of the month and the time of day
Step 4 – Click Save to create the new schedule.
The new schedule is added to the Schedule Policy list.
Edit Schedule Policy
Follow the steps to edit the scheduled tasks.
Step 1 – Navigate to the Policy > Platforms > Schedule Policies page.
Step 2 – Click the Edit icon to open the Schedule Policy Editor window.
Step 3 – From the Frequency radio buttons, set the frequency of how often the scheduled task is run:
NOTE: The fields will change depending on the selected frequency.
- Every X Hours — Enter the number of hours between executions
- Every X Days— Enter the time of day
- Weekly — Select the day of the week from the drop-down menu and enter the time of day
- Monthly — Enter a number representing the day of the month and then enter the time of day
Step 4 – Click Save to accept the changes.
The task will run at the new scheduled frequency.
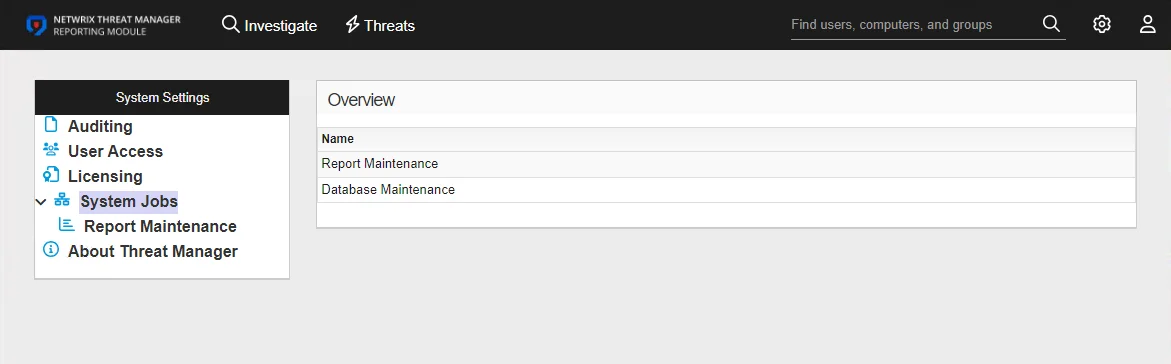
Schedule Policies Page
The Schedule Policies page is accessible from the Navigation pane under Policies > Platforms. It shows configured schedule policies.
Schedules can be applied:
- Platforms — Configure schedules used by resources on a given platform type. See the Platforms Page topic for additional information.
- Protection Policy — See the Protection Policies Page topic for additional information.
- Change Policy (credential rotation) — How often the password of a managed account is changed. See the Credentials Dashboard topic for additional information on managed accounts.
- Host scan — Scan a host resources for local users, groups, windows services and scheduled tasks
- Verification — Check that the passwords for managed accounts match the credentials set by Privilege Secure
The pane on the left side of the page displays a list of the configured schedule policies. This pane has the following features:
- Search — Searches the table or list for matches to the search string. When matches are found, the table or list is filtered to the matching results.
- Green + button — Create a new schedule policy. See the Add Schedule Policy topic for additional information.
- Trashcan icon — Deletes the schedule policy. Icon appears when profile is hovered over. A confirmation window will display.
NOTE: The default password policy cannot be deleted.
The selected schedule policy details display in the main pane:
- Name — Displays the schedule recurrence information
- Edit icon — Click the icon to edit the selected schedule policy. See the Edit Schedule Policy topic for additional information.
Schedule Tab for Protection Policies
The Schedule tab shows the schedule tasks for the resources in the selected protection policy. The protection policy schedule is run based on the platform type configuration on the Platforms Page.
The Schedule tab has the following features:
- Search — Searches the table or list for matches to the search string. When matches are found, the table or list is filtered to the matching results.
- View Logs — View the log for the selected task
- Refresh — Reload the information displayed
The table has the following columns:
- Task Name — Displays the name of the scheduled task. See the Schedule Policies Page topic for additional information.
- Last Run Time — Date timestamp of the previous scheduled task
- Next Run Time — Date timestamp of the next scheduled task
- Recurrence — Indicates the scheduled recurrence
- Last Status — Shows the previous status information for the task
- Status — Shows status information for the task
The table columns can be resized and sorted in ascending or descending order.