Add Approval Workflow
An approval workflow requires that the session must be approved before the requestor of the session can log in. Up to three Approval Tiers can be added. When the required number of approvals is reached in a Tier, the approvers in the next Tier are notified. Each Tier must approve the request in sequence. See the Approvals Dashboard topic for additional information on how to approve a requested session.
Follow the steps to add an approval workflow to the console.
Step 1 – Navigate to the Policy > Access Policies > Connection Profiles page.
Step 2 – Select the Connection Profile and click any field to edit.
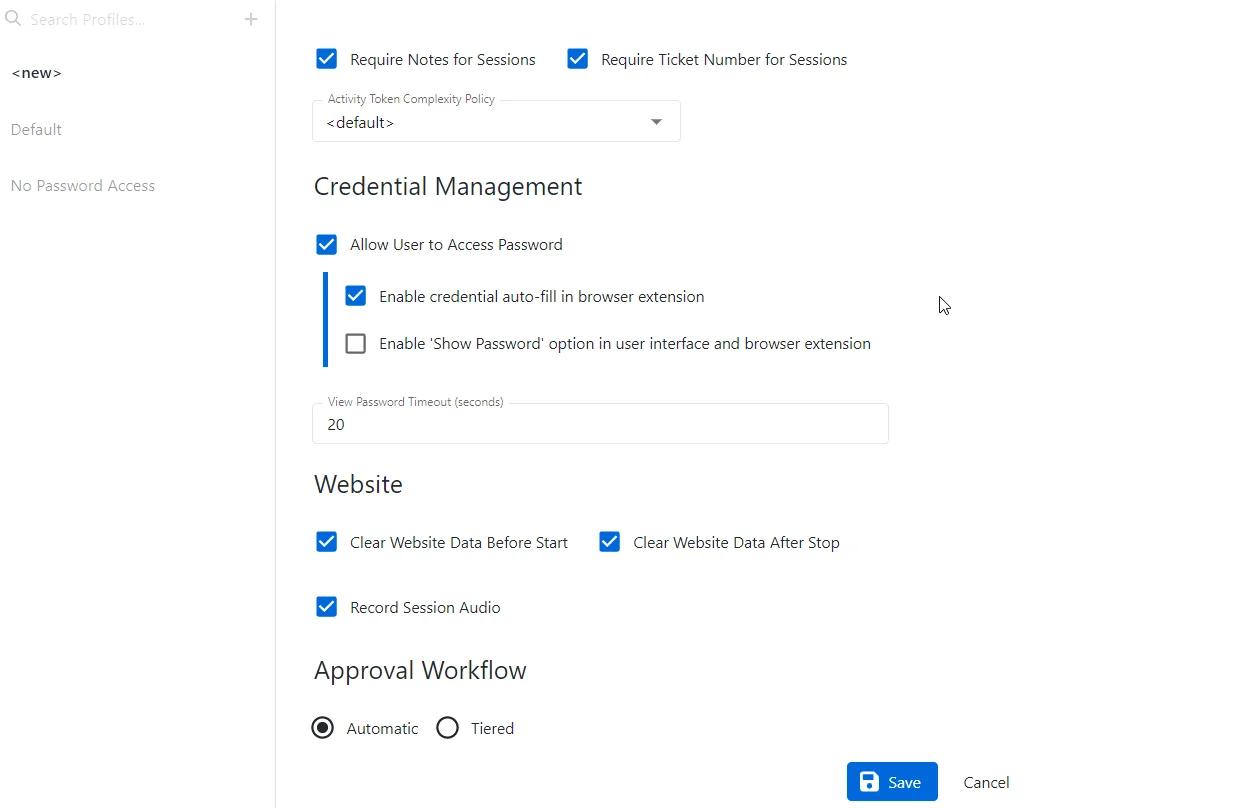
Step 3 – In the Approval Workflow section, select Tiered and click Save.
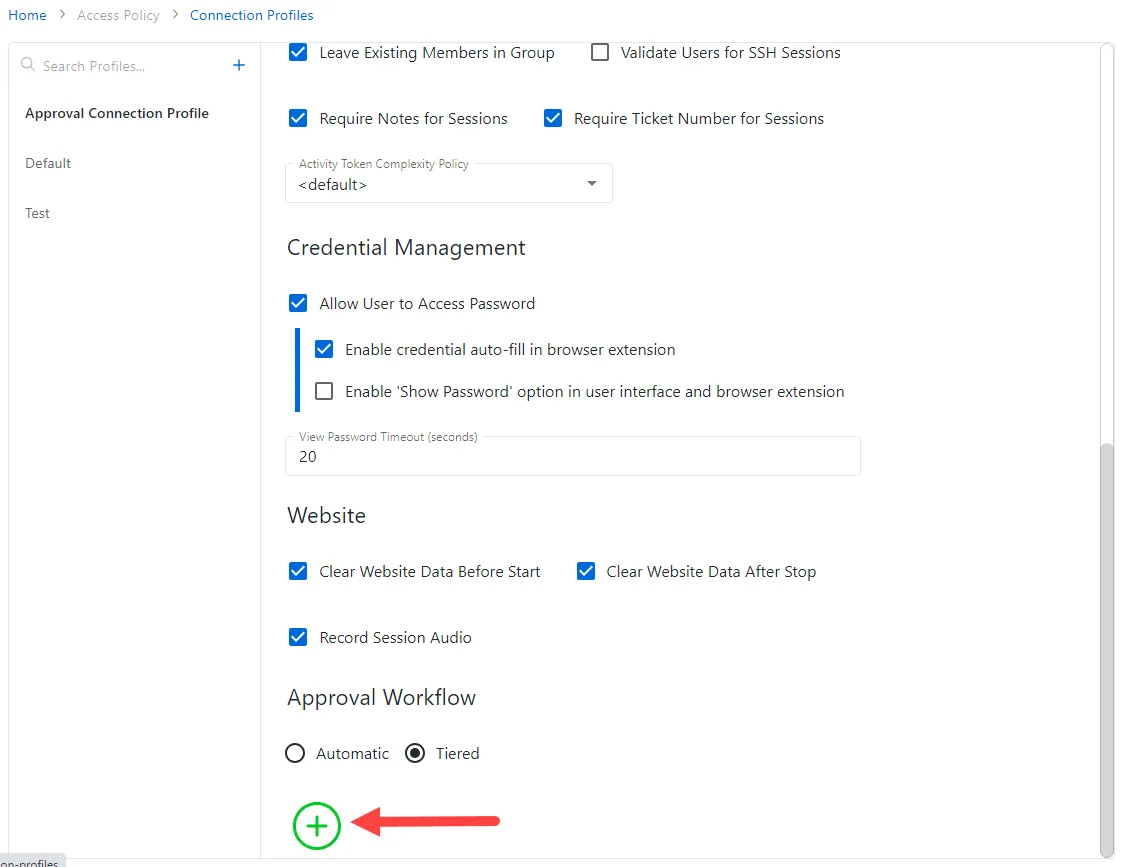
Step 4 – Once the policy has been created, click the Add Tier icon to add an Approval Tier.
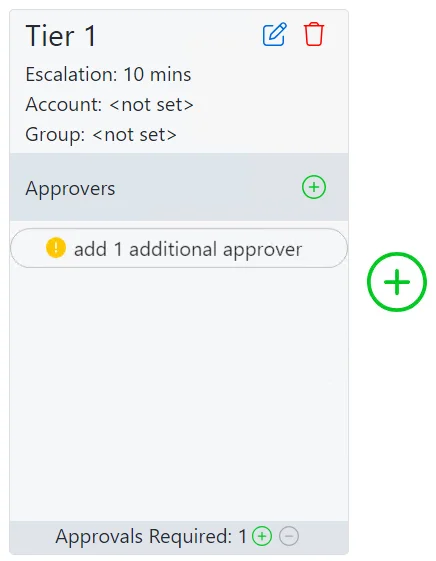
Workflow Tier(s) (only visible when Approval Type is set to Tiered):
- Delete icon – Deletes the selected Workflow Tier (A confirmation window will display)
- Edit icon – Modify the escalation settings for the Workflow Tier
- Escalation – The amount of time available to approve the request before it is escalated
- Escalation Account – The user that the request will be escalated to
- Escalation Group – The group that the request will be escalated to
- Approvers – The user(s) or group(s) that can approve a request. See the Approvals Dashboard topic for additional information on how to approve a requested session.
- Add Approver icon – Add a user or group as an approver
- Remove Approver icon – Removes the selected approver (A confirmation window will display)
- Approvals Required – The number of approvers required to approve the request
Step 5 – Click the Edit icon to open the Tier Escalation window.

Step 6 – In the Tier Escalation window, enter the following information:
- Escalation in Minutes – The amount of time available to approve the request before it is escalated (default is 10 minutes)
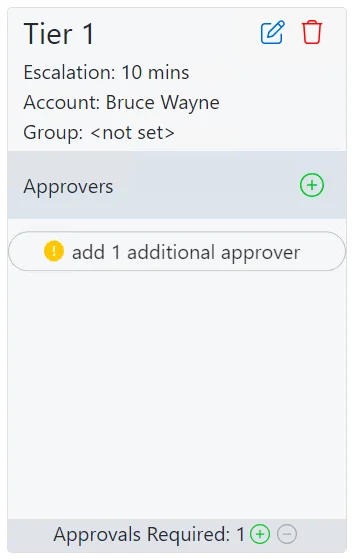
- Escalation Account – The user that the request will be escalated to
- Escalation Group – The group that the request will be escalated to
Step 7 – Click Okay to save the escalation settings.
Step 8 – Click the Add Approvers icon to open the Add Users and Groups as Approvers window.
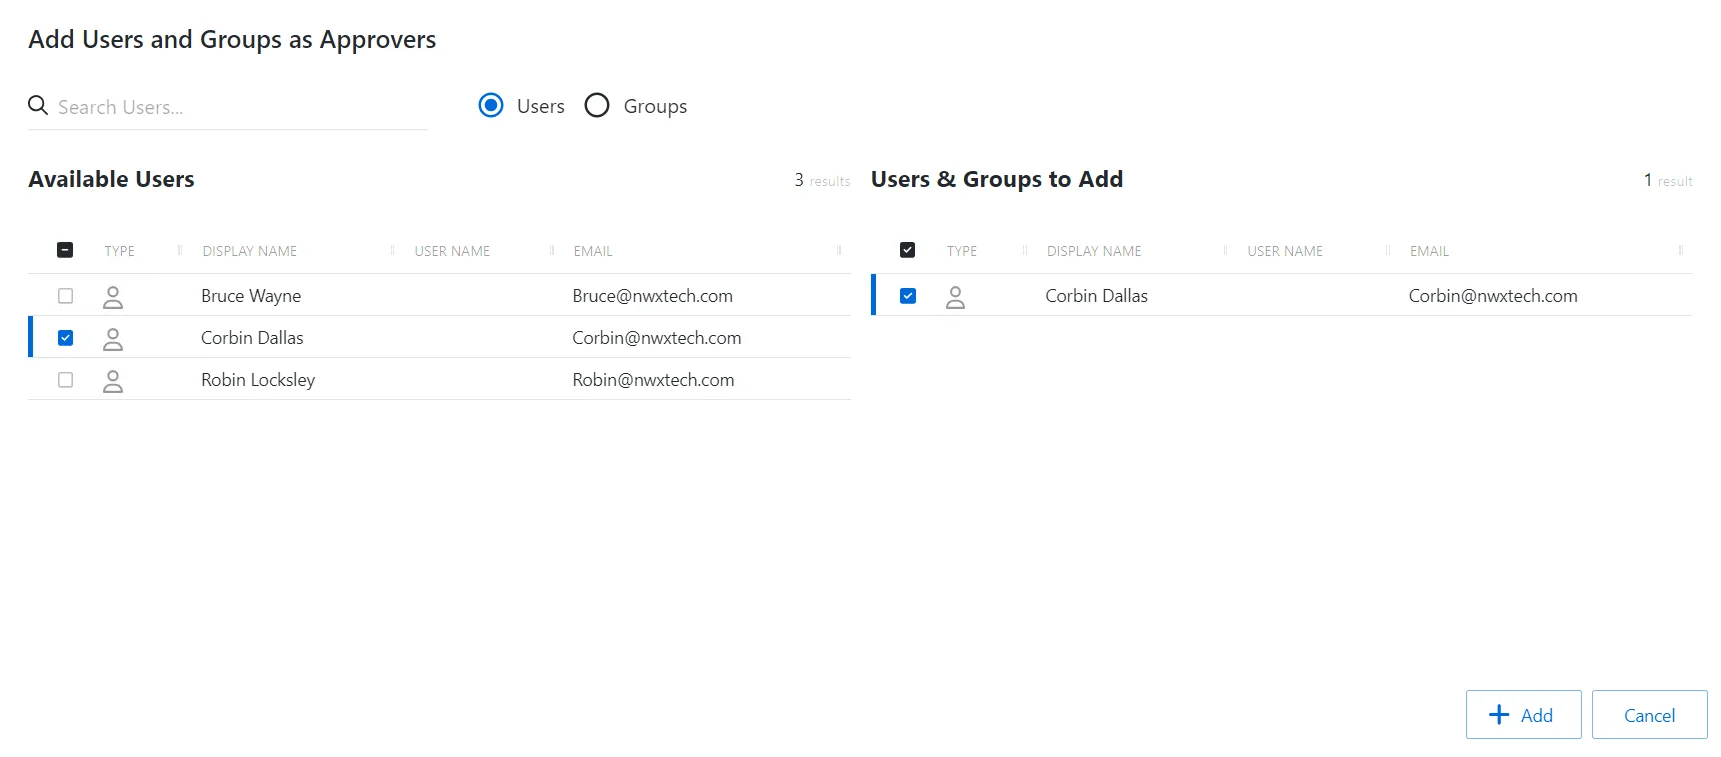
The Add Users and Groups as Approvers window has the following features:
-
Search – Searches the table or list for matches to the search string. When matches are found, the table or list is filtered to the matching results.
-
Radio buttons to filter by users or groups
-
Available Users/Groups – Shows all users and groups added to the console
-
Users & Groups to Add – Shows the users and groups to be added to the Workflow Tier as Approvers
-
Column headers can be sorted in ascending or descending order:
- Type – User or group
- Name – Name of the user or group
- User Name – User or group SAM Account Name
- Email – User or group email address
Step 9 – Filter by Users or Groups, or use the Search feature.
Step 10 – To add a user or group to the Approval Tier as an Approver, click a row in the Available Users/Groups table and it is immediately moved to the Users & Groups to Add table.
RECOMMENDED: It is usually desirable to add more approvers than required to approve the request, in order to ensure that approval is granted before the escalation timeout is reached.
Step 11 – (Optional) Click a row in the Users & Groups to Add table to move it back to the Available Users/Groups table.
Step 12 – Click Add to add the Approvers to the Approval Tier.

Step 13 – Set the Approvals Required:
- Click the More or Less icons to change the number of approvers required to approve the request.
Workflow Tier settings (only visible when Approval Type is set to Tiered):
- Delete icon – Deletes the selected Workflow Tier (A confirmation window will display)
- Edit icon – Modify the escalation settings for the Workflow Tier
- Escalation – The amount of time available to approve the request before it is escalated
- Escalation Account – The user that the request will be escalated to
- Escalation Group – The group that the request will be escalated to
- Approvers – The user(s) or group(s) that can approve a request.
- Add Approver icon – Add a user or group as an Approver.
- Remove Approver icon – Removes the selected Approver (A confirmation window will display)
- Approvals Required – The number of Approvers required to approve the request
Remember, there must be enough Approvers in the list to meet the number of Approvals Required, though it is usually desirable to have more than the minimum.
Step 14 – To add an additional Approval Tier, click the Add Tier icon and repeat from Step 4.
- Up to three Approval Tiers can be added. When the required number of approvals is reached in a Tier, the Approvers in the next Tier are notified. Each Tier must approve the request in sequence.
NOTE: Connection profile approvals allow the same user that initiated the request to approve the session as well.
The new Approval Workflow is added to the Connection Profile. See the Approvals Dashboard topic for additional information on how to approve a requested session.