Create Activity Session
Follow the steps to create an activity session.
Step 1 – Navigate to the Dashboard > Active page.
Step 2 – In the Active Session table, click Create Session to open the Activity Request window.
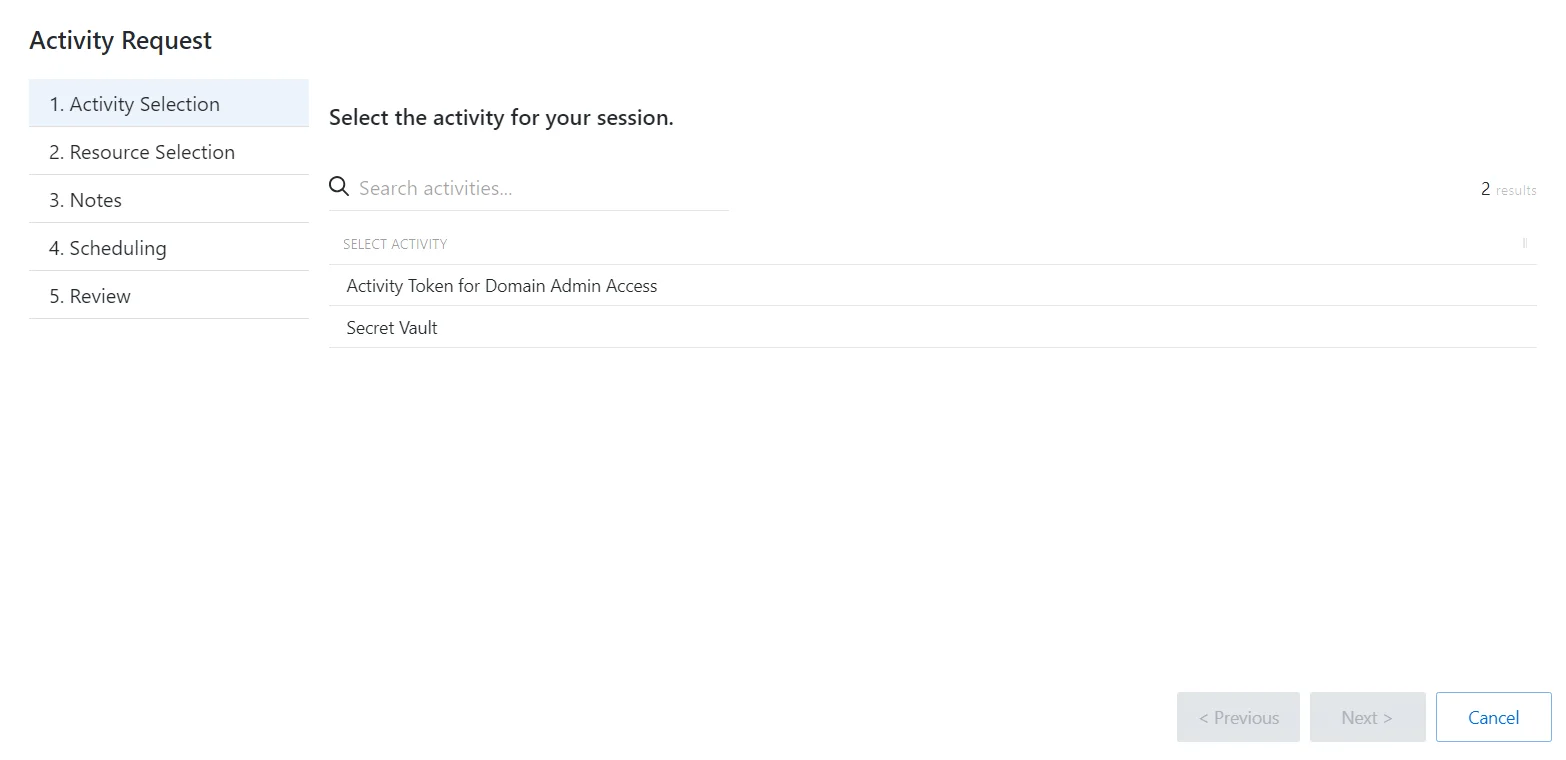
Step 3 – On the Request Type page, enter the following information:
- Select Activity – Search for and select an activity from the drop-down list
Step 4 – Click Next to go to the Resource Selection page.
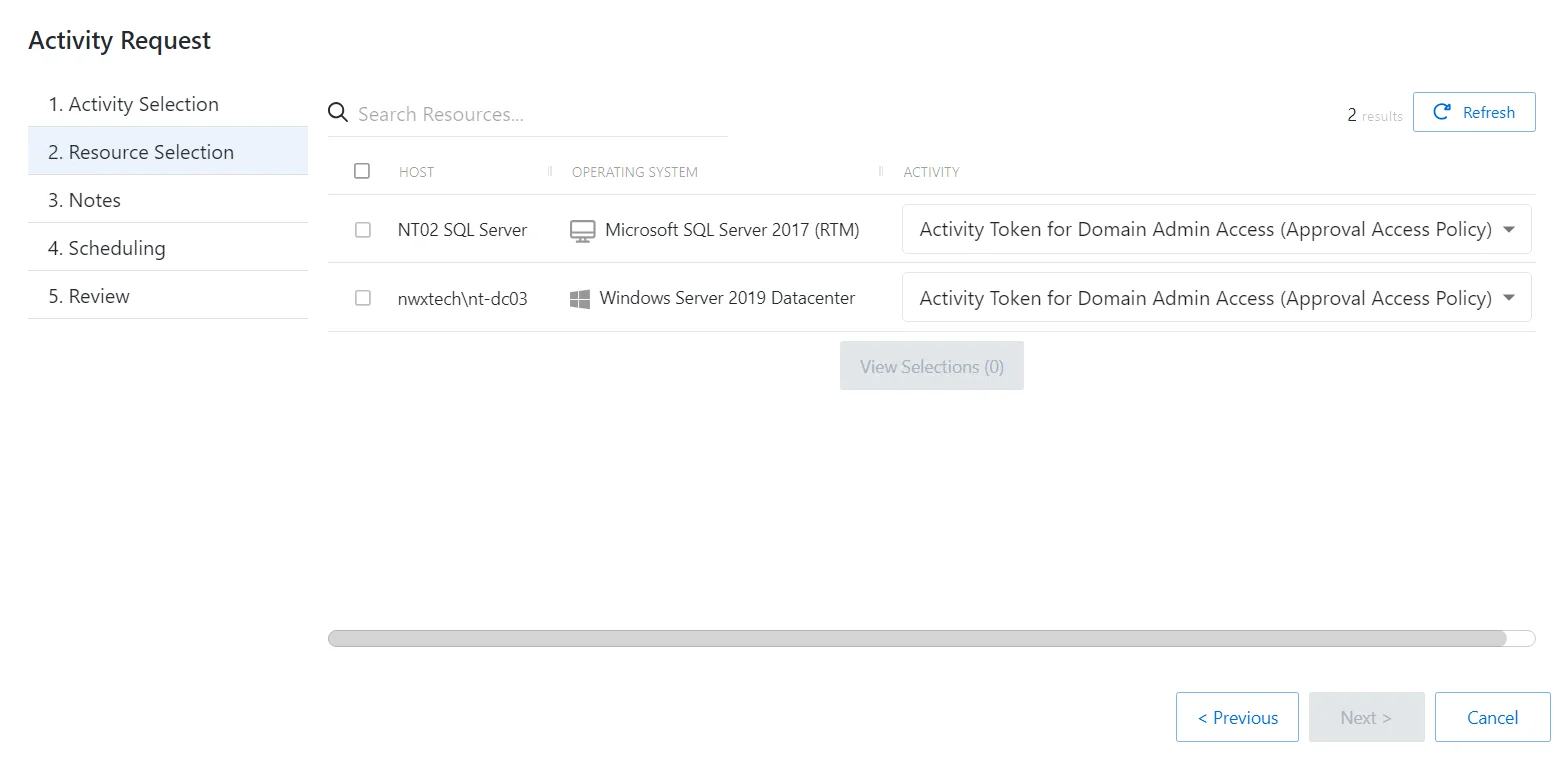
Step 5 – On the Resource Selection page, enter the following information:
- Select the resource(s) from the table
- (Optional) Click View Selections to view all selected resources
Step 6 – Click Next to go to the Notes page.
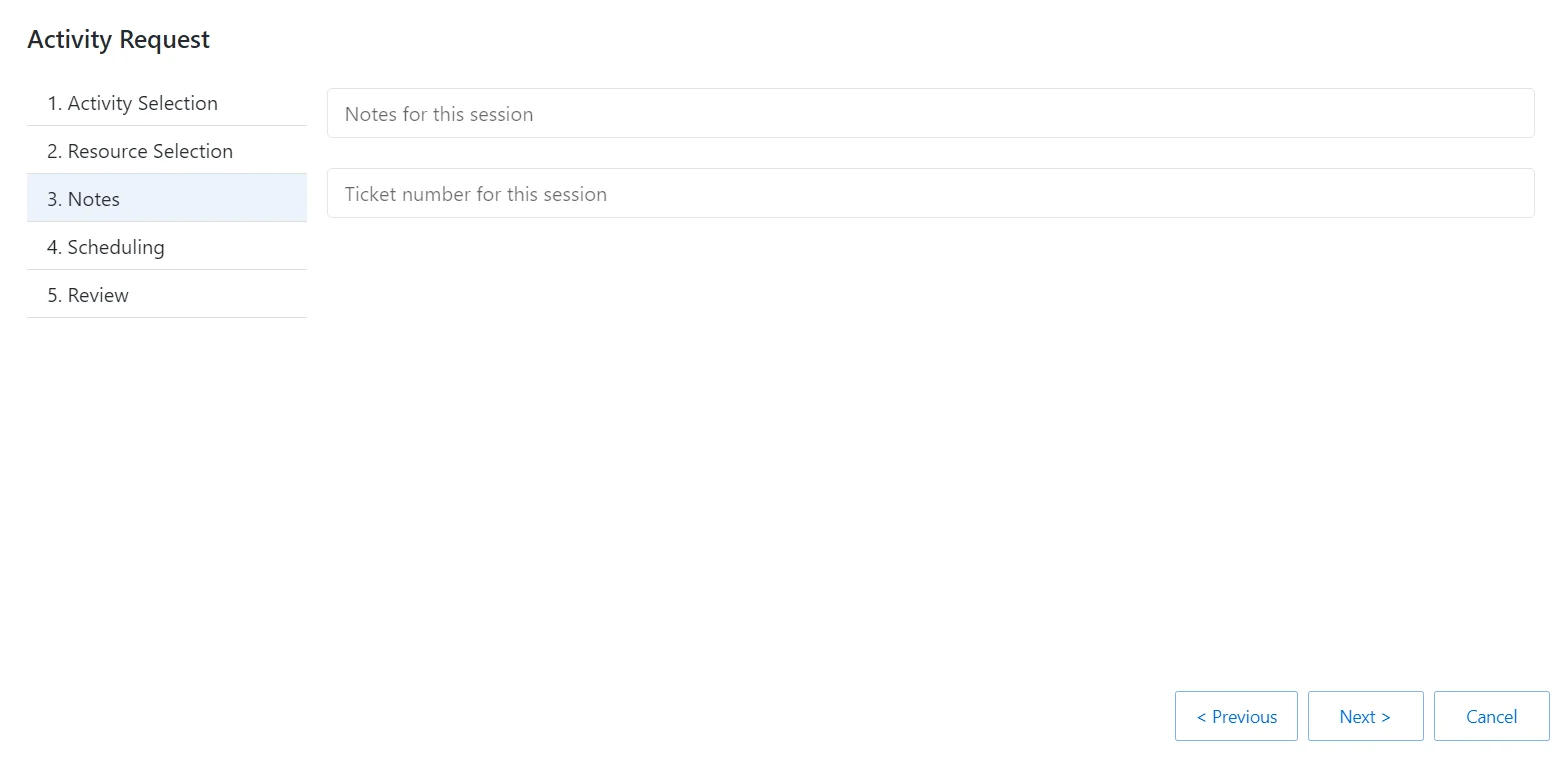
Step 7 – On the Notes page, enter the following information:
- Notes for this session
- Ticket number for this session
Step 8 – Click Next to go to the Scheduling page.
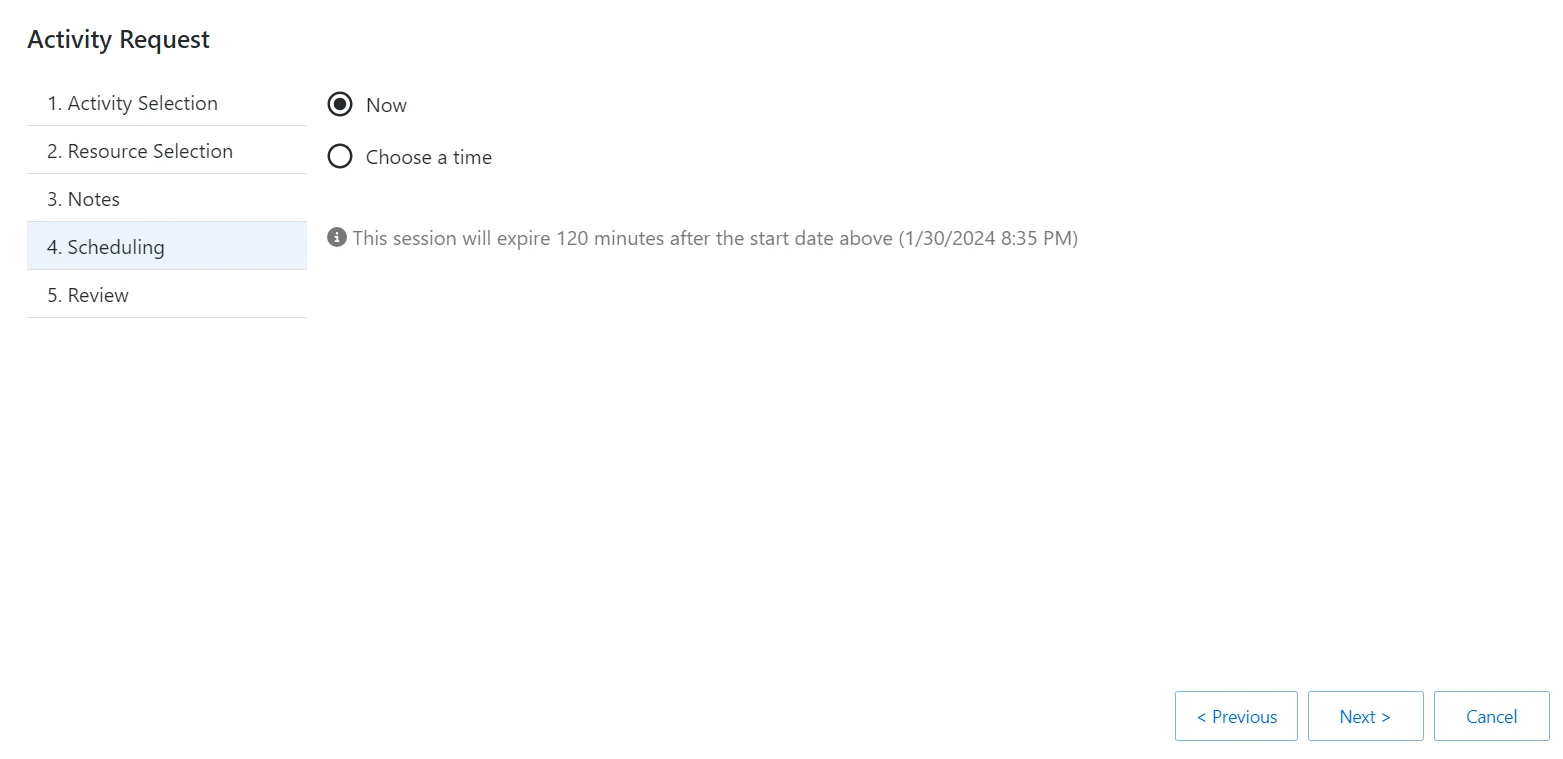
Step 9 – On the Scheduling page, enter the following information:
- Select Now or enter a desired date and time to begin the session
Step 10 – Click Next to go to the Review page.
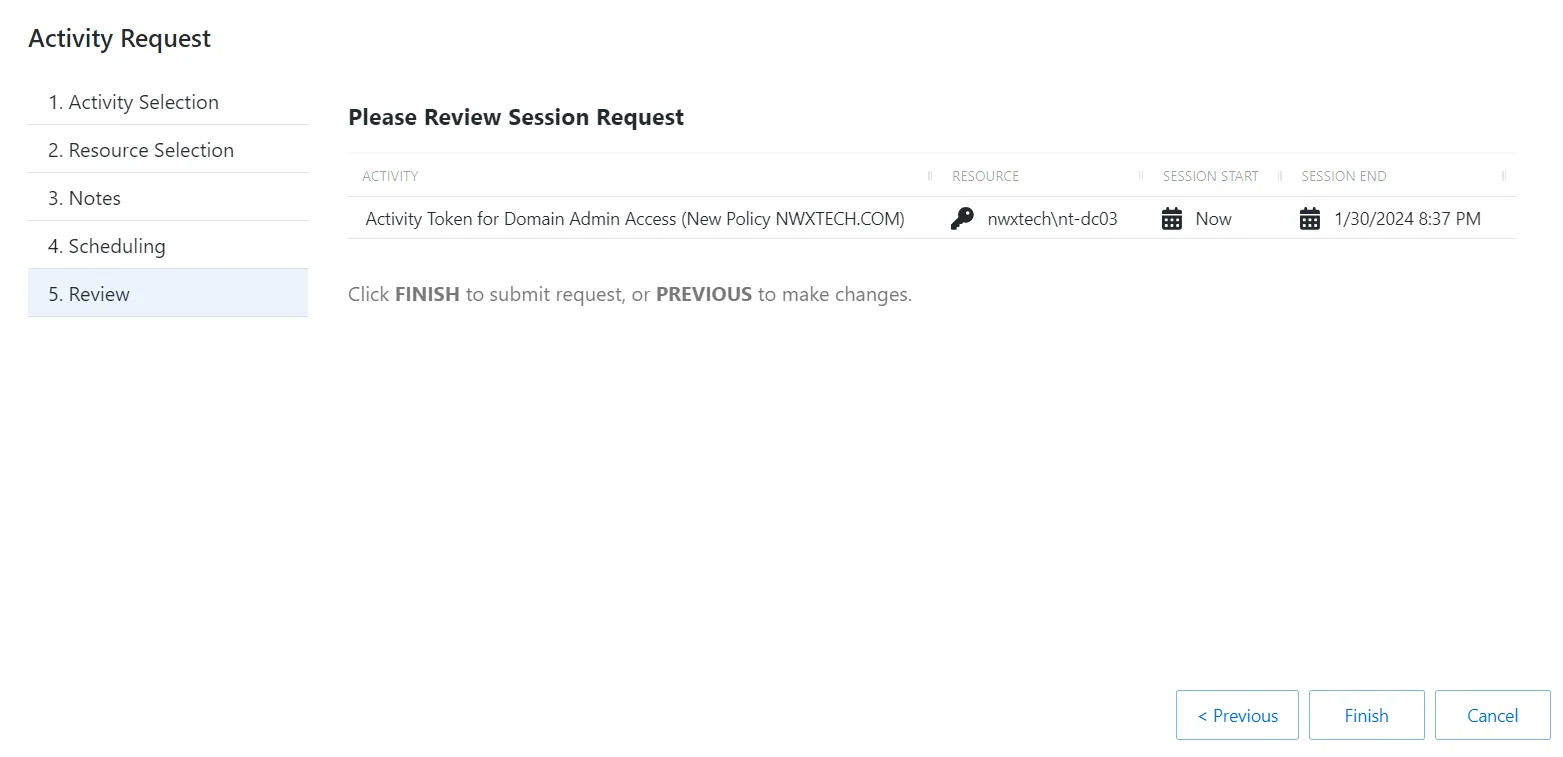
Step 11 – On the Review page, review the summary of the new session.
Step 12 – Click Finish to create the session.
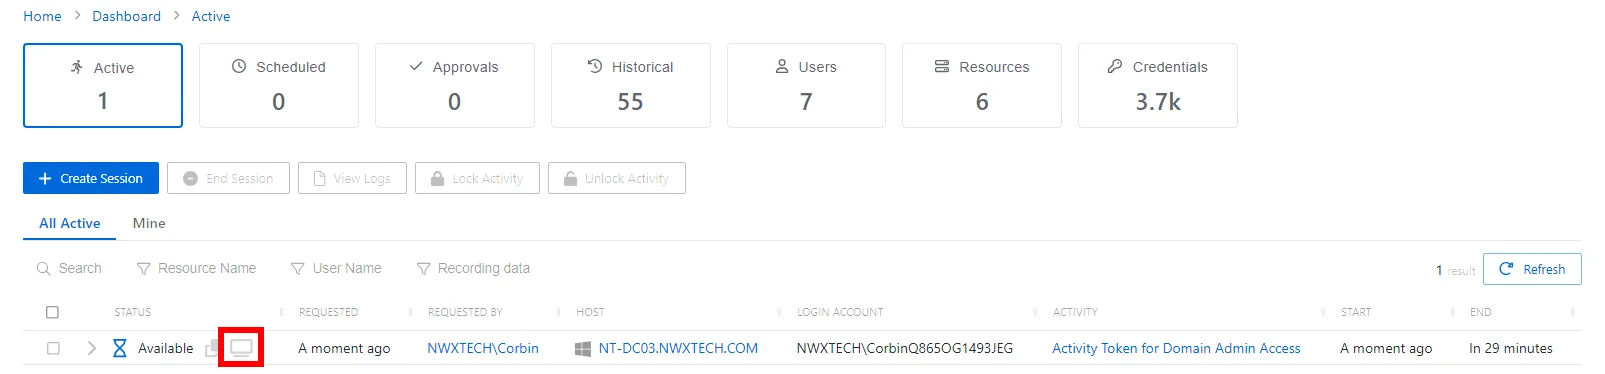
The new session is created and is shown in the applicable dashboard in the Dashboard interface. If approval is required, the status Waiting for Approval is shown. The requester cannot log in to the session until the request is approved and the status changes to Available.
When the status Available is shown, the remote session is ready. Click the Connection icon to begin the session, or log in through a client.
See the Start Activity Session topic for additional information.
Start Activity Session
On the Active Sessions dashboard, when the status Available is shown, the activity session is ready. To begin the activity session, click the Connection icon in the Status column for the applicable session to be automatically connected to the resource.
Also note the icons to view and copy the password for the session as plain text, if the option is enabled in the access policy Connection Profiles.
- Copy to Clipboard icon — Click to copy the password for the session as plain text. For resource–based activities for end users, this is only available if enabled in the activity's Access Policy. The password can always be viewed for credential–based activities.
- View Password icon — Click to view the password for the session as plain text. For resource–based activities for end users, this is only available if enabled in the activity's Access Policy. The password can always be viewed for credential–based activities. To view a password, select the Eye icon. Users will have 20 seconds to view the password or copy it.
- Connection icon — Click the icon to begin the activity session.
Alternatively, configure any RDP / SSH Manager for remote login, including:
- PuTTY
- MobaXterm
- MS Remote Desktop Connection Manager
- MS Terminal Services Client (Remote Desktop)
Session Extension
Each session will remain active for a pre-configured amount of time based on the Connection Profile being used with the Access Policy. Session extension options can be configured in the connection profile that allow a session to be extended by the user, in increments.
If Session Extension is enabled, the session extension option appears for users when the remaining time is 5 minutes or less.

For RDP, a pop-up message is displayed in the session window.

For SSH the user can extend by typing Ctrl+X when prompted.
SSH for Legacy Cisco Device
If the Cisco device is running with insecure ciphers when the user attempts to connect to an SSH session, the following error message is displayed:
ssh: handshake failed: ssh: no common algorithm for key exchange; client offered: [curve25519-sha256@libssh.org ecdh-sha2-nistp256 ecdh-sha2-nistp384 ecdh-sha2-nistp521 diffie-hellman-group14-sha1], server offered: [diffie-hellman-group1-sha1]
Ideally the Cisco device should be upgraded to support secure ciphers. If this is not possible, it is necessary to add additional ciphers to machines with older (insecure) ciphers that need to be managed with SSH. You can “opt-in” by configuring the cipher suites used by the Proxy Service.
See the Proxy Service Install topic for additional information.
DirectConnect Inline Password Prompt
RDP DirectConnect now supports the prompting of users for password, removing the old requirement to modify group/local policy to force RDP password prompts.

If a password is entered outside of the RDP session, this will be automatically be used and the inline password prompt will not display, unless there is an authentication error.