Secret Vault Configuration
This topic walks through the steps necessary to configure a Netwrix Privilege Secure Secret Vault. Secret Vaults can be used to provide Privilege Secure users with access to vaulted secrets.
Add a Secret Vault
Follow the steps below to add a new Secret Vault.
Step 1 – Navigate to the Policy > Resources page.
Step 2 – Click the Plus icon and select New Secret Vault from the drop-down list.

Step 3 – Enter the following information:
- New Secret Vault Name — Name of the new secret vault
- Platform — Displays the type of platform, which defines the resource.
- Description (optional) — Description of the policy
Step 4 – Click Save to create the Secret Vault.
Step 5 – Once the Secrete Vault is created, select the Accounts tab.
Step 6 – Click the Add button to add an account to access the Secrete Vault.
Step 7 – The Add a Managed Account window will open. Enter the following information:
- Resource Name
- Username
- Password
Step 8 – Click Okay to add the account to the Secrete Vault.
A secret vault has been created, and a secret added to the vault. See the Secret Vault Details Page topic for additional information.
NOTE: Vaulted credentials must be manually entered and updated.
See the Credentials Tab for Credential Based Access Policies topic for additional information.
Create an Access Policy
Follow these steps to add a credential-based access policy to Privilege Secure.
Remember, a connection profile is required to create an access policy. You can create one ahead of time on the Connection Profiles Page page or use the arrow button to create one during these steps.
Step 1 – Navigate to the Policy > Access Policies page.
Step 2 – In the Access Policy list, click the Plus icon.
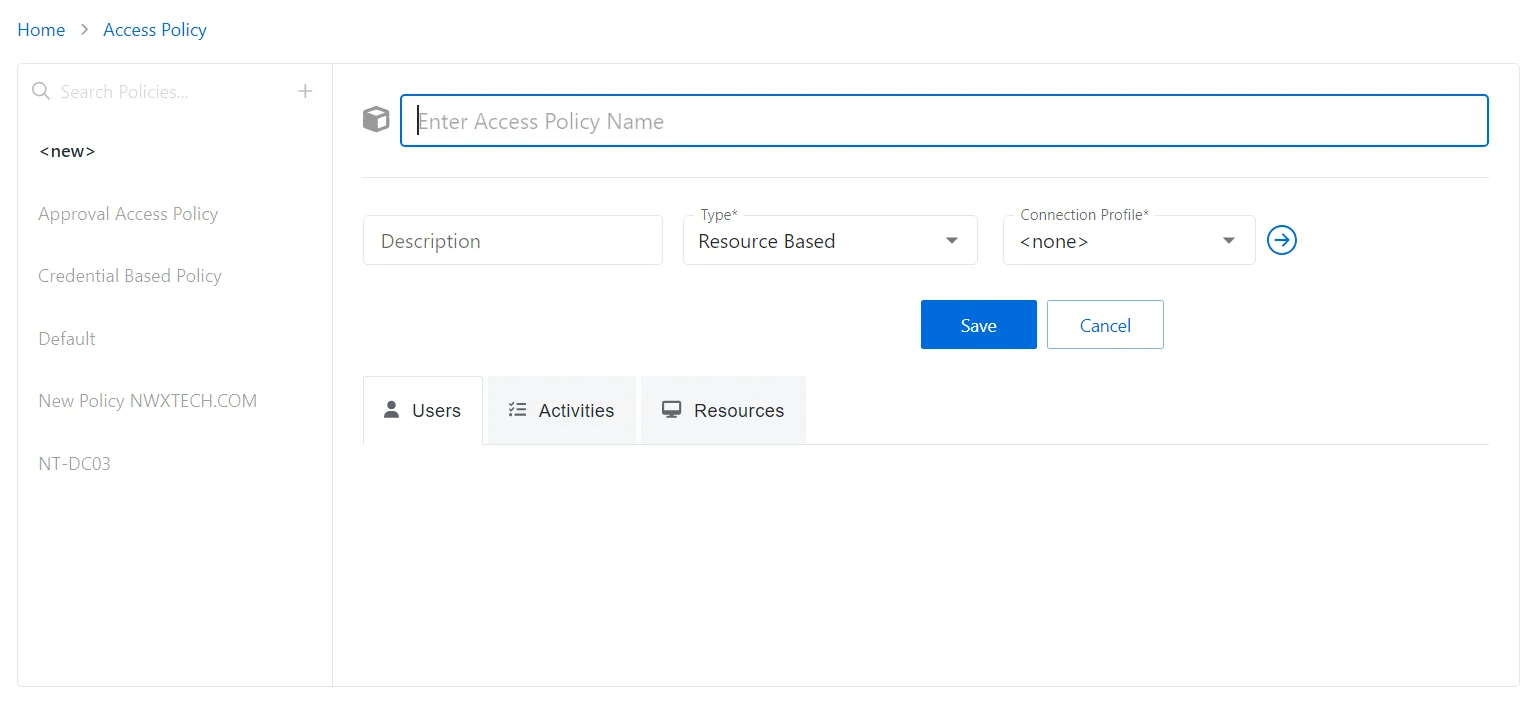
Step 3 – Enter the following information:
- Name – Displays the name of the policy
- Description – (Optional)Description of the policy
- Type – Classification of the access policy. Select Credential Based.
- Connection Profile – Displays the name of the connection profile associated to the access policy
Step 4 – Click Save to create the new access policy.
Step 5 – On the new access policy, select the Users tab.
Step 6 – Click the Add button to add users to the access policy. See the Users Tab for Credential Based Access Policies for additional information.
Step 7 – Once the users have been added, select the Credentials tab.
Step 8 – Click the Add button to add the necessary credentials to access the Secrete Vault. See the Credentials Tab for Credential Based Access Policies for additional information.
The new Secret Vault access policy has been created. Users added to the policy will now have a Credential Release tile on the My Activities page.
Secret Vault Platform Policy Configuration
The Secrete Vault menu displays the configuration options for Windows platforms.
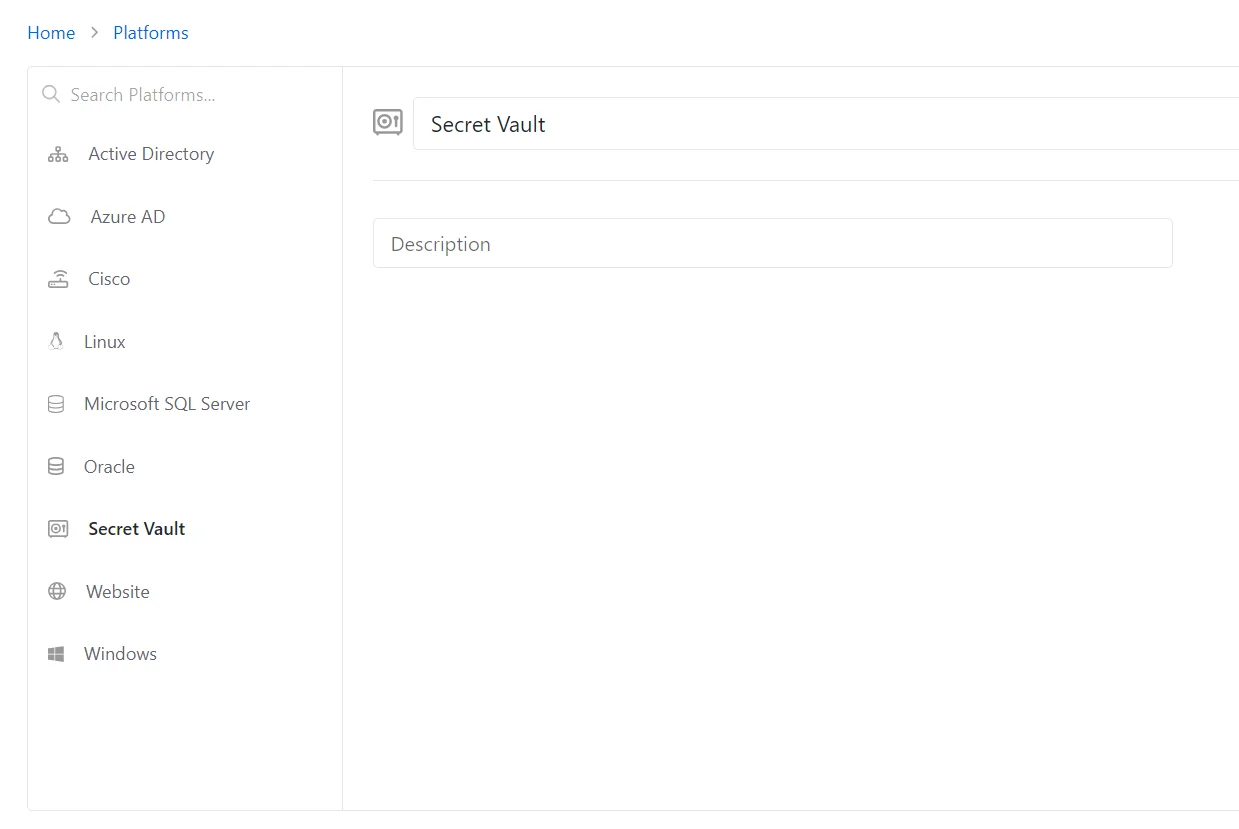
Details for the selected platform are displayed on the right side of the page. Below are the configuration options for a Secret Vault Platform.
- Name — Displays the name of the policy
- Description — Description of the policy
If any of these settings are modified, Save and Cancel buttons are displayed. Click Save to commit the modifications. Click Cancel to discard the modifications.
Accounts Tab for Secret Vault
The Accounts tab shows information about the accounts associated to the selected resource.
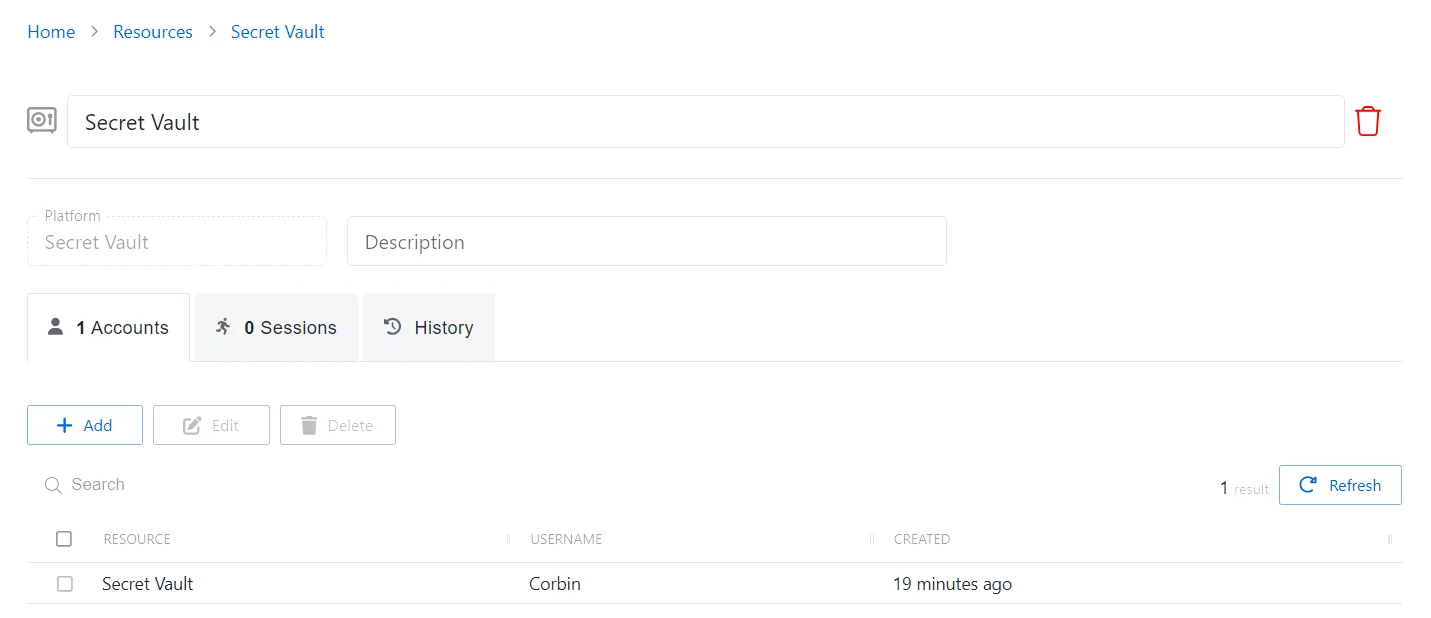
The Accounts tab has the following features:
- Search — Searches the table or list for matches to the search string. When matches are found, the table or list is filtered to the matching results.
- Add — Opens the Add a Managed Account window. See the Add a Managed Account Window topic for additional information.
- Edit — Opens the Edit a Managed Account window. See the Edit a Managed Account Window topic for additional information.
- Delete — Removes the selected item. A confirmation window will appear.
- Refresh — Reload the information displayed
The table has the following columns:
- Checkbox — Check to select one or more items
- Resource — Name of the resource that the account is on
- Username — Displays the name of the account
- Created — Date timestamp when the account was added to the secret vault
The table columns can be resized and sorted in ascending or descending order.
History Tab for Secret Vault
The History tab shows information about the session history of the selected resource.
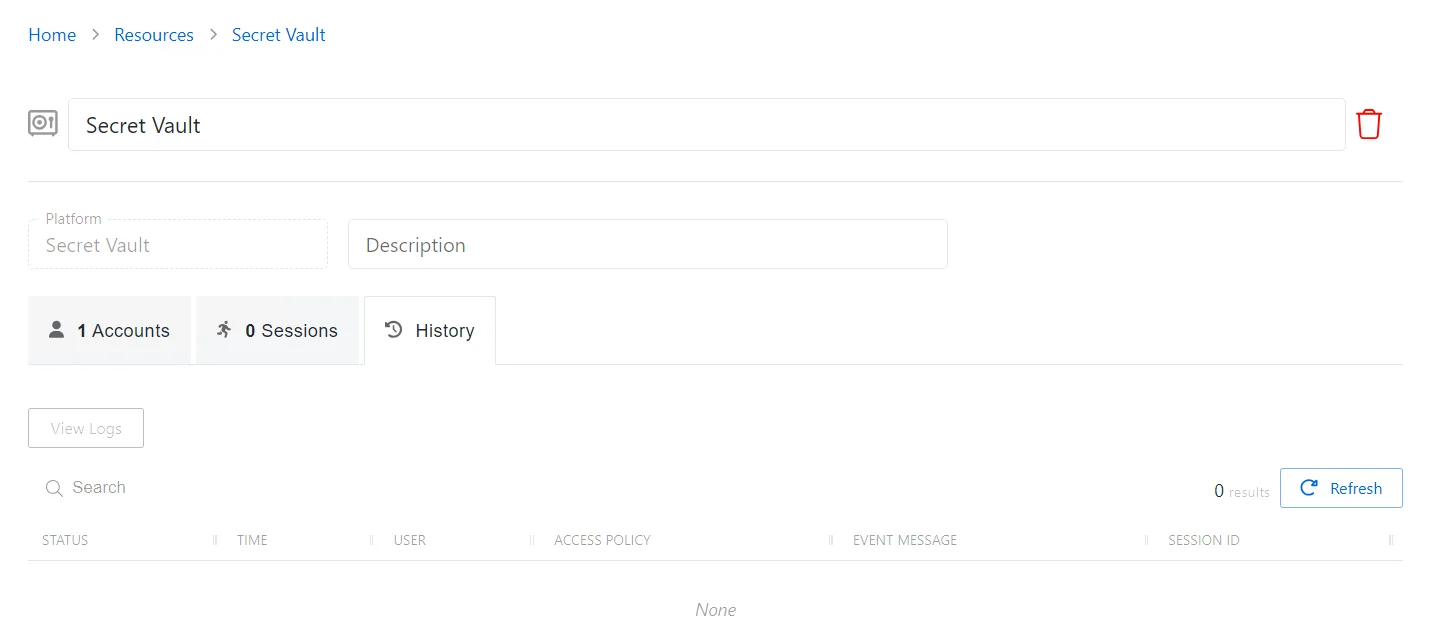
The History tab has the following features:
- Search — Searches the table or list for matches to the search string. When matches are found, the table or list is filtered to the matching results.
- View Logs — Opens the Session Logs window to view the action log for the selected session. See the Session Logs Window topic for additional information.
- Refresh — Reload the information displayed
The table has the following columns:
-
Status — Shows status information for the session:
- Information — Session was successful and row contains details
- Error — Session had an error and row contains details
-
Time — Date timestamp for when the event occurred
-
User — User who requested the session. Click the link to view additional details. See the User, Group, & Application Details Page topic for additional information.
-
Access Policy — Displays the name of the policy
-
Event Message — Description of the event
-
Session ID — Unique identifier for the session
The table columns can be resized and sorted in ascending or descending order.
Sessions Tab for Secret Vault
The Sessions tab shows information about the sessions of the selected resource.
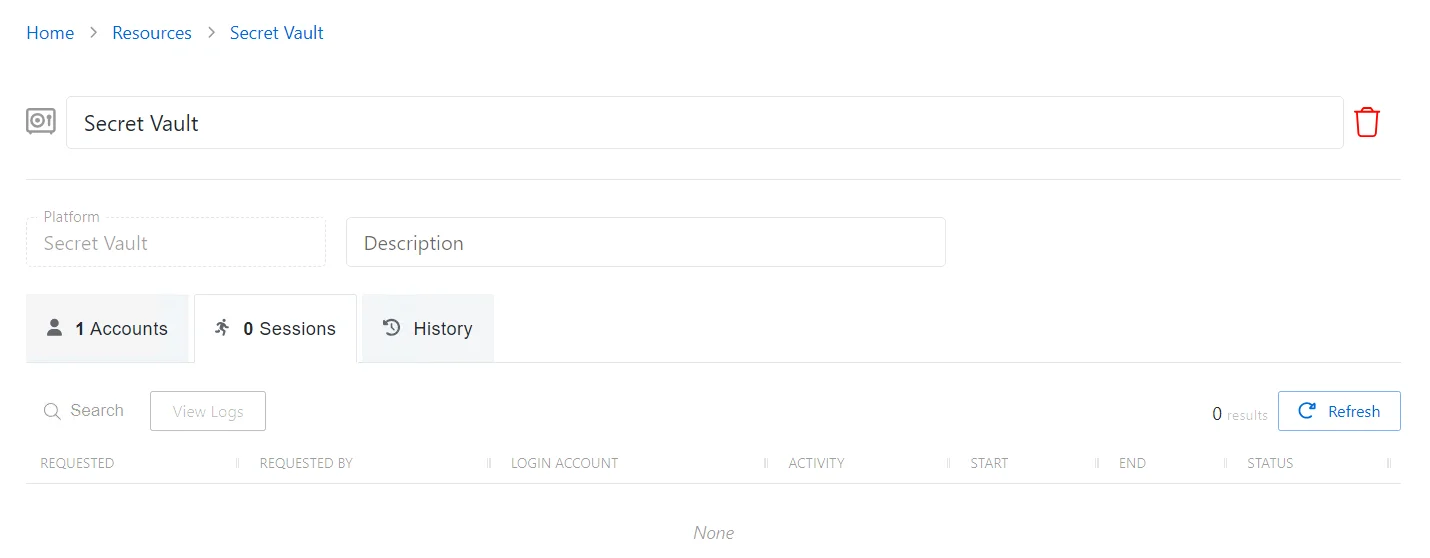
The Sessions tab has the following features:
- Search — Searches the table or list for matches to the search string. When matches are found, the table or list is filtered to the matching results.
- View Logs — Opens the Session Logs window to view the action log for the selected session. See the Session Logs Window topic for additional information.
- Refresh — Reload the information displayed
The table has the following columns:
-
Requested — Date and time of when the session was created
-
Requested By — User who requested the session. Click the link to view additional details. See the User, Group, & Application Details Page topic for additional information.
-
Login Account — Displays the account used to log onto the resource
-
Activity — Displays the name of the activity. Click the link to view additional details. See the Activities Page topic for additional information.
-
Start — Indicates when the activity started. This refers to when the activity's actions were executed and not when the user was logged on to the resource.
-
End — Indicates when the session is scheduled to end the activity, which is determined by the start time plus the maximum session duration set by the access policy Connection Profile
-
Status — Shows status information for the session:
- Waiting for Approval — The session requires approval to begin. See the Approvals Dashboard topic for additional information.
- Approval Denied — Requested session was denied
- Approval Failed — Approval request has encountered an error
- Pending — Session scheduled start time is still in the future, session is waiting to start. See the Scheduled Dashboard topic for additional information.
- Available — The activity session is ready. Click the icon to begin the session, or log in through a client. See the Start Activity Session topic for additional information.
- Completed — Activity either reached the end of its scheduled end time or was canceled early by the requestor
- Canceled — The session is either expired or was canceled manually by the user or an Privilege Secure administrator.
- Failed — Pre-Session stage of the Activity has encountered an error
- Locked — The session has been locked by an Privilege Secure administrator. See the Lock Session topic for additional information.
- Logged In — User is successfully logged in to the Resource either directly or via the Proxy. Direct log-in is detected by polling the Resource at regular intervals and may not update immediately.
The table columns can be resized and sorted in ascending or descending order.