Add New Domain
Follow the steps to add a domain to the console.
Step 1 – Navigate to the Policy > Resources page.
Step 2 – Click the Plus icon and select Domain from the drop-down list.

Step 3 – Enter the following information:
-
Domain Name – Displays the fully qualified domain name (FQDN)
-
Service account – From the drop-down menu, select a previously added service account with credentials for the domain. See the Service Accounts Page topic for additional information.
- Add New Service Account – Open the Add New Service Account window. The fields are identical to those on the Service Accounts page.
-
Use TLS – Check to enable a secure connection to the domain
-
Enter the desired frequency for the domain sync.
Step 4 – Click Test to verify the connection to the domain.
Step 5 – When the connection is verified, the Save button is enabled. Click Save to add the domain to the console.
The new domain has been on-boarded. See the Domain Details Page topic for additional information.
Domain Details Page
The Domain Details page shows additional information for the selected domain resource. This page is opened from any linked resource within the various interfaces.
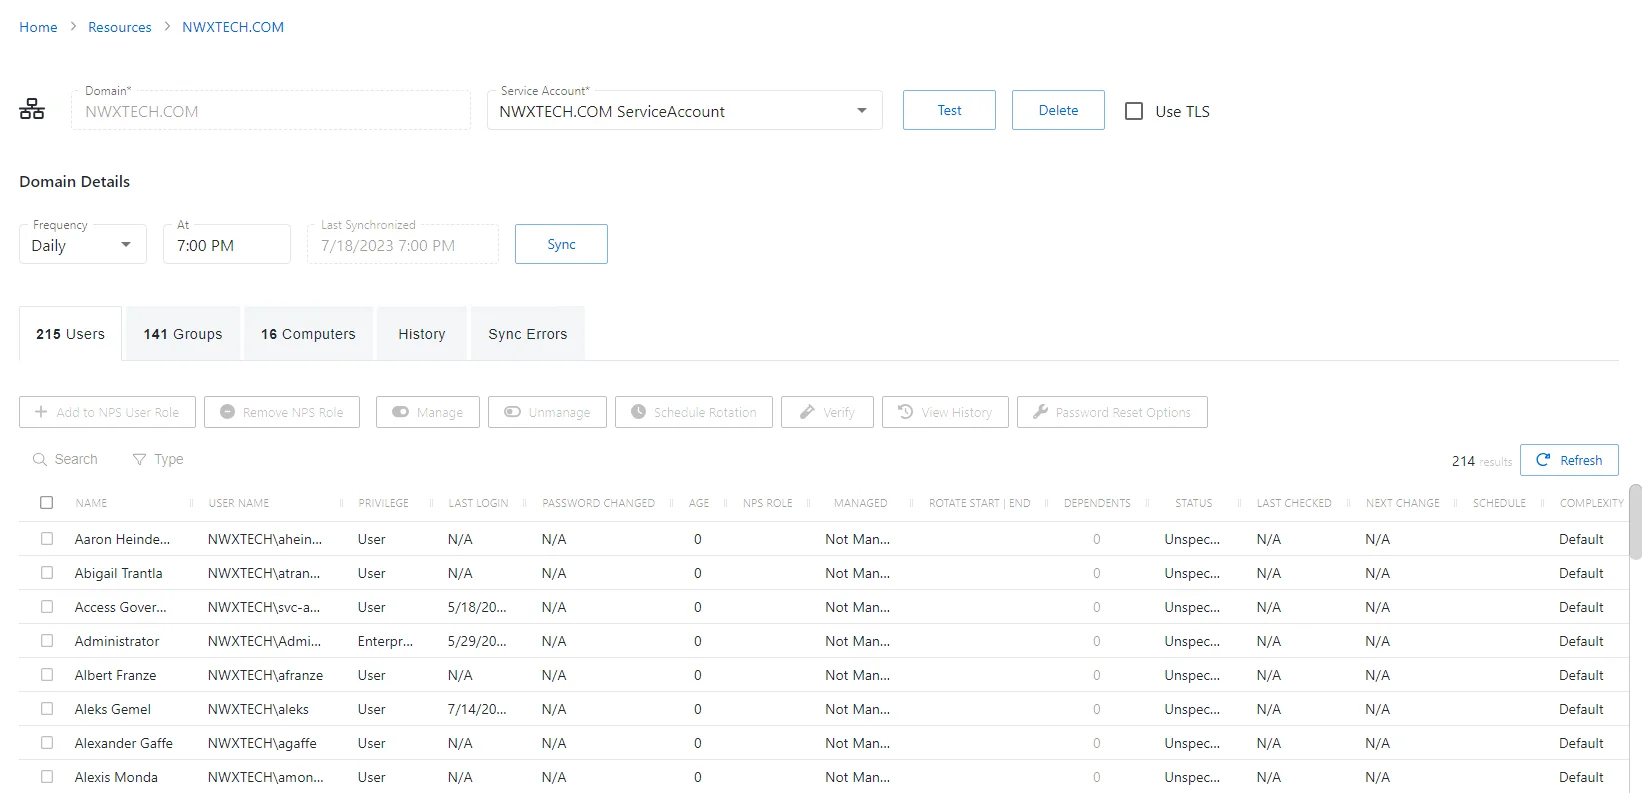
The details page shows the following information:
-
Name — Displays the name of the resource
-
Trashcan icon — Removes the selected resource from being managed by the application. A confirmation window will display.
-
Users — Number of user objects in the domain
-
Groups — Number of group objects in the domain
-
Members — Number of users that are members of groups
-
Computers — Number of computer objects in the domain
-
Last Synchronized — Date timestamp for the last time the domain was synchronized
-
Status — Shows status information for the synchronization:
- Complete — Synchronization completed successfully
- Processing — Synchronization is actively occurring
- Failed — Synchronization failed to complete
- Cancelled — Synchronization was cancelled by an Administrator
-
Synchronize Now button — Scans the domain for users, groups, members, and computers. The Cancel button, which is only visible when scanning can be used to stop the resource scan. This scan can also be scheduled from the Platforms Page.
-
Platform — Displays the type of platform, which defines the resource
-
Service Account — Displays the service account associated with the resource
-
Use TLS checkbox — Enables a secure connection to the domain
-
Frequency — Indicates how often the synchronization task will run: Never, Hourly, Daily, or Weekly. Options open additional fields:
- Hourly — Opens the Every field for selecting specific hour ranges
- Daily— Opens the At field for indicating the start time of the daily synchronization
- Weekly— Opens the On and At fields for indicating the day of the week and start time of the weekly synchronization
-
Test button — Tests the settings by attempting to connect
If any of these settings are modified, Save and Cancel buttons are displayed. Click Save to commit the modifications. Click Cancel to discard the modifications.
The details page has the following tabs: