Secret Vault Configuration
This topic walks through the steps necessary to configure a Netwrix Privilege Secure Secret Vault. Secret Vaults can be used to provide Privilege Secure users with access to vaulted secrets.
Add a Secret Vault
Follow the steps below to add a new Secret Vault.
Step 1 – Navigate to the Policy > Resources page.
Step 2 – Click the Plus icon and select New Secret Vault from the drop-down list.
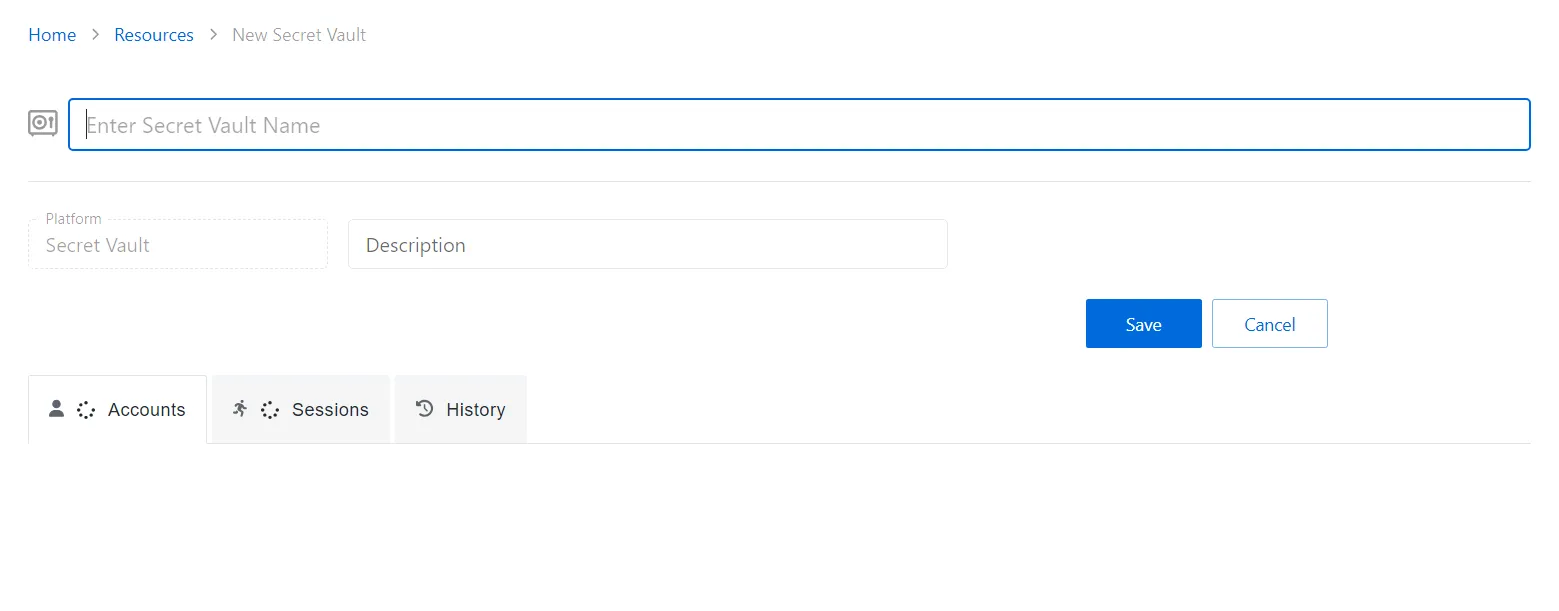
Step 3 – Enter the following information:
- New Secret Vault Name — Name of the new secret vault
- Platform — Displays the type of platform, which defines the resource.
- Description (optional) — Description of the policy
Step 4 – Click Save to create the Secret Vault.
Step 5 – Once the Secret Vault is created, select the Accounts tab.
Step 6 – Click the Add button to add an account to access the Secret Vault.
Step 7 – The Add a Managed Account window will open. Enter the following information:
- Resource Name
- Username
- Password
Step 8 – Click Okay to add the account to the Secret Vault.
A secret vault has been created, and a secret added to the vault. See the Secret Vault Details Page topic for additional information.
NOTE: Vaulted credentials must be manually entered and updated.
See the Credentials Tab for Credential Based Access Policies topic for additional information.
Create an Access Policy
Follow these steps to add a credential-based access policy to Privilege Secure.
Remember, a connection profile is required to create an access policy. You can create one ahead of time on the Connection Profiles Page page or use the arrow button to create one during these steps.
Step 1 – Navigate to the Policy > Access Policies page.
Step 2 – In the Access Policy list, click the Plus icon.
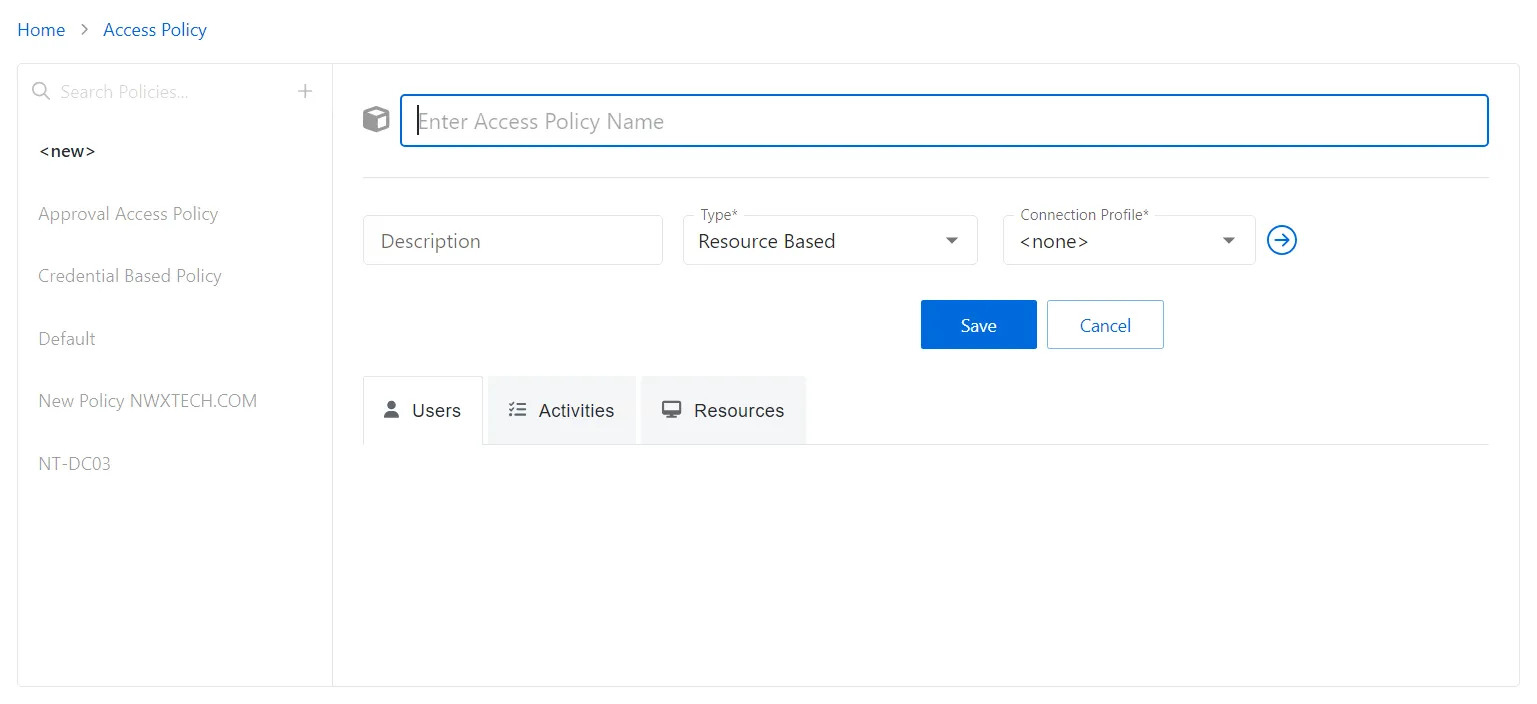
Step 3 – Enter the following information:
- Name – Displays the name of the policy
- Description – (Optional)Description of the policy
- Type – Classification of the access policy. Select Credential Based.
- Connection Profile – Displays the name of the connection profile associated to the access policy
Step 4 – Click Save to create the new access policy.
Step 5 – On the new access policy, select the Users tab.
Step 6 – Click the Add button to add users to the access policy. See the Users Tab for Credential Based Access Policies for additional information.
Step 7 – Once the users have been added, select the Credentials tab.
Step 8 – Click the Add button to add the necessary credentials to access the Secrete Vault. See the Credentials Tab for Credential Based Access Policies for additional information.
The new Secret Vault access policy has been created. Users added to the policy will now have a Credential Release tile on the My Activities page.