Add Credential Groups
Follow the steps to add credential groups to the Privilege Secure Console.
Step 1 – Navigate to the Policy > Credentials > Credential Groups page.
Step 2 – In the Credential Groups list, click the Plus icon.

Step 3 – Enter or select the following information:
- Name — Displays the name of the credential
- Description — Description of the policy
Step 4 – Click Save to create the new credential group.

Step 5 – With the new credential group selected, click the + Add Credentials button to open the Add Credentials window.
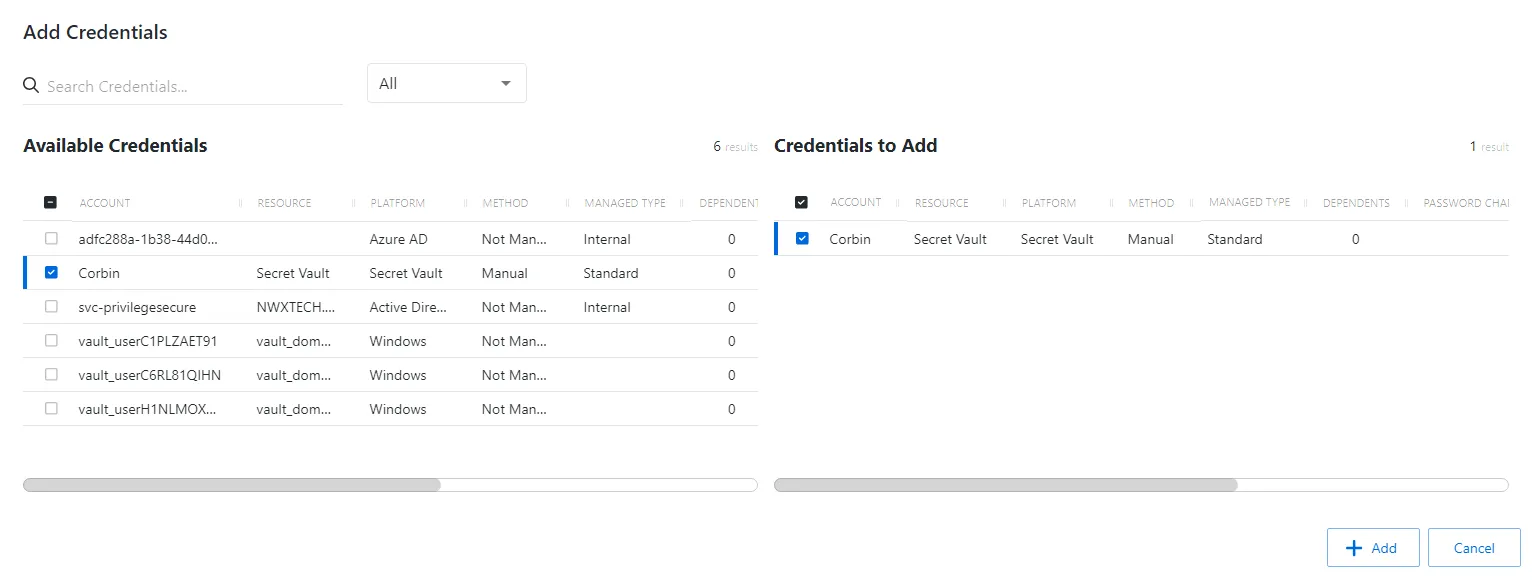
Step 6 – Select the checkbox for the credential and click Add to save the credential to the Credential Group. See the Add Credentials to a Credential Group topic for additional information.
The new credential group is added to the console and is shown in the Credential Groups list.
Credential Groups Page
The Credential Groups page is accessible from the Navigation pane under Credentials. It shows the configured credential groups, which are used to control account assignments in Credential Based access policies. See the Credentials Tab for Credential Based Access Policies topic for additional information.
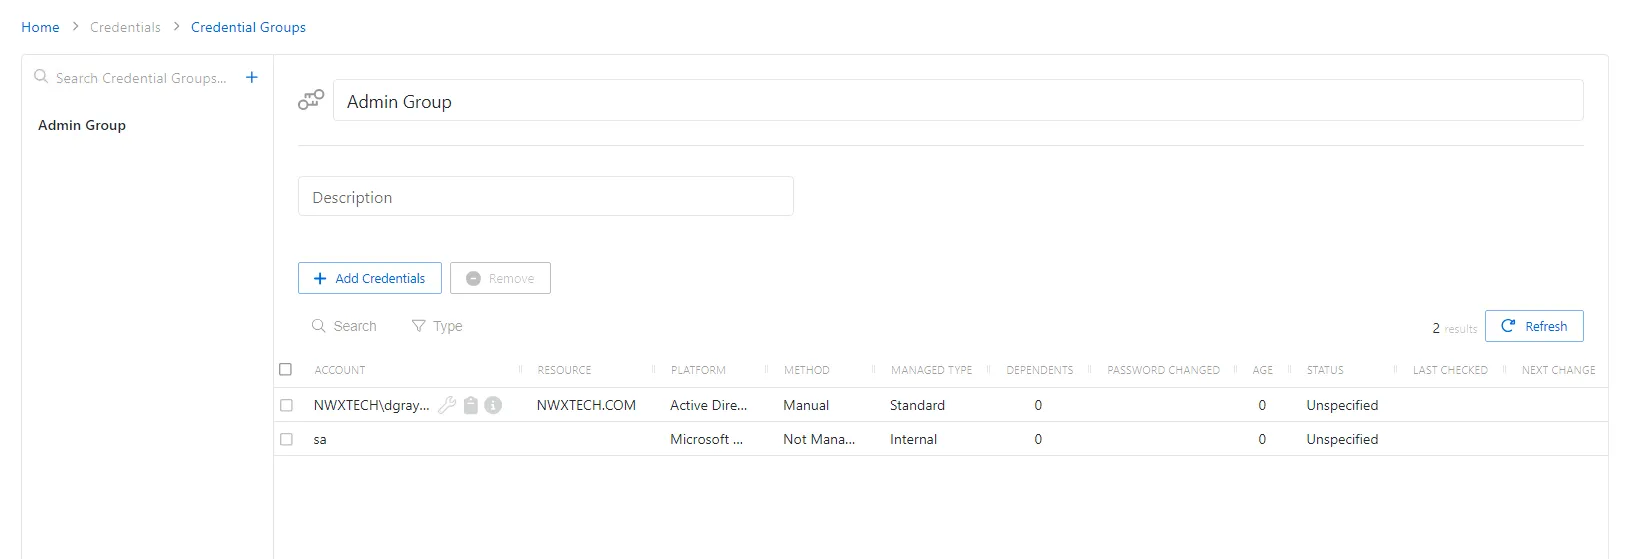
The pane on the left side of the page displays a list of the configured credential groups. This pane has the following features:
- Search — Searches the table or list for matches to the search string. When matches are found, the table or list is filtered to the matching results.
- Blue + button — Create a new credential group. See the Add Credential Groups topic for additional information.
- Trashcan icon — Deletes the access policy. Icon appears when policy is hovered over. A confirmation window will display.
The selected access policy details display at the top of the main pane:
- Name — Displays the name of the policy
- Description — Description of the policy
If any of these settings are modified, Save and Cancel buttons are displayed. Click Save to commit the modifications. Click Cancel to discard the modifications.
The table has the following features:
- Search — Searches the table or list for matches to the search string. When matches are found, the table or list is filtered to the matching results.
- Type — Provides options to filter results based on a chosen criterion: Internal, Standard, and Service
- Add Credentials — Opens the Add Credentials window. See the Add Credentials to a Credential Group topic for additional information.
- Remove — Removes the selected item
- Refresh — Reload the information displayed
The table has the following columns:
-
Checkbox — Check to select one or more items
-
Account — Name of the account. The following icons may also appear in this column:
- Clipboard icon — Copies the password for the selected account
- Information icon — Opens the View Password window to view the password and copy it to the clipboard. The window stays open for 20 seconds.
-
Resource — Name of the resource that the account is on
-
Platform — Displays the type of platform, which defines the resource
-
Method — Indicates how the account is managed:
- Automatic — Credential rotation is managed by Privilege Secure according to the change policy for that platform type. See the Platforms Page topic for additional information.
- Manual — Credential rotation must be initiated manually with the Rotate Service Account button, or the credential must be manually updated on both the resource and in Privilege Secure. See the Service Accounts Page topic for information on updating credentials for Internal service accounts.
- Not Managed — Not currently managed by Privilege Secure and no credentials have ever been stored
NOTE: See the Rotation Methods topic for additional information.
-
Managed Type — Type of managed account:
- Standard — Local or domain user account, including managed users created by activity sessions
- Internal — Internal service account used by Privilege Secure with no dependencies. See the Service Accounts Page topic for additional information.
- Service — Local or domain service account with one or more dependencies. Includes Internal service accounts with one or more dependencies.
-
Dependents — Number of scheduled tasks or Windows services using this account
-
Password Changed — Date timestamp for the last time the password was rotated
-
Age — Number of days since the last credential rotation or from when the password was first created
-
Status — Indicates if the account credentials have been verified by Privilege Secure. See the Platforms Page topic for additional information on configuring a verification schedule.
- Unspecified — Verification check has not run
- Verified — Confirmed the credentials match the value stored in Privilege Secure
- Mismatch — Credentials do not match the value stored in Privilege Secure. This status only appears when the Reset on Mismatch option is not enabled.
- Changed — Credentials were successfully updated to match the value stored in Privilege Secure. This status only appears when the Reset on Mismatch option is enabled.
- Failed — Attempt to update the credentials to match the value stored in Privilege Secure was unsuccessful. This status only appears when the Reset on Mismatch option is enabled.
-
Last Checked — Date timestamp of the last verification check
-
Next Change — Date timestamp for the next credential password rotation
The table columns can be resized and sorted in ascending or descending order.