Add Protection Policy
Follow the steps to add a Protection policy to the console.
Step 1 – Navigate to the Policy > Protection Policies page.
Step 2 – In the Protection Policy list, click the Plus icon.

Step 3 – Enter the following information:
- Name – Name of the protection policy
- Description – (Optional) Brief description to identify the protection policy
Step 4 – Click Save to create the new protection policy.
The new protection policy has been created. The next step is to associate Resources, Users, and Schedule to the policy. See the following topics for additional information:
- Resources Tab for Protection Policies
- Allowed Members Tab for Protection Policies
- Schedule Tab for Protection Policies
Protection Policies Page
The Protection Policies page is accessible from the Navigation pane under Policy. It shows the configured protection policies, which are used to monitor local groups on a resource for changes. Only users or groups added to the protection policy are permitted. When the resource is scanned, any local group members that are not listed on the Allowed Members Tab for Protection Policies are removed from the resource.
It is also possible to add the action Invoke Protection Policy to the Post Session group of an activity. This will proactively run all protection policies that apply to the target resource when the session completes, instead of waiting for the scheduled sync. See the Activities Page topic for additional information.

The pane on the left side of the page displays a list of the configured protection policies. This pane has the following features:
- Search — Searches the table or list for matches to the search string. When matches are found, the table or list is filtered to the matching results.
- Blue + button — Create a new protection policy. See the Add Protection Policy topic for additional information.
- Copy icon — Create a new protection policy based on the current selection. Icon appears when the policy is hovered over.
- Trashcan icon — Deletes the protection policy. Icon appears when policy is hovered over. A confirmation window will display.
The selected protection policy details display at the top of the main pane:
- Name — Displays the name of the policy
- Description — Description of the policy
If any of these settings are modified, Save and Cancel buttons are displayed. Click Save to commit the modifications. Click Cancel to discard the modifications.
The tabs at the bottom of the main pane are for associating Resource, Members, and Schedule to the protection policy. See the following topics for additional information:
- Resources Tab for Protection Policies
- Allowed Members Tab for Protection Policies
- Schedule Tab for Protection Policies
Resources Tab for Protection Policies
The Resources tab shows the resources associated with the selected protection policy.

The Resources table has the following features:
- Add — Opens the Add Resources window. See the Add Resources Window for Protected Policy topic for additional information.
- Remove — Removes the selected item from being associated with the policy
The table has the following columns:
- Checkbox — Check to select one or more items
- Name — Displays the name of the resource. Click the link to view additional details. The details vary based on the type of resource. See the Resources Page topic for additional information.
- DNS Host Name — Displays the DNS host name for a host resource or the FQDN for a domain resource
- Operating System — Displays the operating system of the resource
The table columns can be resized and sorted in ascending or descending order.
Add Resources Window for Protected Policy
The Add Resources window provides a list of resources that have been onboarded. Resources are onboarded in the Resources Page.
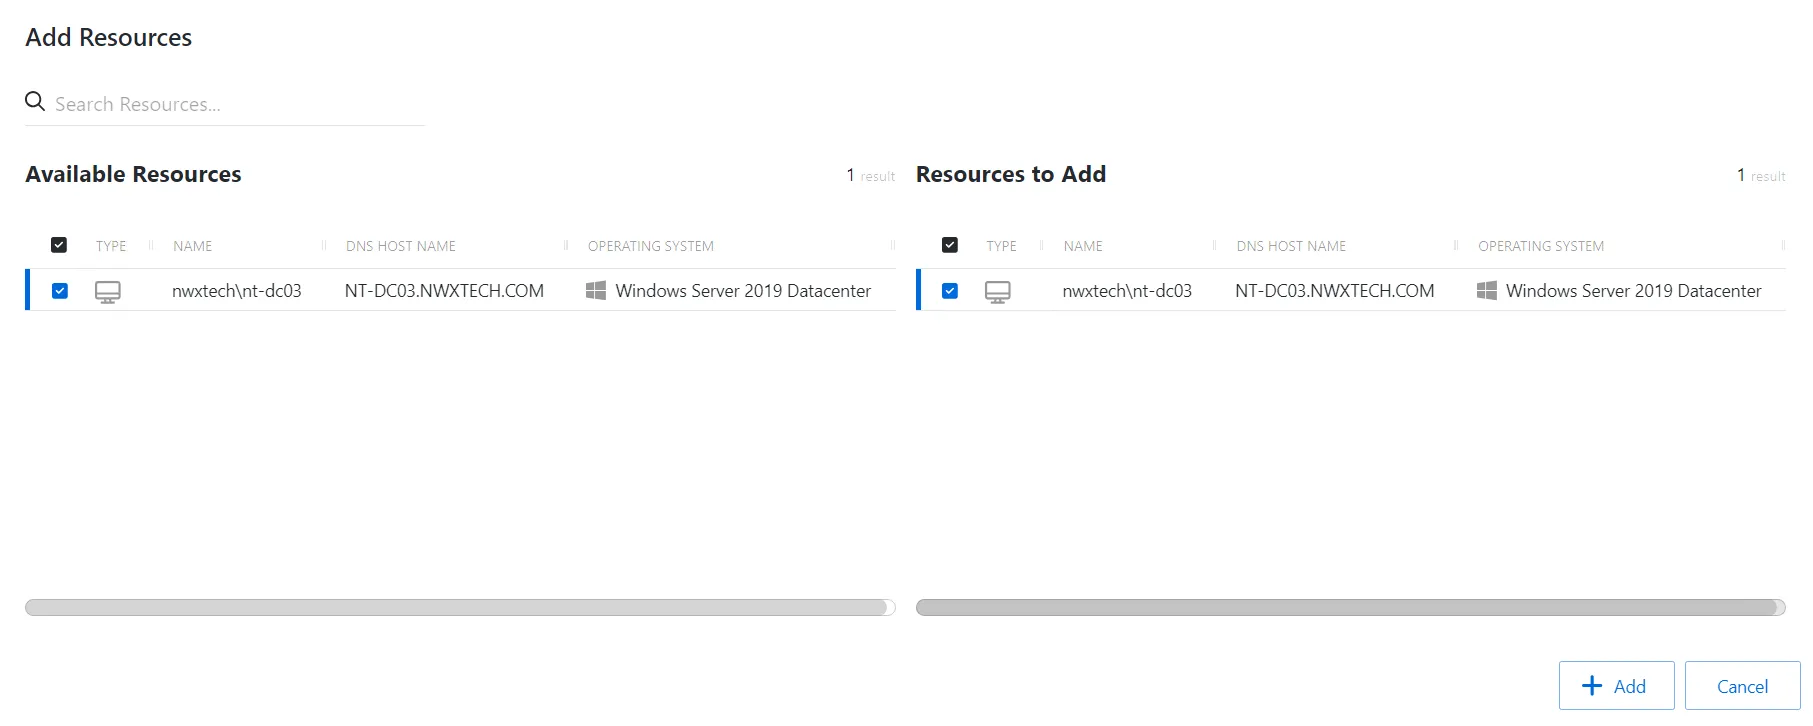
The window has the following features:
- Search — Searches the table or list for matches to the search string. When matches are found, the table or list is filtered to the matching results.
- Available Resources — Shows all available resources
- Resources And Groups to Add — Shows selected resources
- Arrow icons — Use the arrows to move selection in and out of the Resources to Add section
- Add — Adds modifications and closes window
- Cancel — Discards modifications and closes the window
Both tables have the following columns:
- Checkbox — Check to select one or more items
- Type — Classification of the activity
- Name — Displays the name of the resource. Click the link to view additional details. See the Resources Page topic for addition information.
- DNS Host Name — Displays the DNS host name for a host resource or the FQDN for a domain resource
- Operating System— Displays the operating system of the resource
Add Resources
Follow the steps to add resources to the selected protection policy.
Step 1 – Navigate to the Policy > Protection Policies page.
Step 2 – In the Protection Policy list, select the name of the protection policy and select the Resources tab.
Step 3 – Click Add to open the Add Resources window.
The Add Resources window has the following features:
-
Search – Searches the Name and Operating System columns to match the search string. When matches are found, both tables are filtered to the matching results.
-
Available Resources – Shows all resources that have been added to the console
-
Resources to Add – Shows the resources to be added to the protection policy
-
Column headers can be sorted in ascending or descending order
- Type – The type of the resource
- Name – The name of the resource
- DNS Host Name – The DNS host name for a host, or FQDN for a domain
- Operating System – Operating System of resource
Step 4 – To add a resource to the protection policy, click a row in the Available Resources table and it is immediately moved to the Resources to Add table.
Step 5 – (Optional) Click a row in the Resources to Add table to move it back to the Available Resources table.
Step 6 – Click Add to add the resources to the protection policy.
The new resource(s) are added to the protection policy and are shown on the Resources Tab for Protection Policies.