Add New Database
Follow the steps to add a database to the Privilege SecureConsole. Supported database platforms include:
- Microsoft SQL
- Oracle
Step 1 – Navigate to the Resources page.
Step 2 – Click Add > New Database.
Step 3 – In the Enter Database Name box, enter a unique name to identify the database.
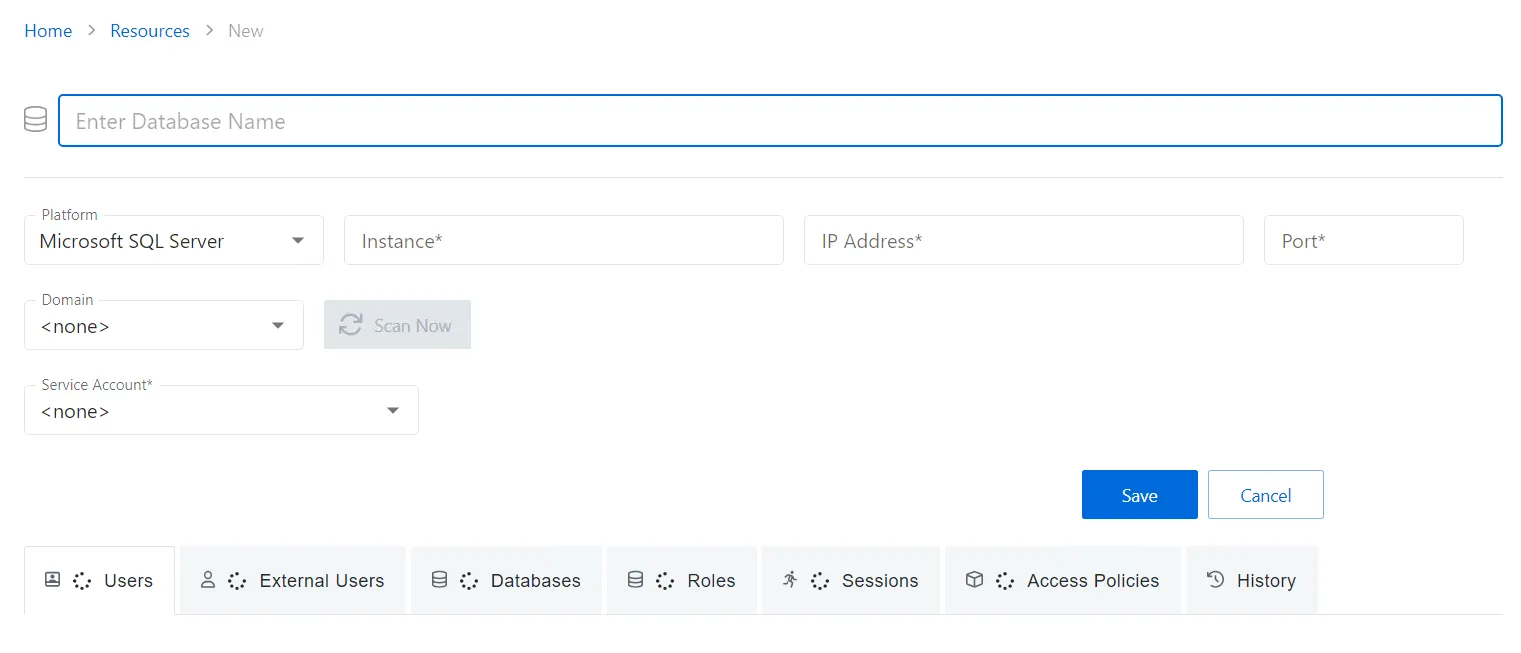
Step 4 – Select Microsoft SQL Server or Oracle from the Platform drop-down list.
Step 5 – Enter the instance name for the server.
Step 6 – Enter the IP address for the server.
Step 7 – Enter the port for the server. The default ports for each database platform are:
- Microsoft SQL: 1433
- Oracle: 1521
Step 8 – Enter the fully qualified domain name (FDQN) for the server.
NOTE: The domain is used as the default domain for database activities.
Step 9 – From the drop-down menu, select a previously added service account with credentials for the database.
-
See the Service Accounts Page topic for additional information.
- Visit icon – Go to the Service Account page to view details of the selected service account.
- Add New Service Account icon – Open the Add New Service Account window. The fields are identical to those on the Service Accounts page.
Step 10 – Click Save to save the configuration options and enable the Scan Now button.
Step 11 – Click Scan Now to begin scanning the database.
The new database is now added. See the Database Details Page for additional details.
Database Details Page
The Database Details page displays information for the selected database resource. This page is opened from any linked resource within the various interfaces.
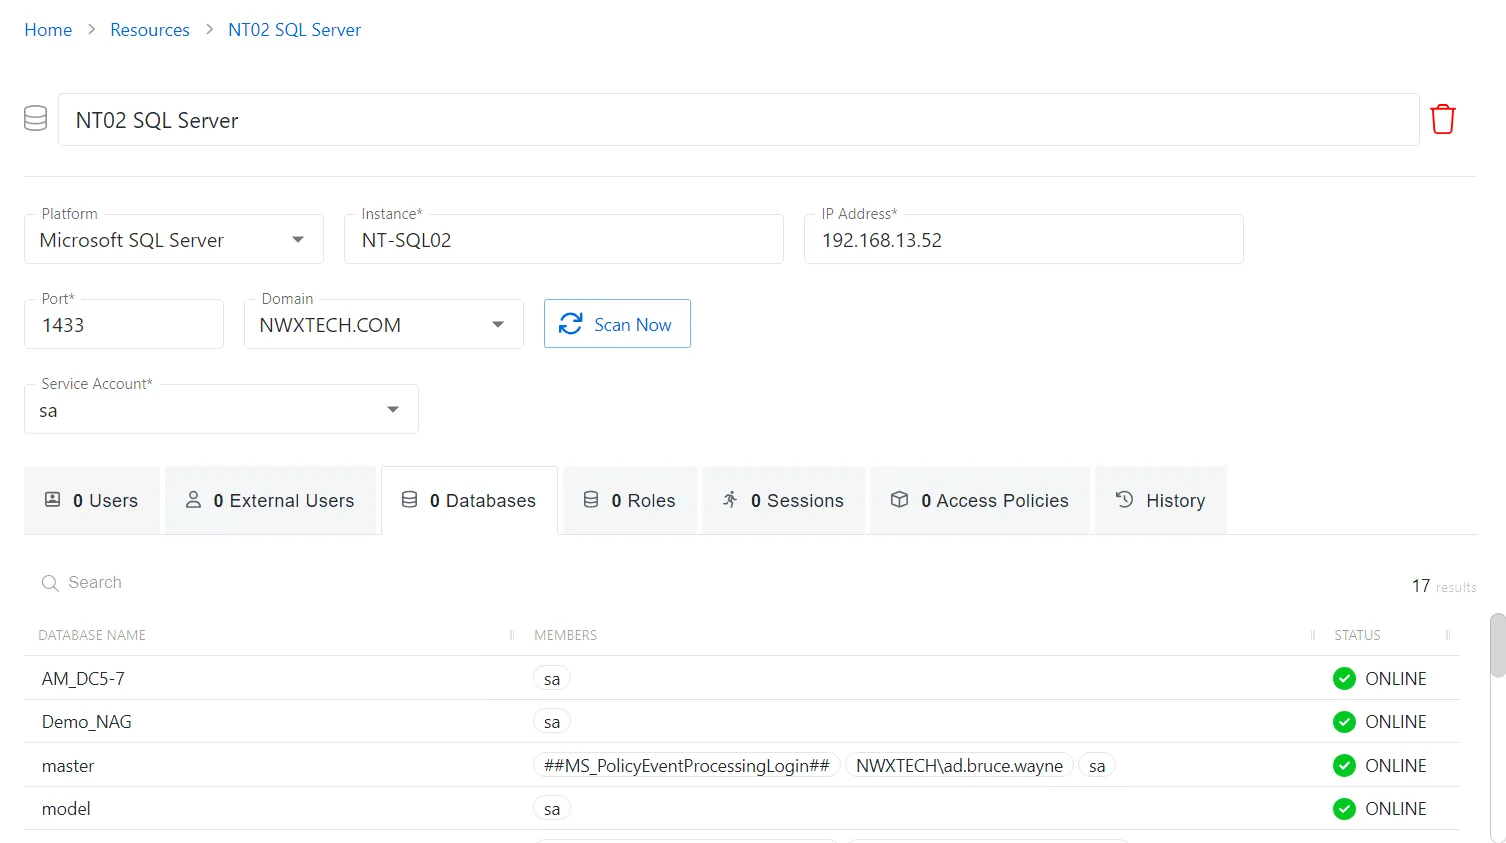
The Database Details page shows the following information:
-
Name — Displays the name of the resource
-
Trashcan icon — Removes the selected resource from being managed by the application. A confirmation window will display.
-
Platform — Displays the type of platform, which defines the resource
-
Server — The instance name for the server
-
IP Address — Displays the IP address for the resource
-
Port — The port for the server
-
Domain — Displays the fully qualified domain name (FQDN)
NOTE: The domain is used as the default domain for database activities.
-
Service Account — Displays the service account associated with the resource. See the Service Accounts Page topic for additional information.
-
Scan Now button — Scans the domain for users, groups, members, and computers. The Cancel button, which is only visible when scanning can be used to stop the resource scan. This scan can also be scheduled from the Platforms Page.
- Status — During synchronization, the button displays as spinning
If any of these settings are modified, Save and Cancel buttons are displayed. Click Save to commit the modifications. Click Cancel to discard the modifications.
The database details page has the following tabs:
- Users – Displays database login accounts that are not domain users or local computer users
- Groups – Displays login accounts that are domain users or local computer accounts
- Databases – Displays a list of discovered databases See the Databases Tab topic for additional information.
- Roles – Displays roles and who has those roles on the database and at the server level
- Sessions – Displays previous sessions that have used this resource as a target
- Access Policies – Displays a list of access policies that this resource belongs to
- History – Displays previous sessions with events that are related to this resource
Microsoft SQL Server Platform Policy Configuration
The Microsoft SQL Server menu displays the configuration options for Microsoft SQL Server platforms.
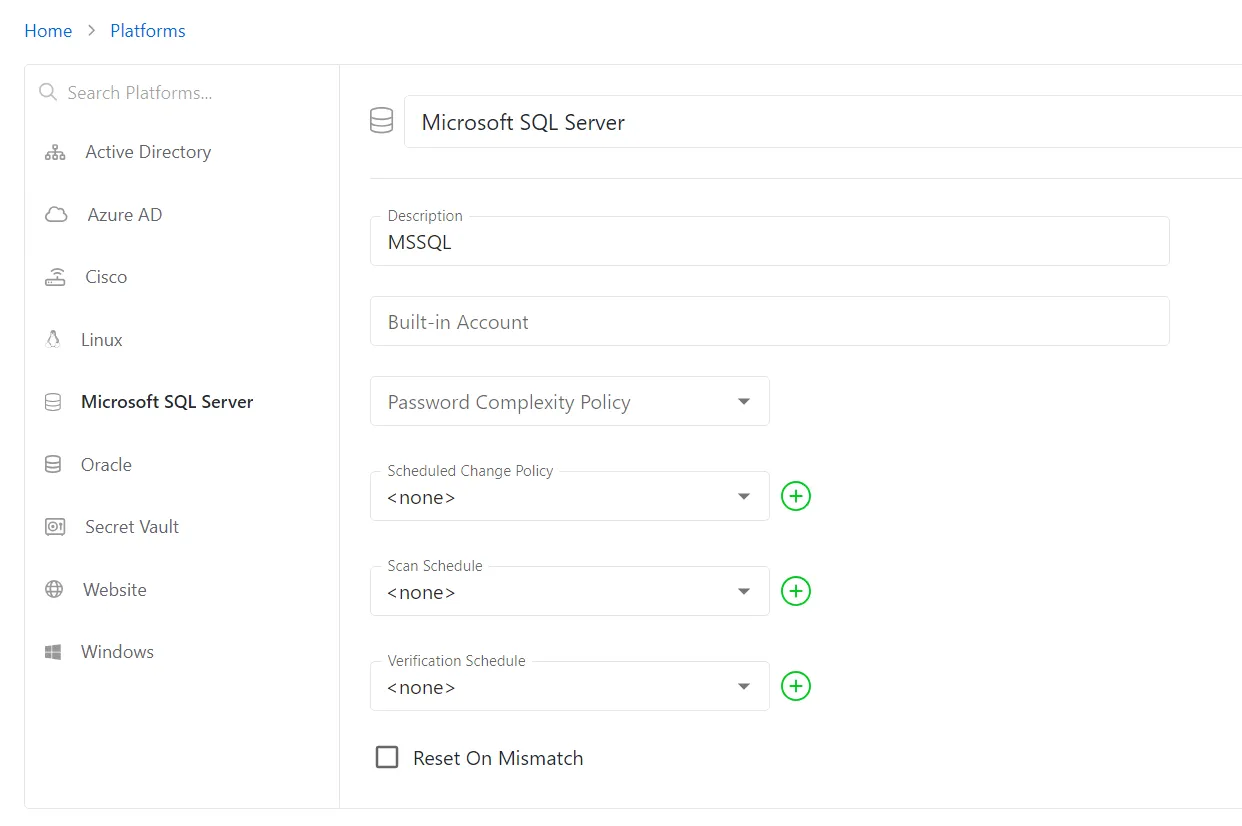
Details for the selected platform are displayed on the right side of the page. Below are the configuration options for a Microsoft SQL Server Platform.
- Name — Displays the name of the policy
- Description — Description of the policy
- Built-in Account — The built-in administrator account for the resources on the selected platform. If multiple built-in administrator accounts are required, create a copy of the platform. For Windows platforms, the built-in account is defined via the well-known SID (S-1-5-21*-500). This feature informs Netwrix Privilege Secure which account(s) to discover and onboard for a given platform during its discovery process.
- Password Complexity Policy — The password complexity rules for managed accounts created on the resources defined by the selected platform. See the Password Complexity Page topic for additional information.
- Scheduled Change Policy — How often the credentials for a managed account are changed (credential rotation). See the Credentials Dashboard and Schedule Policies Page topic for additional information.
- Scan Schedule — How often to perform a host scan on the resources defined by the selected platform (local users, groups, windows services and scheduled tasks). This scan can also be run ad-hoc from the Resources Page.
- Verification Schedule — How often to verify the credentials for managed accounts on the resources defined by the selected platform. See the Credentials Dashboard topic for additional information on managed accounts.
- Reset on Mismatch — When selected, this option will force a password rotation if the password verification step finds that the existing password for an account does not match what Privilege Secure expects.
If any of these settings are modified, Save and Cancel buttons are displayed. Click Save to commit the modifications. Click Cancel to discard the modifications.
Databases Tab
The Databases tab shows information about the server database on the selected resource.
The Databases tab has the following features:
- Search — Searches the table or list for matches to the search string. When matches are found, the table or list is filtered to the matching results.
The table has the following columns:
- Database Name — Displays the name of the database
- Members — List of accounts with group membership
- Status — Shows status information for the database
The table columns can be resized and sorted in ascending or descending order.