Add New Website
Follow the steps to add a Website Resource to the Privilege Secure Console.
Step 1 – Navigate to the Policy > Resources page.
Step 2 – Click the Plus icon and select New Website from the drop-down list.
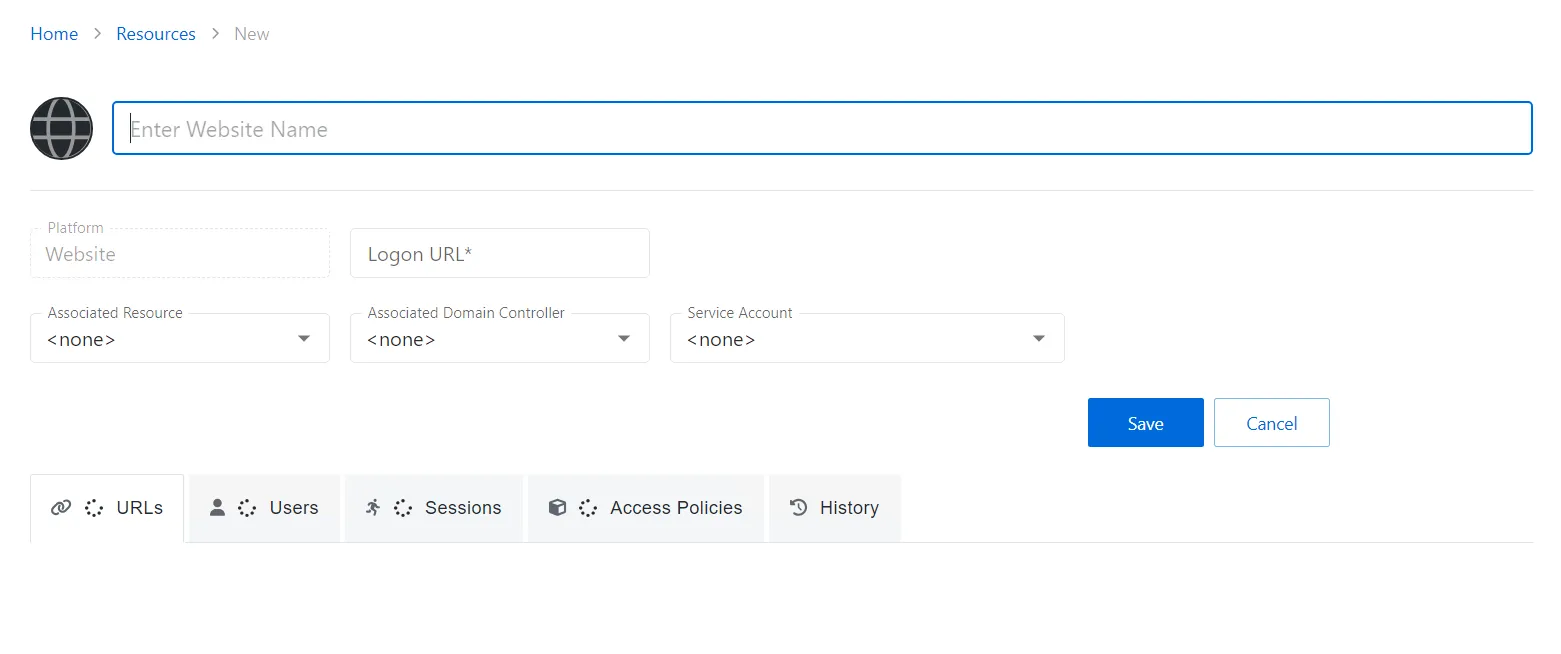
Step 3 – Enter the following information:
-
Website Name – Displays the name to be displayed in the Resource list for the website
-
Platform – Website (This field cannot be changed.)
-
Logon URL – Enter the primary logon page for the website. This is only used if no URL is specified when defining a website Activity.
-
Associated Resource – (optional) If the website is hosted on a server that is also managed by Privilege Secure, select the resource from the drop-down list to ensure that AD account operations are performed on the domain controller the website resource is bound to
-
Associated Domain Controller – (optional) A specific domain controller may be selected to ensure that AD account operations are performed on a domain controller the website will reference for authentication
-
Service Account – (optional) The service account used when activity actions require a provisioned account to interact with the resource, e.g. custom PowerShell. From the drop-down menu, select a previously added service account. See the Service Accounts Page topic for additional information.
- Add New Service Account — Open the Add New Service Account window. The fields are identical to those on the Service Accounts page
Step 4 – Click Save to add the website to the console.
The new website has been onboarded. See the Website Details Page topic for additional information.
Website Details Page
The Website Details page shows additional information for the selected website resource. This page is opened from any linked resource within the various interfaces.
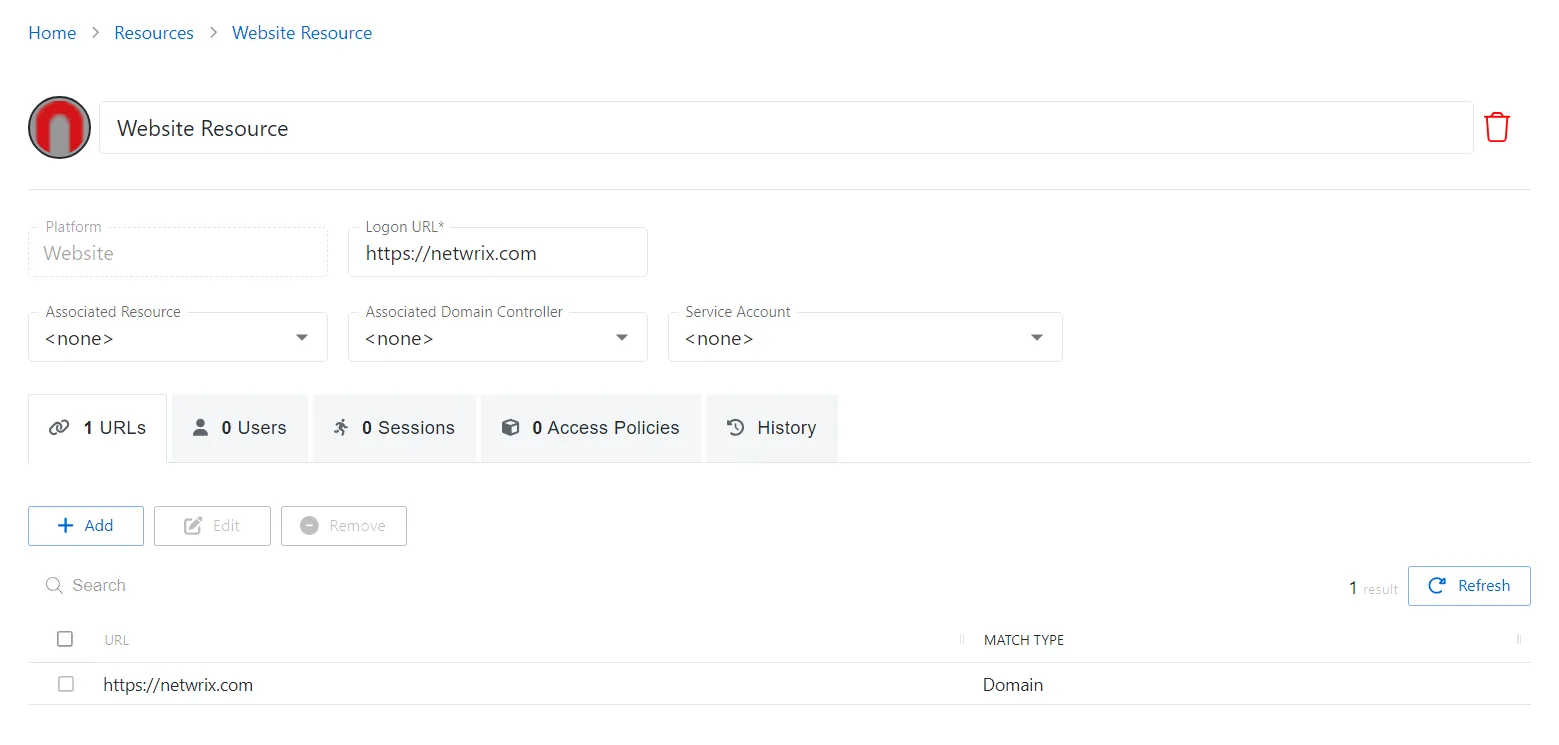
The details page shows the following information:
- Name — Displays the name of the resource
- Trashcan icon — Removes the selected resource from being managed by the application. A confirmation window will display.
- Platform — Displays the type of platform, which defines the resource
- Logon URL — Displays the primary logon page. This is only used if no URL is specified when defining a website activity.
- Associated Resource — If the website is hosted on a server that is also managed by Privilege Secure, it may be associated to the website management. This ensures that AD account operations are performed on the domain controller the website resource is bound to.
- Associated Domain Controller — A specific domain controller may be associated to the website management. This ensures that AD account operations are performed on a domain controller the website will reference for authentication.
- Service Account — Displays the service account associated with the resource
- Blue arrow button — Opens the Service Account details page. See the Service Accounts Page topic for additional information.
- Green plus button — Opens the Add New Service Account window. See the Add New Service Account Window topic for additional information.
If any of these settings are modified, Save and Cancel buttons are displayed. Click Save to commit the modifications. Click Cancel to discard the modifications.
The details page has the following tabs:
- URLs Tab for Website
- Users Tab for Website
- Sessions Tab for Website
- Access Policies Tab for Website
- History Tab for Website
Web Site Platform Policy Configuration
The Web Site menu displays the configuration options for Web Site platforms.
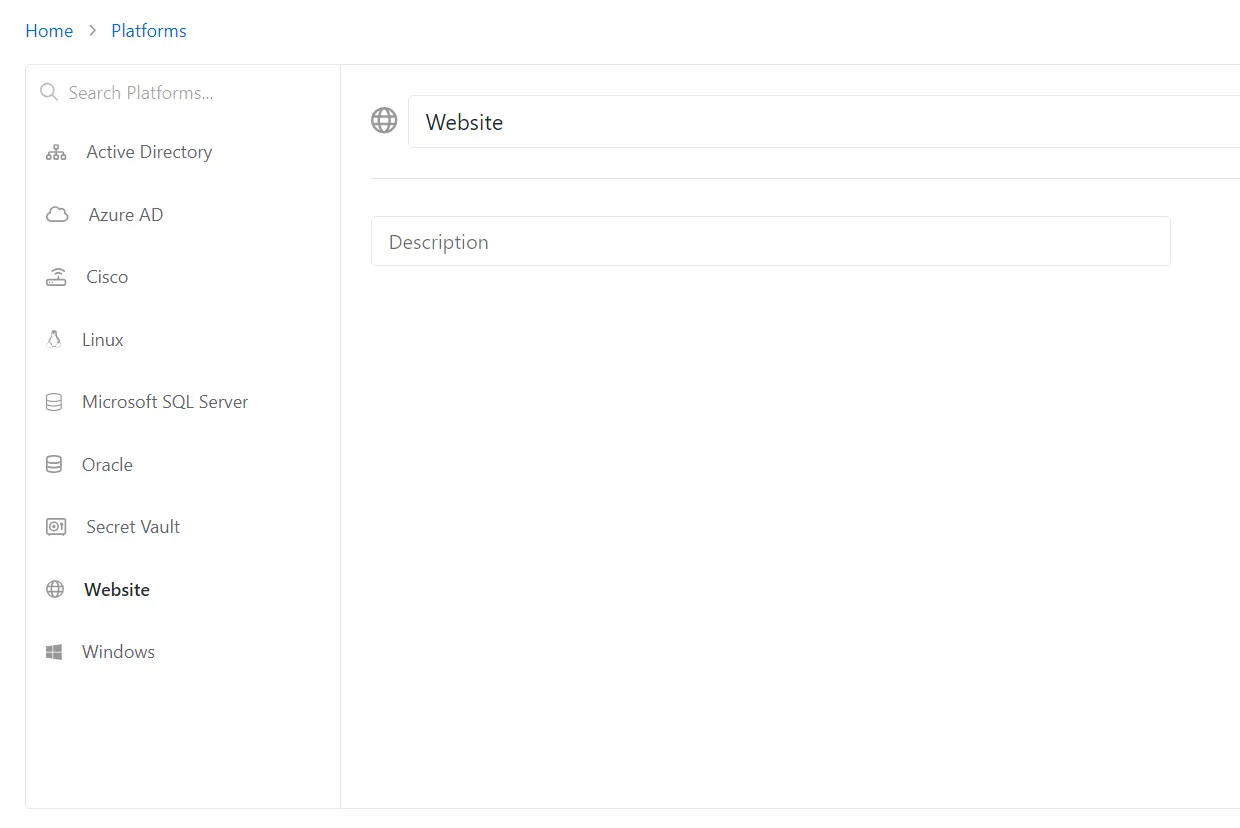
Details for the selected platform are displayed on the right side of the page. Below are the configuration options for a Website Platform.
- Name — Displays the name of the policy
- Description — Description of the policy
If any of these settings are modified, Save and Cancel buttons are displayed. Click Save to commit the modifications. Click Cancel to discard the modifications.
Add Website URL Window
Follow the steps to add or edit a Website URL used by a resource.
NOTE: Only applicable to Microsoft Entra ID and Website resources.
Step 1 – Navigate to the Resources page.
Step 2 – Click the name of the desired resource to open the Resource Details page and select the URLs tab.
Step 3 – Do the following:
- To add a new URL, click Add.

Step 4 – Enter the following information:
-
URL — The URL or string to match
-
Match Type — A Match Type is required:
- Domain — A match will be made on the domain name
- Exact — A match will only be made if the URL exactly matches
- Never — Never match the URL
- StartsWith — Only match if the URL starts with this value
- Regex — Match based upon valid regex string
- Host — Match based upon host name (FQDN)
Step 5 – Click Save to accept changes.
The URL is added to the resource and shown on the URLs tab.