Add Resources Window
The Add Resources window is for onboarding resources. The features within the window change based on the onboarding method:
- Import from AD
- Import from CSV
- Add Manually
Import from AD
When the Import from AD option is selected, the Add Resources window provides a list of resources found via Active Directory sync.
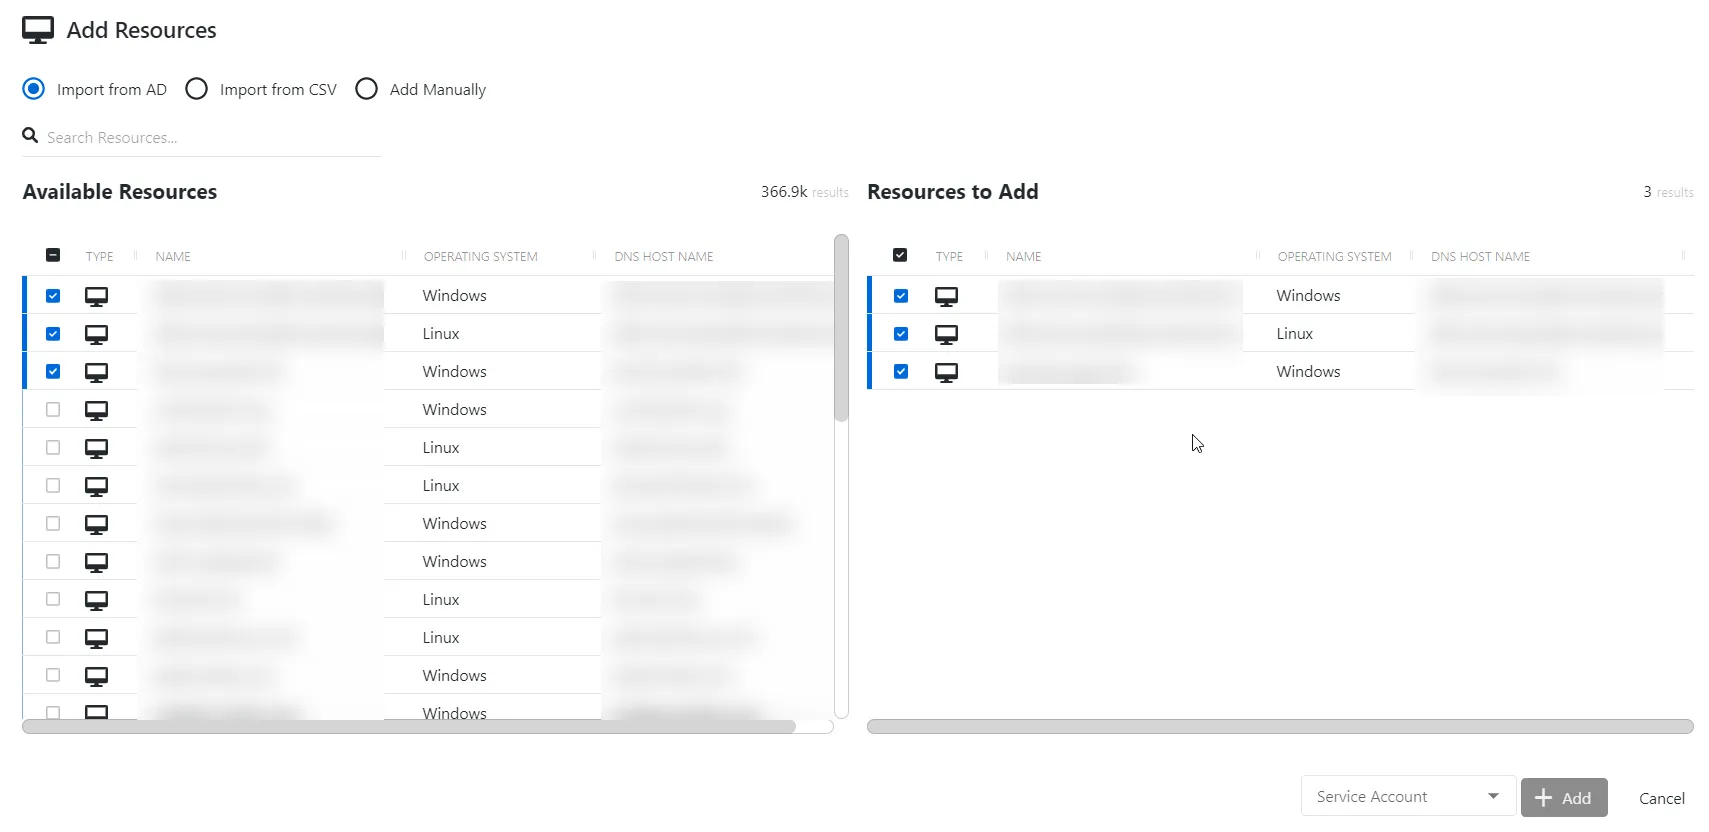
The window has the following features:
- Search — Searches the table or list for matches to the search string. When matches are found, the table or list is filtered to the matching results.
- Available Resources — Shows all available resources
- Resources And Groups to Add — Shows selected resources
- Service Account — Provides a list of available Service Accounts. See the Service Accounts Page topic for additional information.
- Add — Onboards resources and closes the window
- Cancel — Discards modifications and closes the window
Both tables have the following columns:
- Type — Classification of the activity
- Name — Displays the name of the resource
- Operating System— Displays the operating system of the resource
- DNS Host Name — Displays the DNS host name for a host resource or the FQDN for a domain resource
Follow the steps to onboard resources by importing from Active Director.
Step 1 – Navigate to either the Resources dashboard or the Resources page.
Step 2 – Click the Add button and select New Server. The Add Resources window will open to onboard new servers.
Step 3 – Select the Import from AD radio button, which is the default option when the window opens. This option lists Available Resources that have been discovered by Privilege Secure.
Step 4 – Select the desired resources in the Available Resources table and it is immediately moved to the Resources to Add table.
NOTE: To remove a resource from the Resources to Add table, uncheck it from either table.
Step 5 – When the Resources to Add table is populated as desired, open the Service Account drop-down menu. Select a previously added service account with credentials for the selected resources.
Step 6 – When the service account is assigned, click Add. The Add Resources window closes.
The new resource(s) have been onboarded and can be added to Access Policies.
Import from CSV
When the Import from AD option is selected, the Add Resources window provides import options.
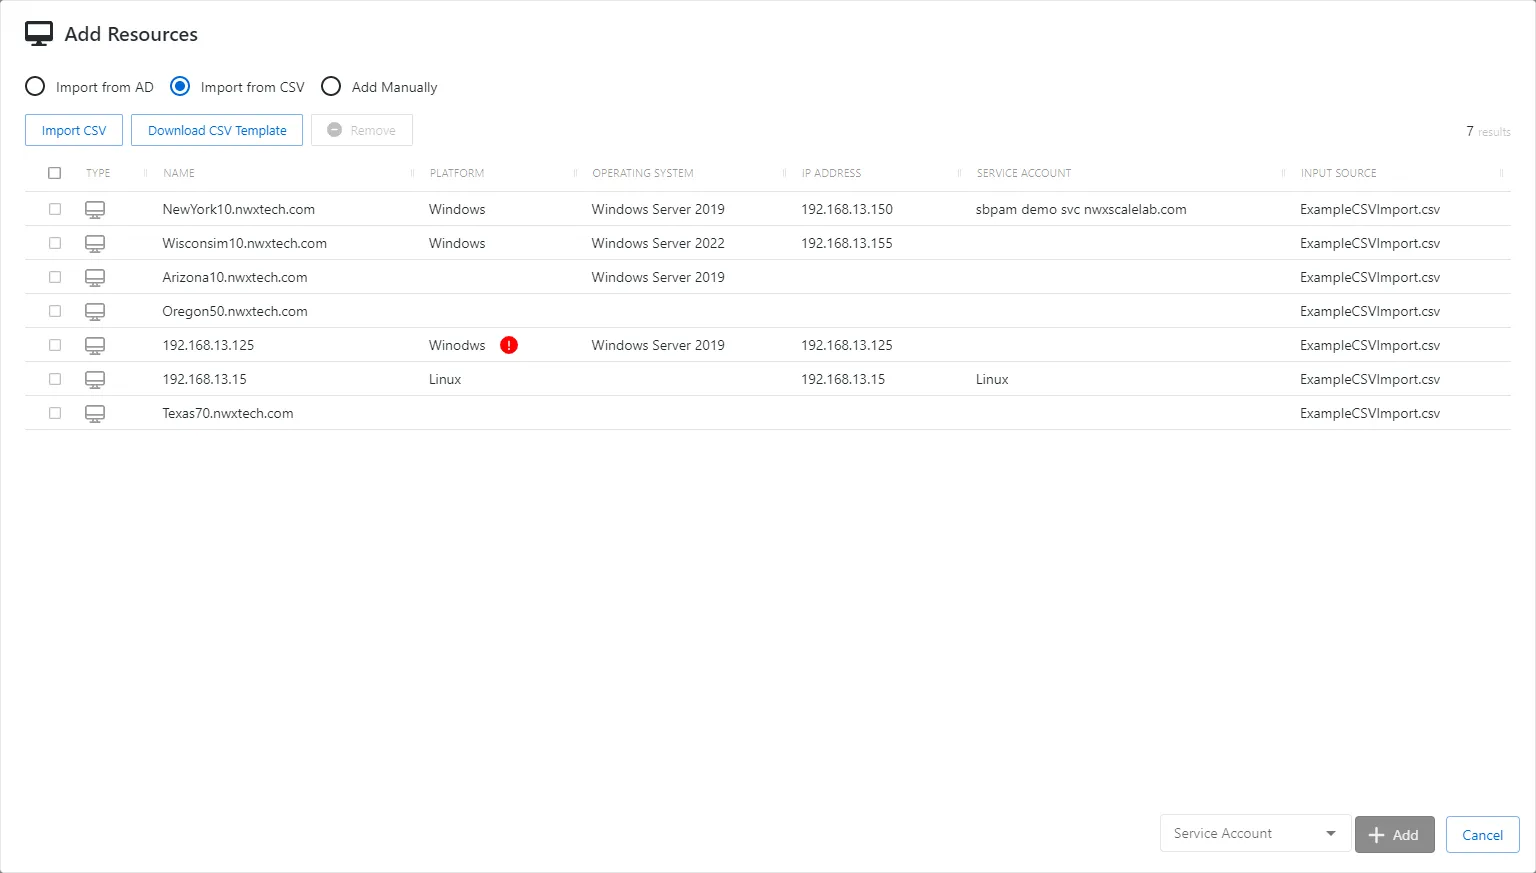
The window has the following features:
- Import CSV — Opens Window Explore to select the file
- Download CSV Template — Downloads the
nps-resource-import-template.csvfile with required columns. See the Create Resource Import CSV File topic for additional information. - Remove — Removes the selected item
- Service Account — Provides a list of available Service Accounts. See the Service Accounts Page topic for additional information.
- Add — Onboards resources and closes the window
- Cancel — Discards modifications and closes the window
The table has the following columns:
- Checkbox — Check to select one or more items
- Type — Classification of the activity
- Name — Displays the name of the resource
- Platform — Displays the type of platform, which defines the resource
- Operating System— Displays the operating system of the resource
- IP Address — Displays the IP address for the resource
- Service Account — Displays the service account associated with the resource
- Input Source — Displays the name of the import file
Follow the steps to onboard resources by importing from a CSV file.
Remember, the CSV file must contain either the DNS Host Name or IP Address for each resource. All other values are options. Also, the Platform and Credentials value must be an exact match to Platforms and Service Accounts already known to Privilege Secure.
Step 1 – Navigate to either the Resources dashboard or the Resources page.
Step 2 – Click the Add button and select New Server. The Add Resources window will open to onboard new servers.
Step 3 – Select the Import from CSV radio button. This option allows you to import a pre-created CSV file to onboard resources.
NOTE: If you did not create the CSV file prior to starting these steps, click Download CSV
Template to download the nps-resource-import-template.csv file with required columns.
Step 4 – Click Import CSV. The Open window opens.
Step 5 – Navigate to the desired CSV file and click Open.
Step 6 – The data is read into the table. There is a validation process taking place. If an issue arises, a red icon will indicate the problem. If a problem occurs, you can either fix the CSV file and reimport the file, or you can select the resource with the issue and click Remove.
Step 7 – Repeat steps 4-6 to import multiple CSV files.
Step 8 – When the table is populated as desired, open the Service Account drop-down menu. Select a previously added service account with credentials for the selected resources. The selection will populate the Service Account value for resources without an assigned Credential from the import file.
Step 9 – When all resources have an assigned service account, click Add. The Add Resources window closes.
The new resource(s) have been onboarded and can be added to Access Policies.
Add Manually
When the Add Manually option is selected, the Add Resources window provides options for entering resources.
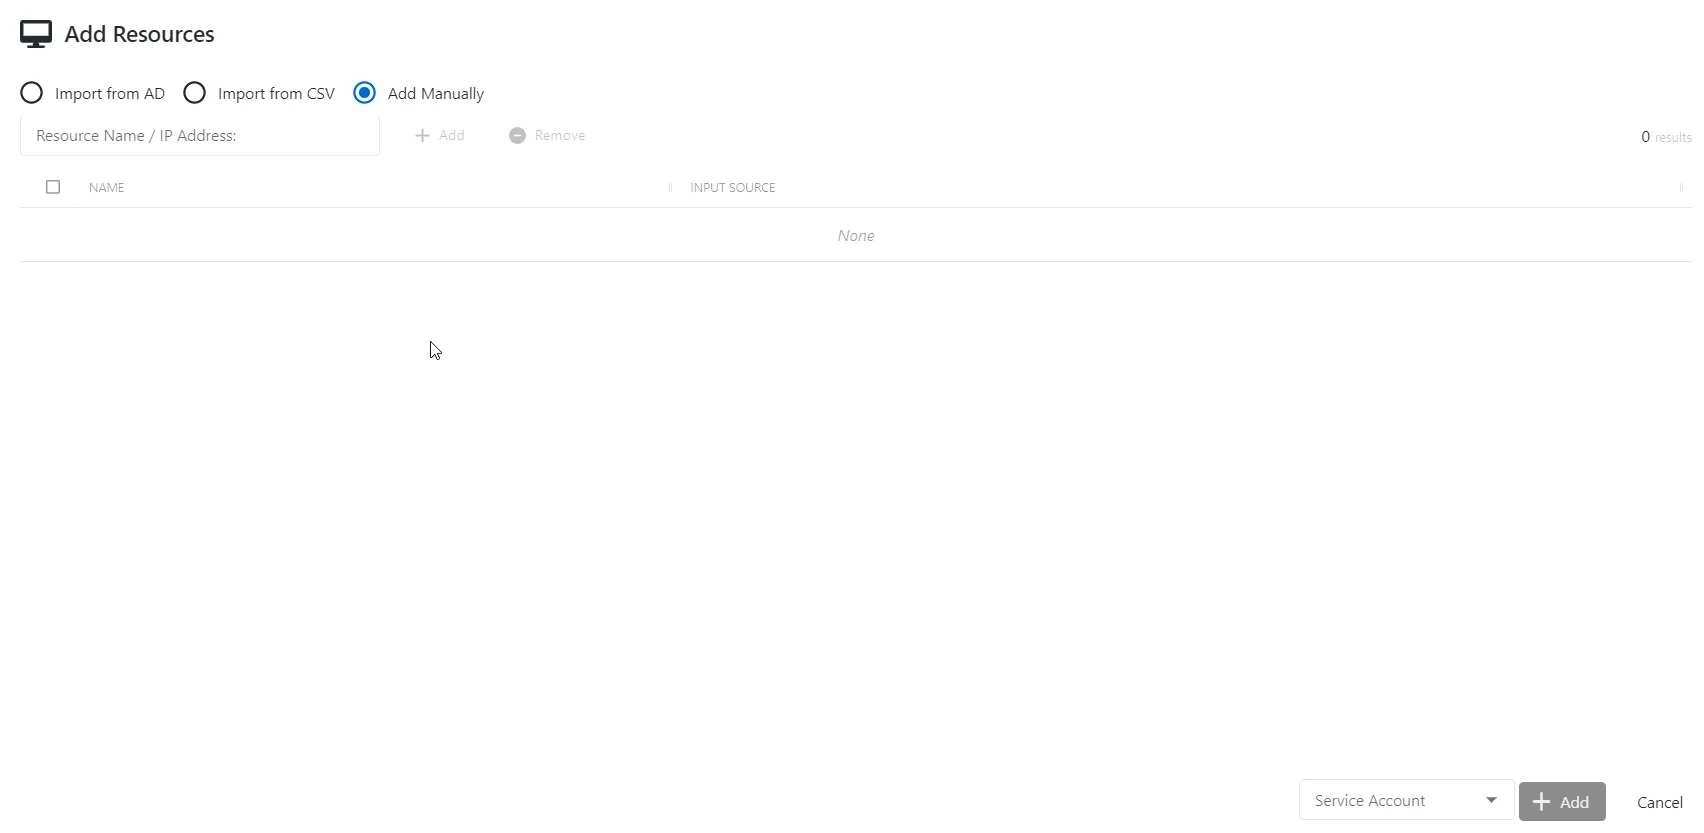
The window has the following features:
- Resource Name / IP Address textbox — Enter the resource name or IP Address
- Add — Adds the resource in the textbox to the table
- Remove — Removes the selected item
- Service Account — Provides a list of available Service Accounts. See the Service Accounts Page topic for additional information.
- Add — Onboards resources and closes the window
- Cancel — Discards modifications and closes the window
The table has the following columns:
- Checkbox — Check to select one or more items
- Name — Displays the name of the resource
- Input Source — Indicates that User Input is the resource source
Follow the steps to onboard resources manually.
Step 1 – Navigate to either the Resources dashboard or the Resources page.
Step 2 – Click the Add button and select New Server. The Add Resources window will open to onboard new servers.
Step 3 – Select the Add Manually radio button.
Step 4 – In the Resource Name / IP Address field, type either the DNS Host Name or IP Address of the resource. Click Add.
Step 5 – Repeat Step 4 for each resource to be onboarded.
NOTE: To remove a resource, select it in the table and click Remove.
Step 6 – When the table is populated as desired, open the Service Account drop-down menu. Select a previously added service account with credentials for the resources.
Step 7 – When service account is assigned, click Add. The Add Resources window closes.
The new resource(s) have been onboarded and can be added to Access Policies.