Apply a Service Account from an existing AD group Directly to a Machine
Apply a Service Account from an existing AD group Directly to a Machine
Apply a Service Account from an existing AD group Directly to a Machine
Overview
All interactive accounts should not have standing privilege, instead these should be using Privilege Secure to elevate access when required. This is easy to arrange with Privilege Secure. These interactive groups should be set as non-persistent. However, sometimes interactive and non-interactive (service) accounts exist in the same group. In this case removing the persistence of the group would break any process or application that is using the service account. The purpose of this article is to show a Privilege Secure administrator how to deal with this situation.
Approach
When groups are mixed with interactive and service accounts, the approach should be to ensure that these accounts are applied directly to the required machines or added to a group and that group applied to the machines. The service account does not need to be removed from the original group (although this can be done at a later date for good account organization).
Reviewing Groups
The group(s) that is targeted to have persistence removed, should be reviewed to find any service accounts that exist within it. A determination should then be made if these should be added to a group for service accounts to be applied to the target machines or should be applied directly. Typically these are applied directly.
Here we can see a service account that exists within the Domain Admins group. The Domain Admin group is an interactive group that should only have a very small set of admin accounts that are used specifically for administering the domain.
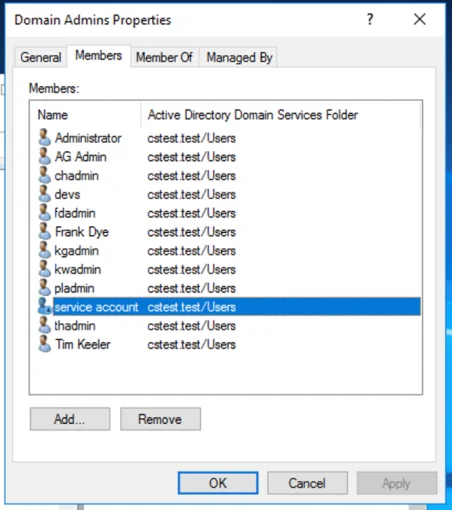
All machines that have the Domain Admins group within the local administrators group will need to have this applied directly to support the software or process using this specific account. If persistence is removed for the Domain Admins group prior to this, the group will be removed from the end point and the software or process will stop functioning.
Tip: Ensure that any nested groups are also reviewed for service accounts.
Pulling the Quickstart File
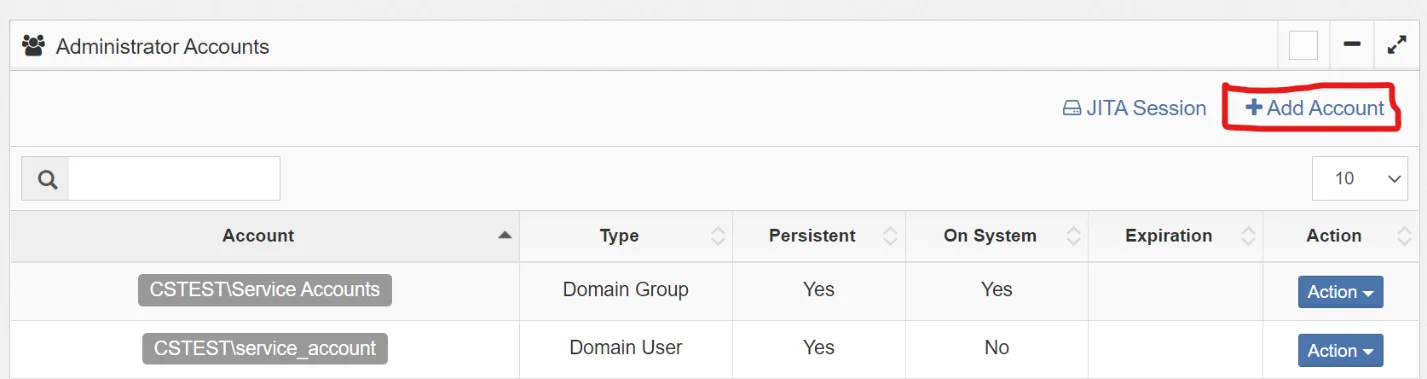
The machine can be updated via the UI to add the account directly to the inventory (Privilege Secure will apply this during the next scan cycle or immediately if a rescan is initiated).
Obviously, this is not suitable for updating a large amount of machines that would likely be involved in a Privilege Secure rollout. In this case Quickstart is utilized.
The Excel spreadsheet is pulled using the following command from the Quickstart reporting folder:
reports.py --insecure
The Quickstart report script is likely to be different for the specific install.
This produces an Excel file with two tabs, Computer Data and Admin List.
Updating the Quickstart File
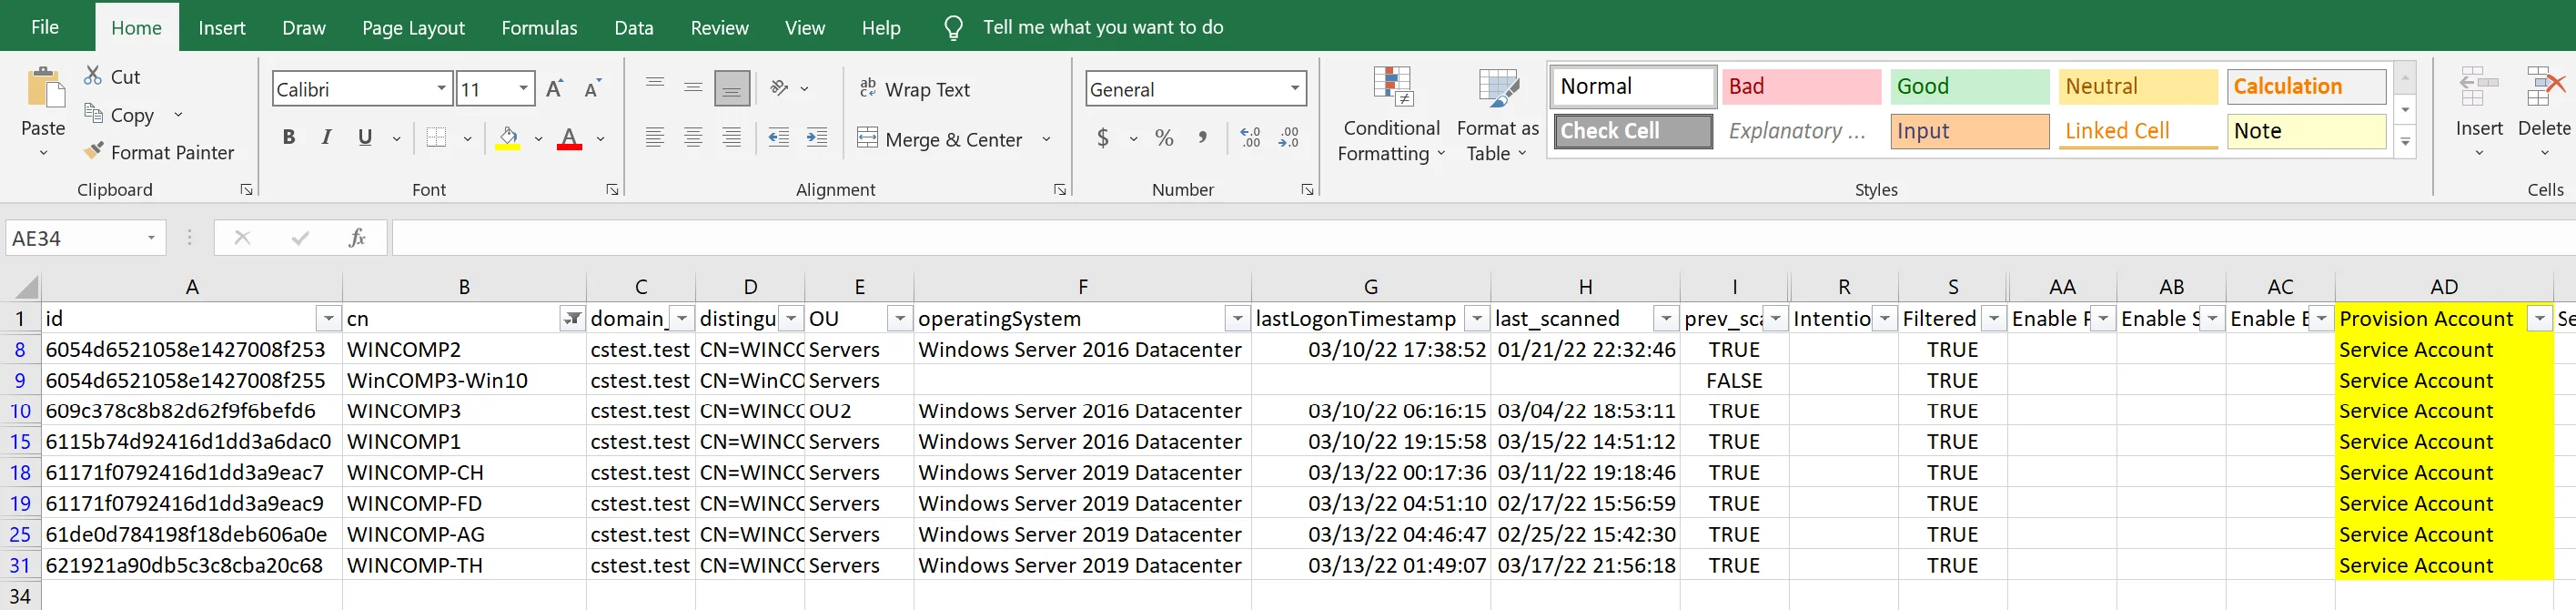
The Computer Data tab can be used to add the necessary account to the inventory of the desired machines within Privilege Secure.
In order to populate the Provision Account column the following formula can be entered.
=IF(ISNA(INDEX('Admin List'!D:D,MATCH(1,(B2= 'Admin List'!B:B)*("Domain Admins"='Admin List'!D:D),0),"","Service Account;true")
This formula must be entered using <Ctrl> <Shift> <Enter> (unless using Office 365). This will
enter the formula as an array formula and the curly braces will appear around the formula. This
can then be copied down the whole column.
Replace the group and service account name as required. This example looks for all machines that have “Domain Admins” in the local administrator group and will add the account “Service Account” to the same machines.
Copy the Provision Account column and paste as values to remove the formula. Any formulas, additional columns or formatting can cause the upload to fail.
The spreadsheet can also be filter to remove target machines if only desktops or servers are to be targeted.
Running the Quickstart File
The file can then be uploaded using the following command from the folder that stores the Quickstart report file.
reports.py --insecure --protect-mode-file apply_service_account_DATE.xlsx --dry-run
It is recommended to include the date and what the purpose of the excel file is expected to do within the file name. Use the --dry-run flag to check that file will make the intended changes.
Appendix
Tips
If Excel is unwieldly slow rows can be deleted for machines that have not been scanned. But, instead of filtering and deleting, sort based on the last_scanned column and then delete the unwanted rows. Sorting and deleting is many times faster for Excel. This can also resolve issues with Excel crashing. Another benefit is the upload back to Privilege Secure will be faster with fewer rows.
Excel Tips
For large Excel files use the following steps to shrink the size of the file allowing it to be managed easier:
- Sort the Quickstart file on the User column (column D) in the Admin List tab
- Filter based on the same User column, excluding the target group
- Delete all the unfiltered rows (CTRL click the top row to exclude it from being deleted)
- Save the file. This will become the basis for applying service accounts and also the basis for removing persistence.
Creating the upload file:
- To apply service accounts add the formula to the Provision Account column (column AD) on the Computer Data tab:
=IF(ISNA(INDEX('Admin List'!D:D,MATCH(1,(B2= 'Admin List'!$B$1:$B$40000)*("TARGET_GROUP"='Admin List'!$D$1:$D$40000),0),"","Service Account;true,Service Account2;true")
- Change TARGET_GROUP to the group that contains the service accounts.
- Update the formula to the specific service accounts that need to be applied.
- Change the amount of rows (40,000 here) to cover the amount of rows in the Admin List tab
- Press
<CTRL><SHIFT>and<ENTER>to apply the formula (this will add curly braces, , to the formula, before copying to the bottom of the Computer Data tab.
Version Requirements
All