Freeze Mode
Freeze Mode
Freeze Mode
Overview
There are two main methods of rolling out Privilege Secure, by machine or by group.
By Machine
Rolling out by machine can be done by individual machines through the UI or en mass using Quickstart. The challenge with this can be that all people needing administrative access to the machine must be familiar with Privilege Secure and how to gain access. Given the simplicity of Privilege Secure, this is not a major issue, but it can add to the logistical challenge of rollout.
By Group
Freeze mode is a method of rolling out Privilege Secure in a way that enables AD user groups to use Privilege Secure while others have access that remains unchanged until they are trained. This is done by making all machines protected but with all access persistent. The persistence is then pared away group by group for all machines as users are informed and trained.
This article explains how the deployment can be done by group.
The Desired State
The desired state of a machine managed by Privilege Secure is shown below:
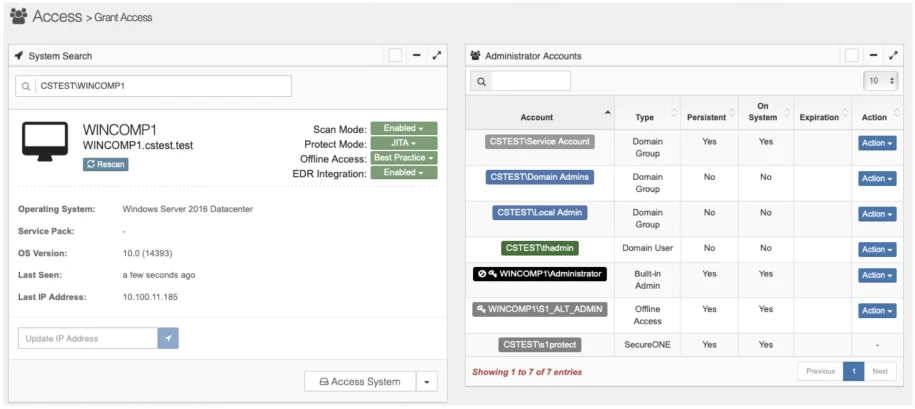
The machine is in Protect Mode JITA.
![]()
This means that any user requiring privileged access to the machine must go through Privilege Secure.
Service accounts are set as persistent.

This means that they will stay on the machine and not be impacted by Privilege Secure (these should be set to non-interactive in AD). Only Service Accounts (including the Privilege Secure service accounts) are set as persistent.
The built in Administrator (RID500) account is locked and password is managed.

The
![]() symbol
denotes that the account is locked
symbol
denotes that the account is locked
The
![]() symbol
denotes that the account password is being rotated by Privilege Secure.
symbol
denotes that the account password is being rotated by Privilege Secure.
An alternative local administrator account has been created for Offline Access Management (OAM).
![]()
The password for this account is also being managed by Privilege Secure.
Groups requiring privileged access are not set to persistent.
![]()
Freeze Mode
Freeze mode is a way of rolling out Protect Mode while reducing potential impacts associated with rollout. It is also useful when combining the rollout of Protect Mode with the review (and potential approval) of existing access.
Below shows a machine in Freeze Mode
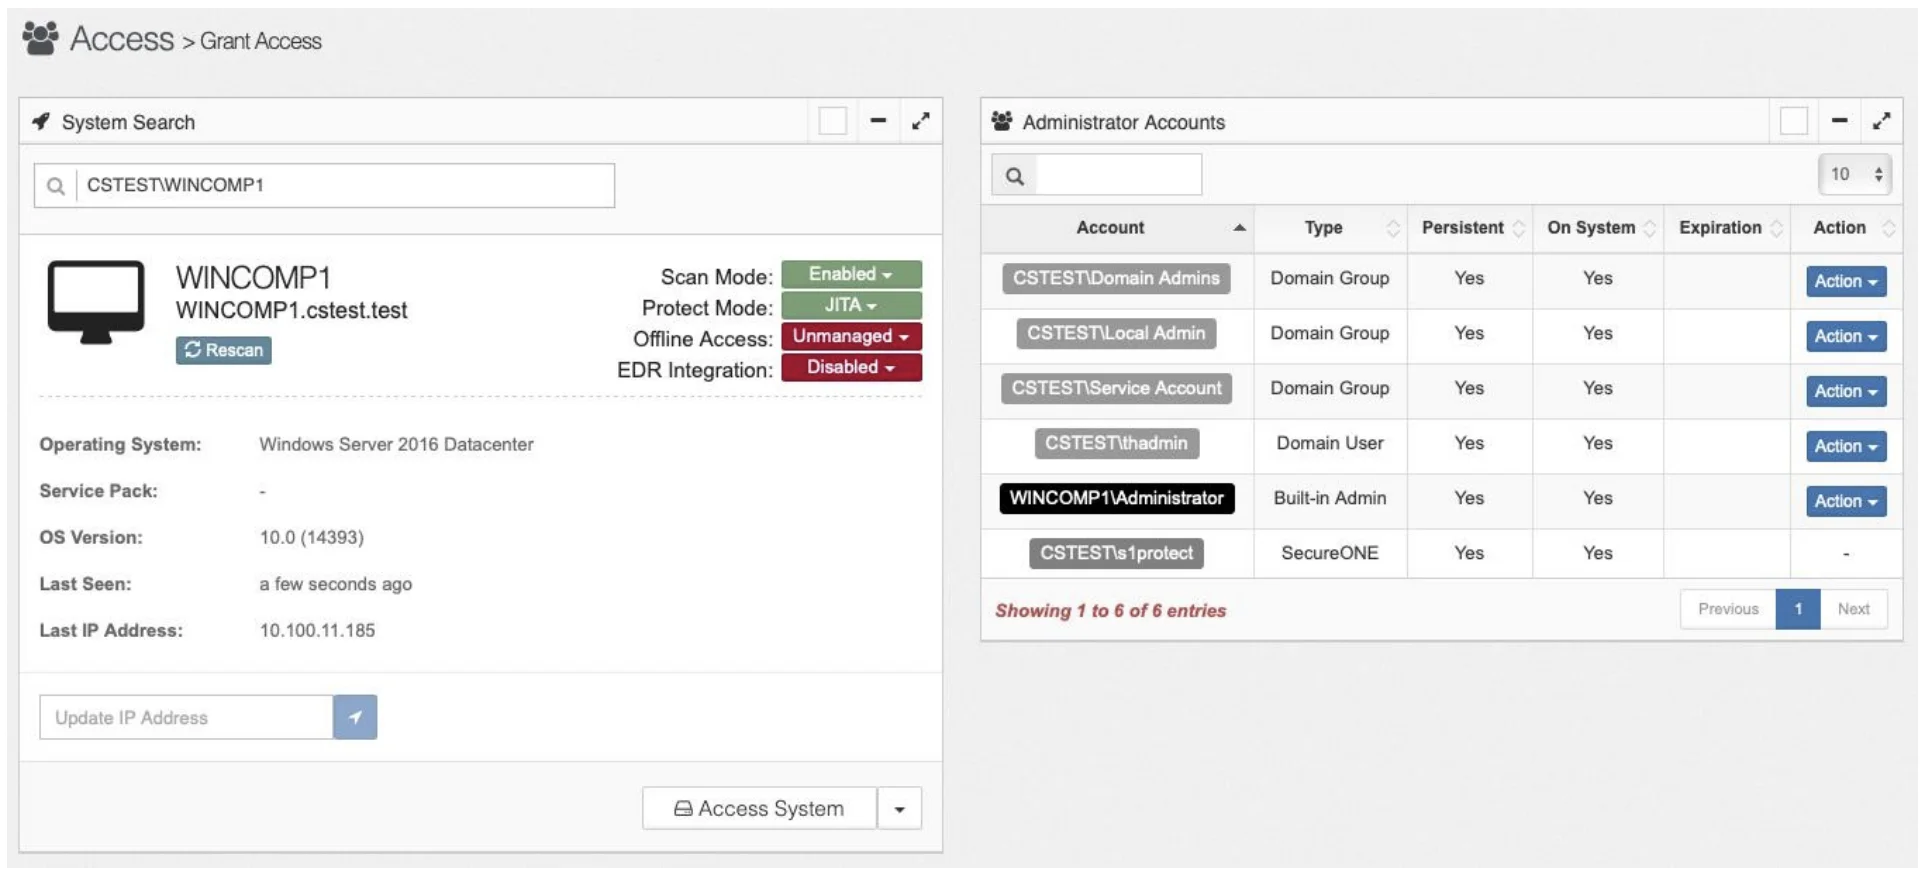
In this case the machine is in Protect Mode, but, all accounts are set as persistent. Any account that is persistent remains on the machine and a user does not need to use Privilege Secure to use this account for admin access.

Any new accounts or groups added to the machine will be ingested into Privilege Secure and will not be persistent. These groups or accounts would require users to access Privilege Secure.
Enabling Freeze Mode - UI
As with all Privilege Secure functionality, changes can be made via the UI or in bulk using Quickstart. Setting a machine to freeze mode in the UI is done by setting all accounts to persistent using the action button:

Then adding the machine to Protect Mode JITA

Current access is not impacted by Freeze Mode.
Enabling Freeze Mode - Quickstart
To ensure that all machines are in freeze mode, an updated extract from Privilege Secure should be pulled using the quickstart process. From a terminal window in the Privilege Secure reporting folder, run the command below to download the spreadsheet of all machines.
reports_2.9.py –insecure
Adjust the command to suit the specific version of quickstart used.
The resultant spreadsheet should be filtered to show the machines that are not in protect mode but have a scan date. These are the machines to be targeted for protect mode (this would be further restricted if just looking for workstations or servers).


The spreadsheet should now be updated to apply freeze mode, i.e. add protect mode JITA and add persistence to all accounts. Here we have one target machine WINCOMP1
Computer Data Tab

Admin List Tab

Filtered to the target machines and persistence set to true for all accounts (i.e. freeze mode)
Once the file has been updated for upload, remove any filters and save the file with a suitable name for uploading. The only entries set to update are the ones targeted for freeze mode.
From the Privilege Secure Quickstart reporting folder, run the following to in a terminal window to upload the file:
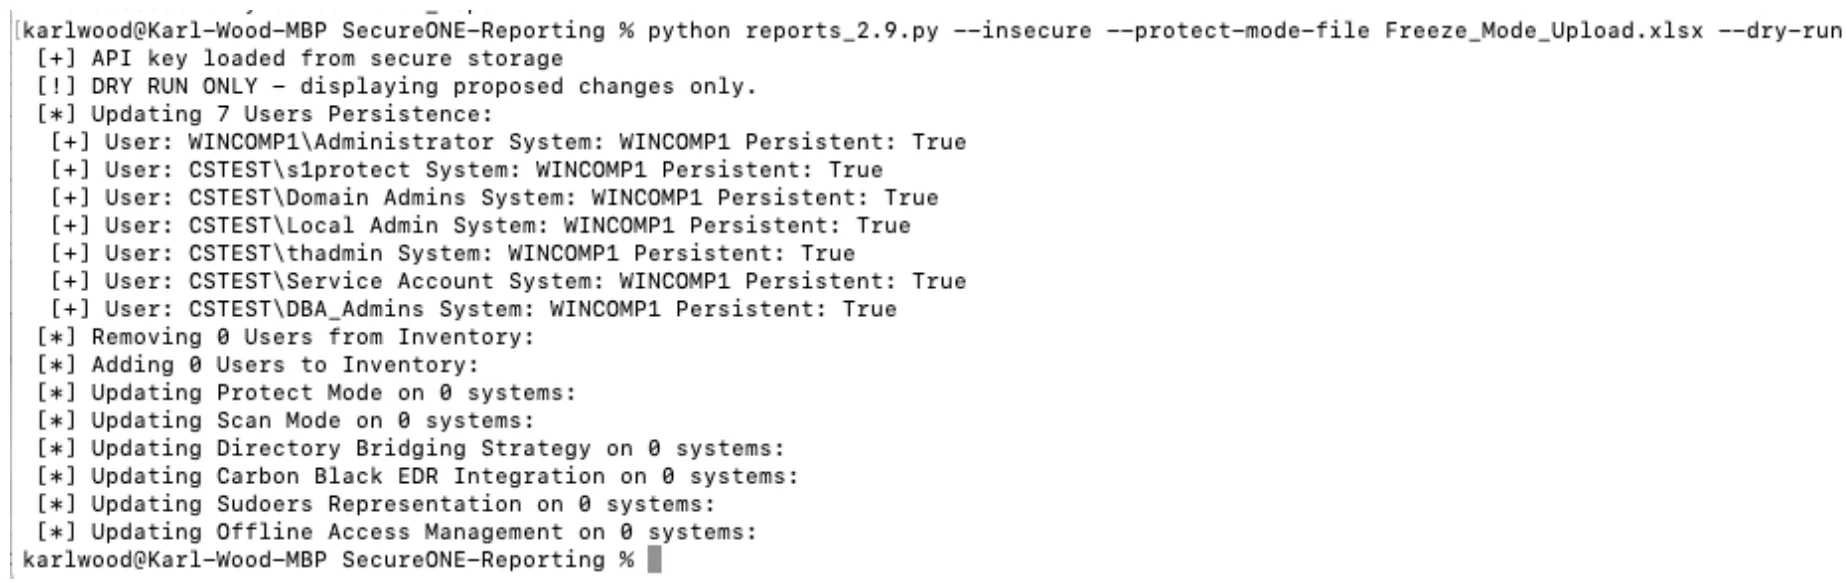
python reports_2.9.py --insecure --protect-mode-file Freeze_Mode_Upload.xlsx --dry-run
Use the –dry-run option to check what is going to be uploaded
Once suitable, remove the –dry-run flag to run the update
python reports_2.9.py --insecure --protect-mode-file Freeze_Mode_Upload.xlsx
A further pull of all machines should be done from Quickstart to ensure that all the target
machines are in protect mode.
reports_2.9.py –insecure
## Removing Persistence
Removing users or groups from persistence forces users to go through Privilege Secure to enable privilege access. This drives towards Zero Standing Privilege (ZSP), minimizing the attack surface area.
With this implementation approach, persistence should be removed on a group by group basis. This should be an iterative process, notifying and training members of the targeted AD group while progressing.
(__Project Management__) Notifications should now be sent to the members of the AD group that is being targeted. The example we will use in this case is the group DBA_Admins. The notification should also include the relevant training resources (cheat sheets, videos, URL for access to Privilege Secure), the date of change and any contact info in case of issues.
We can update to remove persistence on a single machine through the UI by using the action button to remove persistence.

This only forces the users of the DBA group to go through Privilege Secure on this ONE server. This would leave this group (the DBA administrators) in a mix of using Privilege Secure for some server and not others. It is better to remove persistence for ALL machines that have the DBA_Admins group. This can easily be achieved using Quickstart. Once this is done all the DBA Administrators will go through Privilege Secure for the servers that they need access to. Optionally a review and approval of the users who exist in the targeted group can also be carried out in conjunction with the owner of the group (machines that this group applies to can be shared with group and machine owners as required)
The updates to the Quickstart spreadsheet would be as follows:

Here we have filtered on the DBA_Admins group. We the return the persistence to FALSE. This should be for ALL machines that have DBA_Admins.
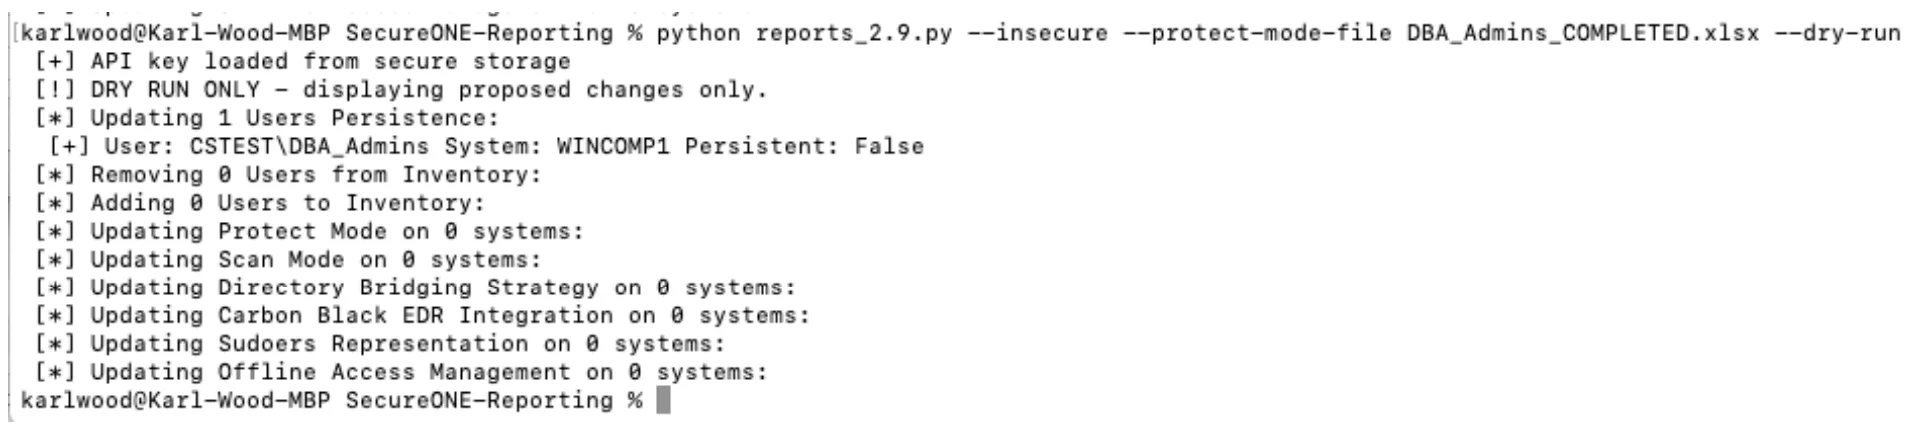
Again store the upload spreadsheet file with a suitable name, in the Privilege Secure reporting folder. Run the command below to apply the change to Privilege Secure (dry run first).
reports_2.9.py --insecure --protect-mode-file DBA_Admins_COMPLETED.xlsx --dry-run
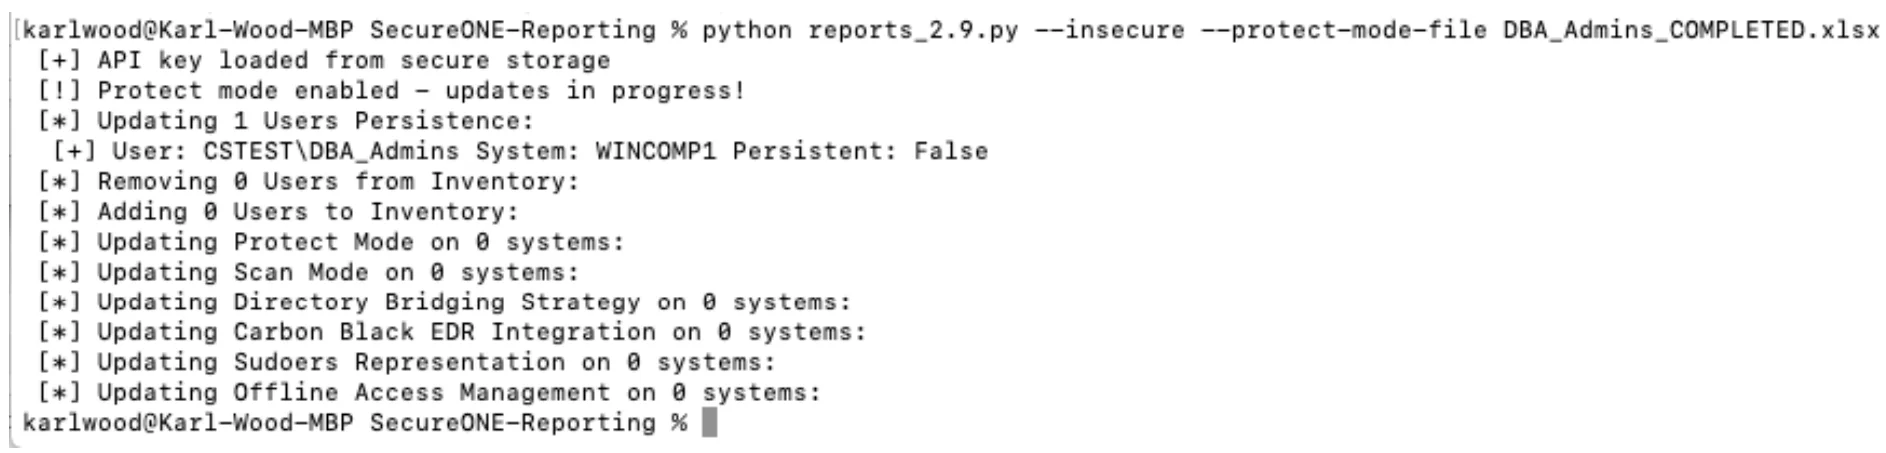
reports_2.9.py --insecure --protect-mode-file DBA_Admins_COMPLETED.xlsx
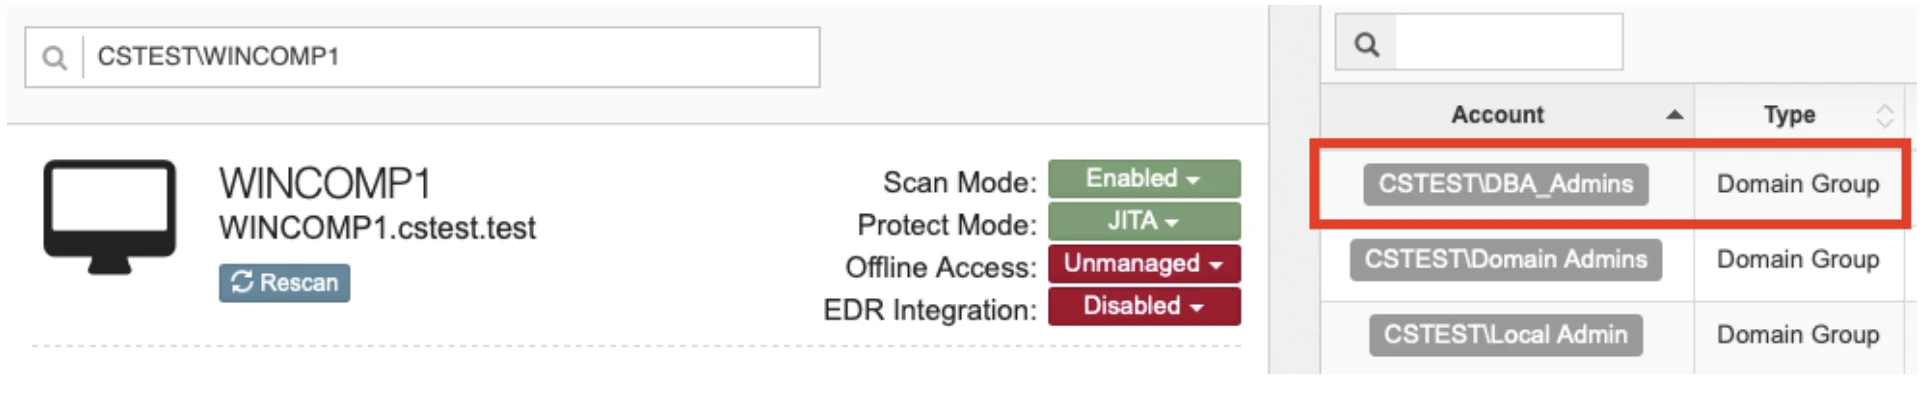
(__Project Management__) Users within the DBA_Admins group should now be informed of the change, along with the training and issue resolution information again. Through the UI we can see the effect on one of the machines, WINCOMP1 in this case.
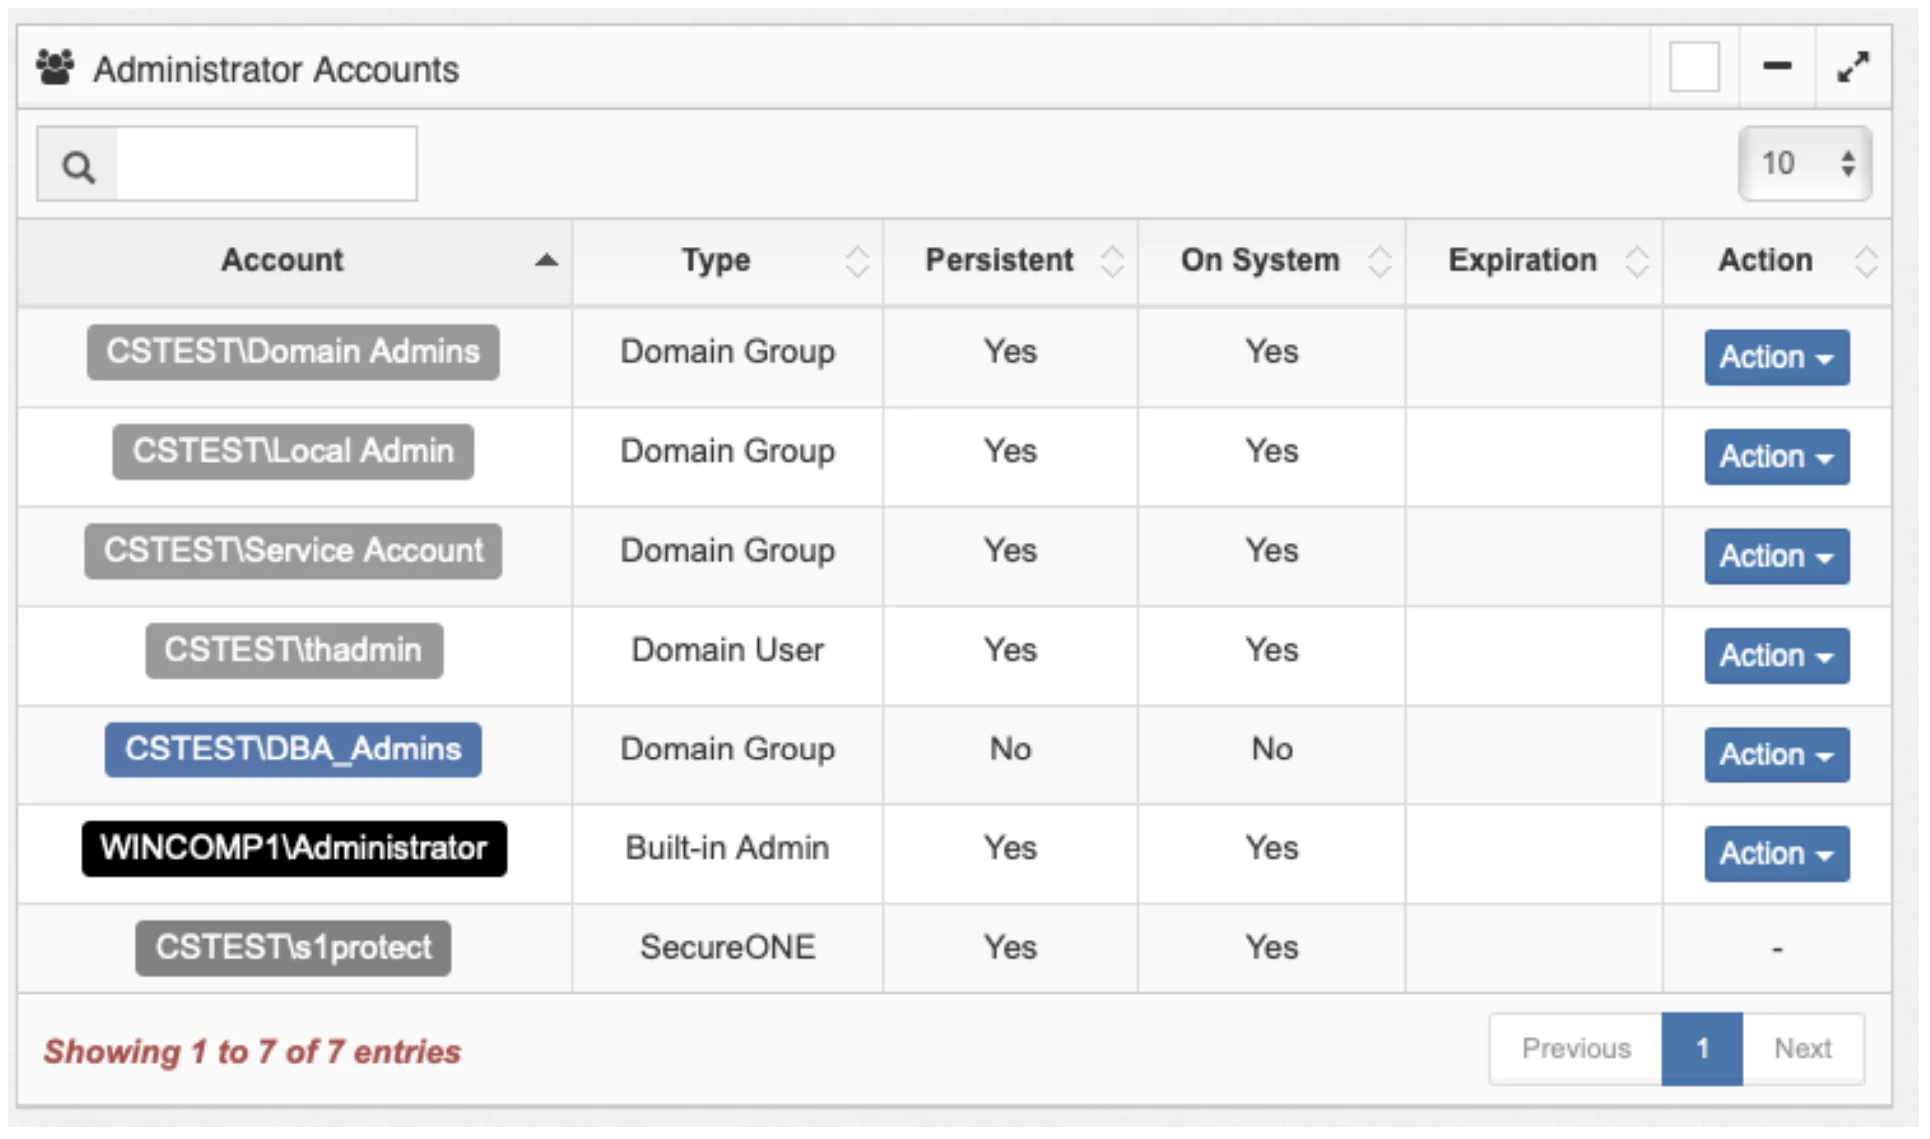
The DBA_Admins users are now forced to request elevated access through Privilege Secure. This would be the case for ALL machines that the group has access to. In this case it was a single machine.
## Rinse and Repeat
What was described above can now be done for all groups that have privileged access. The main groups for each team should be targeted first (desktop admins, helpdesk, application developer groups, etc.). It will then become apparent that most users will be directed to Privilege Secure quite early within the process. This ensures the most efficient method to reduce standing privilege. Smaller groups can then be combined into batches to have persistence removed.
With each wave of persistence removal ensure that a new Quickstart spreadsheet is pulled as this will be the current source of truth.
Keep a track of all groups that have been removed from persistence until the standard is that no groups have persistence. This will prove useful for new machines as they are built (see below). Eventually, the only accounts or groups that remain persistent should be service accounts or service account groups. These accounts should be non-interactive.
## New machines
New machines, server and workstations, are constantly being built within the organization. As these machines are built, they should be either added to Privilege Secure protect mode immediately or should be added on a cyclic basis. The groups that exist on these machines that have not been moved away from persistence should be made persistent at the same time as the machine is added to protect mode.
## Tips and Tricks
When uploading an Excel file it can be good to delete rows that are not needed (e.g. machines that have not been scanned). The amount of lines to be deleted can be considerable (depending on how many outdated AD entries). This can cause Excel to run slow or even crash. To avoid this sort the spreadsheet by the column that the deletion will be based upon (e.g. last_scanned) and then delete.