Postman: Installing and Configuring
Postman: Installing and Configuring
Postman: Installing and Configuring
Overview
Postman is used to run APIs that are available within Privilege Secure. These APIs are used for the Quickstart reporting process. This can be used to configure and enroll multiple machines into protect mode. In order to setup Quickstart reporting functionality Postman is utilized to get an API key that is used to authenticate against Privilege Secure.
Install Postman
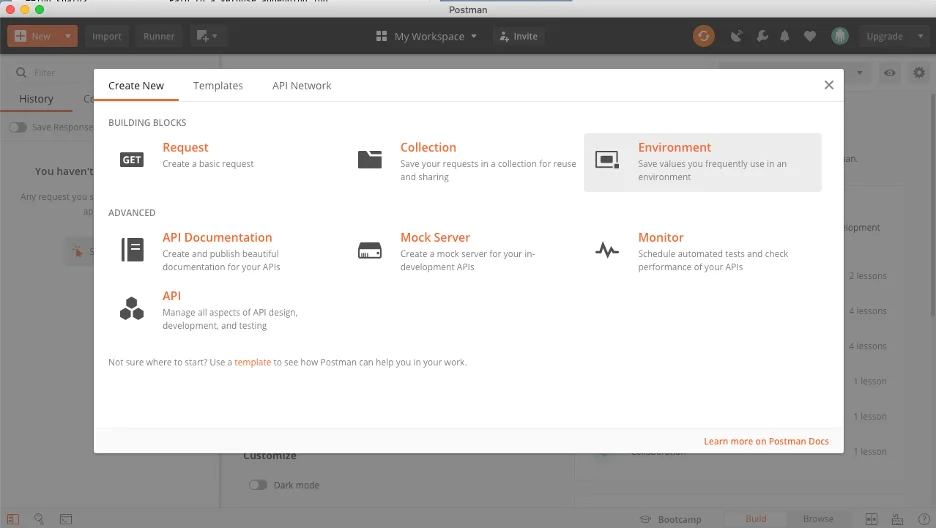
Navigate to https://www.postman.com and install the latest version of Postman. Follow the configuration steps for Postman as detailed in the article below. When first launching Postman, it will prompt to start new from a template. Exit out of this window by clicking the “X” in the top-right corner of this pane.
Next, select the “Import” option in the top left corner. Locate the API.postman_collection.json file which will be supplied by a Sales Engineer or a Customer Success Team contact, and select this file to import.

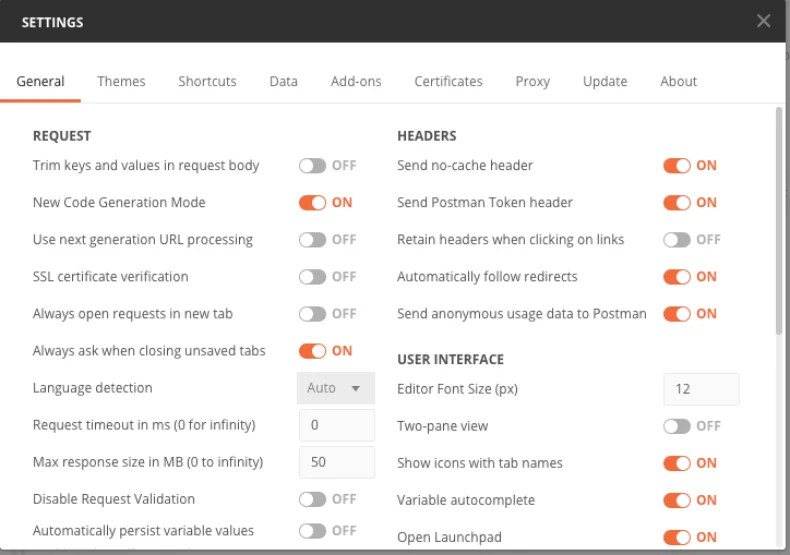
Prior to attempting to run any GET/POST requests, open the Postman Preferences and disable “SSL certificate verification” on the left side of the “General” section:


Setting the Base URL Environment Variable
To set the base_url variable needs to be set. Click the “eyeball” symbol:

The following screen will display. Click the Edit button:

Enter the baseUrl variable for your specific environment:
Note: Older collections use base_url.

Click Save and then exit out of the screen below:

Setting Up The Token With SAML:
Open a browser that has developer tool capabilities. This example will use screenshots from Google
Chrome.
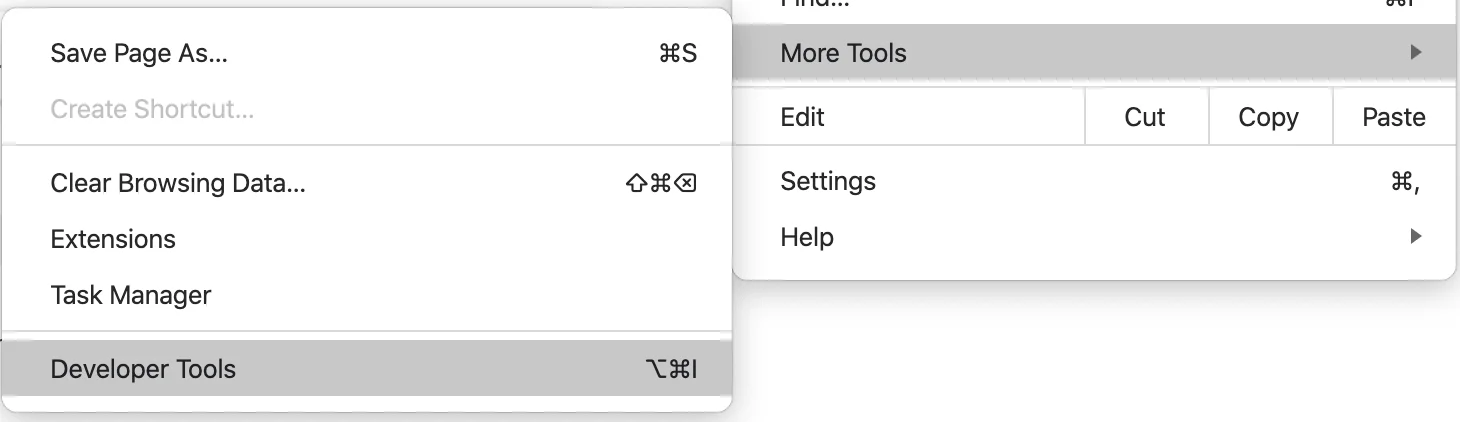
In your Chrome browser, select the three dots in the top right corner, accessing the drop down
settings menu. Select More Tools > Developer Tools:
Once the Developer Tools pane is open, select the “Network” tab, and check the “Preserve log” box. You may need to click the chevrons to be able to see the “Network” option.
![]()
Now, log into the Privilege Secure platform and complete the MFA/SSO process until able to see the Dashboard. Once successfully logged in and authenticated, select the >> option in the top right of the Developer Tools pane, and then select “Application.”

Inside of the “Application” section, select “Local Storage.” There will be an option here to you select the current session connecting the machine to Privilege Secure.
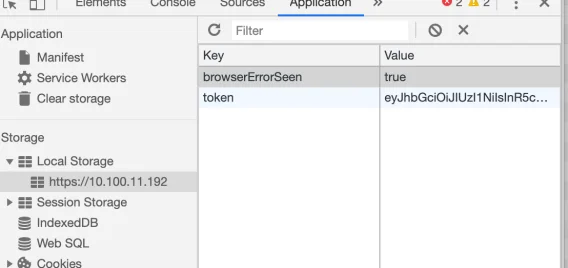
Once selected, there is a key:value section that will appear to the right where the key is ‘token’
and the value is the JWT that needs to be copied. Ensure you use “Select All” to copy the full
key.
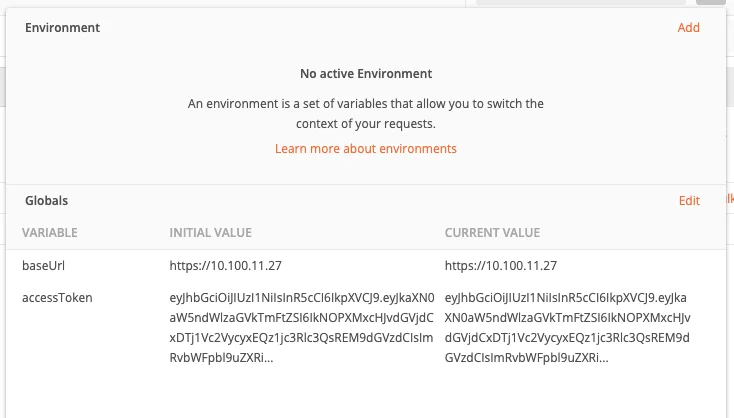
This is now set as a global variable called accessToken inside of Postman in the same way that
the baseUrl variable was created above (this is done by clicking the “eyeball” icon).
Copy and paste the JWT captured from the login session into the ‘Initial Value’ and ‘Current Value’ fields for the accessToken:
Note: Older collections use current_jwt instead of accessToken.
Confirming the Postman Configuration
The Postman setup can now be confirmed. Open the collections, as shown below. Under “Users” click the “User List” collection.

Click the “Send” button

The result should be a list of users in a format similar to below:
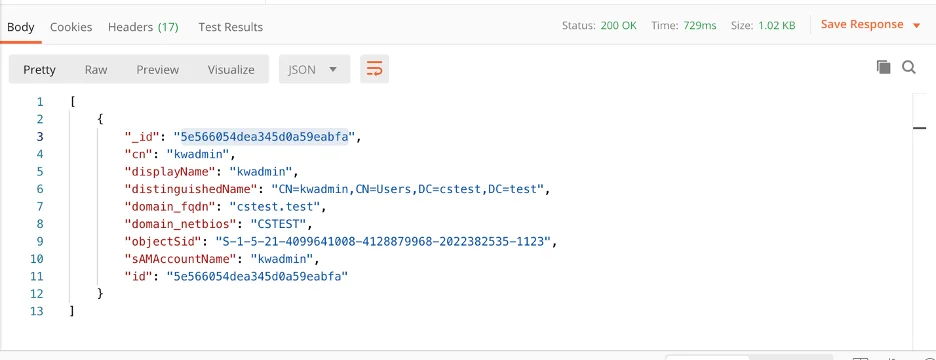
Note the “id” of the user that will be running Quickstart. Additional user ids can be obtained by
sending different display names. All the user ids for Quickstart users should be noted.
An error of a “malformed key” is usually from only part of the key being saved as the “current_jwt”
variable in postman.
Creating the API Key
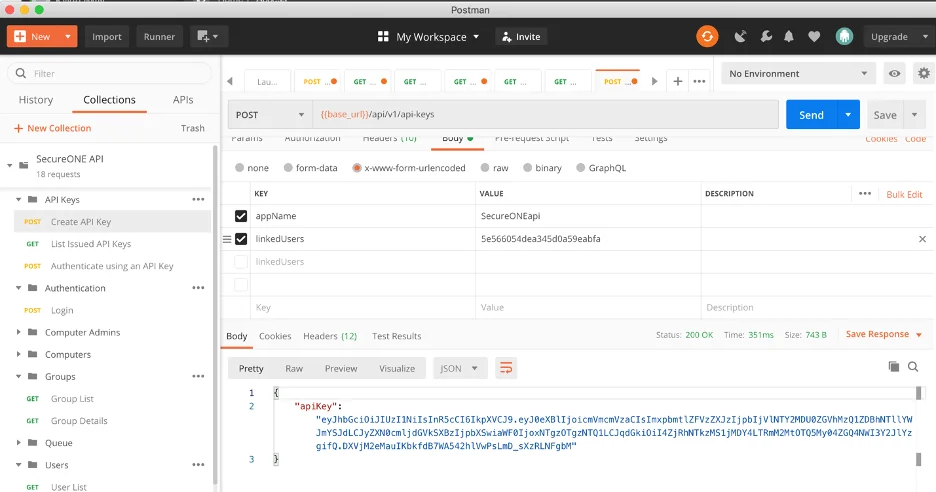
Next the API Key can be created to allow the Quickstart script to be utilized. Under the “API Keys” option click “Create API Key”

Add the ID for additional “linkedUsers”. The key should ideally be generated for all the users that will be running Quickstart. Click the send button to return the suitable key
The API Key is returned from Privilege Secure:
Save a copy of API key in a safe and secure. This is sensitive data! This will need to be shared with other users who will be using Quickstart.