Proxy Service Install
Logging directly onto managed systems from desktops leaves artifacts that can be compromised and requires ports to be opened into secure networks. A critical element of the Privilege Secure solution is the proxy, which is able to broker the connection between security zones. The application includes an advanced session proxy service for automatic connection to privileged sessions.
The NPS Proxy Service is installed on the proxy server as part of Privilege Secure install. It must also be installed on any server running services for the application, specifically the NPS Action Service, the NPS Scheduler Service, and NPS SIEM Service. This provides the option to run sessions defined in the application from different locations within your organization.
The NPS Proxy Service installer is in the Extras folder of the ZIP file downloaded from the Netwrix Customer portal. See the Install Components & Methods topic for additional information.
Follow the steps to install the NPS Proxy Service on another server that will run services for the application.
Remember, You must configure the Antivirus exclusions according to the Exclusions for Antivirus (AV) & Endpoint Software knowledge base article.
Step 1 – Copy the NPS.ProxyService.exe file to the desktop of the remote server.
Step 2 – Right-click on the installer and select Run as administrator. The Netwrix Privilege Secure Proxy Service Setup wizard opens.
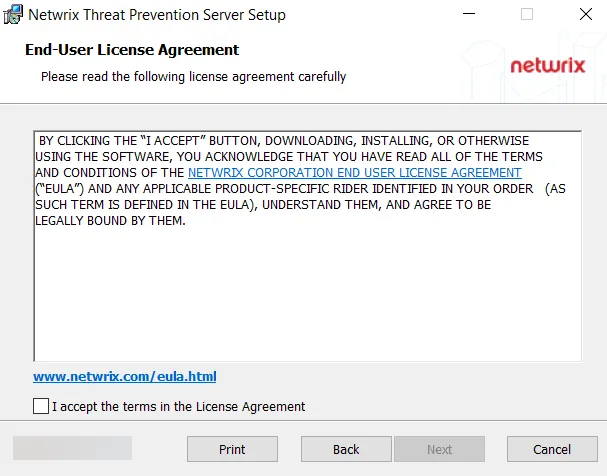
Step 3 – On the End User License Agreement page, check the I agree to the license terms and conditions box and click Options.
Remember, it is a best practice to read the agreement before accepting it.

Step 4 – The default installation location for Install Folder is:
C:\Program Files\Netwrix\Netwrix Privilege Secure Proxy Service
- To change the default location, click Browse and set a new location.
- When the location is set, click OK.
Step 5 – You will return to the End User License Agreement page. Click Install.
NOTE: The installation process begins and the wizard displays the its Progress. This may take a few moments.

Step 6 – When installation is complete, click Close.
The NPS Proxy Service is now installed on a remote server. You can verify that it is started and set
to run automatically in the Services app (services.msc).
Register the Remote NPS Proxy Service
When the NPS Proxy Service is installed on a remote machine, it must be registered with the proxy server.
Example Values
When referring to the NPS Application server, we will use the following example values in our configuration. Replace these values with values that are specific for your environment.
NPS Application Server
- DNS FQDN: nps-app.example.com
- IP Address: 192.168.99.1
NPS Remote Proxy Server
- DNS FQDN: nps-remote.example.com
- IP Address: 192.168.99.2
NPS Application Server
Follow the steps to register the NPS Proxy Service.
NOTE: All commands are executed on the NPS Application Server as administrator.
Step 1 – Validate the existence of the sbpam_node.json file in the installation directory of
both servers. The default location is:
C:\ProgramData\Stealthbits\PAM\ProxyService
NOTE: If you are going to use the DNS FQDN to connect from your remote server, you will need to
make sure that the FQDN is listed in the sbpam_node.json file.
Step 2 – Open the JSON file as an administrator (via administrator command prompt) on both
servers. The JSON file can be located at
C:\ProgramData\Stealthbits\PAM\ProxyService\sbpam_node.json
CAUTION: If this is not the first remote service, do not change the name of your NPS Application Server. If you do, you will need to re-register all the remote proxy servers.
Step 3 – Ensure that the "advertise" value of the JSON file on each server has the NPS Proxy
Server information, if changes are made, ensure they are saved:
{
    "advertise": ["[ Server FQDN]","[ Server IP Address]"],
    "tag": []
}
For example:
{
    "advertise": ["newyorksrv10.nwxtech.com","192.168.13.172"],
    "tag": []
}
NOTE: This file references the IP, FQDN, and hostname of the server you are on, not all
servers.
Step 4 – If edits were made, remove the sbpam-node.crt file from the following location on
both servers using the command below as an administrator:
del C:\ProgramData\Stealthbits\PAM\tls\certs\sbpam-node.crt
NOTE: If you are adding the proxy to an existing mesh, only delete the sbpam-node.crt file on
the new proxy service server.
Step 5 – On the NPS Application Server, run the following command:
"C:\Program Files\Stealthbits\PAM\ProxyService\sbpam-proxy.exe" register ca-hash
Step 6 – Copy the returned hash value and save it for later, you will need this value when you register your remote service..
Remote NPS Proxy Server
Follow the steps to register the Remote NPS Proxy Service.
NOTE: All commands are executed on the Remote NPS Proxy Server as an administrator.
Step 1 – Validate the existence of the sbpam_node.json file in the installation directory. The
default location is C:\ProgramData\Stealthbits\PAM\ProxyService.
Step 2 – Open the JSON file as an administrator (via administrator command prompt) on both servers.
Step 3 – (Optional) This step is only necessary if FQDN is required for DNS, otherwise do not
change and move to step four. Ensure that the "advertise" value of the JSON file on the remote
server has remote proxy server information:
{
    "advertise": ["nsp-remote-proxy.example.com","192.168.99.2"],
    "tag": []
}
Step 4 – Remove the sbpam-node.crt file on the remote proxy server using the command below.
del C:\ProgramData\Stealthbits\PAM\tls\certs\sbpam-node.crt
Step 5 – On the remote proxy server, run the following command from an elevated command prompt:
"C:\Program Files\Stealthbits\PAM\ProxyService\sbpam-proxy.exe" register -s [NPS Application Server IP Address] -u [Privilege Secure Admin Account in NT-Style format] -H [Value copied in Step 6 from above ]
For example:
"C:\Program Files\Stealthbits\PAM\ProxyService\sbpam-proxy.exe" register -s 192.168.99.1 -u nwxtech\ad.john.smith -H eb367841c099c0338cee72ed572c7b5539f68fa215f7598c0ef5dcc067ee729c
The Privilege Secure Proxy Service is now registered with the Privilege Secure application.
SSH for Legacy Cisco Device
If the Cisco device is running with insecure ciphers when the user attempts to connect to an SSH session, the following error message is displayed:
ssh: handshake failed: ssh: no common algorithm for key exchange; client offered: [curve25519-sha256@libssh.org ecdh-sha2-nistp256 ecdh-sha2-nistp384 ecdh-sha2-nistp521 diffie-hellman-group14-sha1], server offered: [diffie-hellman-group1-sha1]
Ideally the Cisco device should be upgraded to support secure ciphers. If this is not possible, it is necessary to add additional ciphers to machines with older (insecure) ciphers that need to be managed with SSH. You can “opt-in” by configuring the cipher suites used by the NPS Proxy Service.
Follow the steps to add Cipher information to the NPS Proxy Service.
Step 1 – Open a command prompt as an Administrator.
Step 2 – Change the directory path to the ProxyService folder in the NPS Proxy Service installation directory. The default path is:
C:\Program Files\Netwrix\Netwrix Privilege Secure Proxy Service\ProxyService
Step 3 – Run the following command to automatically generate the "sbpam_ssh" file:
.\sbpam-proxy.exe cfg -c sbpam_ssh
Step 4 – Browse to the location of the newly created file in "ProgramData". The default path is:
C:\ProgramData\``````Stealthbits``````\PAM\ProxyService
Step 5 – Copy and paste the following into the "nps_ssh.json" file.
{
    "listenaddress": "0.0.0.0:4422",
    "ClientSettings": {
        "Algorithms": {
            "KeyExchanges": [
                "curve25519-sha256@libssh.org",
                "ecdh-sha2-nistp256",
                "ecdh-sha2-nistp384",
                "ecdh-sha2-nistp521",
                "diffie-hellman-group14-sha1",
                "diffie-hellman-group1-sha1"
            ],
            "Ciphers": [
                "aes128-gcm@openssh.com",
                "chacha20-poly1305@openssh.com",
                "aes128-ctr",
                "aes192-ctr",
                "aes256-ctr",
                "aes128-cbc",
                "3des-cbc",
                "aes192-cbc",
                "aes256-cbc"
            ]
        }
    }
}
This will add the additional Key Exchange diffie-hellman-group1-sha1 and the additional Ciphers
aes128-cbc, 3des-cbc, aes192-cbc, aes256-cbc, required to make old Cisco Machines work with
remote login.